
In selected countries, we have introduced Time Tracking through which clients can now create hourly EOR , PEO, and Direct Employee-Payroll contracts, and employees can submit their worked hours.
Employees can submit their worked hours information on the platform, which is then processed for payroll. This article explains the procedures for submitting, editing, and deleting worked hours.
In This Article:
How to Submit Worked Hours
✅ Step 1 - Select Add Shift
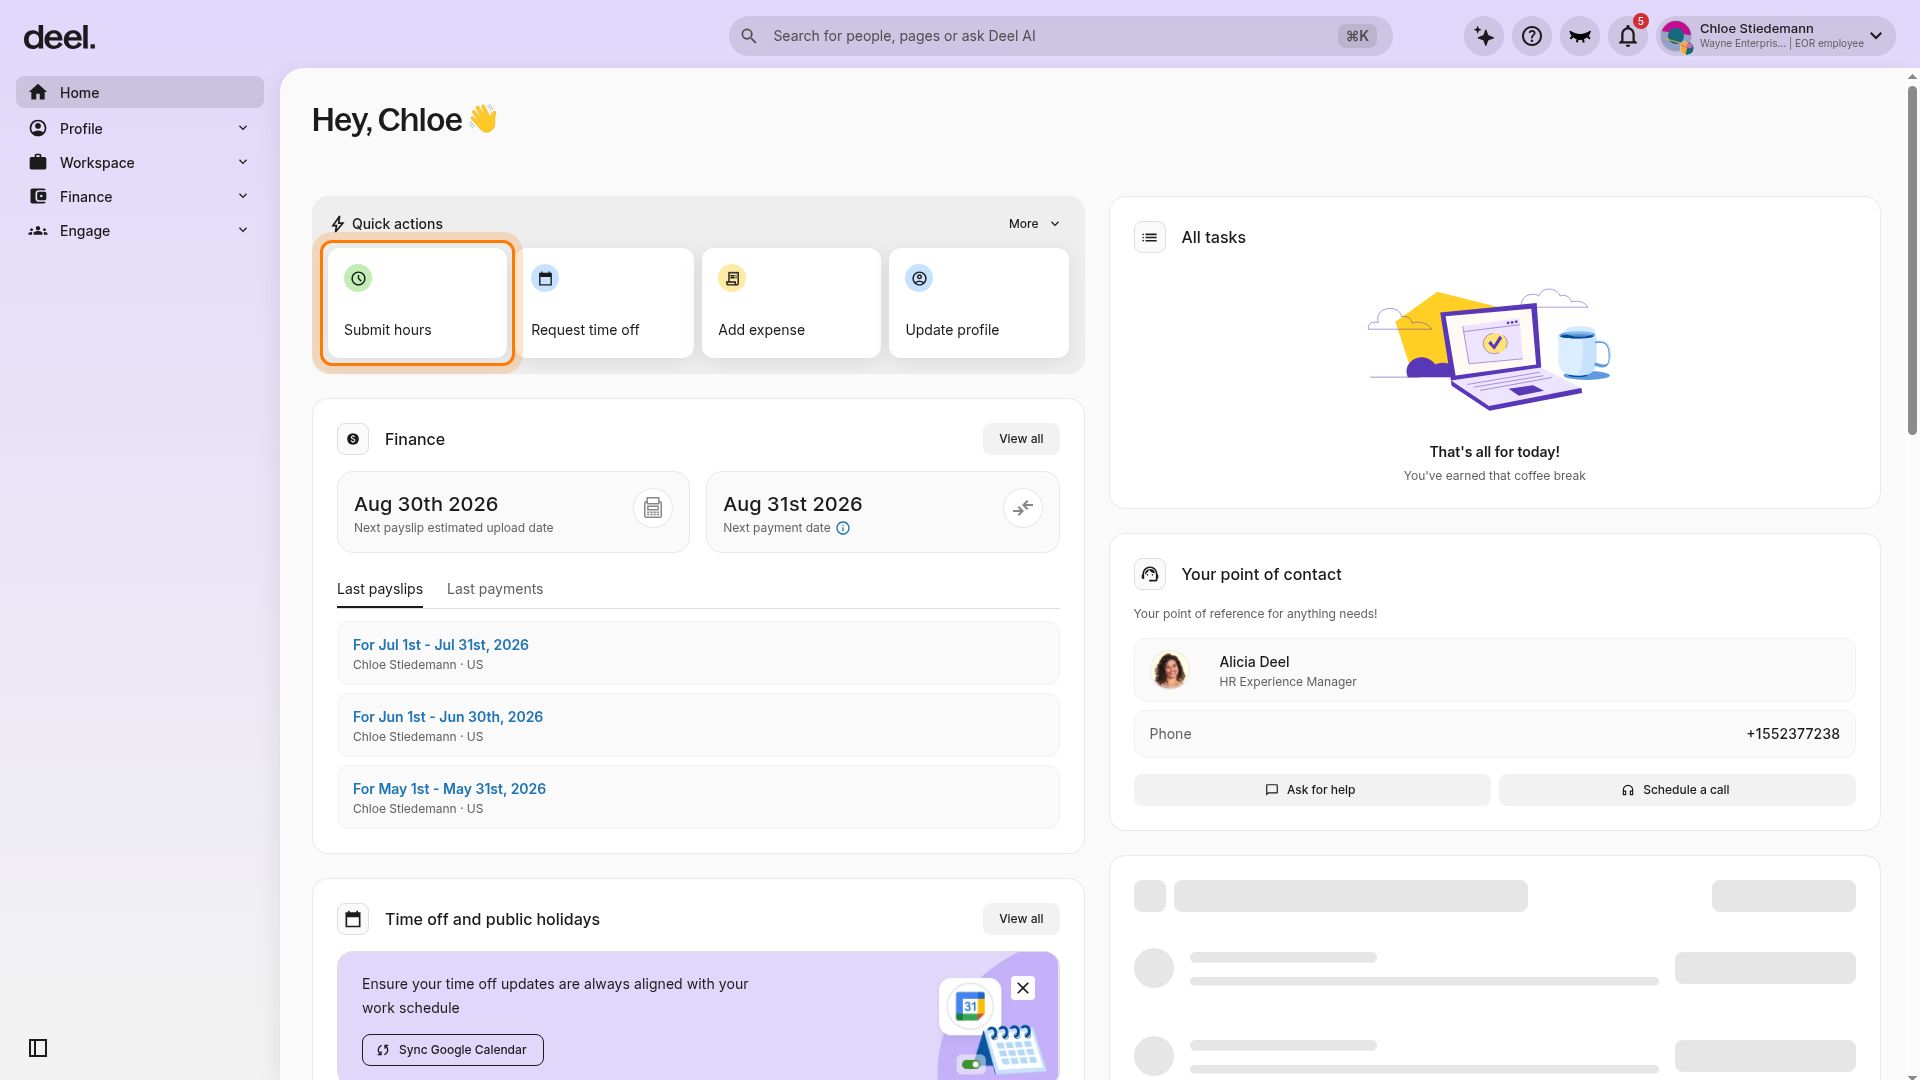
You can open the Submit worked hours form from Home or from the Time tracking page.
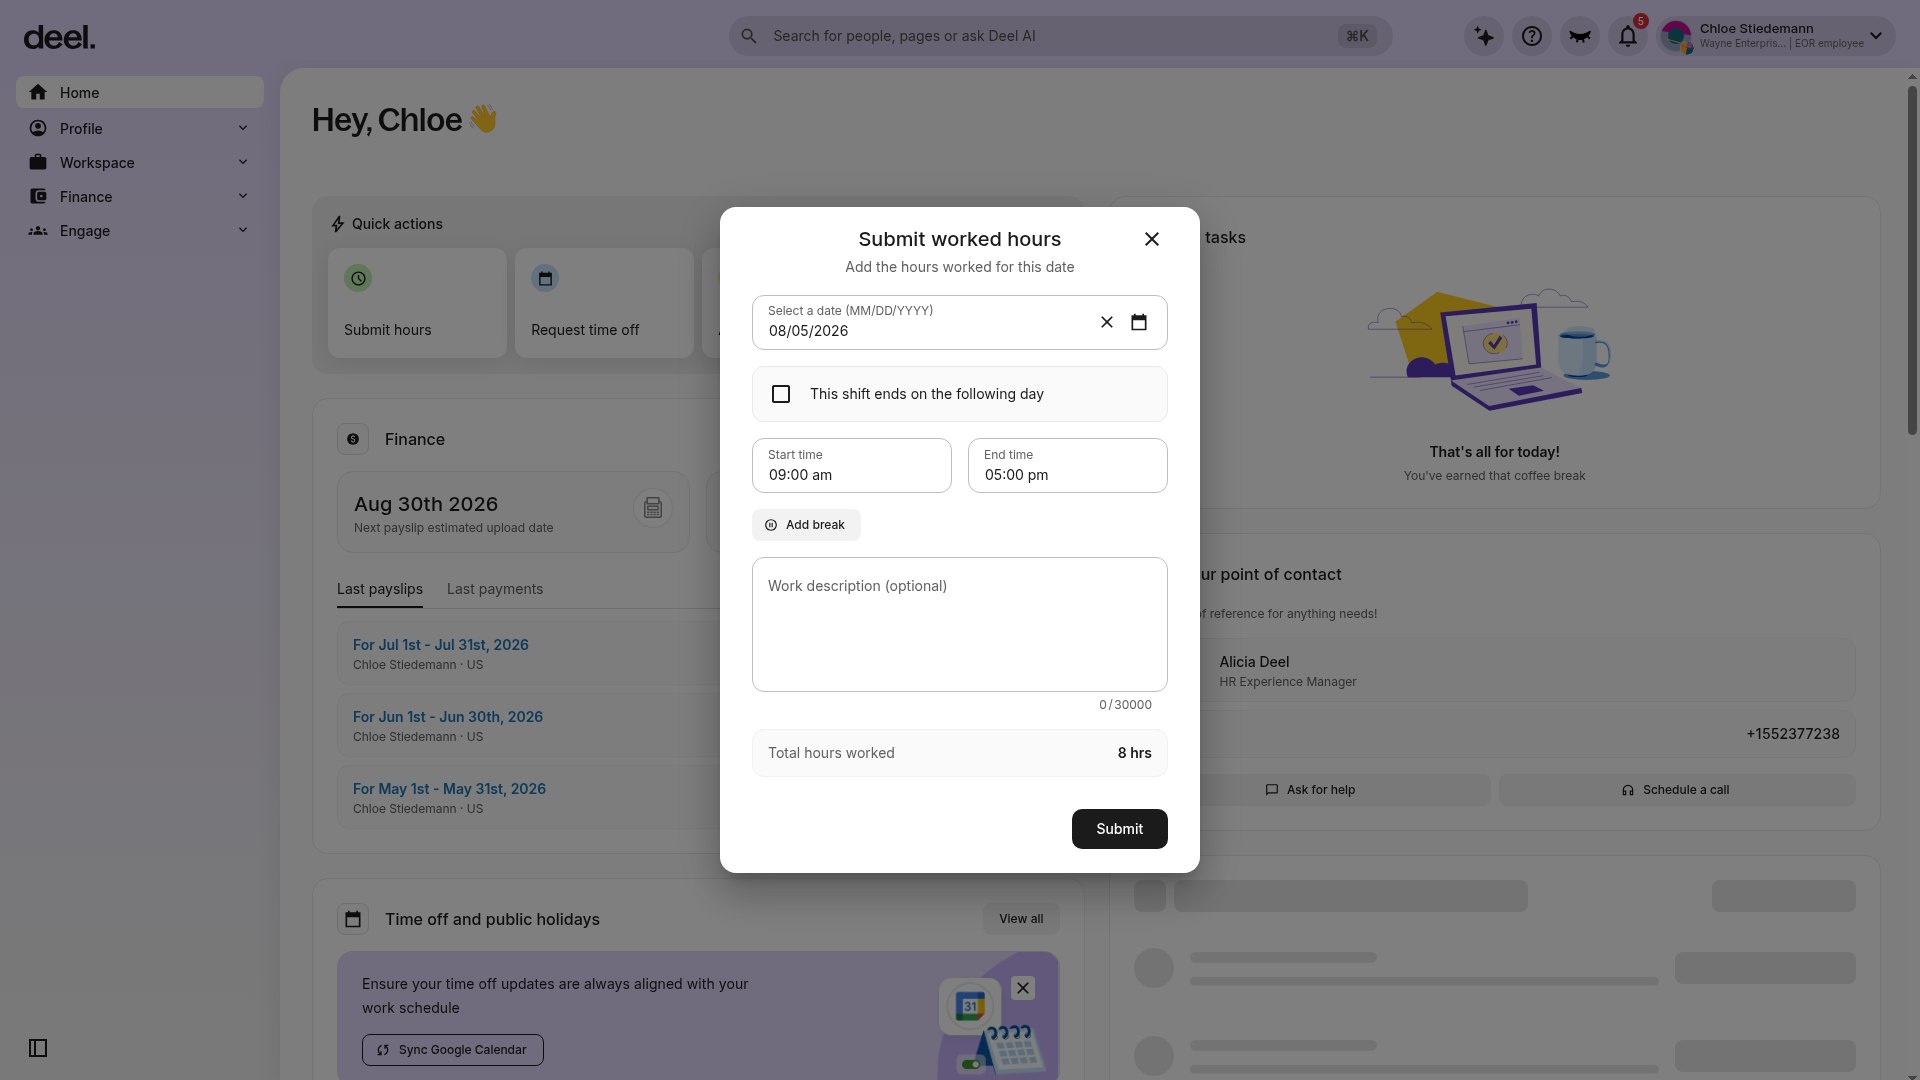
From Home, select Submit hours in Quick actions. This is the current equivalent of the older Submit Shift option.
The centered Submit worked hours form opens.
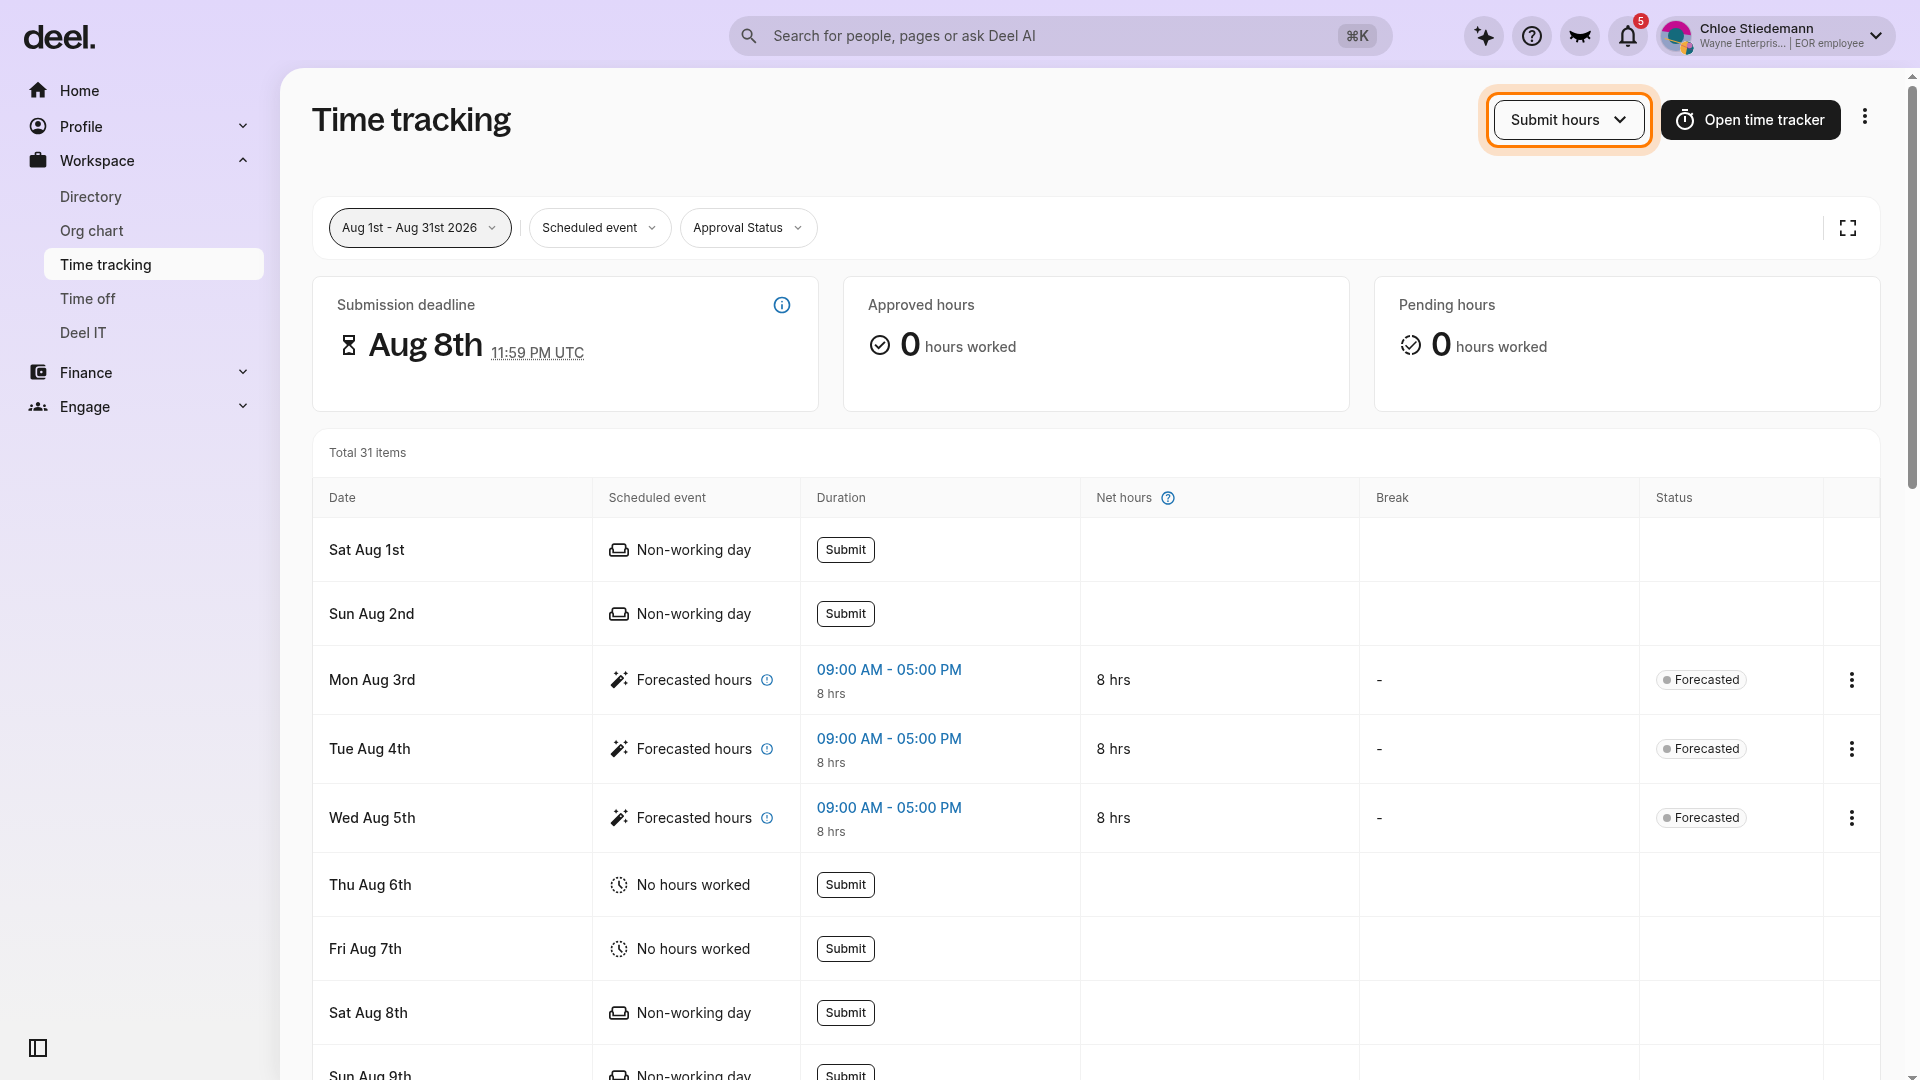
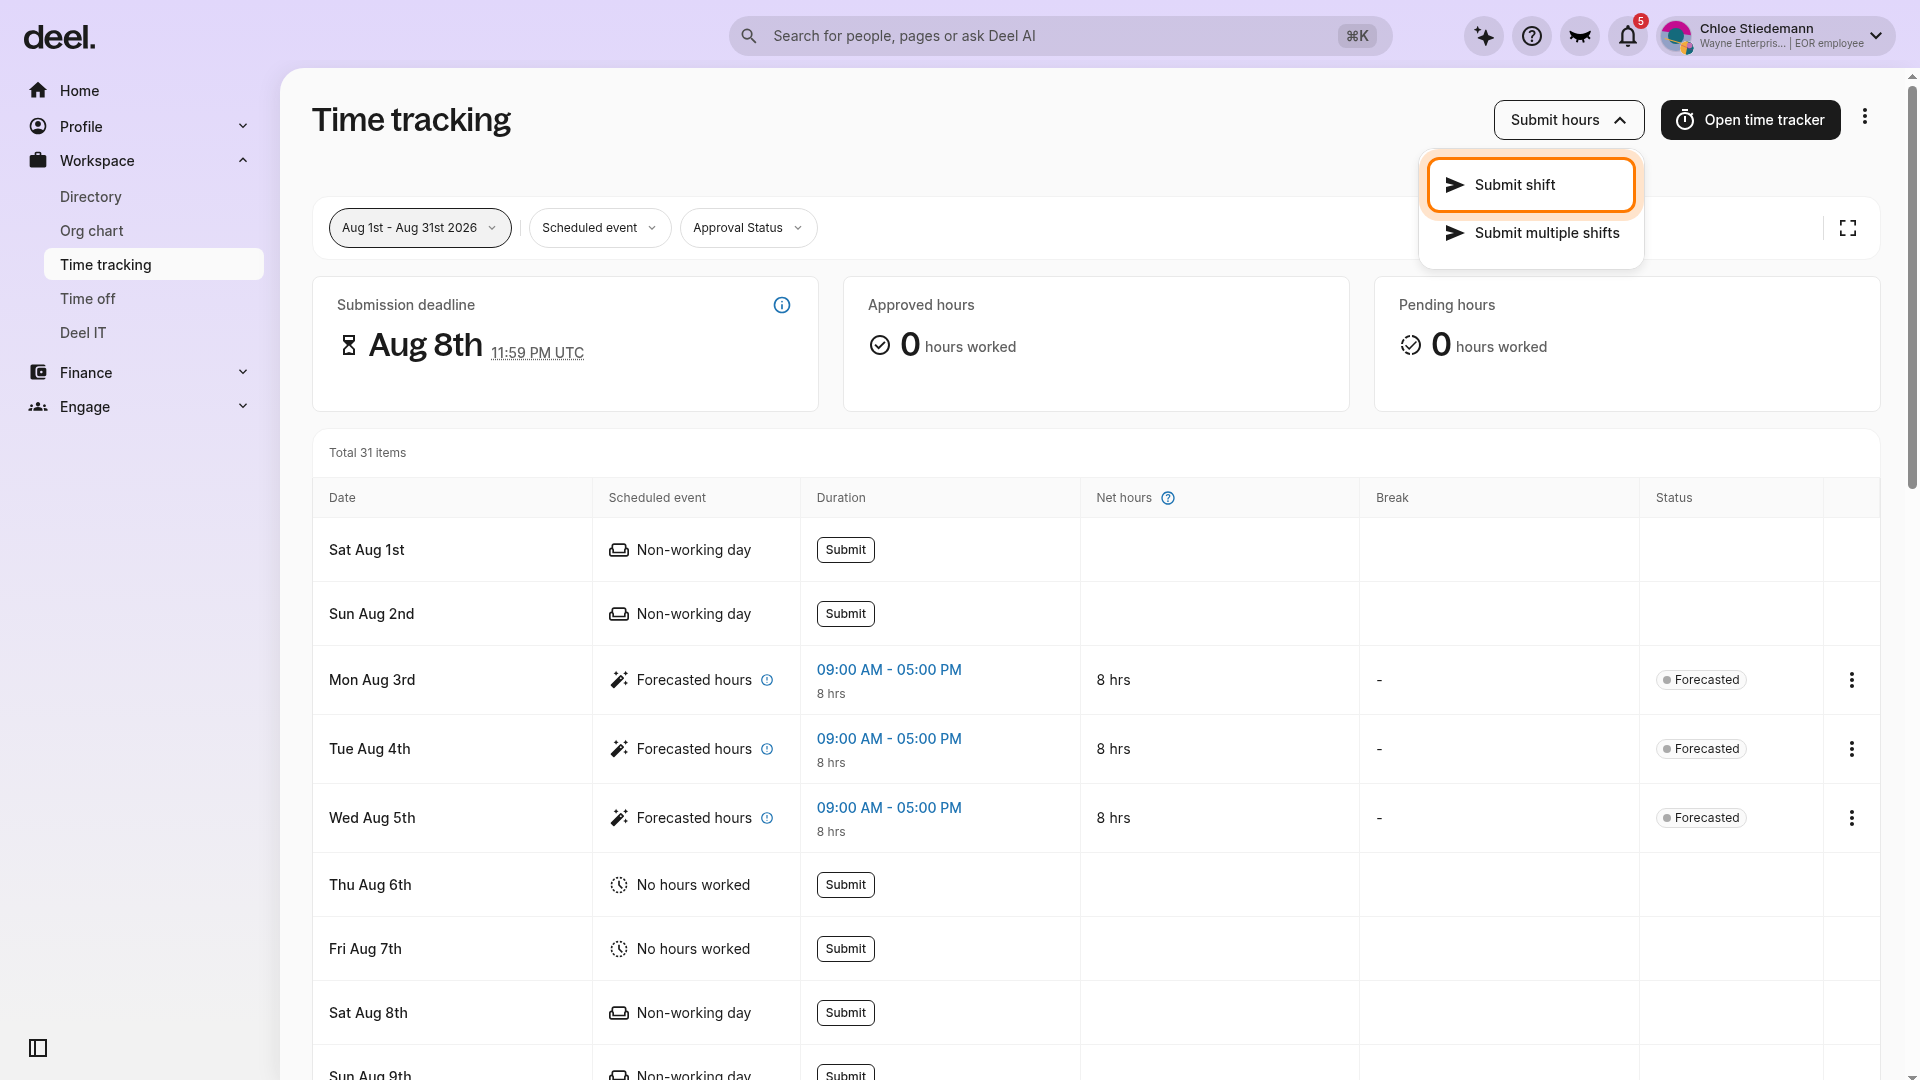
Alternatively, expand Workspace in the left sidebar and select Time tracking. Select Submit hours in the upper-right corner, then select Submit shift.
✅ Step 2 - Add Worked Hours
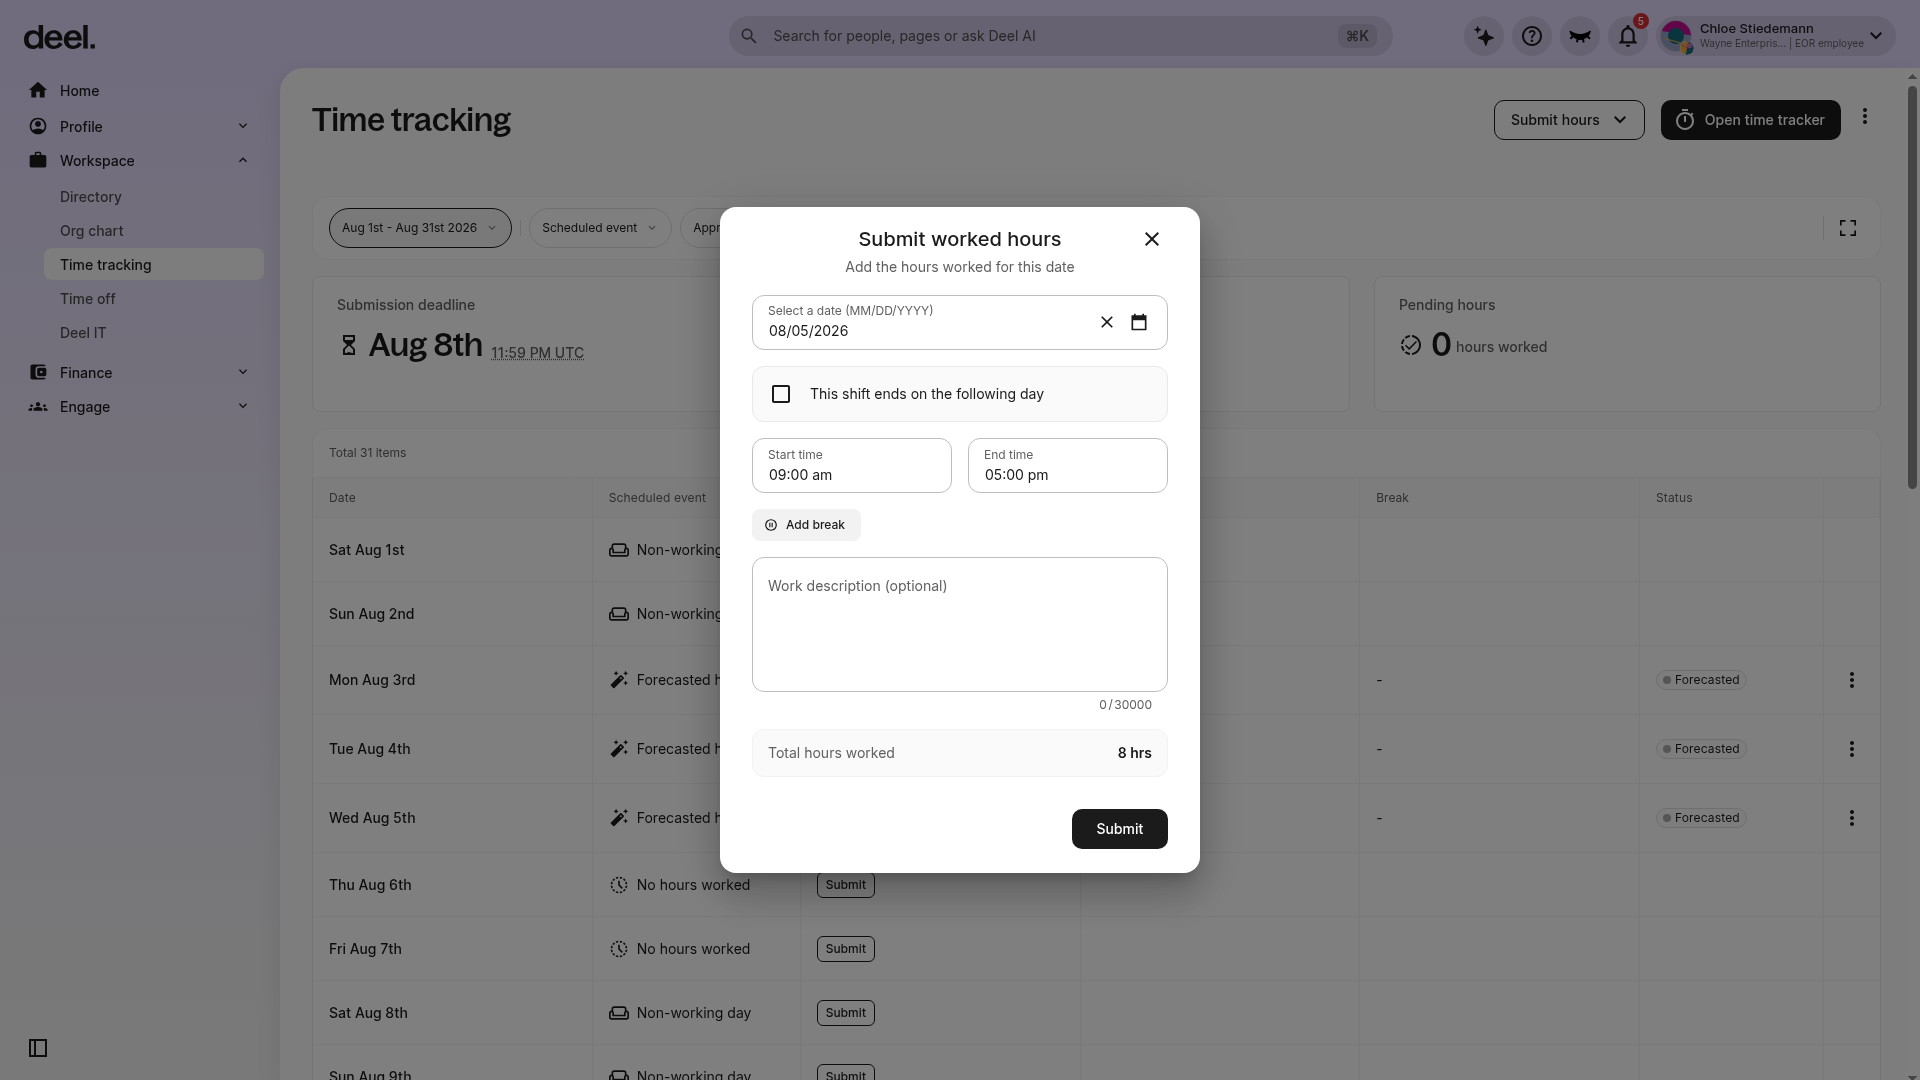
In the Submit worked hours form, select the date and enter the Start time and End time. Add a break and work description if needed.
Review Total hours worked, then select Submit to send the hours for approval.
✅ Step 3 - View Shift Details
View submitted shift details and approval status on the Time tracking page.
How to submit multiple shifts
Employees can also enter clock-in, clock-out, and break times and apply these to multiple days.
✅ Step 1 - Select Add Multiple Shifts
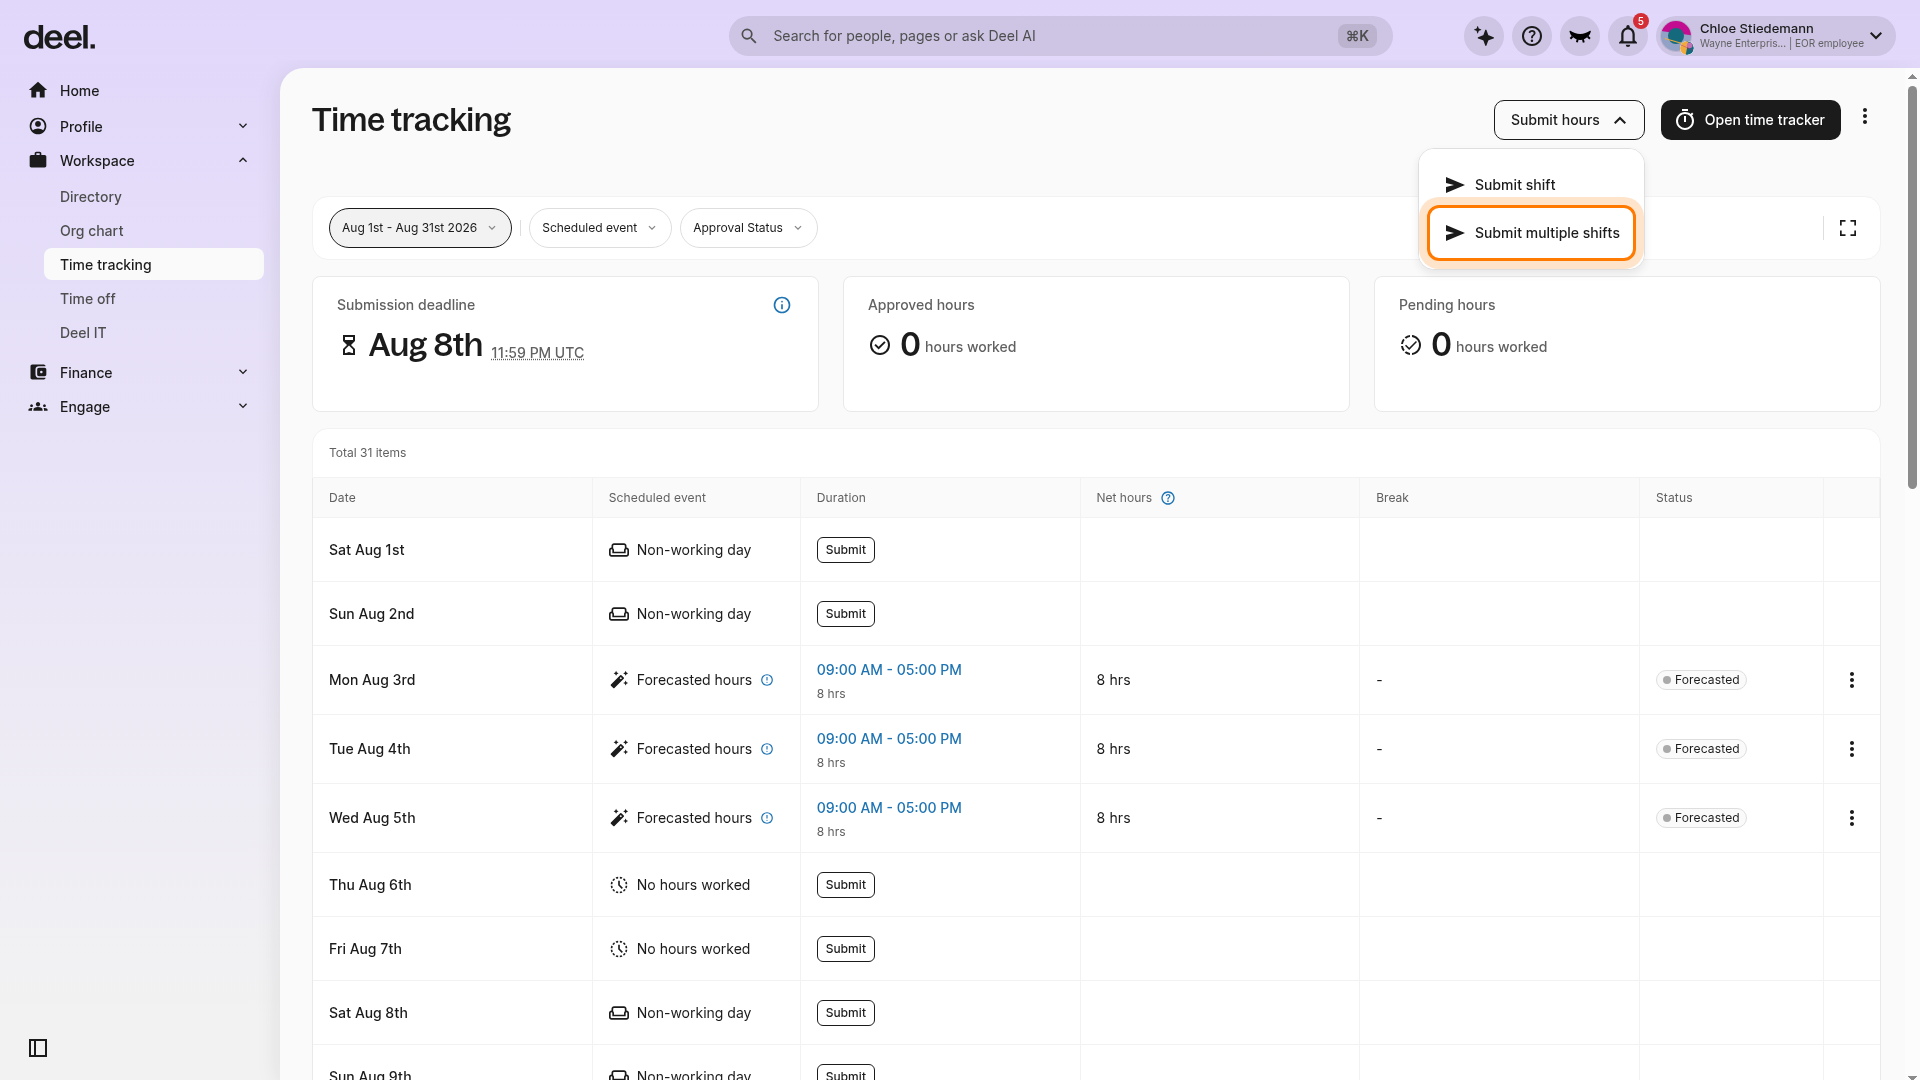
Expand Workspace in the left sidebar and select Time tracking. Select Submit hours in the upper-right corner, then select Submit multiple shifts. This is the current equivalent of Add Multiple Shifts.
✅ Step 2 - Add Multiple Shifts
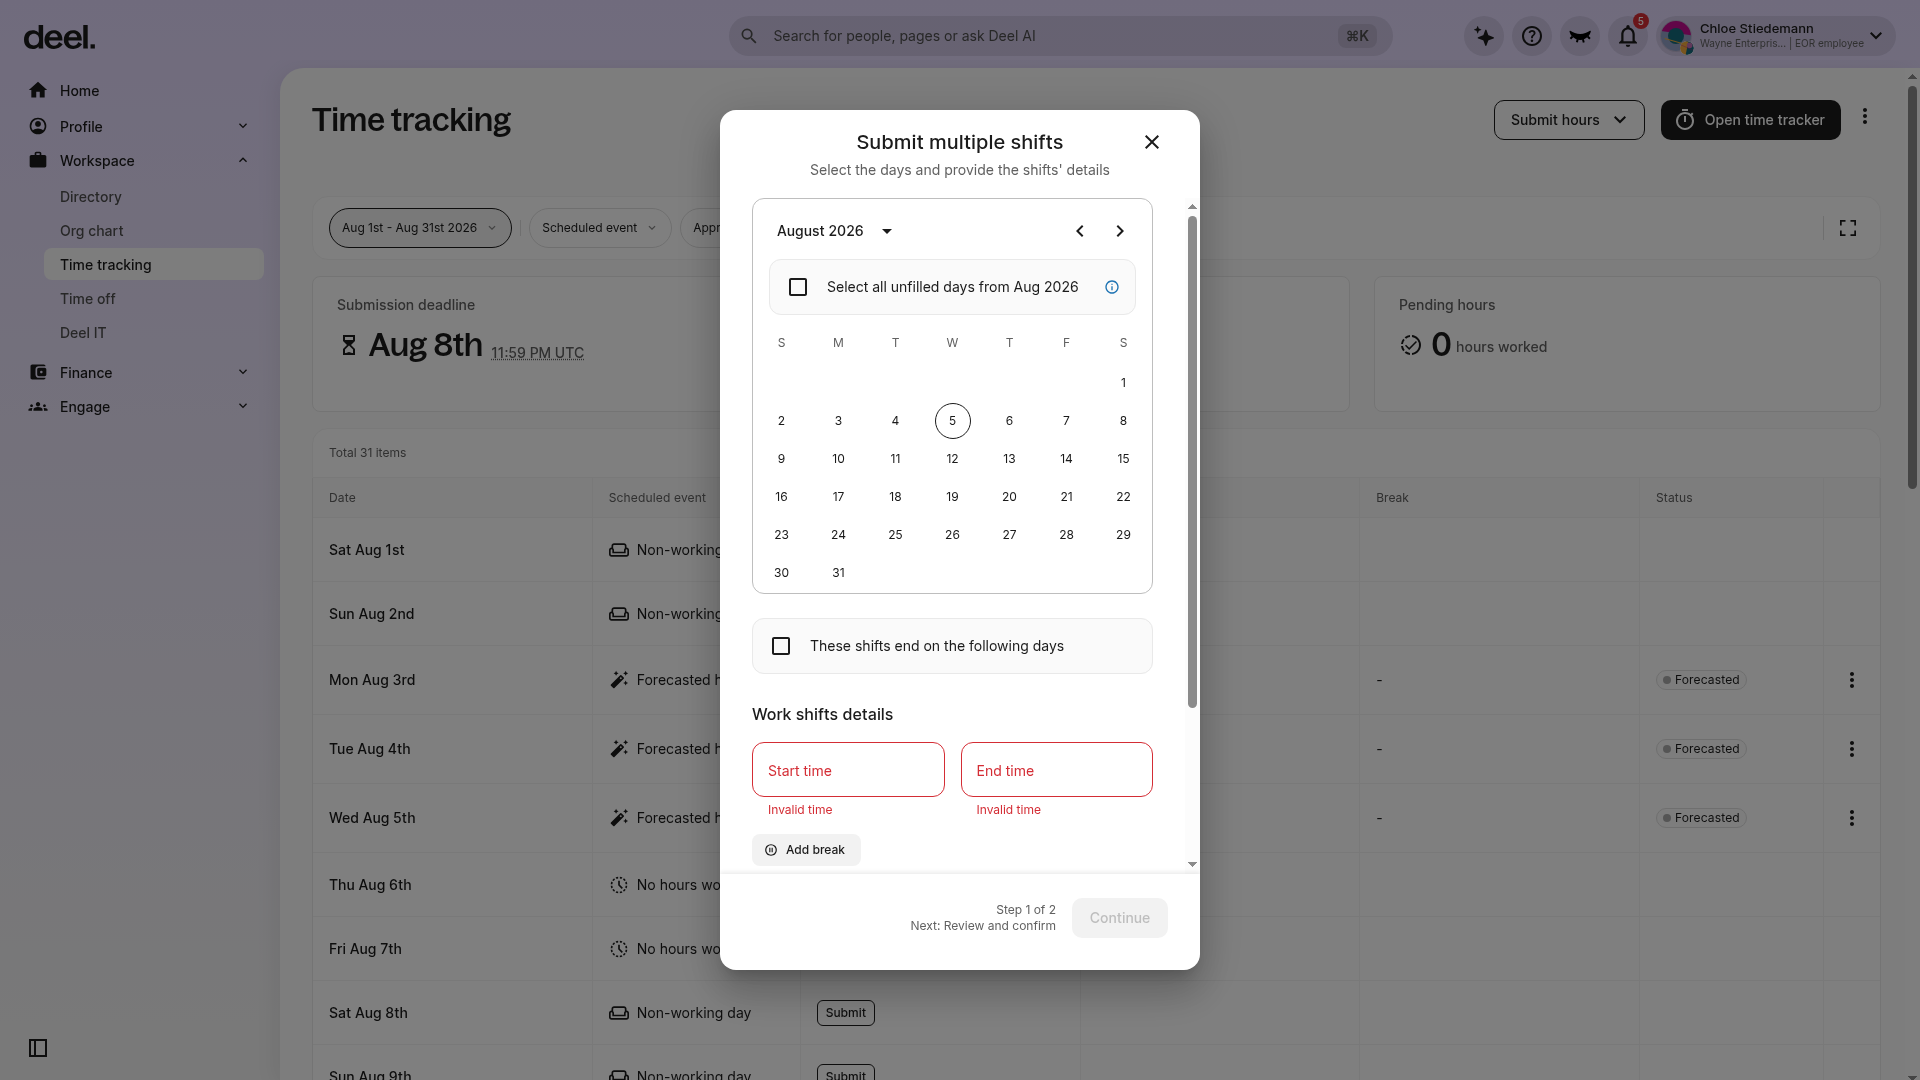
At Step 1 of 2, select the unfilled days for the displayed month. Unfilled days do not already have a submitted shift, time off, or public holiday.
Enter the start time and end time under Work shifts details, and add a break if needed. You can also indicate that the shifts end on the following day.
Select Continue, review the entries, and submit them for approval.
How to Edit Worked Hours
Worked hours can only be edited if the client has not yet approved them. If there is a need to edit an approved entry on the timesheet, please contact the manager.
✅ Step 1 - Click on the work shift to edit
Expand Workspace in the left sidebar and select Time tracking. Use the date range filter, if needed, to find the shift. Select the work shift to be edited and click Edit.
✅ Step 2 - Edit Worked Hours
Edit the worked hours and click on Update. The changes will be reflected on the platform.
How to Delete Worked Hours
✅ Step 1 - Click on the Shift to delete
Expand Workspace in the left sidebar and select Time tracking. Use the date range filter, if needed, to find the shift. Select the work shift to delete and click Delete. This is available only for non-approved shifts.
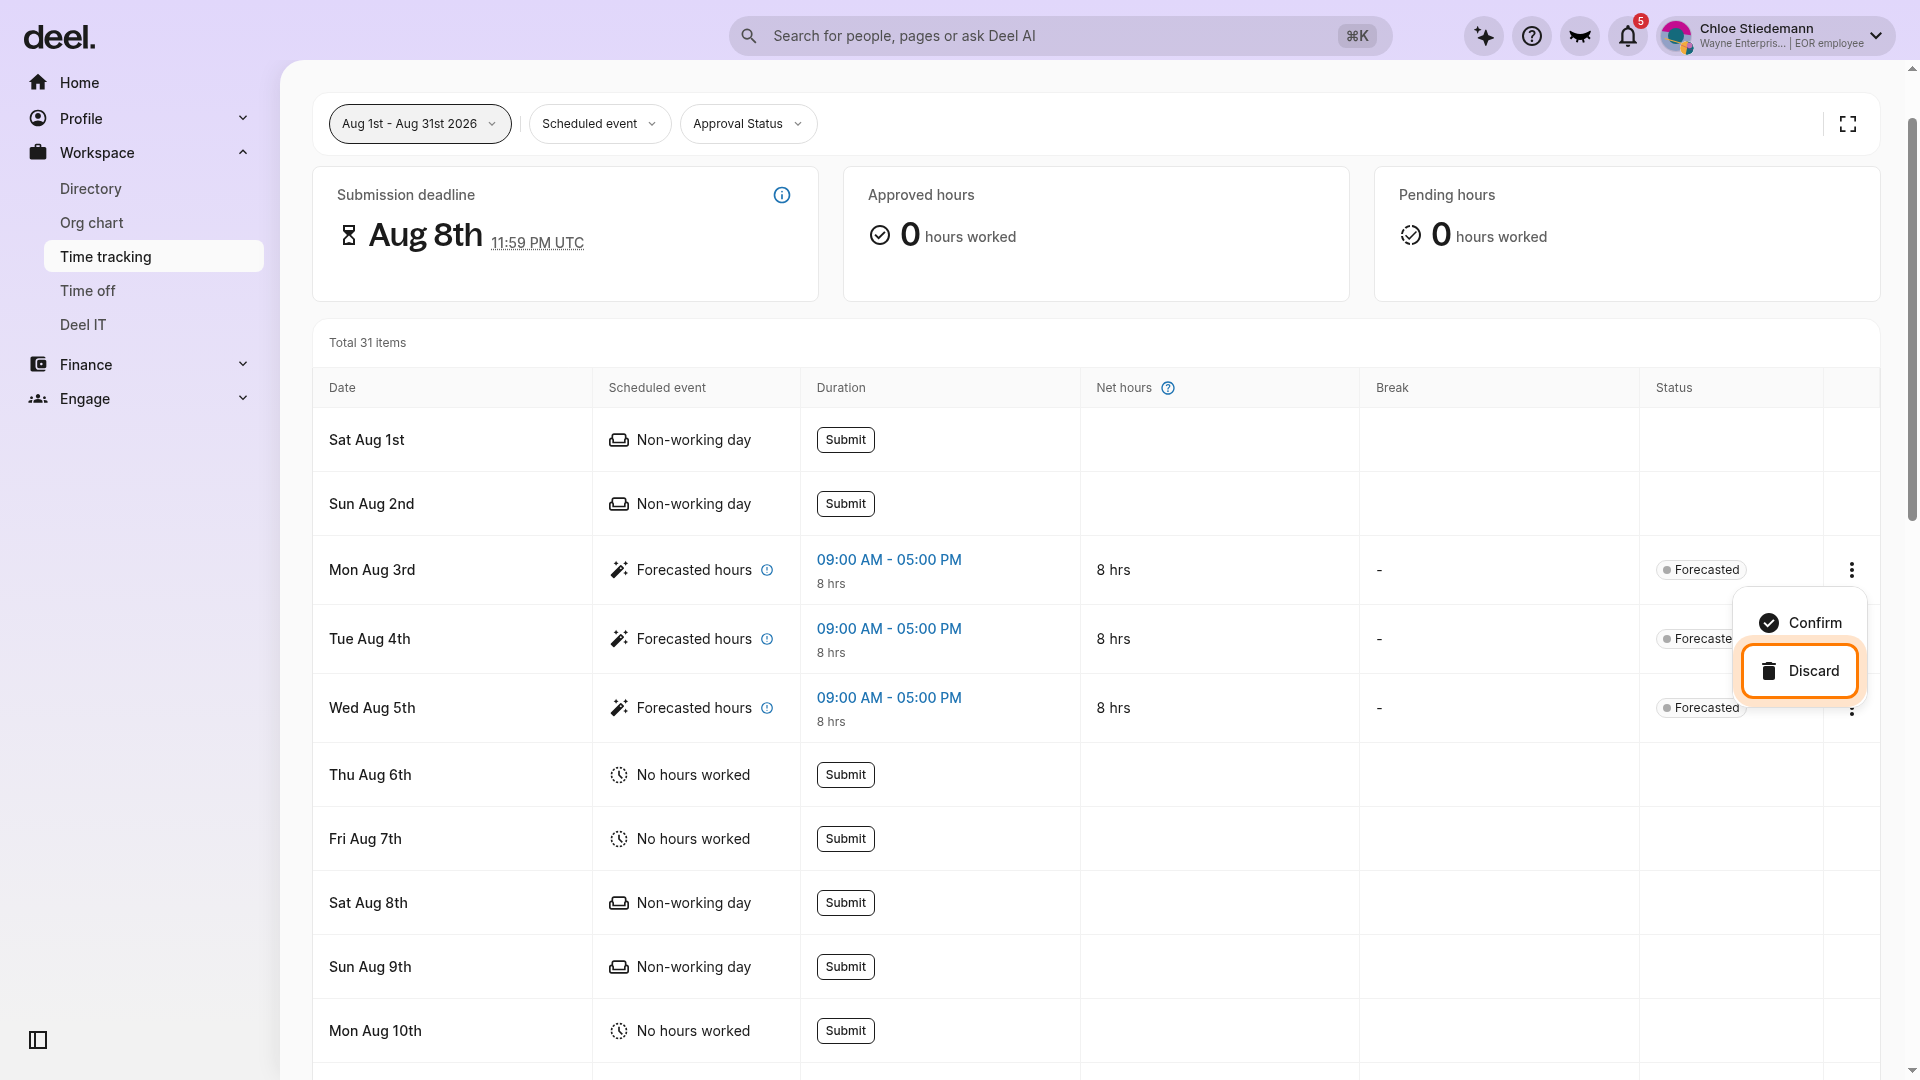
For a row labeled Forecasted hours with a Forecasted status, select the three-dot menu at the far right.
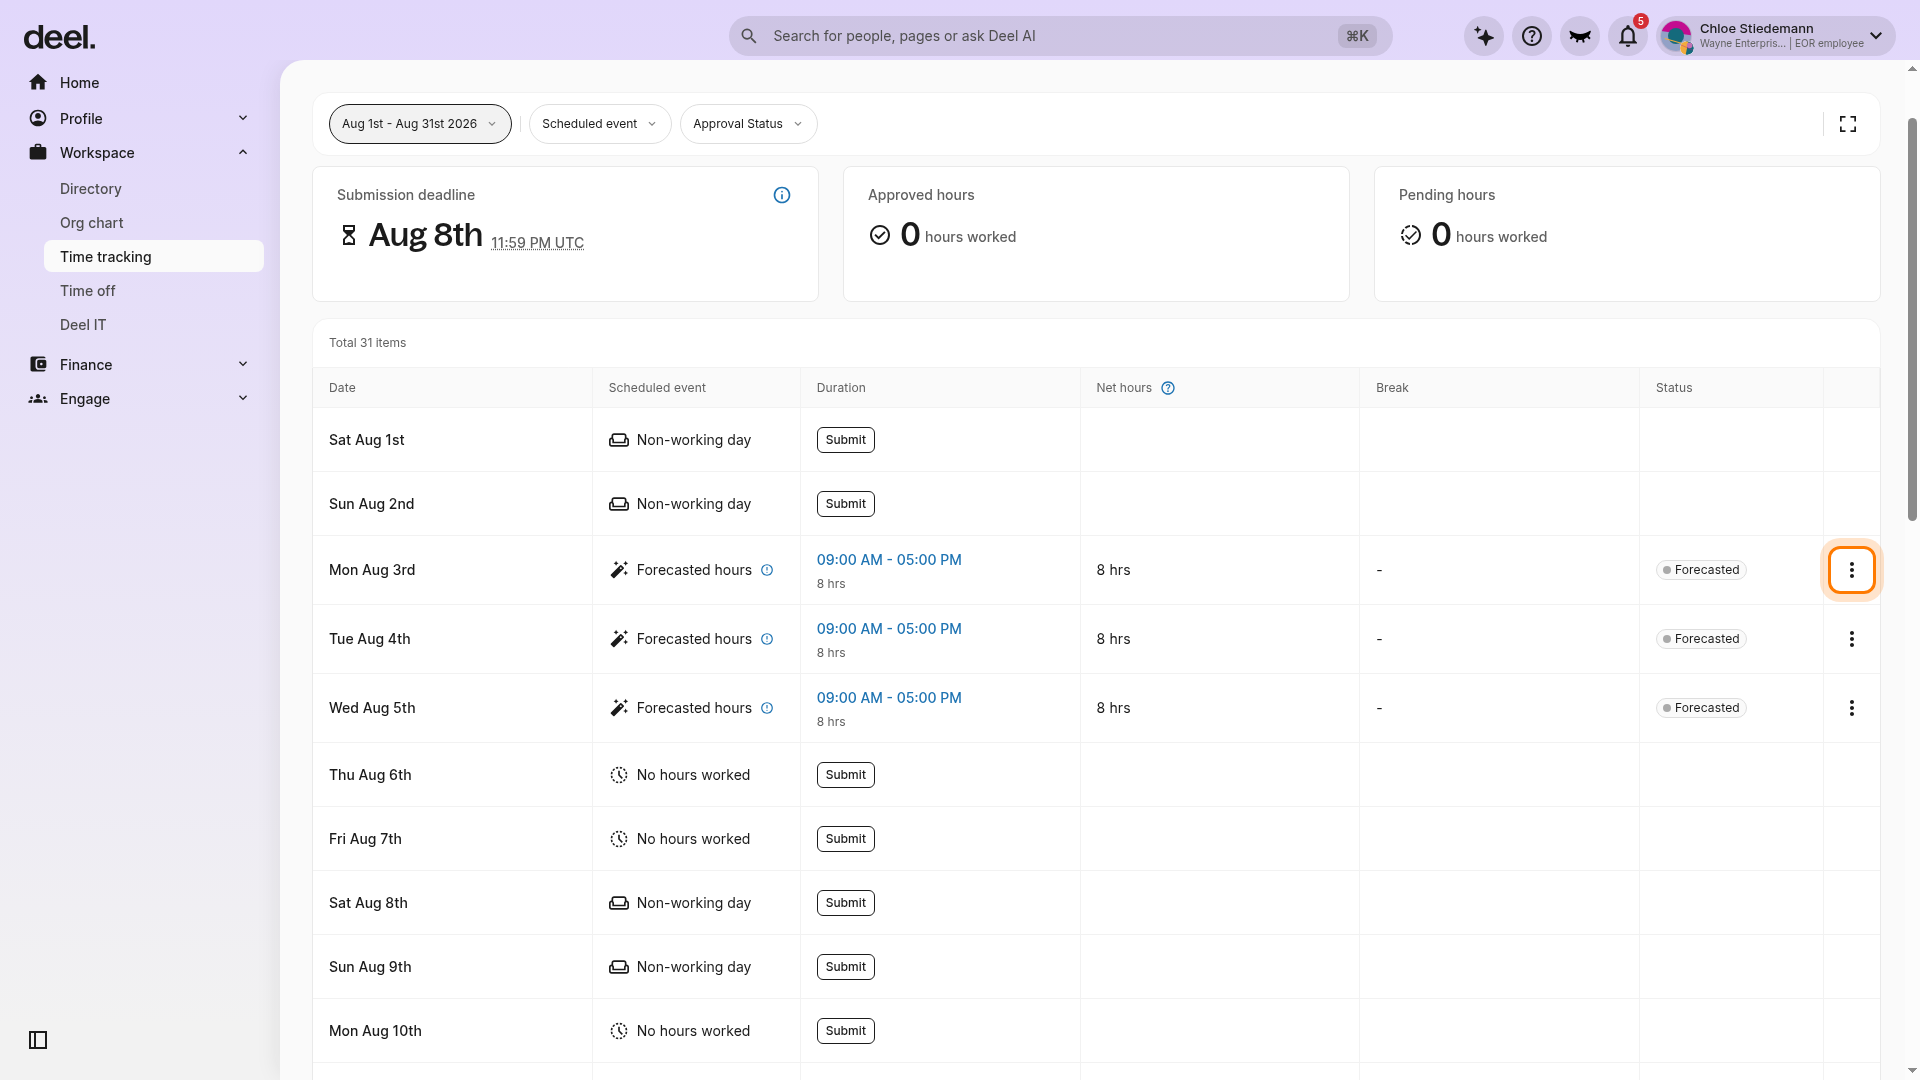
Select Discard. This opens a confirmation; it does not remove the shift yet.
✅ Step 2 - Click on delete
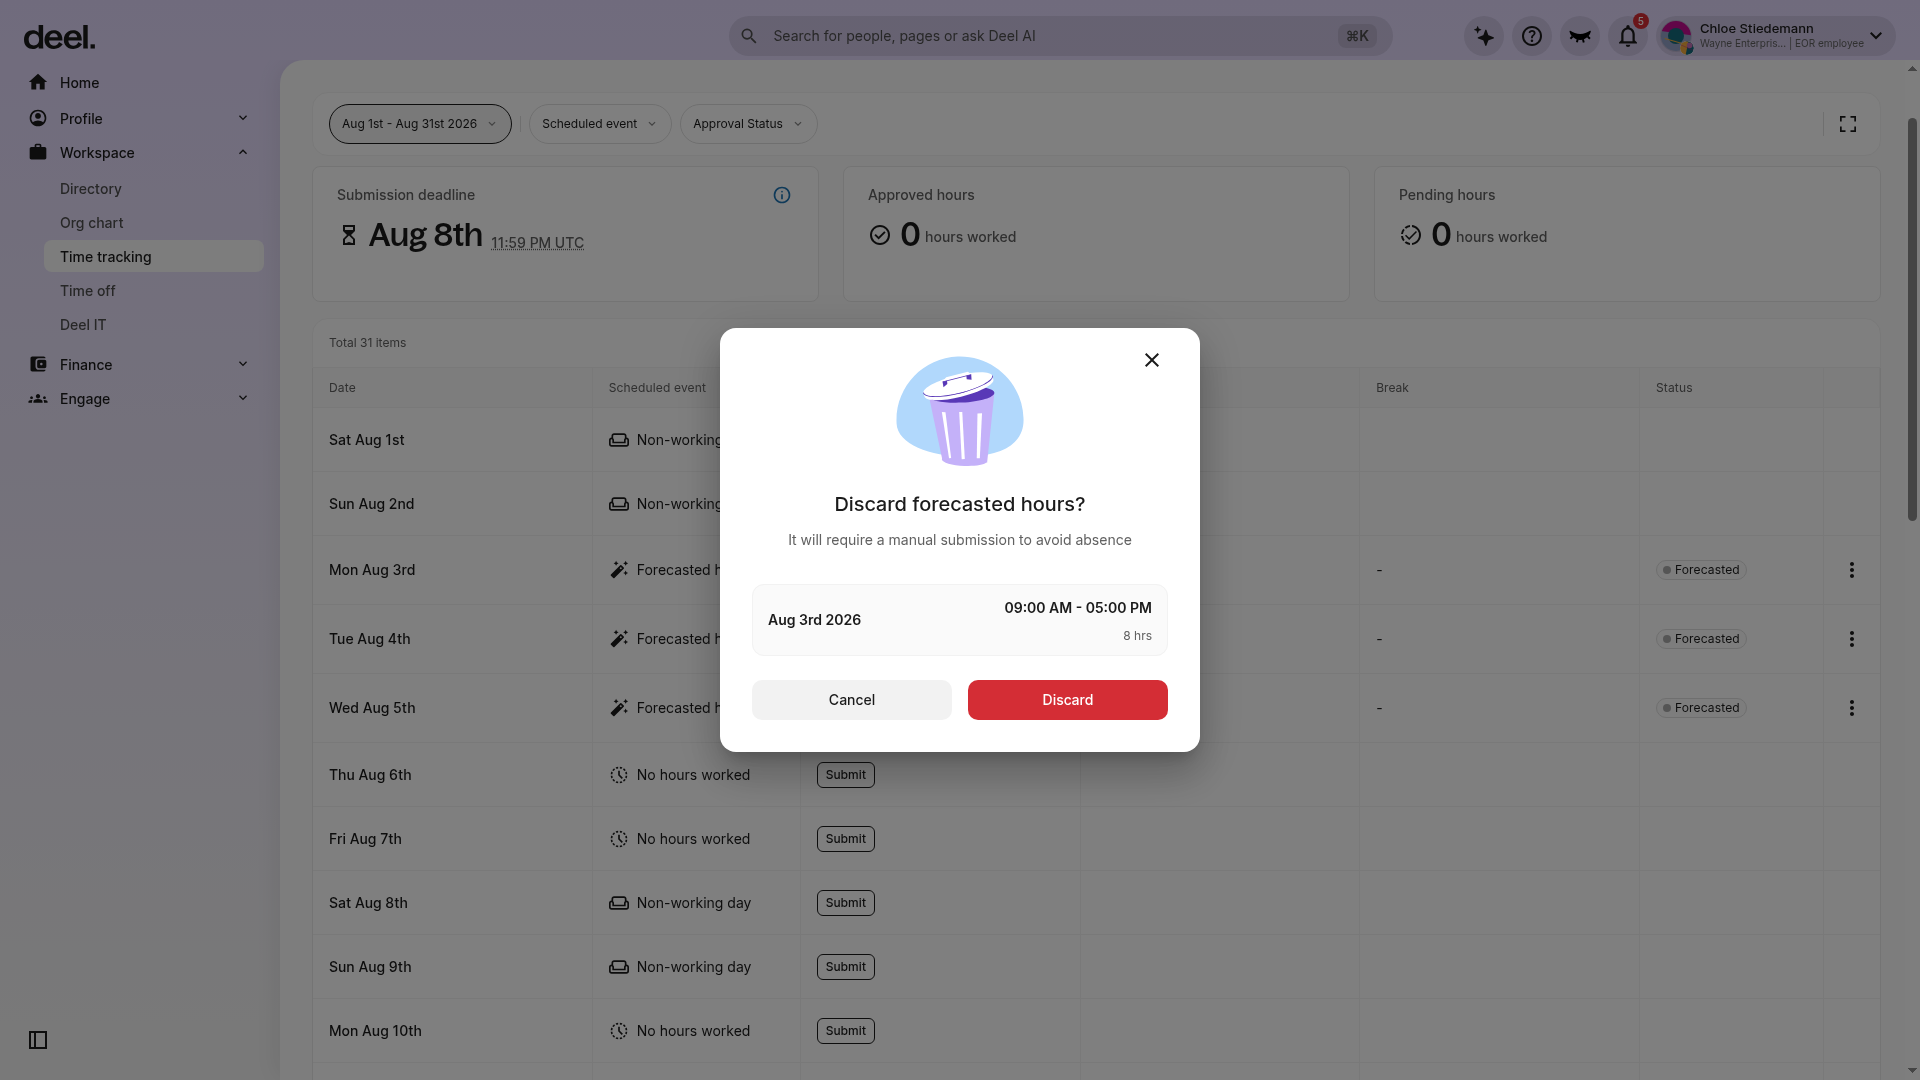
The system will then show a confirmation message, click Delete to confirm it.
For forecasted shifts, verify that the date and hours in the Discard forecasted hours? dialog match the intended shift. Select Discard to remove it, or select Cancel to keep it.
Frequently Asked Questions
[ACCORDION] How can I review the status of the timesheet?
To review the status of worked shifts, go to the Time Tracking tab via the Workspace icon on the homepage.
You can also use the date filter to view past timesheets.
[/ACCORDION]
[ACCORDION]How to submit Overtime Hours?
The client will set an Overtime Submission method to determine whether all worked hours or only overtime hours should be added.
If the client selects Submit all hours worked, then once the total worked hours are submitted, the platform will automatically calculate regular versus overtime hours.
If the client selects Overtime hours only, then the workers should see the option to add overtime only when they click on Add hours button in the time tracking page.
[/ACCORDION]
[ACCORDION]How to view hourly compensation details?
You can view your hourly compensation details in the contract overview, under the Compensation section.
[/ACCORDION]