
The Deel Expense Card allows employees to make business-related purchases directly from their employer-funded expense balance. This eliminates the need for out-of-pocket spending and reimbursement requests.
This article explains how employees can activate and use the Deel Expense card.
In This Article
Here’s what you’ll find in this article:
Before Starting
🎥 Check out this interactive walkthrough for a quick, step-by-step overview of how to activate your Deel Expense Card, make purchases, and submit expenses.
To successfully activate the Deel Expense card, ensure that your employer has enabled Expense cards on your organization on Deel.
We also recommend checking out our article on How the Deel Expense Card Works.
Activate the Deel Expense Card
1. In the left sidebar, select Finance to expand its submenu, then select Expense Card if it is available.
2. Select Request Card.
3. Accept the Terms and Conditions to activate your card.
Make a Purchase with Your Card
Once your Deel Expense Card is activated, you can begin using it immediately for business-related purchases. You can choose between:
Virtual Card – for online and mobile payments.
Physical Card – for in-person transactions.
Be sure all charges are for approved, business-related expenses in accordance with your company’s policy.
Submit an Expense Made with Your Deel Expense Card
When you make a purchase using your Deel Expense Card, an expense is automatically created in DRAFT status. Here’s how to complete and submit it:
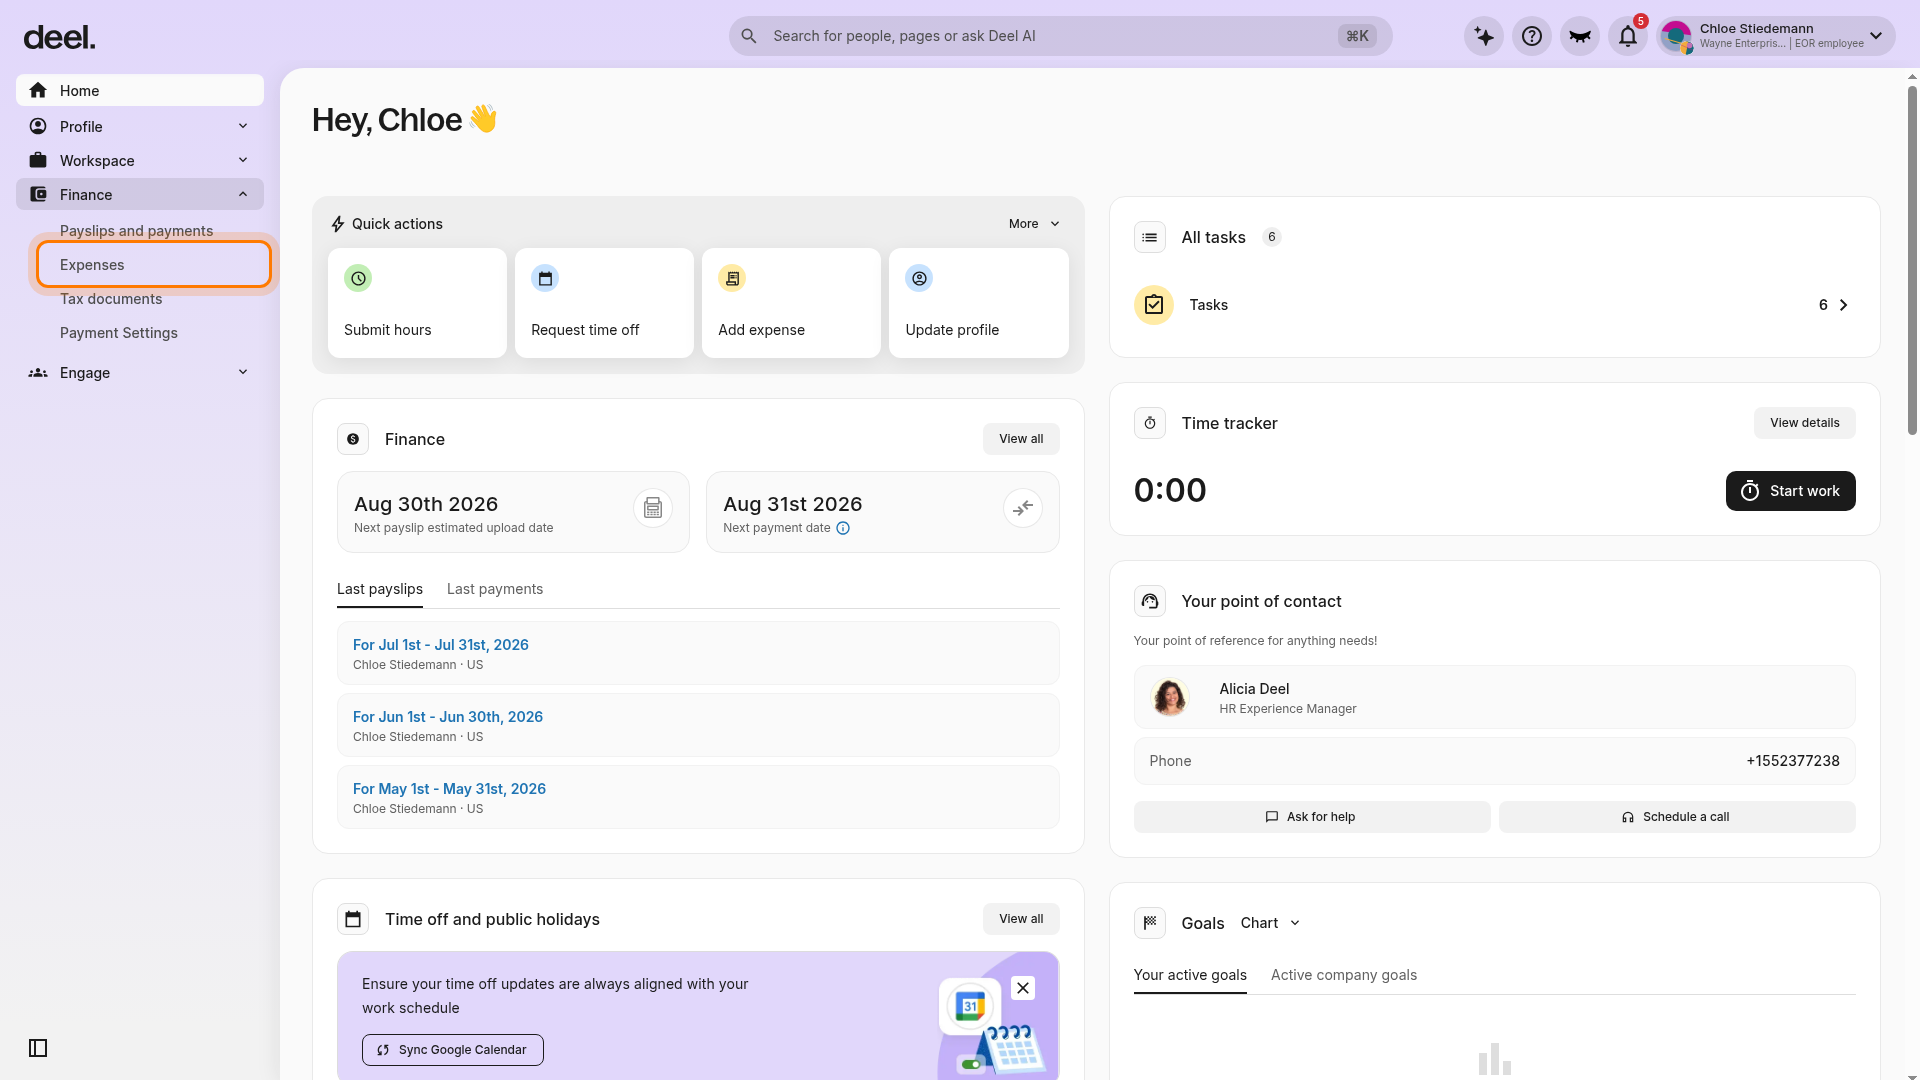
✅ Step 1 - From the homepage, go to the Expense Card tab
In the left sidebar, select Finance to expand its submenu, then select Expenses.
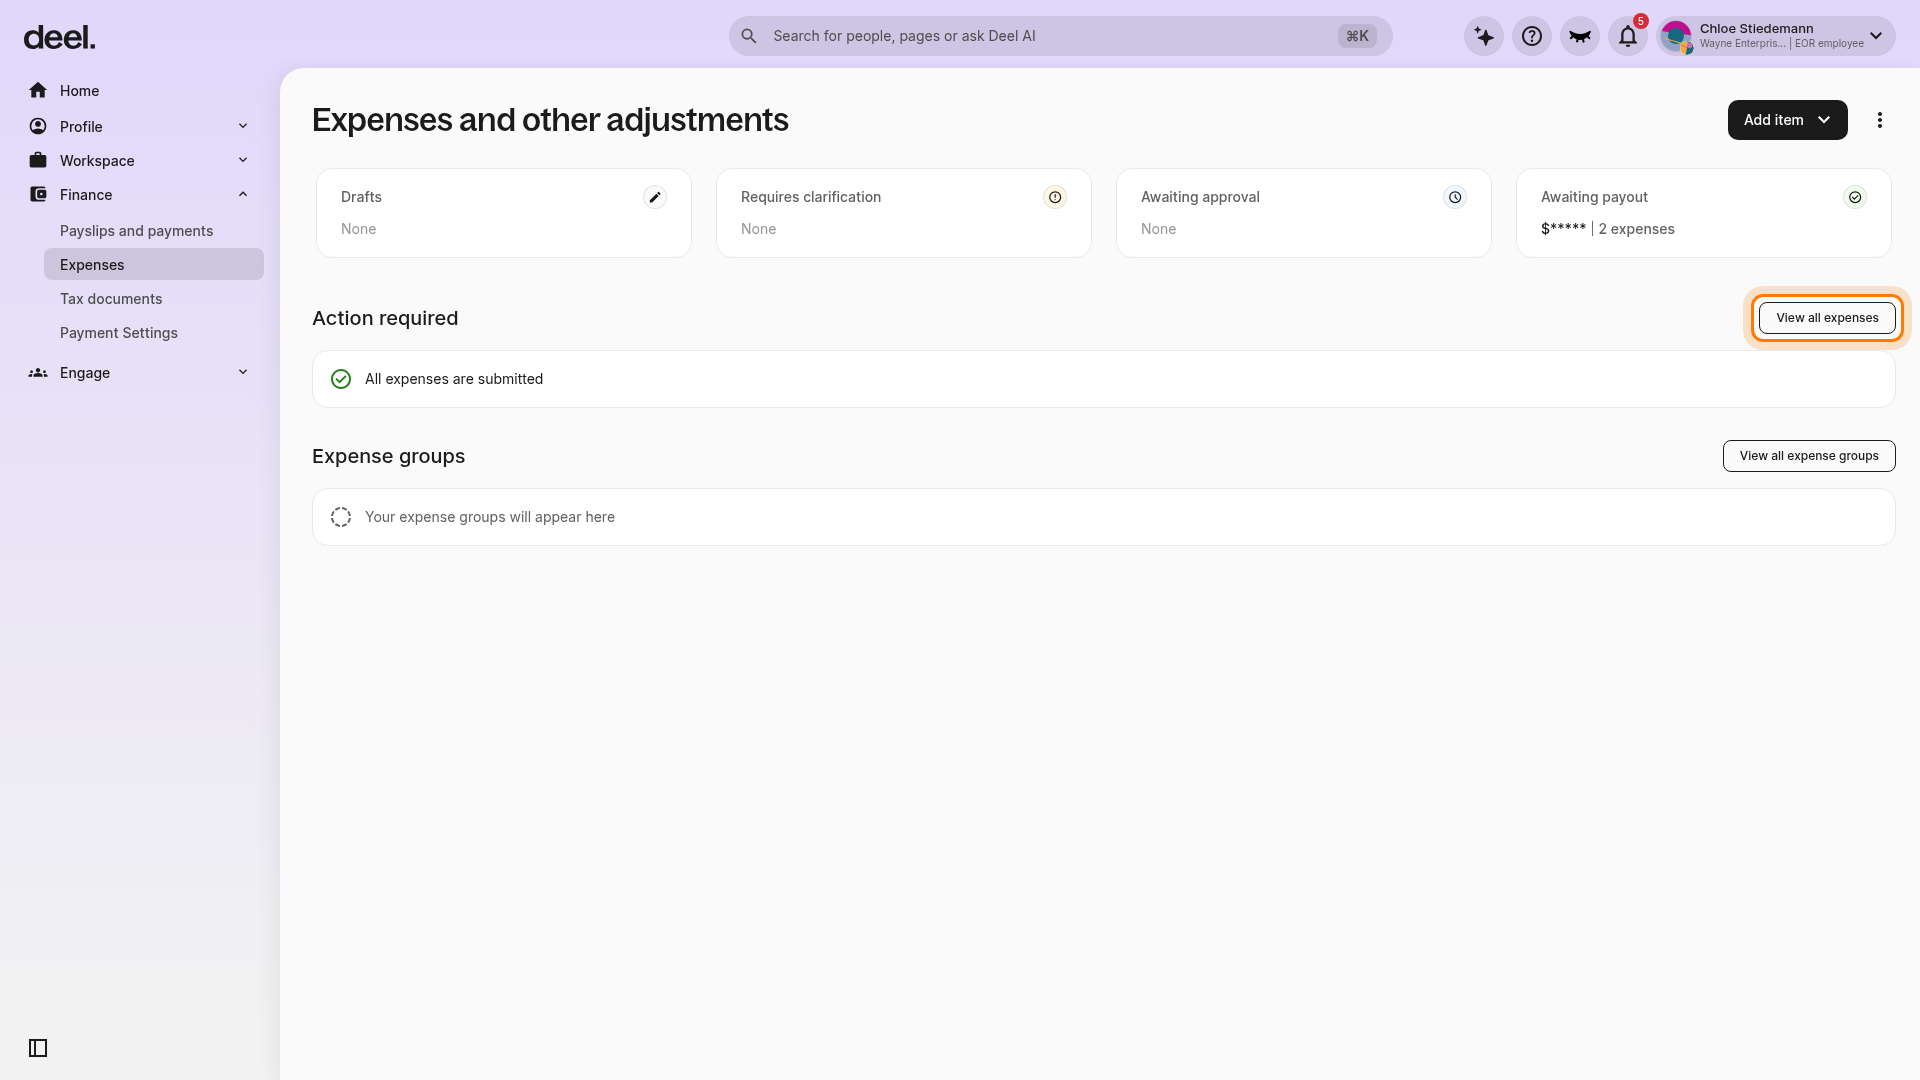
✅ Step 2 - Click File Expenses
On the Expenses and other adjustments page, review the Drafts summary card. If it shows a draft count or amount, select View all expenses. If it shows None, there is no draft expense currently available to open.
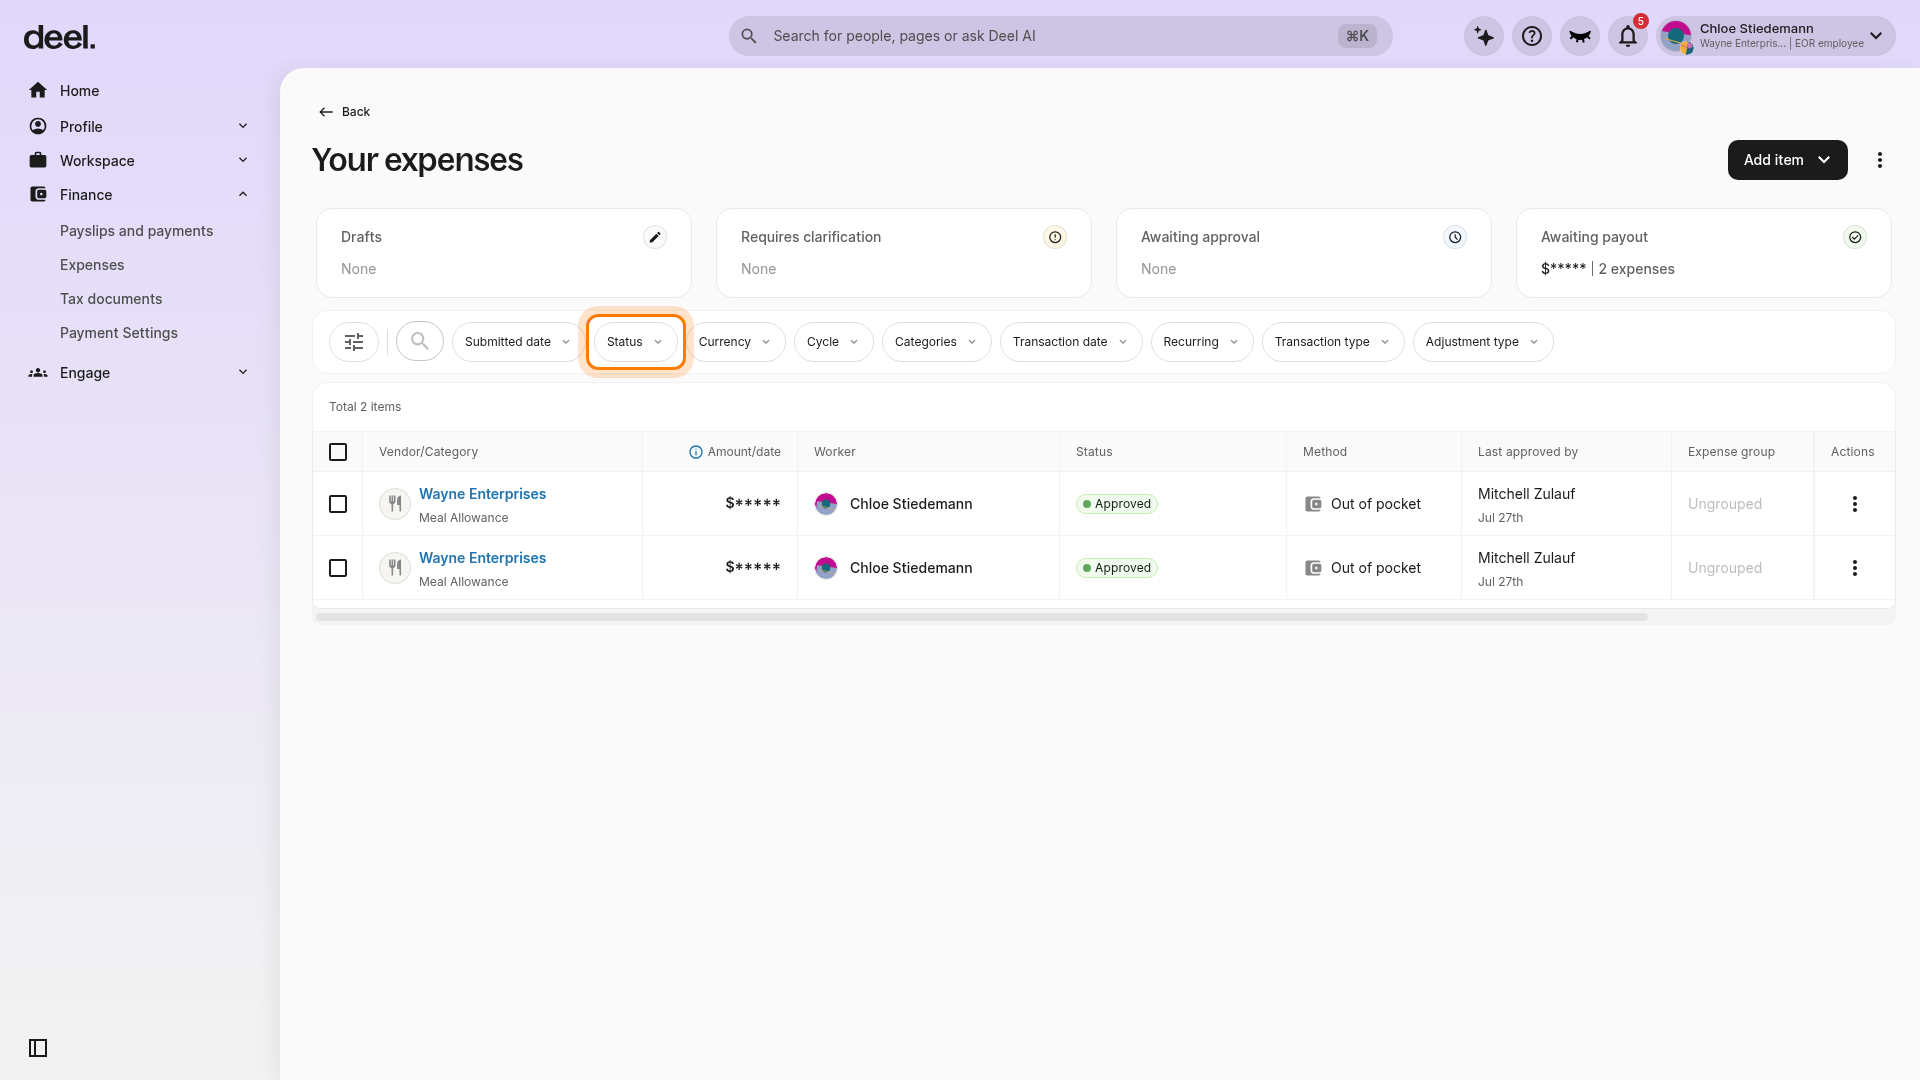
✅ Step 3 - Click on the relevant Draft expense to open it
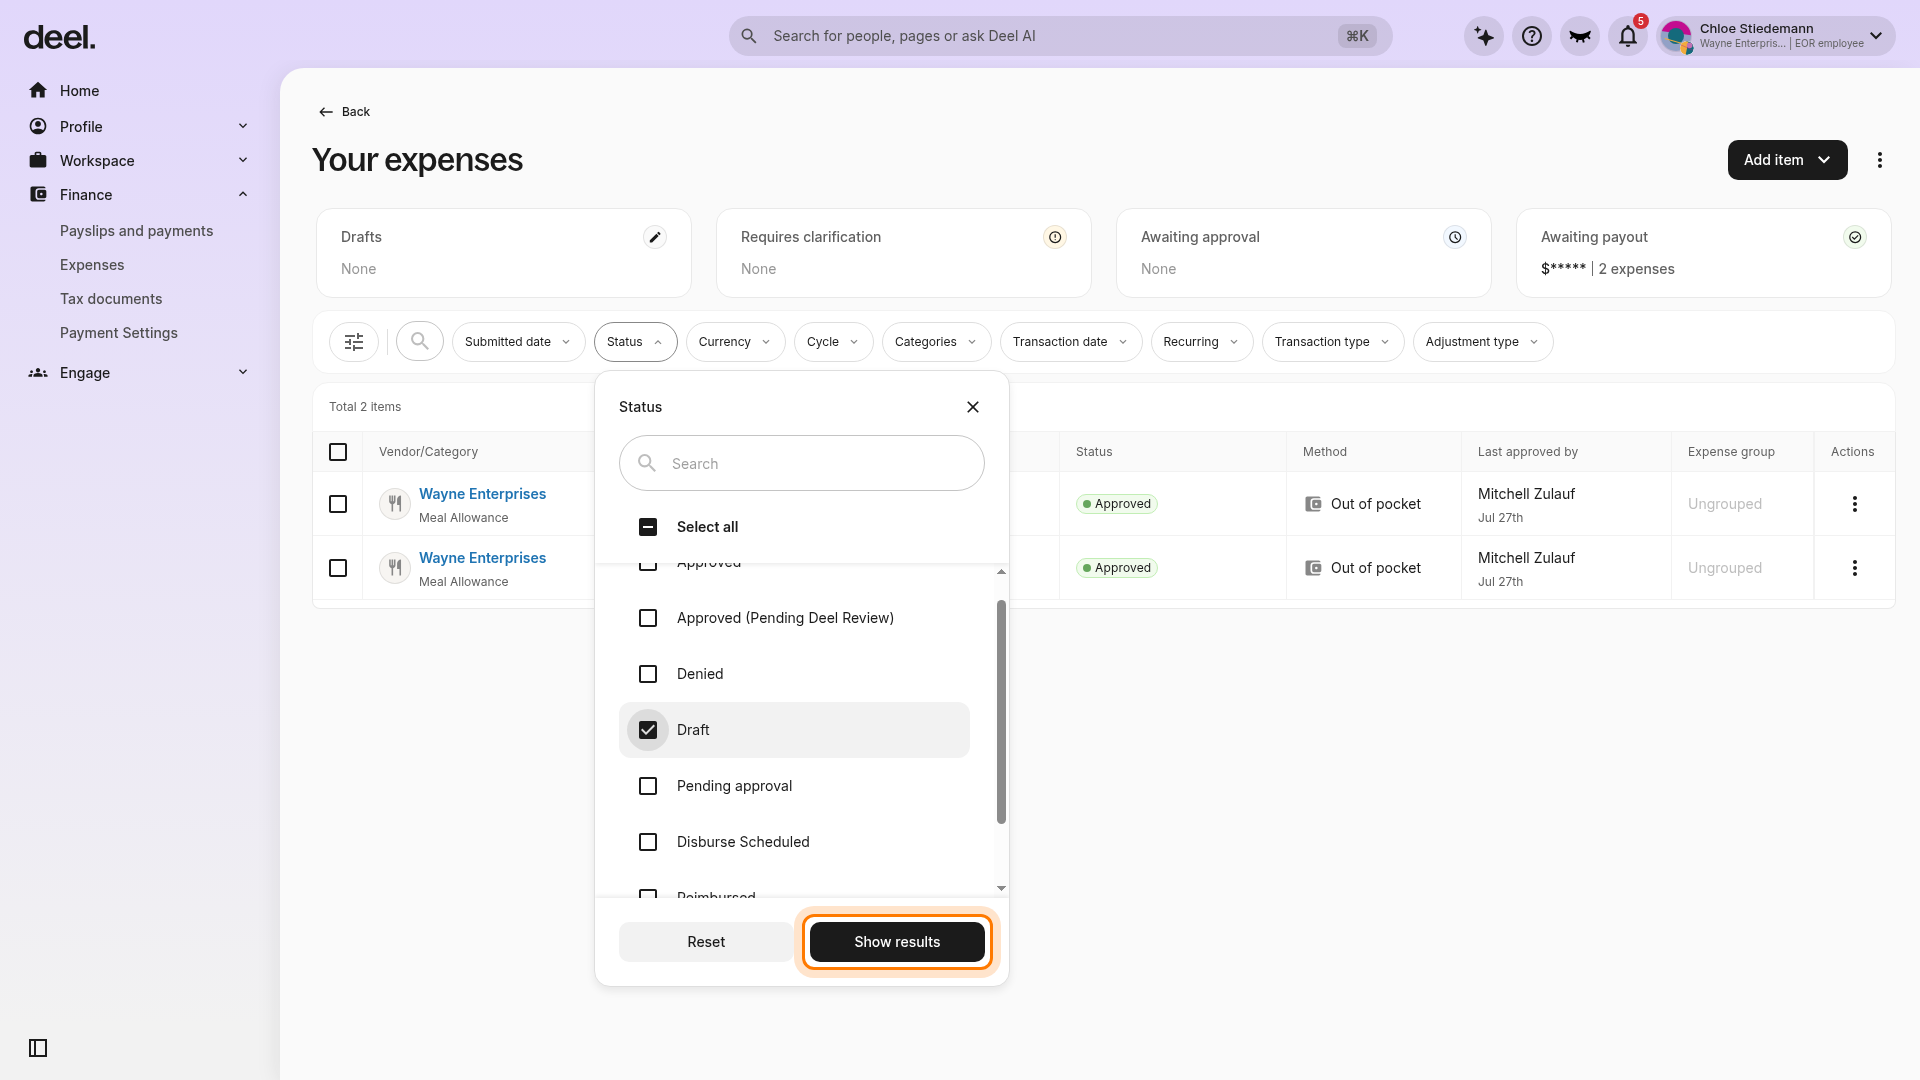
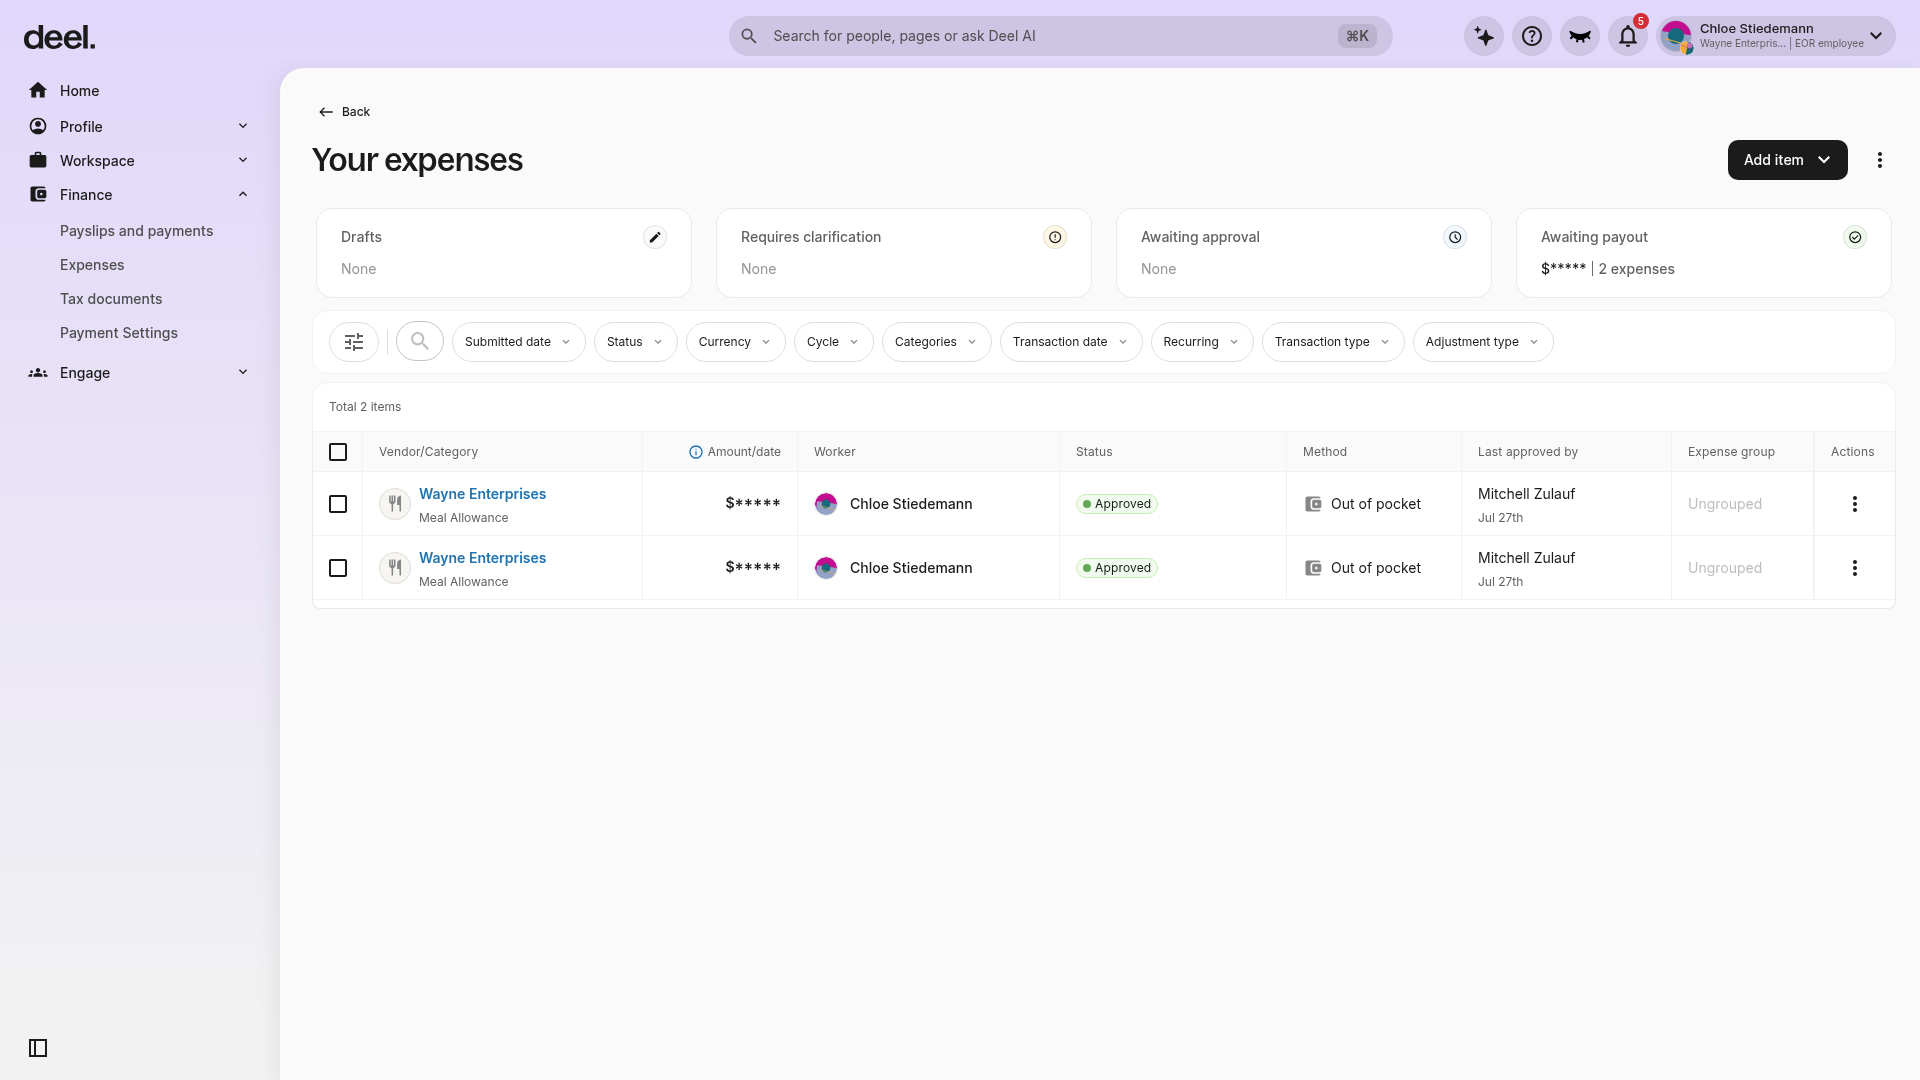
On the Your expenses page, select the Status filter above the expense table. In the Status panel, select Draft, then select Show results.
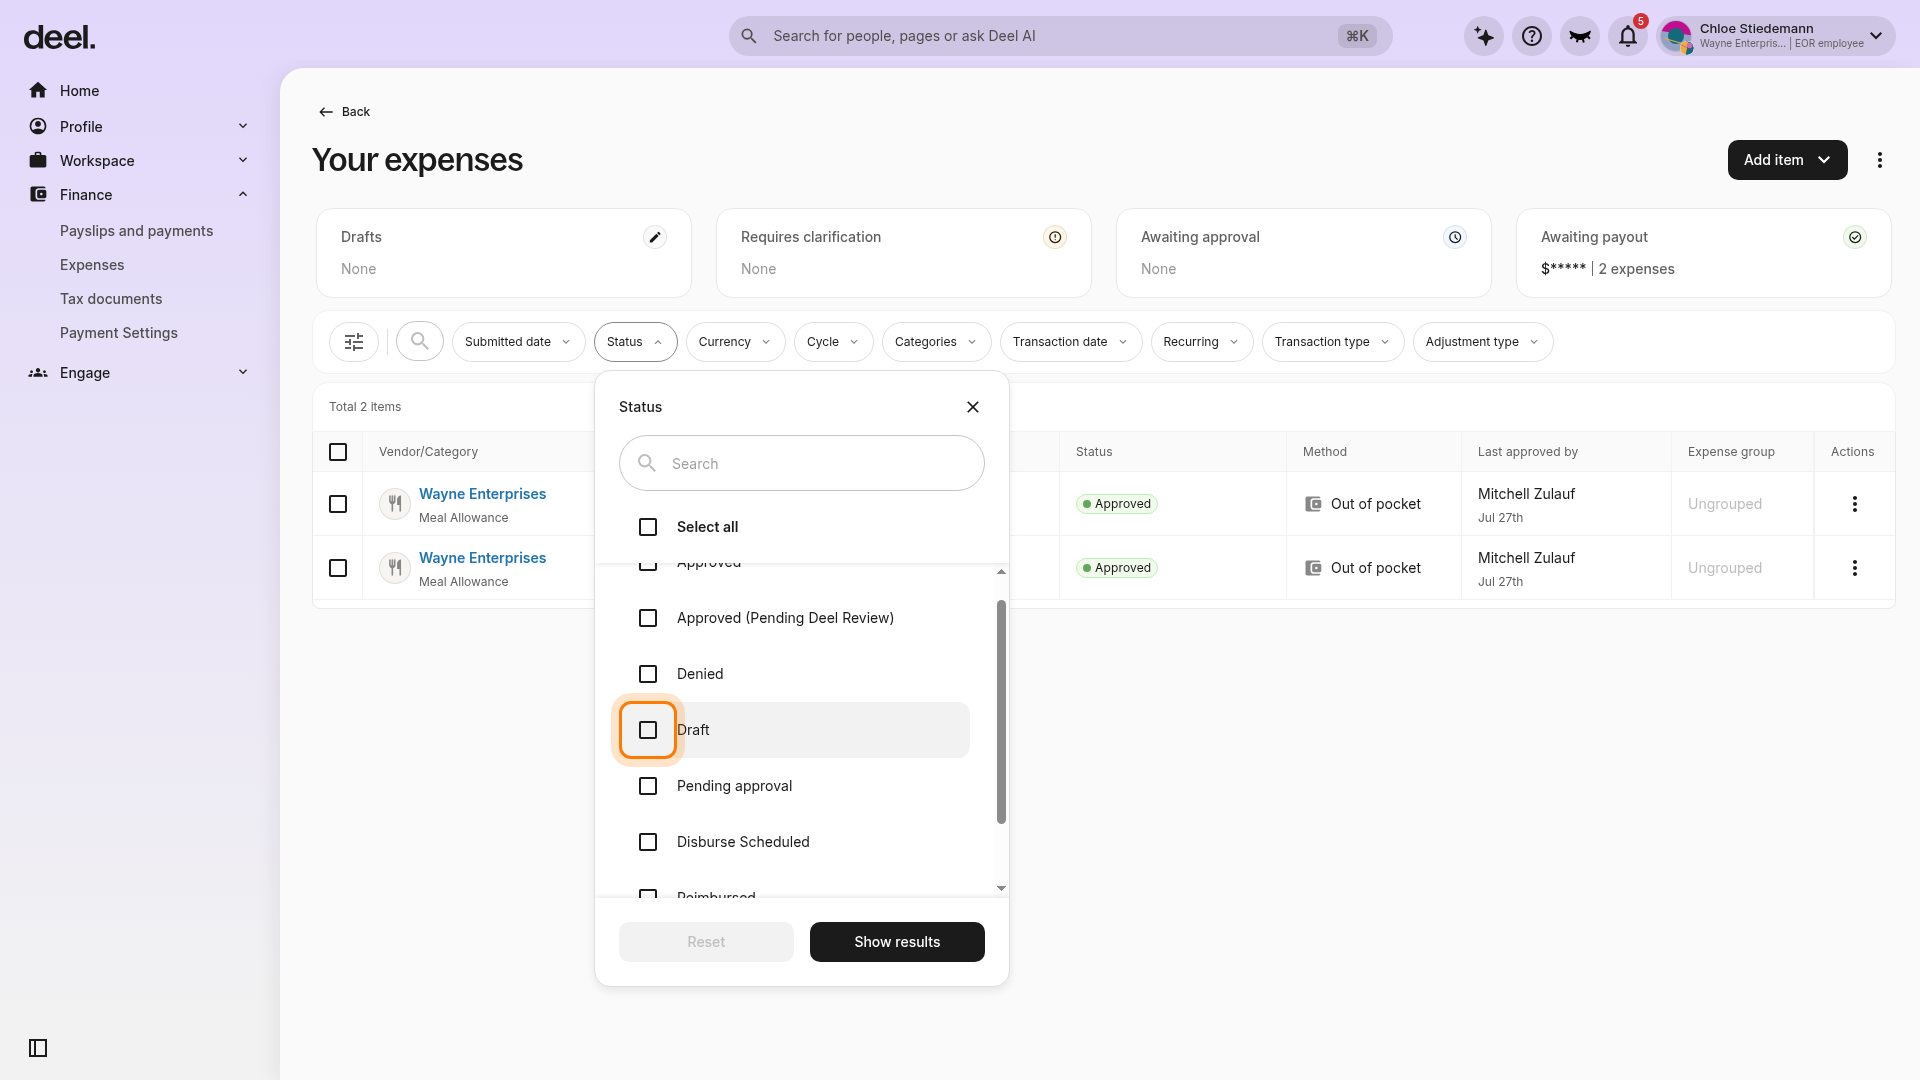
✅ Step 4 - Upload a supporting document
Select the relevant expense row marked Draft to open its details page. If no rows appear after filtering, there is no draft expense available to submit. An expense marked Approved is not a draft and cannot be used for this workflow.
✅ Step 5 - Review the details and submit the expense for approval.
Attach a supporting document, such as a receipt, invoice, or proof of payment, to validate the expense. Review the expense details and select Submit.
Once submitted, your expense will go through the standard approval process as per your company’s policy.
Frequently Asked Questions (FAQs)
[ACCORDION] Can I use the card for personal expenses?
No, the Deel Expense Card is strictly for business-related purchases. Employers review submitted expenses for approval, and any unapproved expenses may be deducted from payroll.
[ACCORDION] What happens if I exceed my spending limit?
Transactions will be declined if they exceed your allocated balance. You can request additional funds from your employer if needed.
[ACCORDION] How can I report a lost or stolen card?
Go to Finance > Expense Card and select Freeze/Cancel Card.
[ACCORDION] Where can I access my Expense Card invoices?
Expense Card invoices can be found under Organisation Settings > Billing & Payments > EOR Expense Card.
[ACCORDION] Can I add the Deel Expense Card to Apple Pay or Google Pay?
While Deel does not currently support direct integration with Apple Pay or Google Pay, some users may be able to manually add the card through the Wallet app by entering the card details. However, this functionality depends on local banking regulations and card issuer policies, meaning it may not be available in all countries. If you’re unable to add the card, this restriction is likely due to regional limitations set by Apple, Google, or the issuing bank. This feature will be added soon!