This article is for clients and it explains how to prepare their Sage Intacct account to connect with Deel.
To enable this integration you need to follow these steps:
- Sage Web services authorizations
- Create a Web service user
- Multi-currency (optional)
Sage Web Services Authorizations
Enable the following permissions as listed here on Sage
✅ Step 1 - Go to your profile page, select company from the Application’s list.
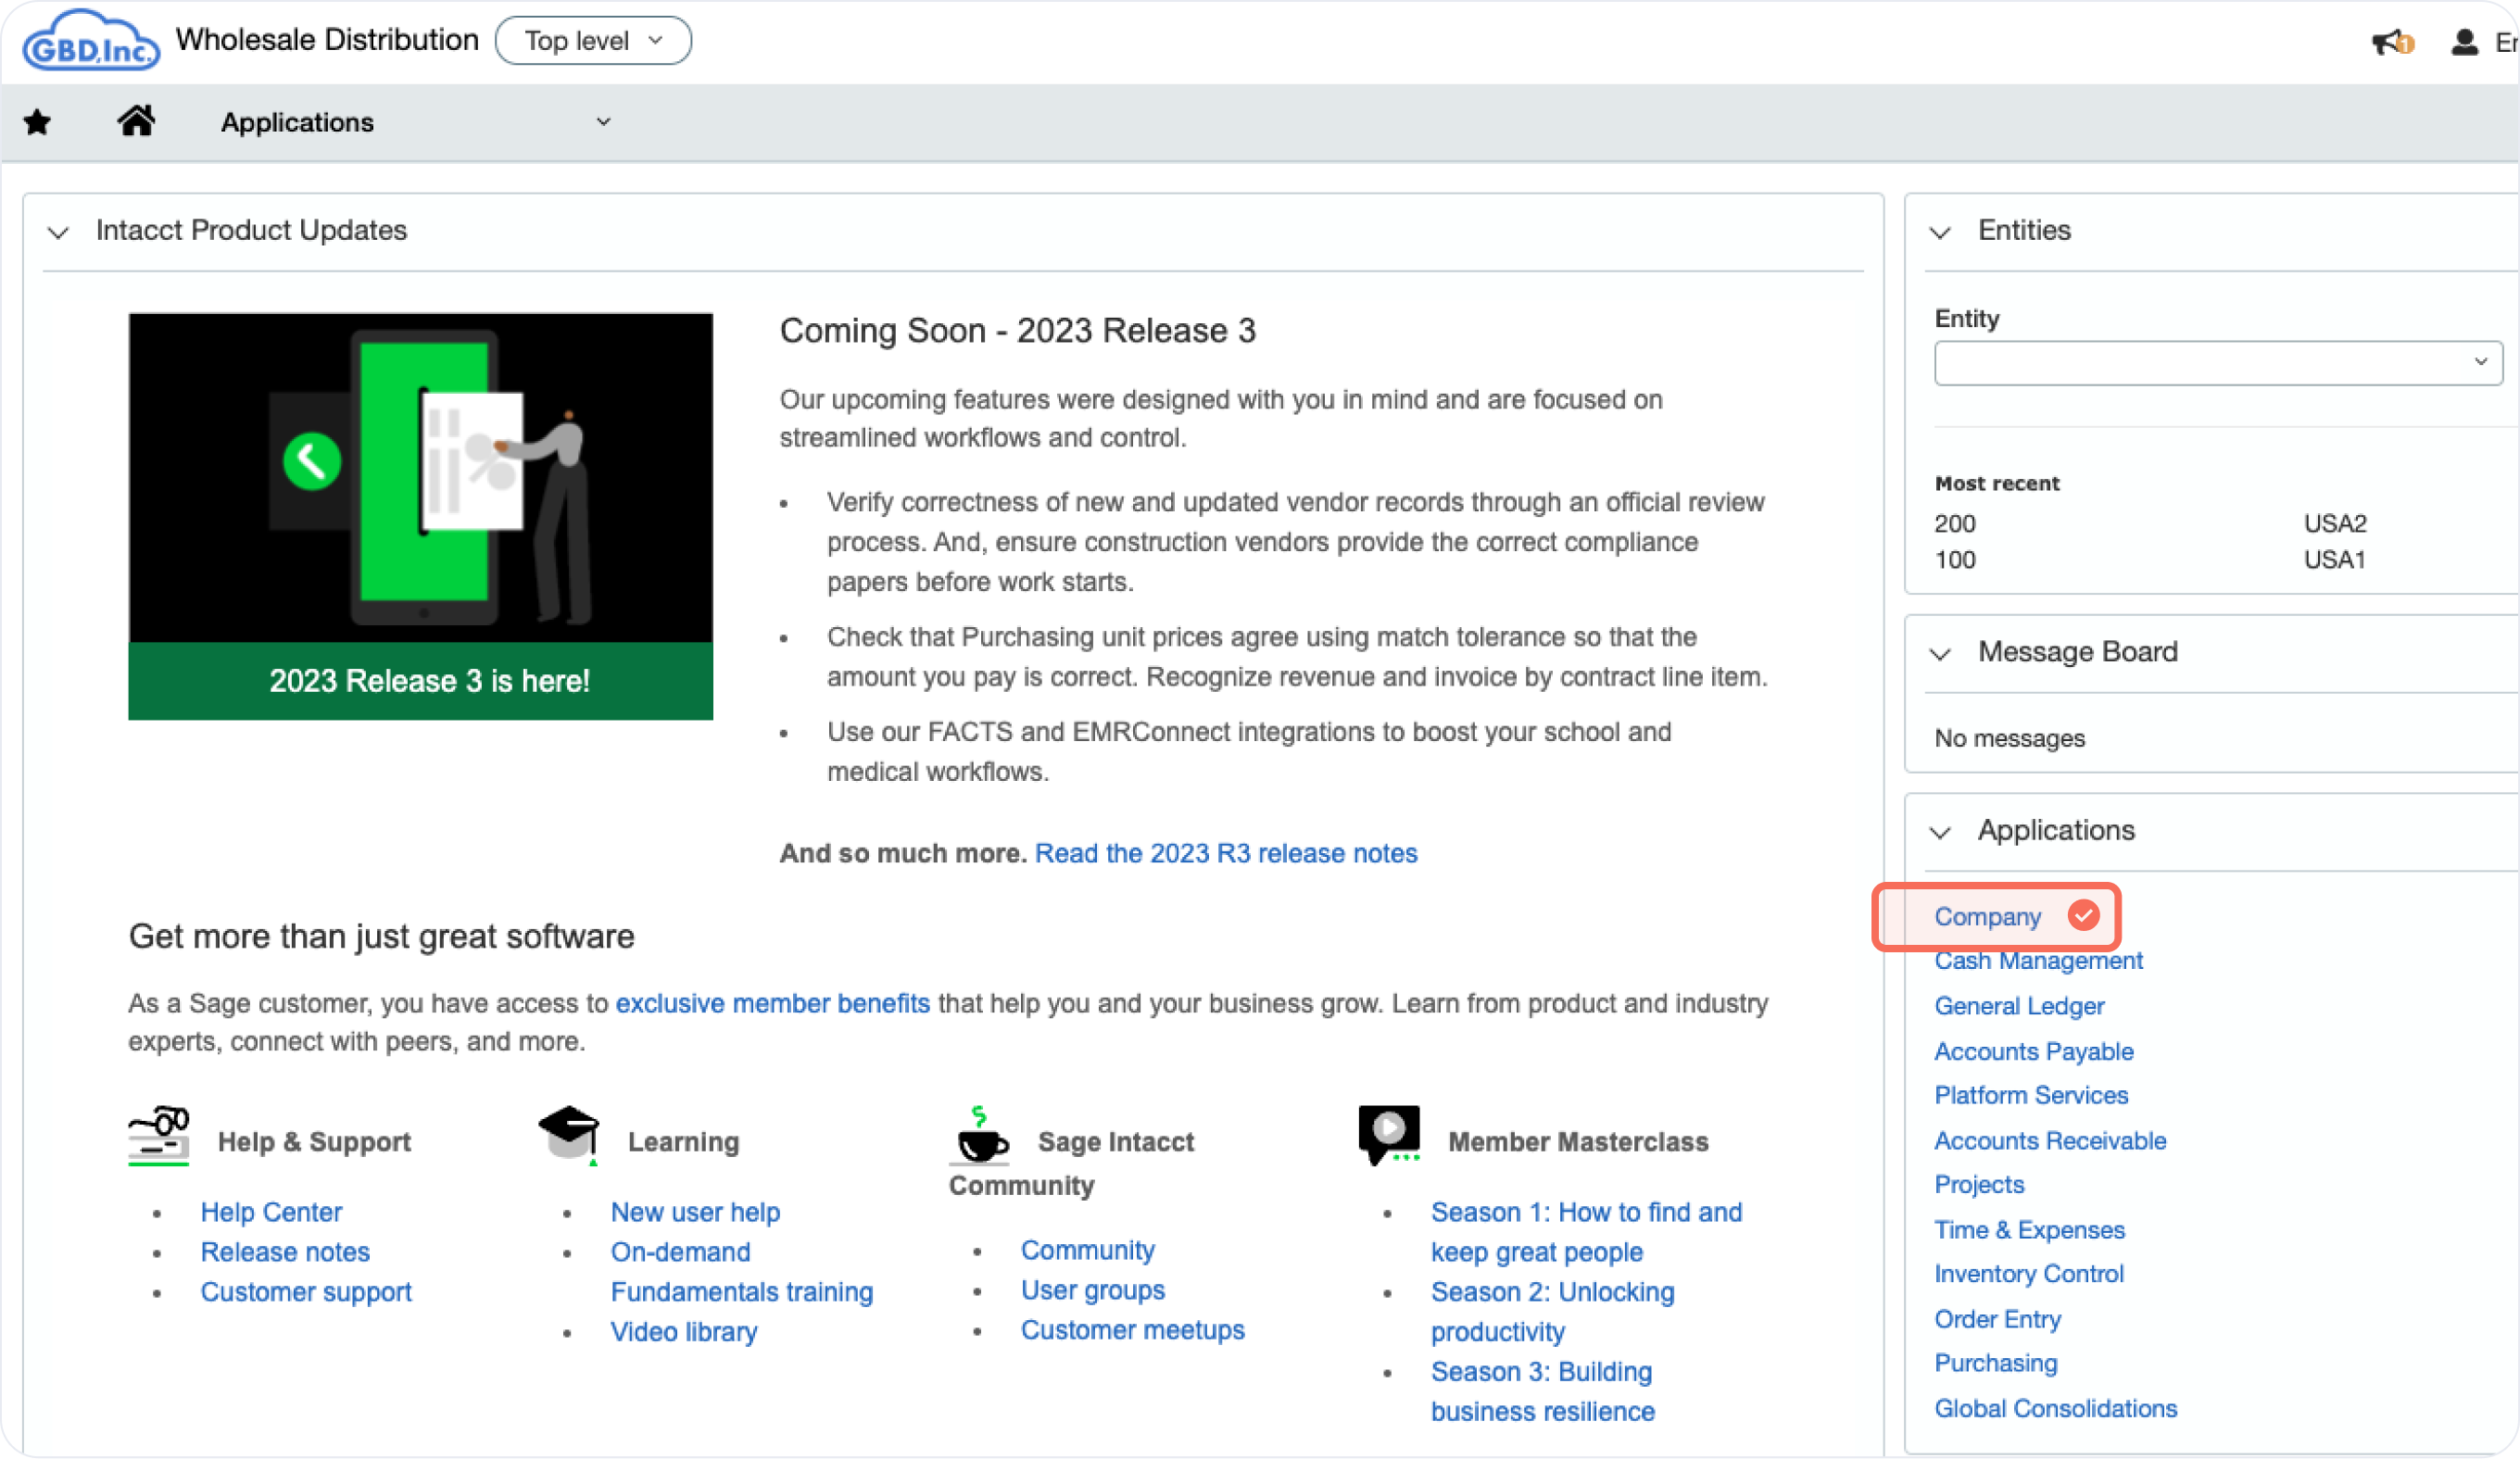
✅ Step 2 - Select Company settings

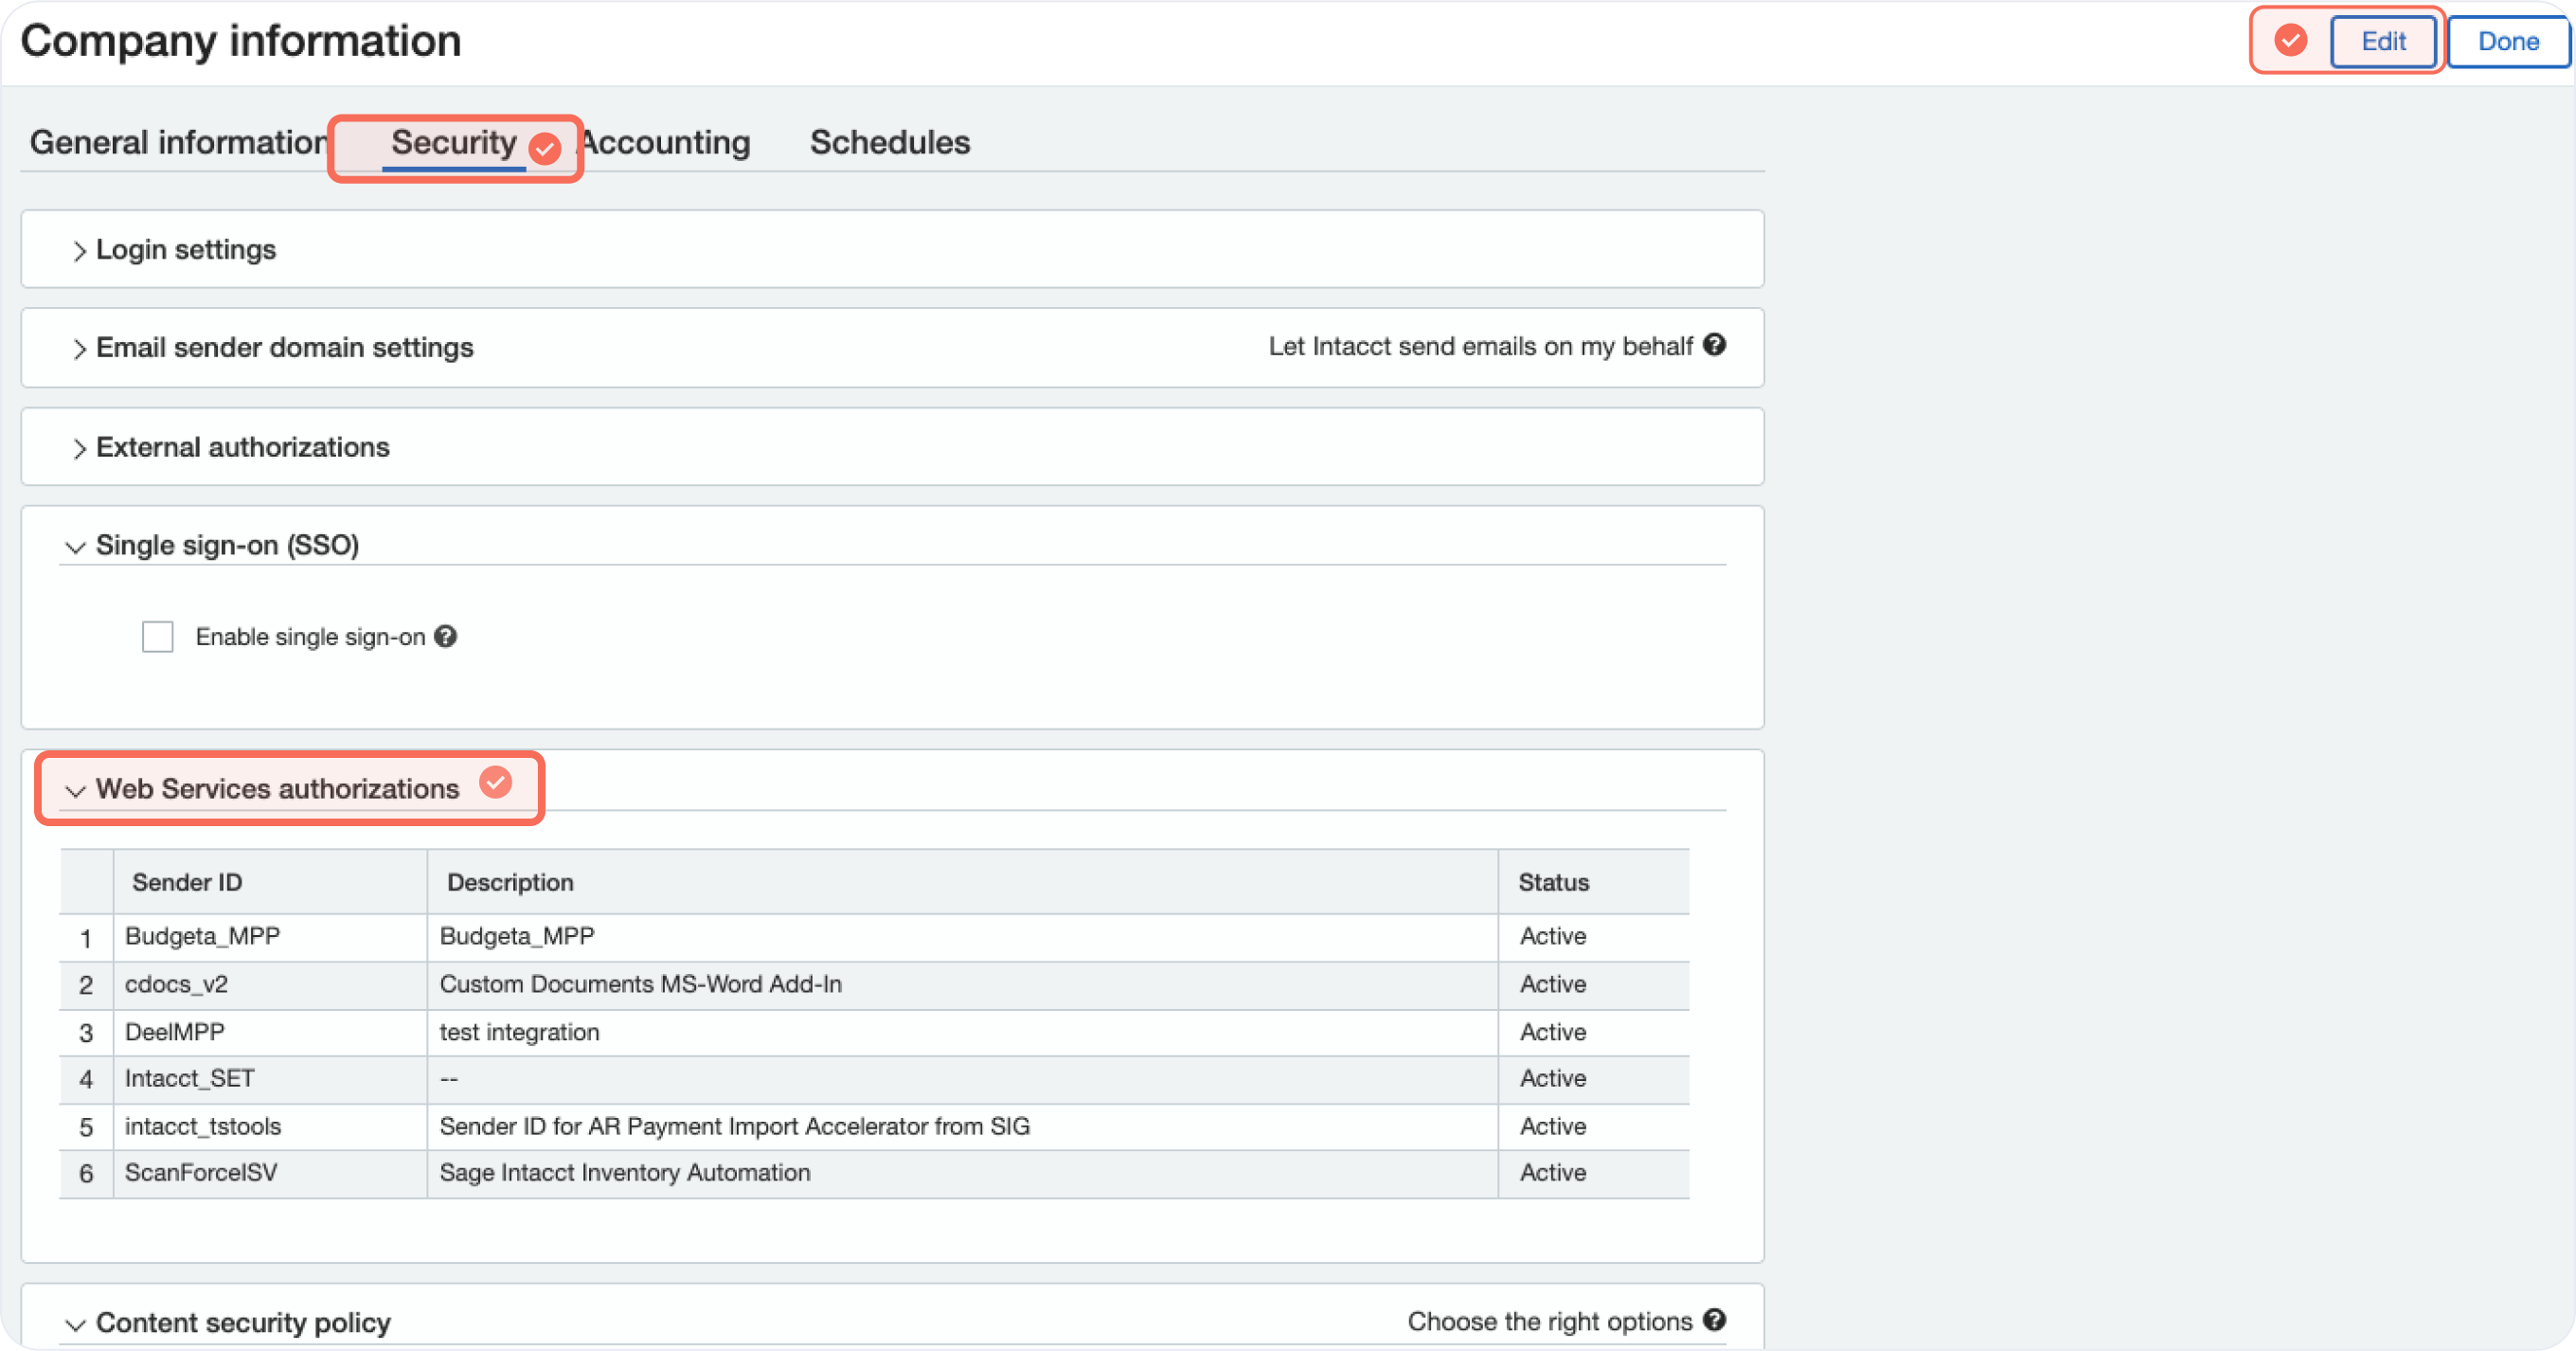
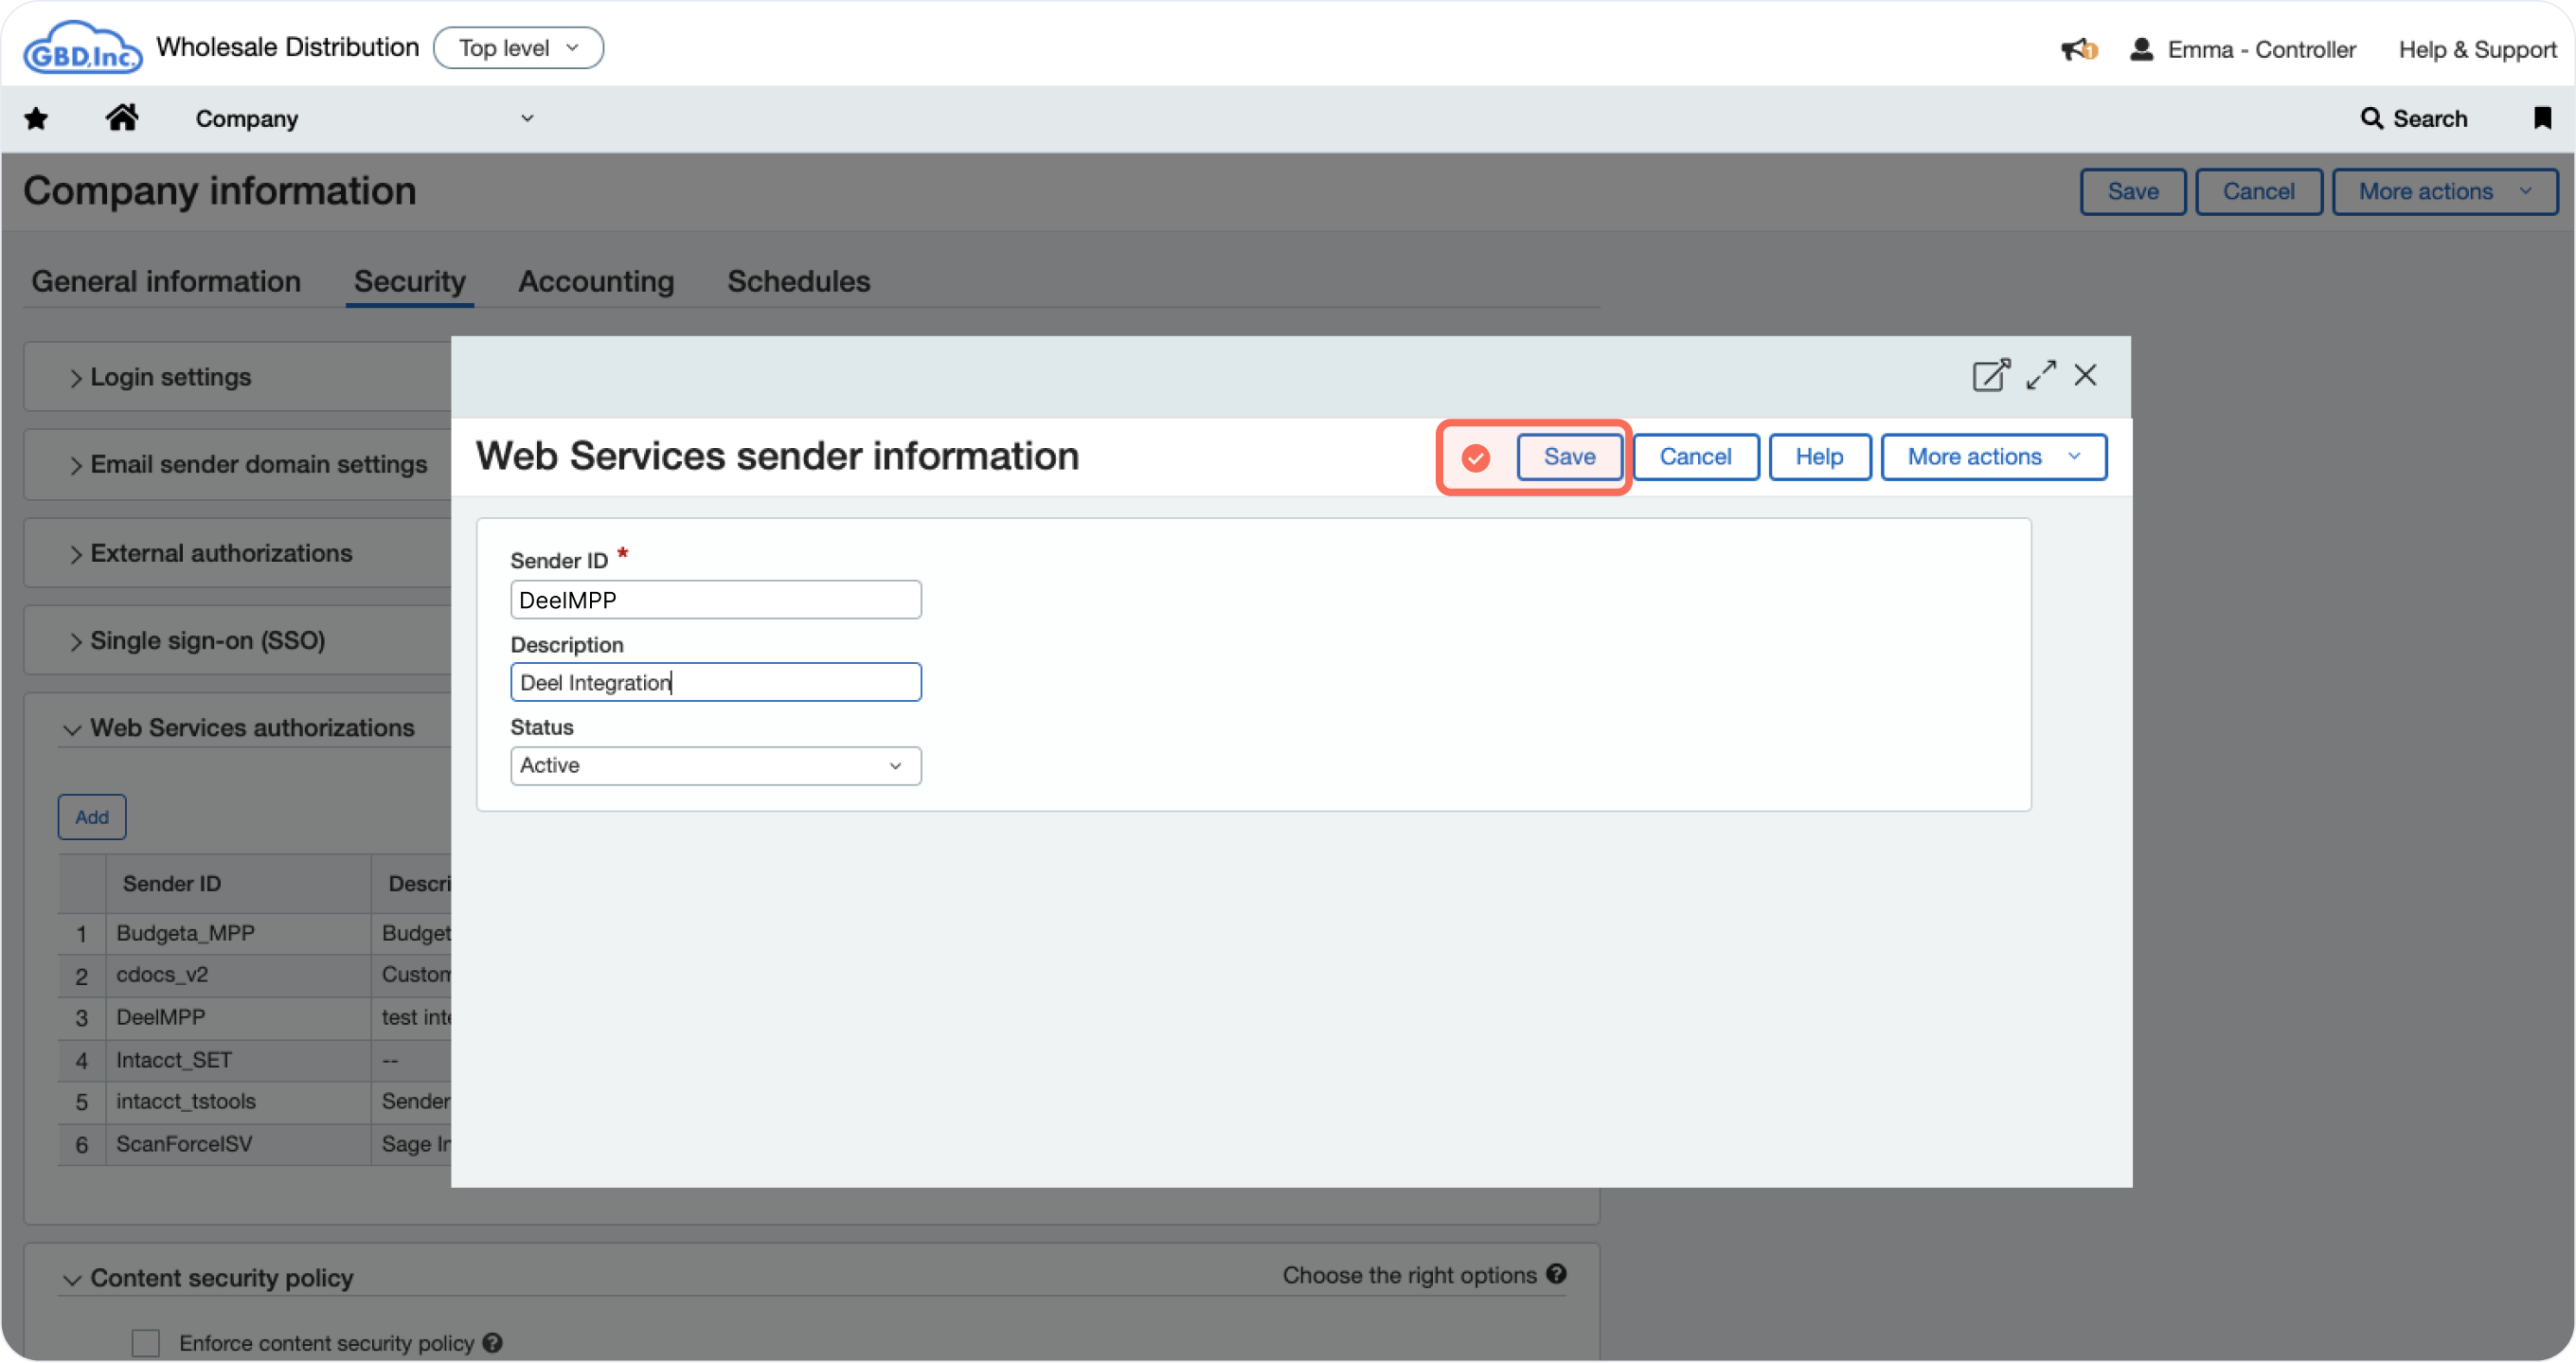
✅ Step 3 - On the Security tab go to Web Services Authorizations. Select Edit and an “Add” button will appear bellow the title.
✅ Step 4 - Add a new Web Service sender by completing Deel’s sender ID, description, status and Save. Then go back to the company settings (second image).
Create a Web Service User
To generate the access tokens, create a Web Service User and assign a role to it.
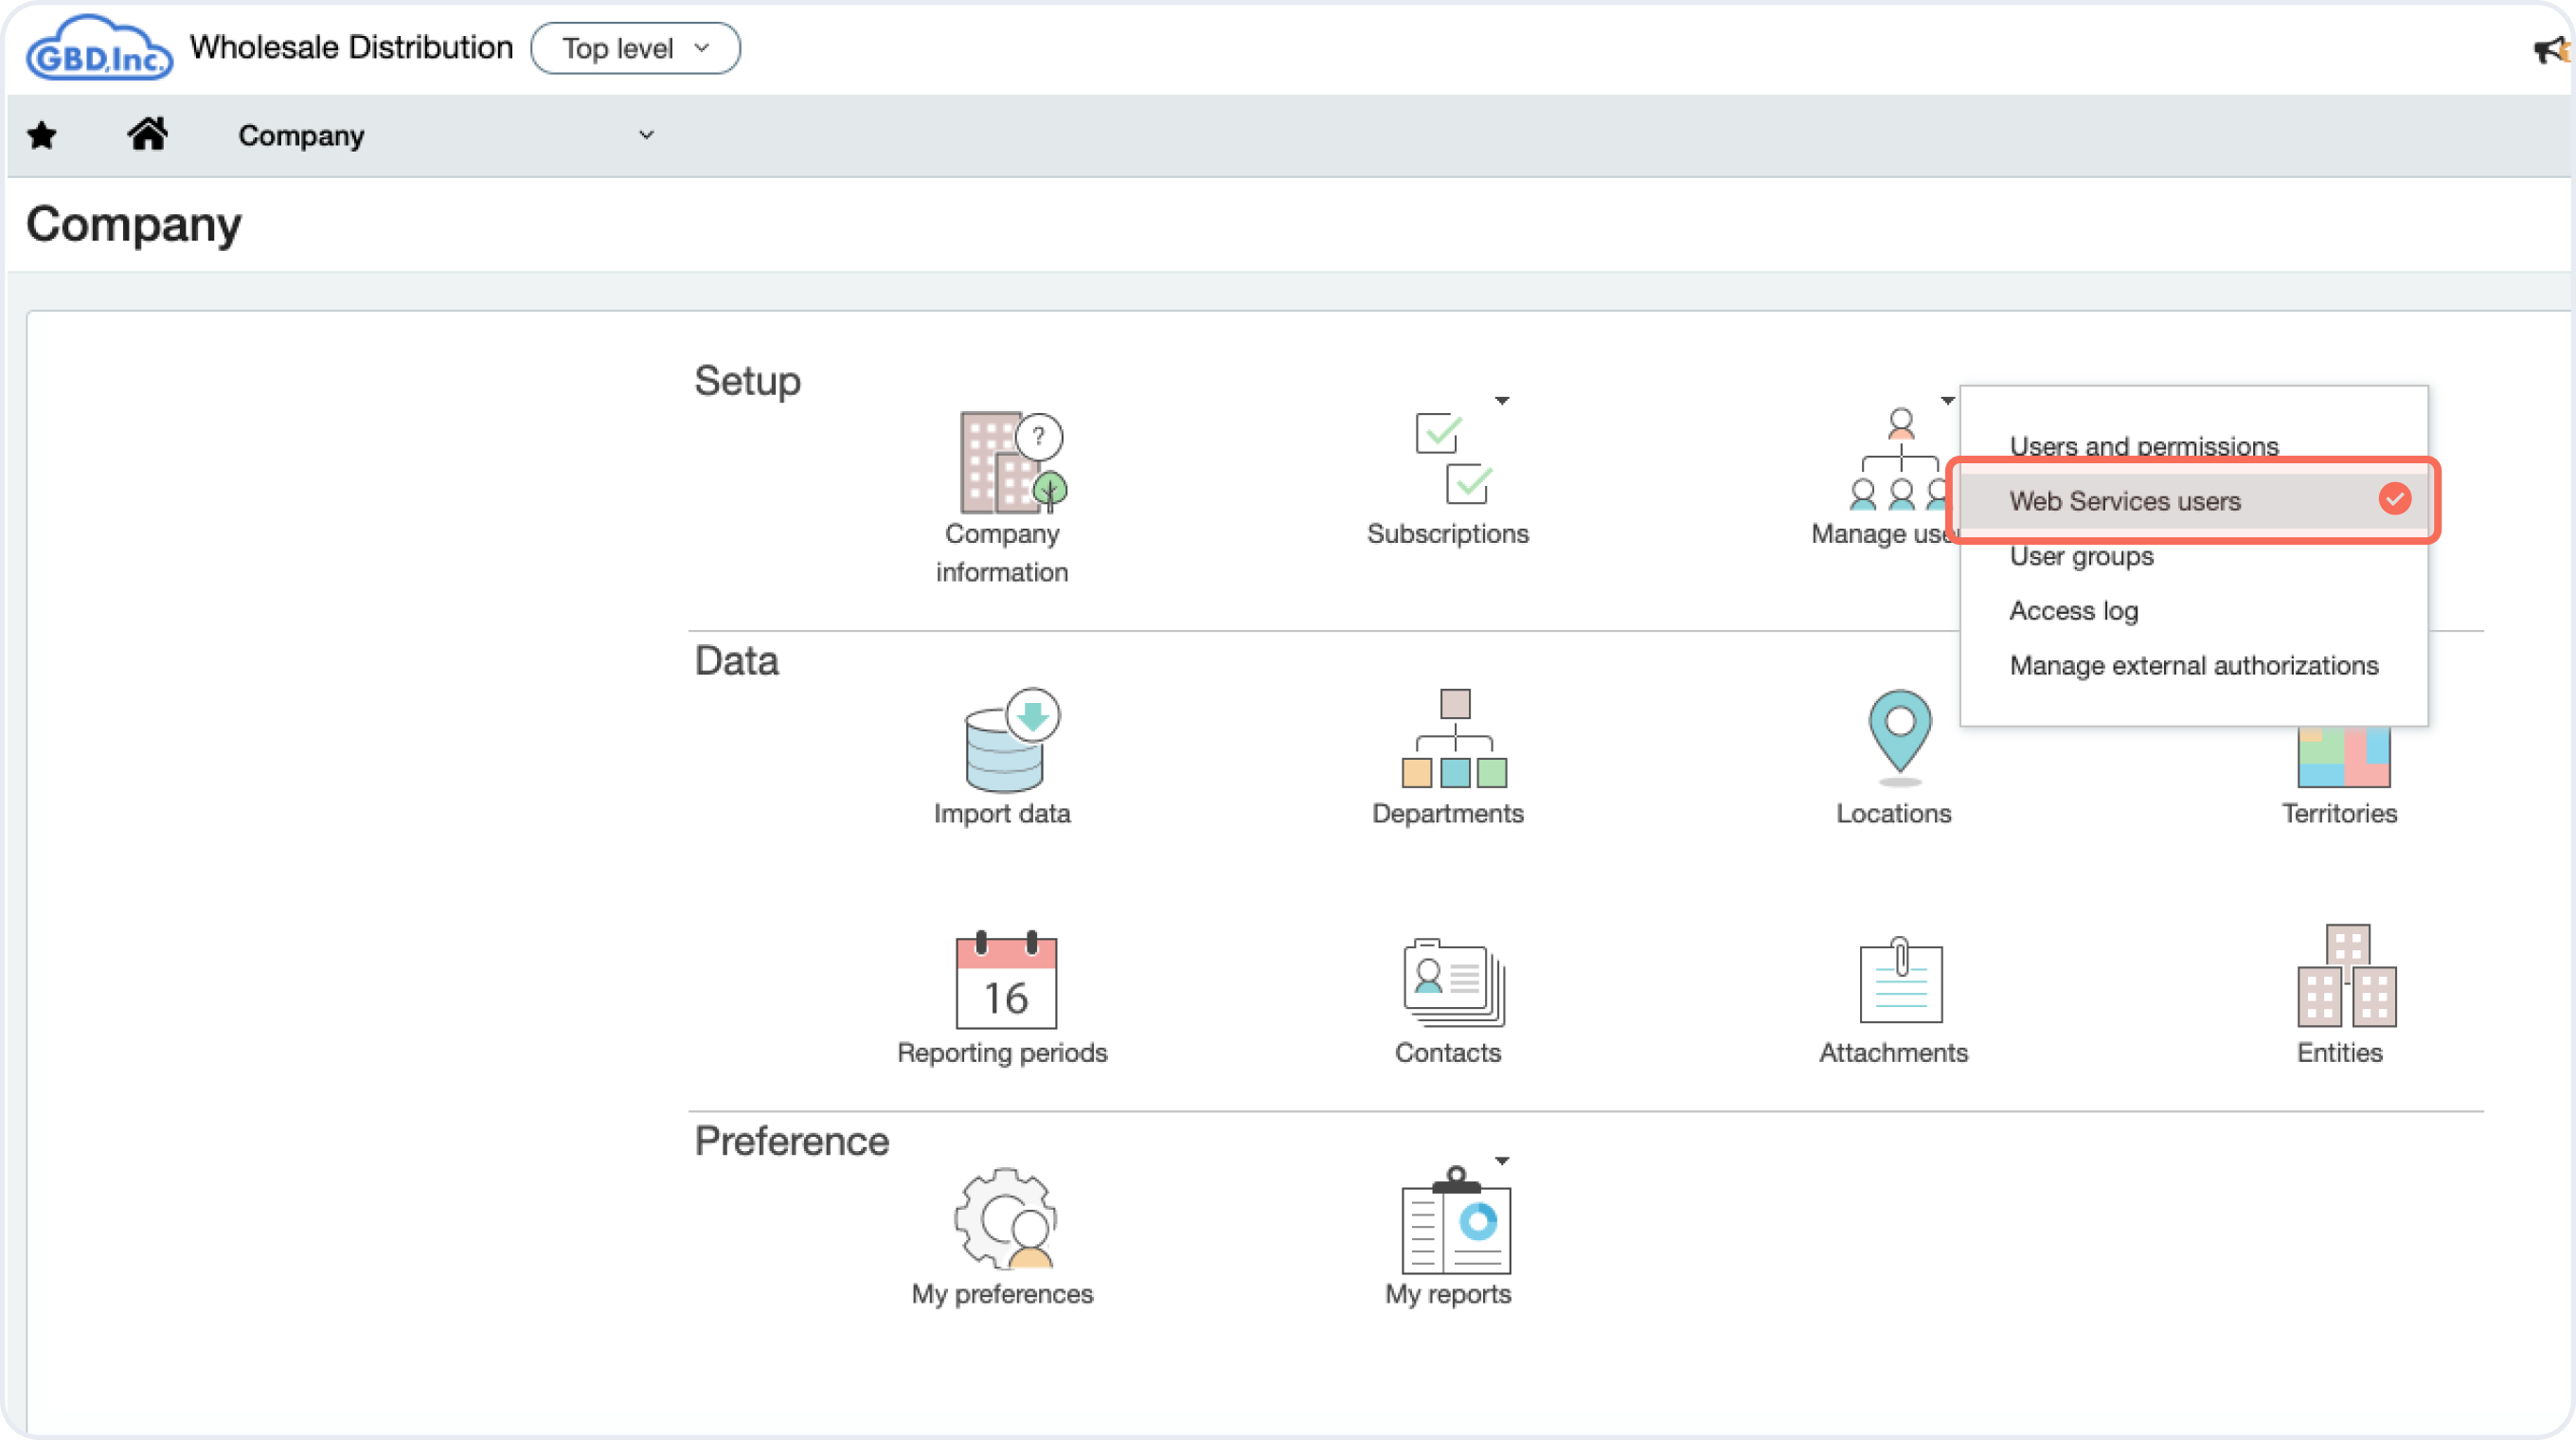
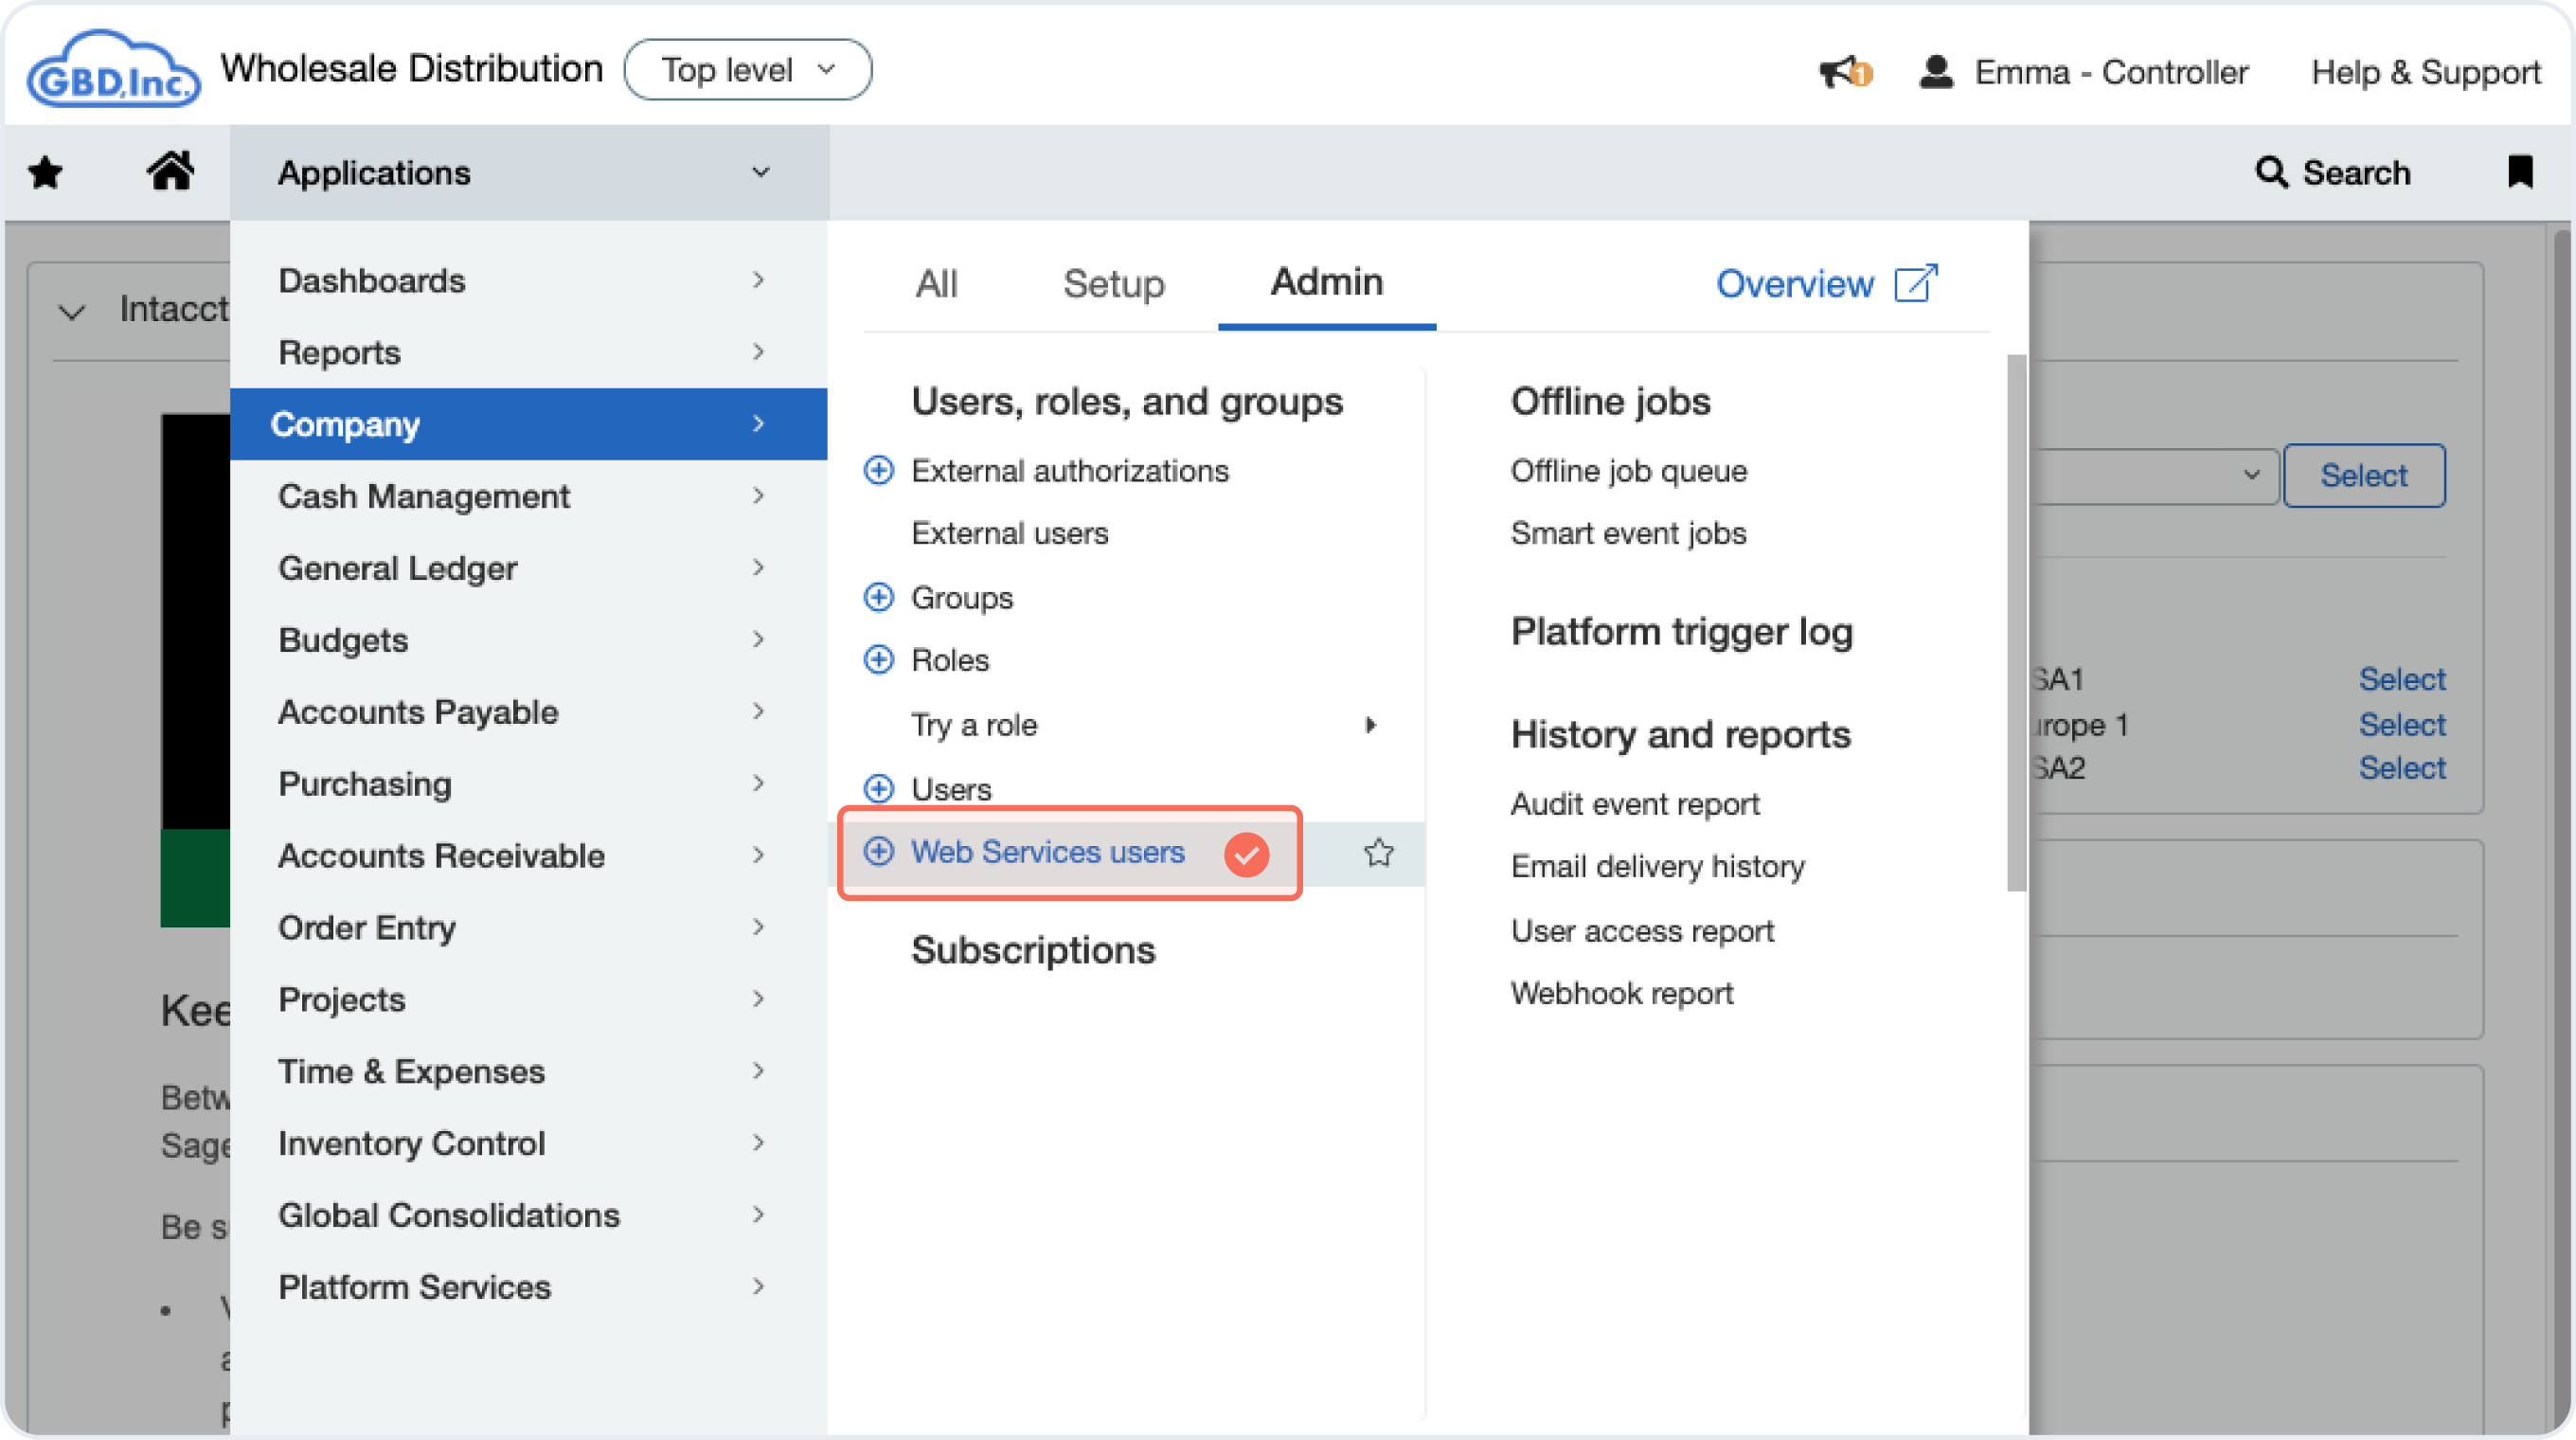
✅ Step 1 - Go to your profile page, select Web Services users under Manage users.
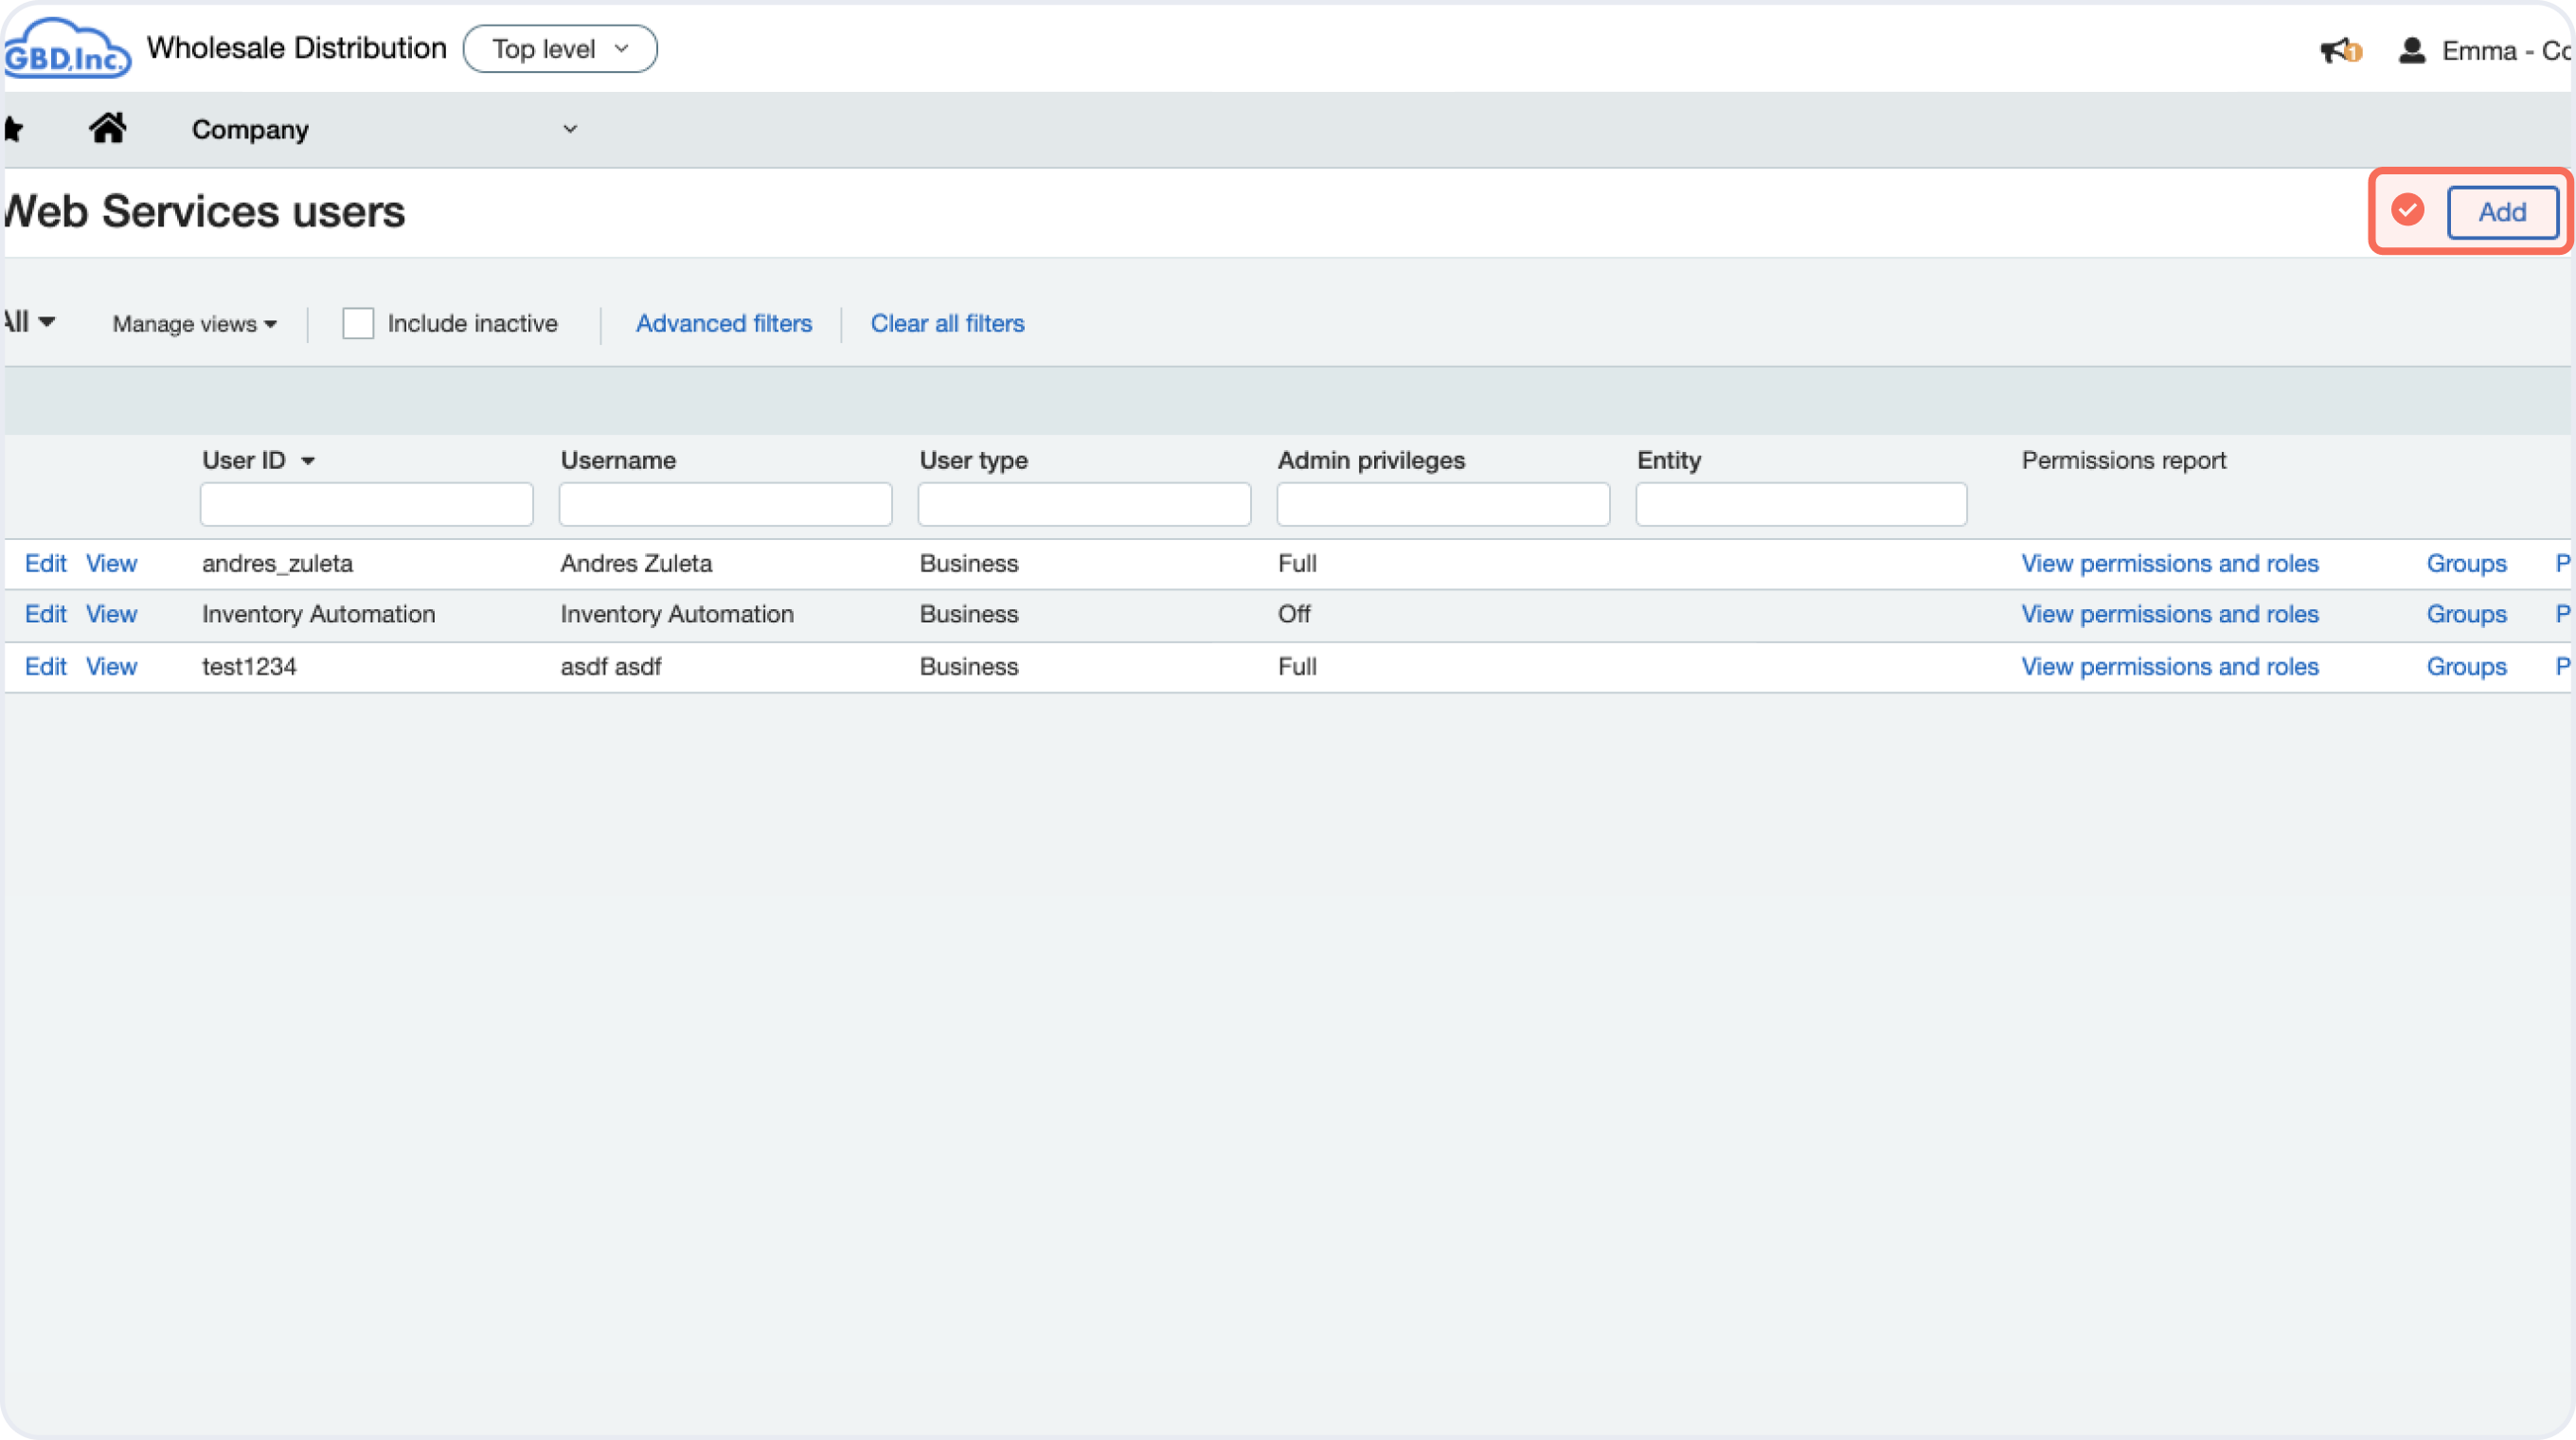
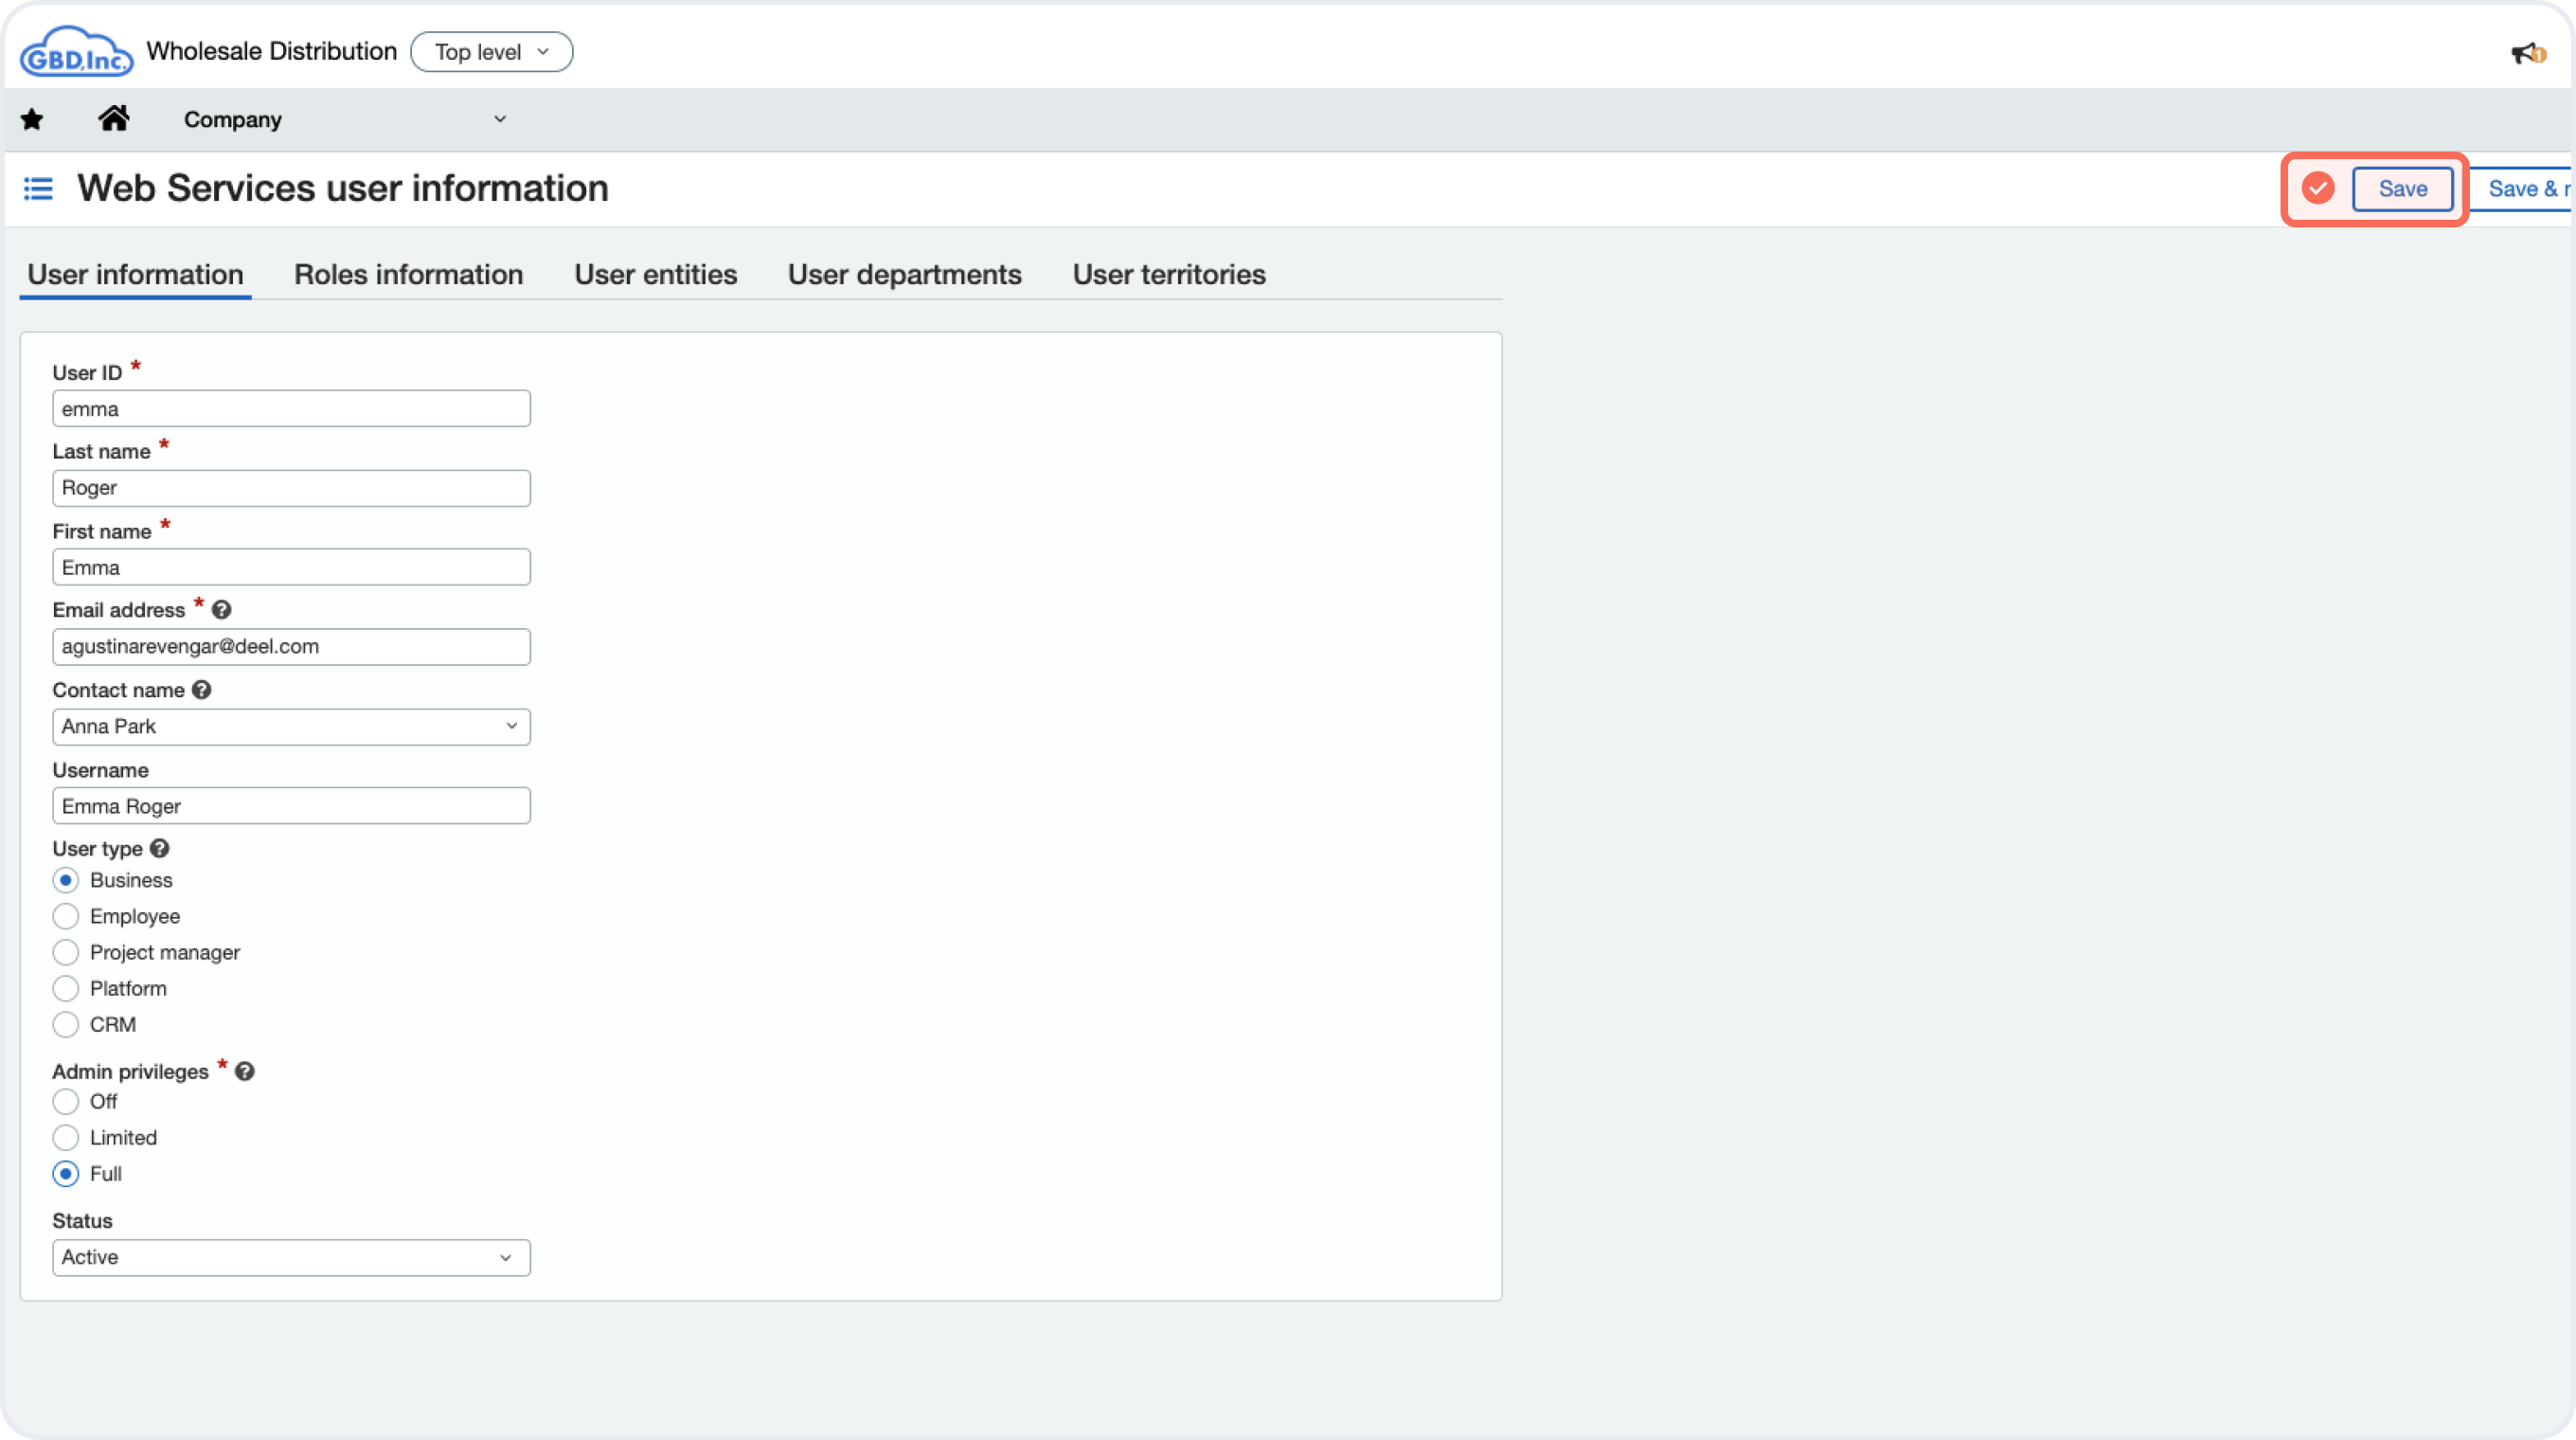
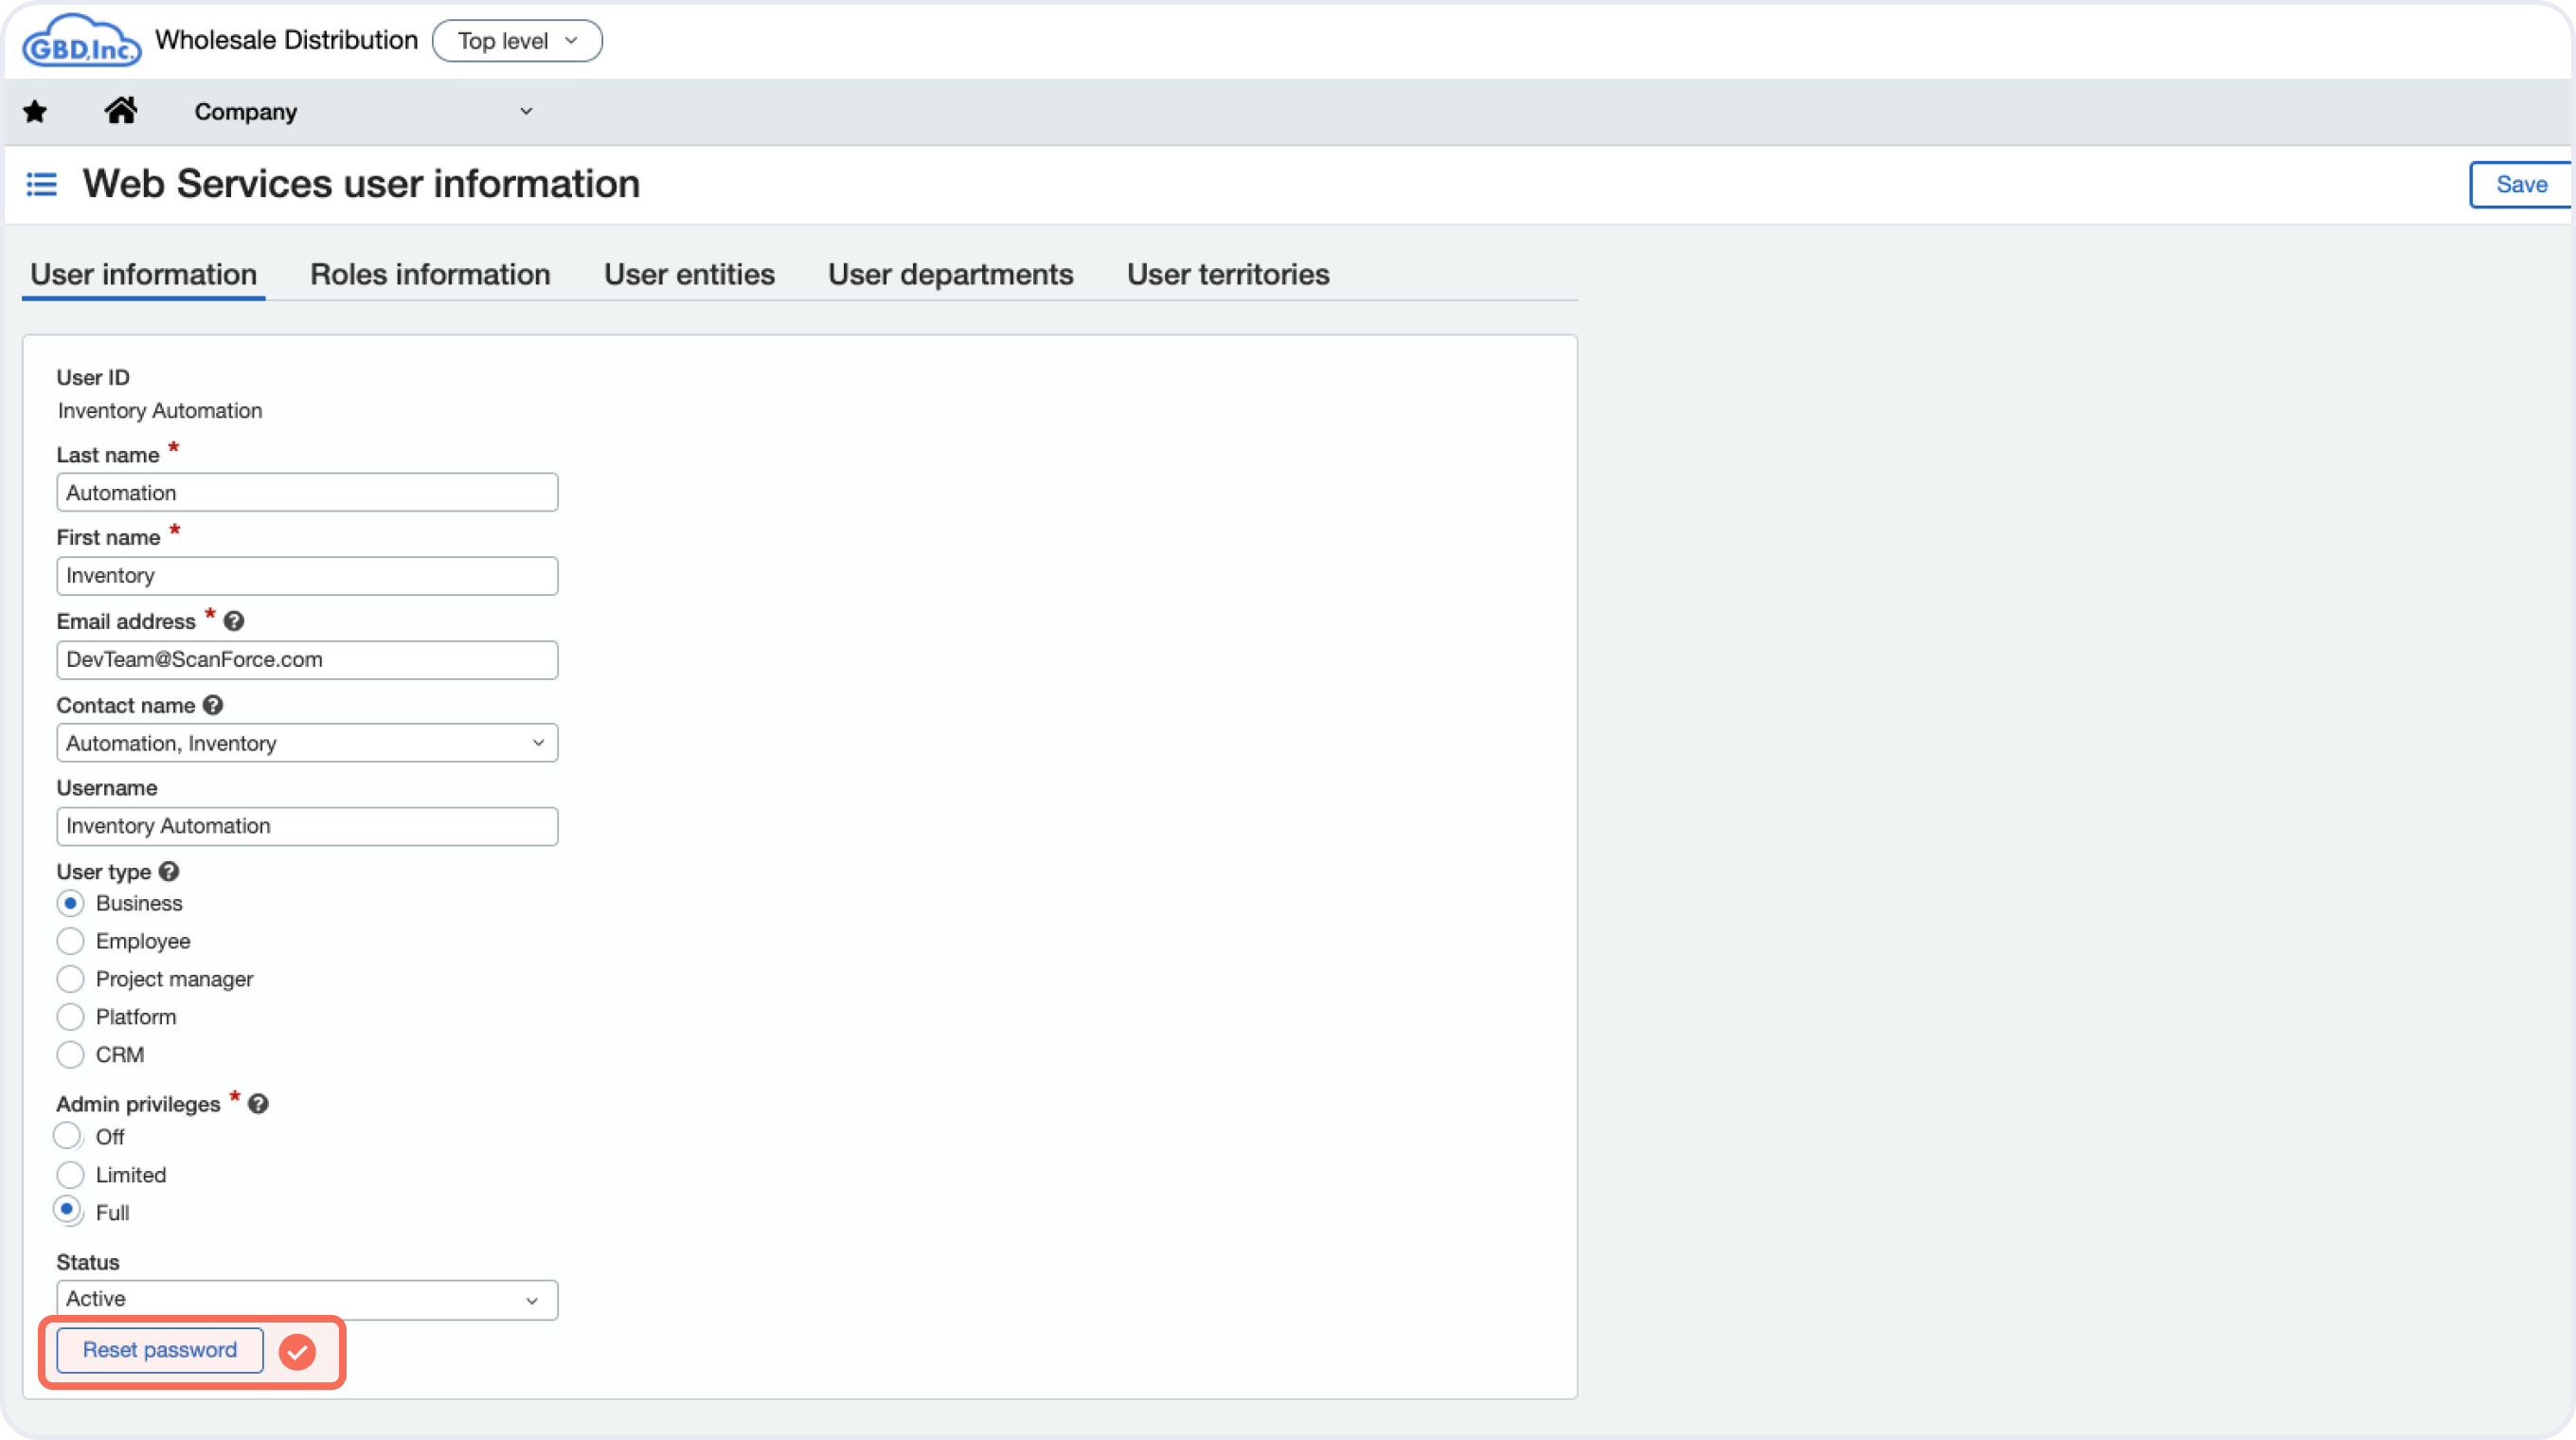
✅ Step 2 - Add a new Web Service User filling in all the information bellow.
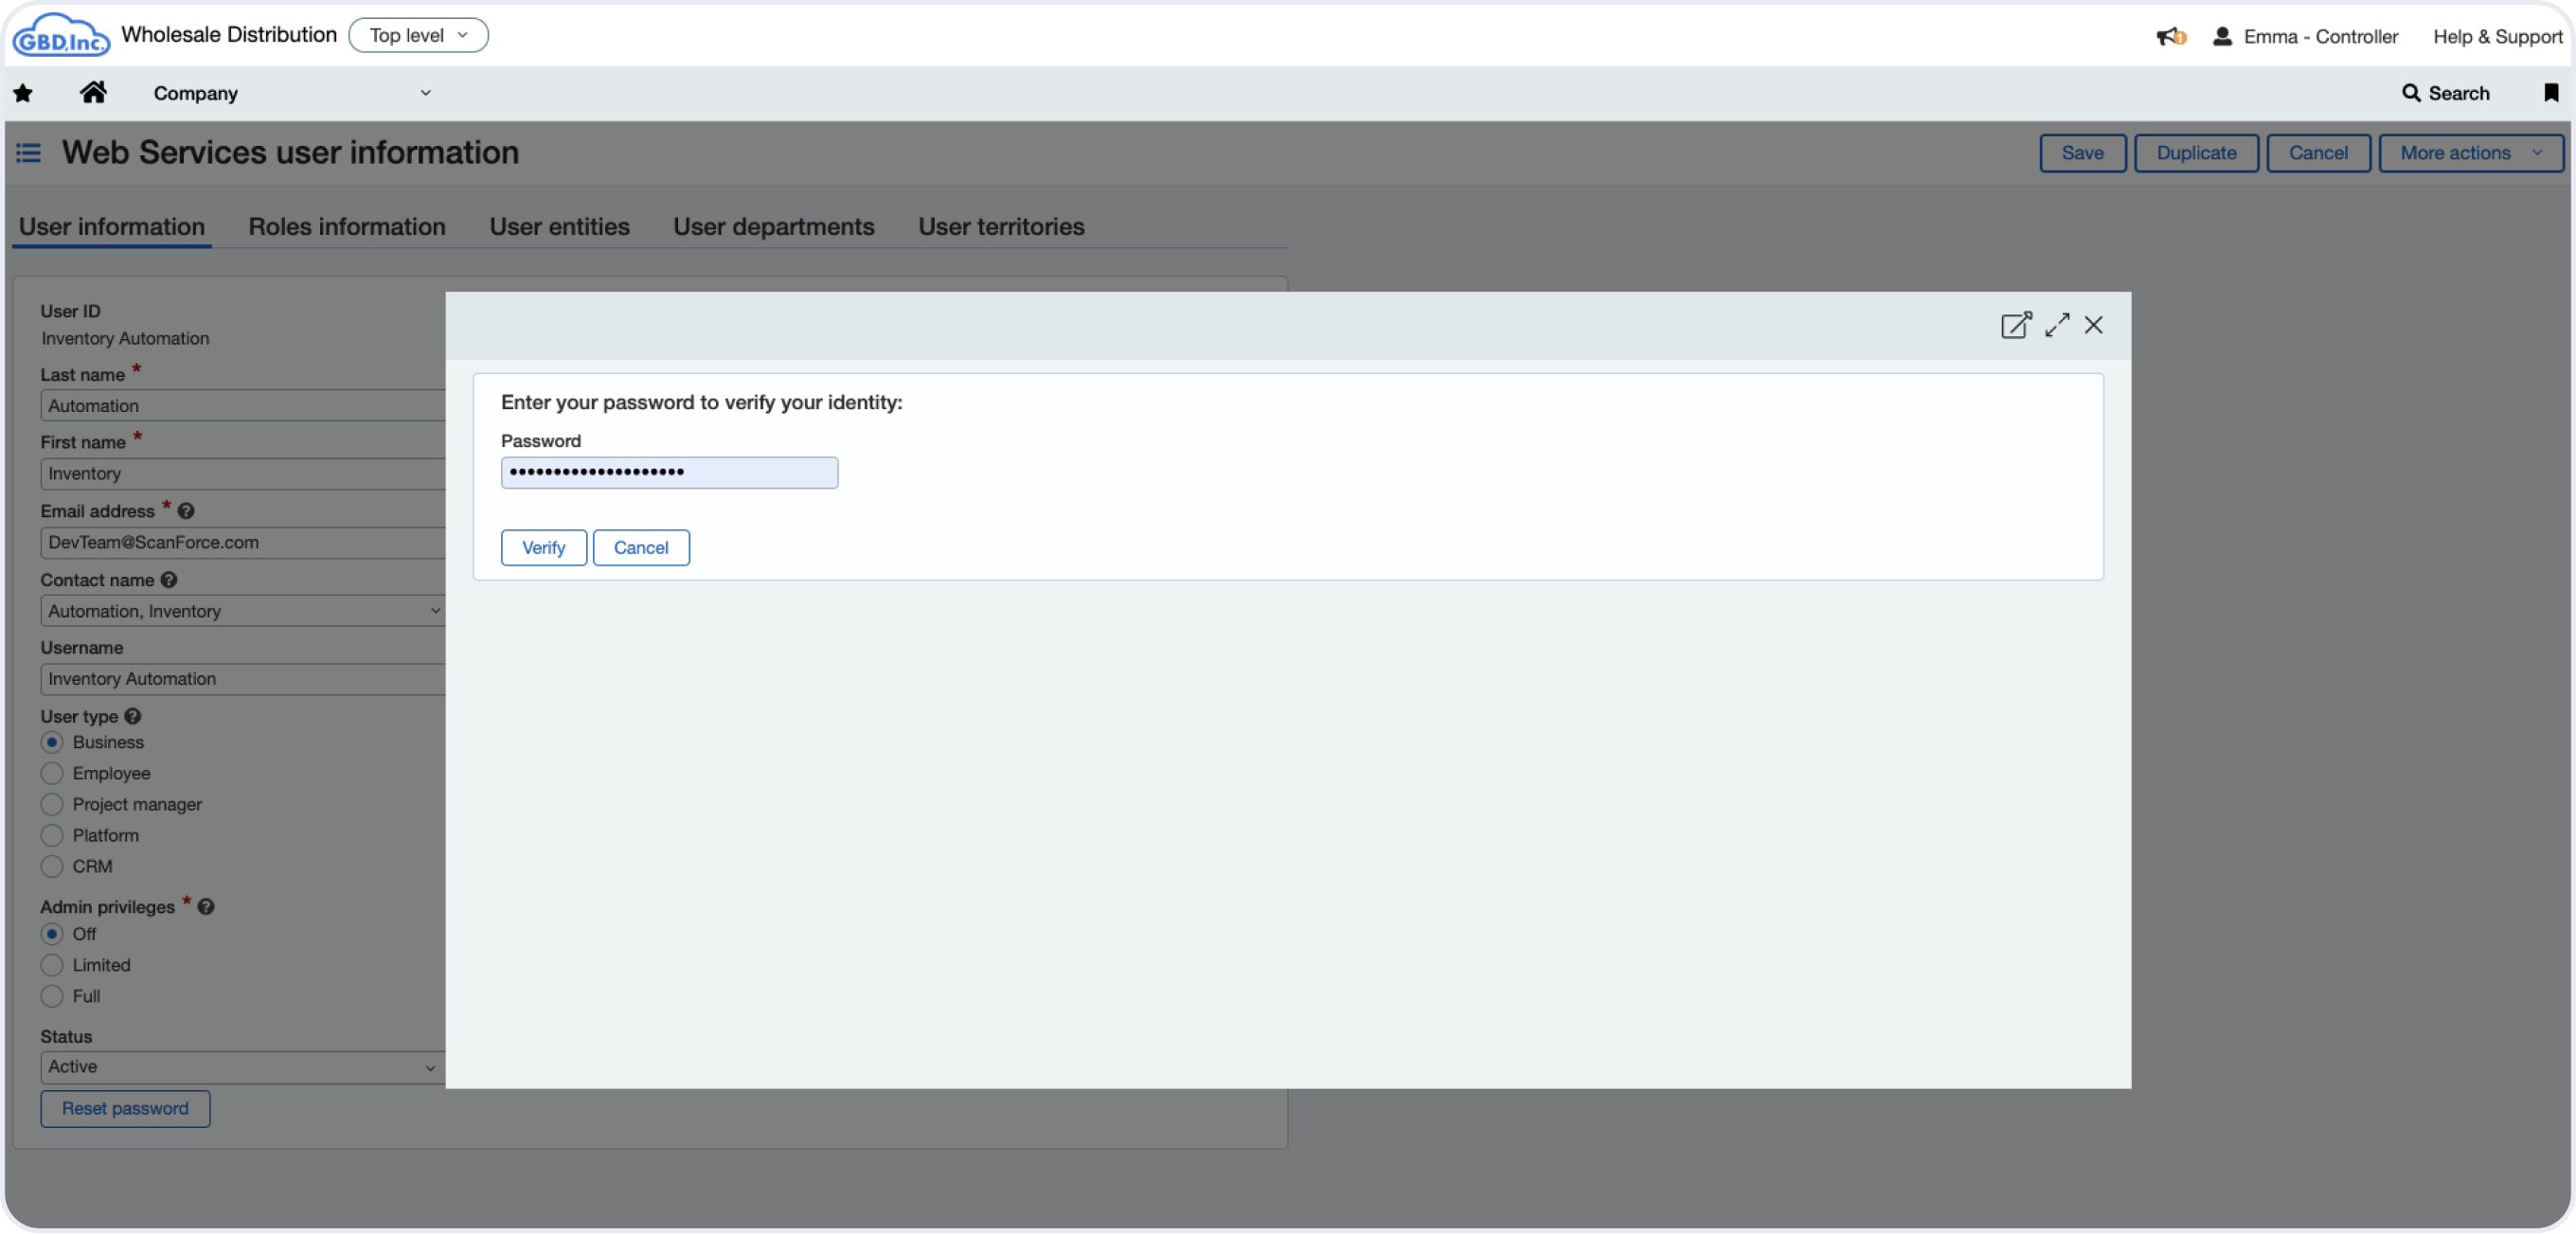
✅ Step 3 - Edit the Web Service user you just created and reset the password.
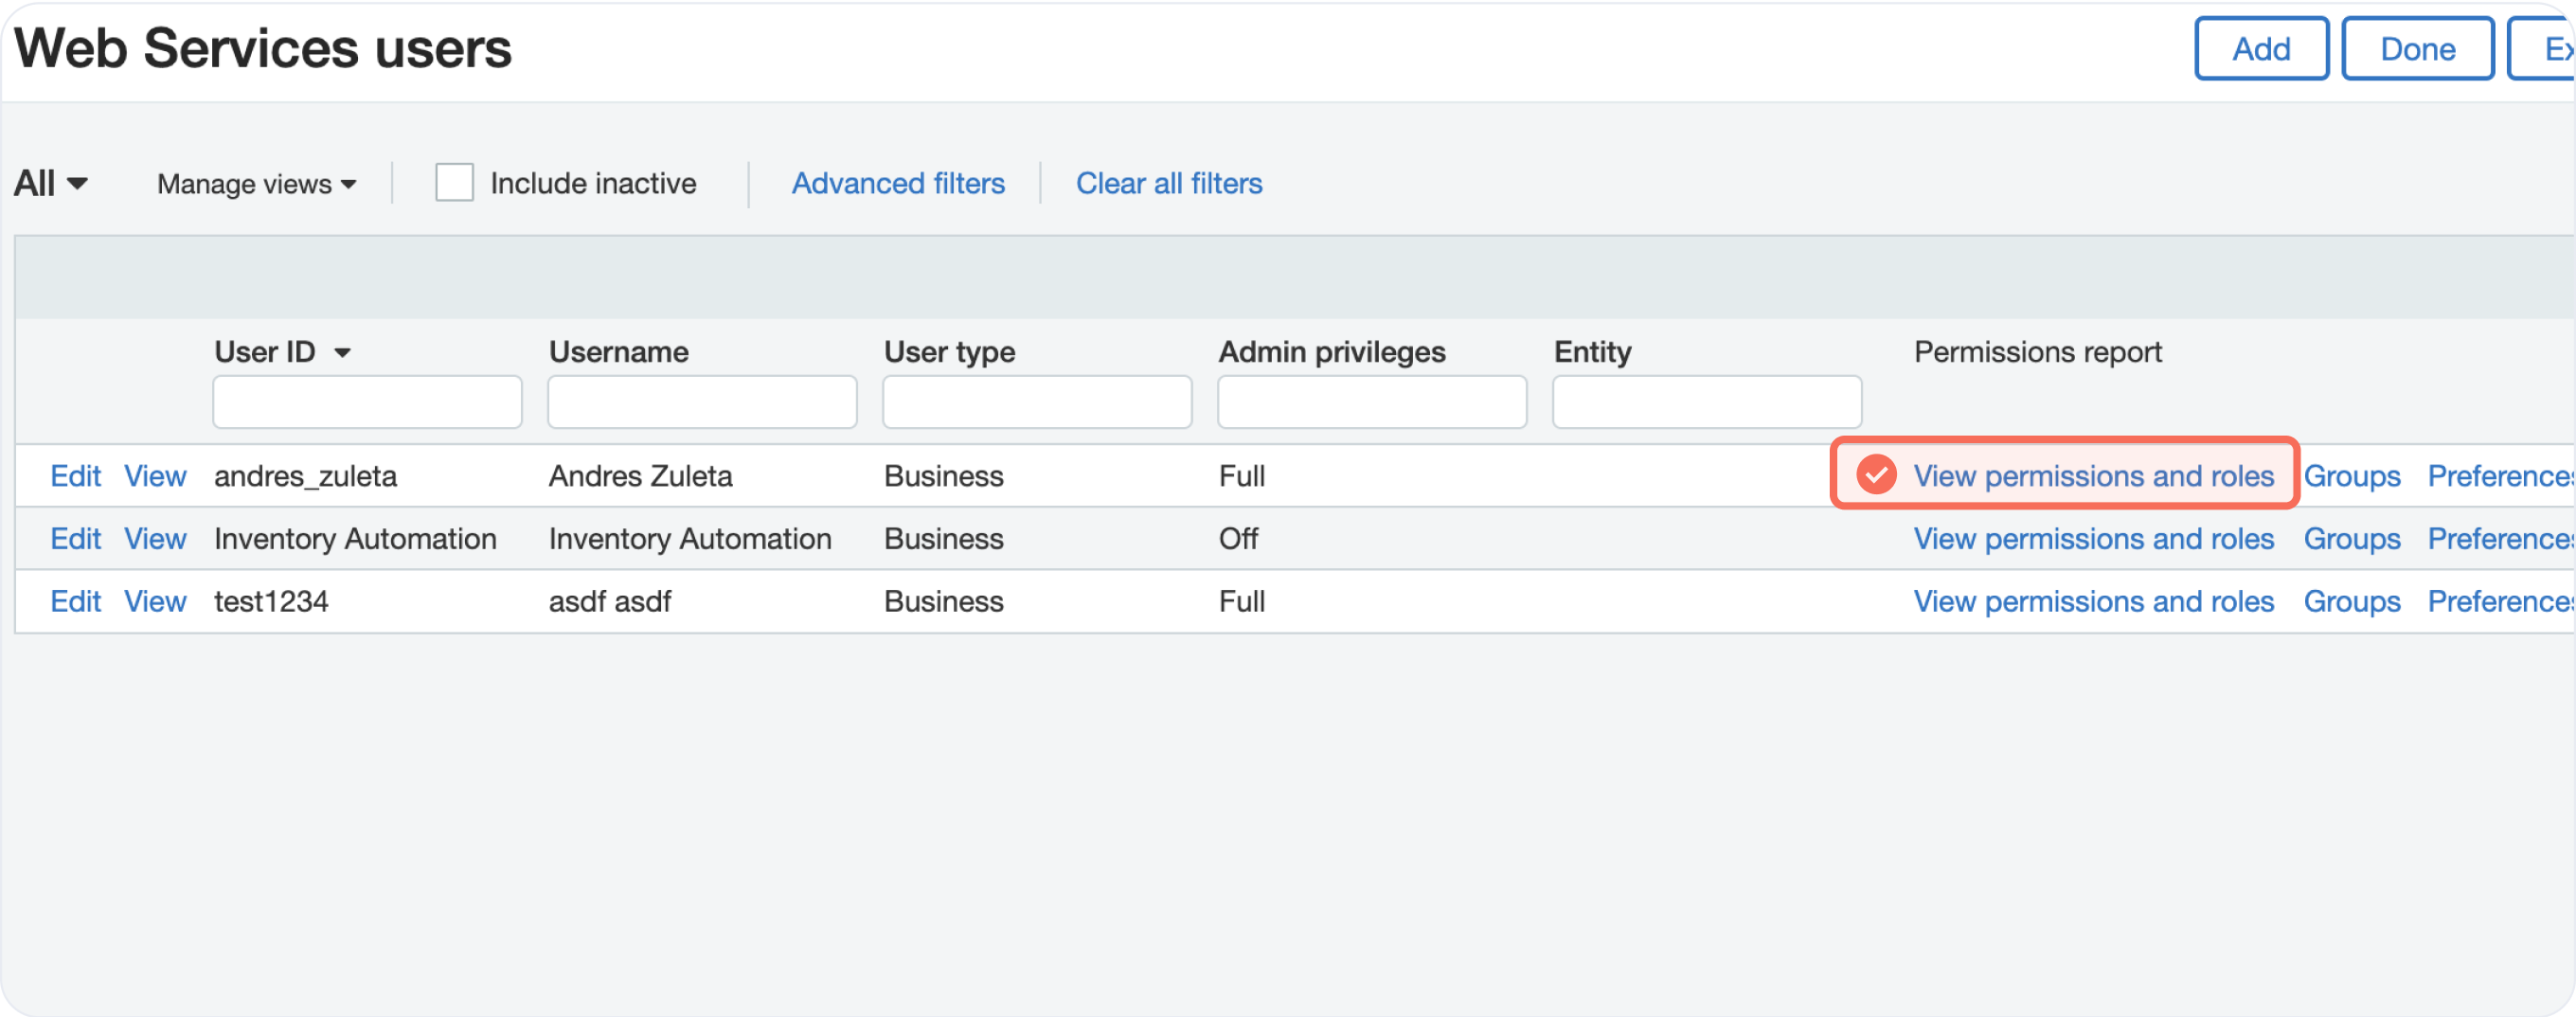
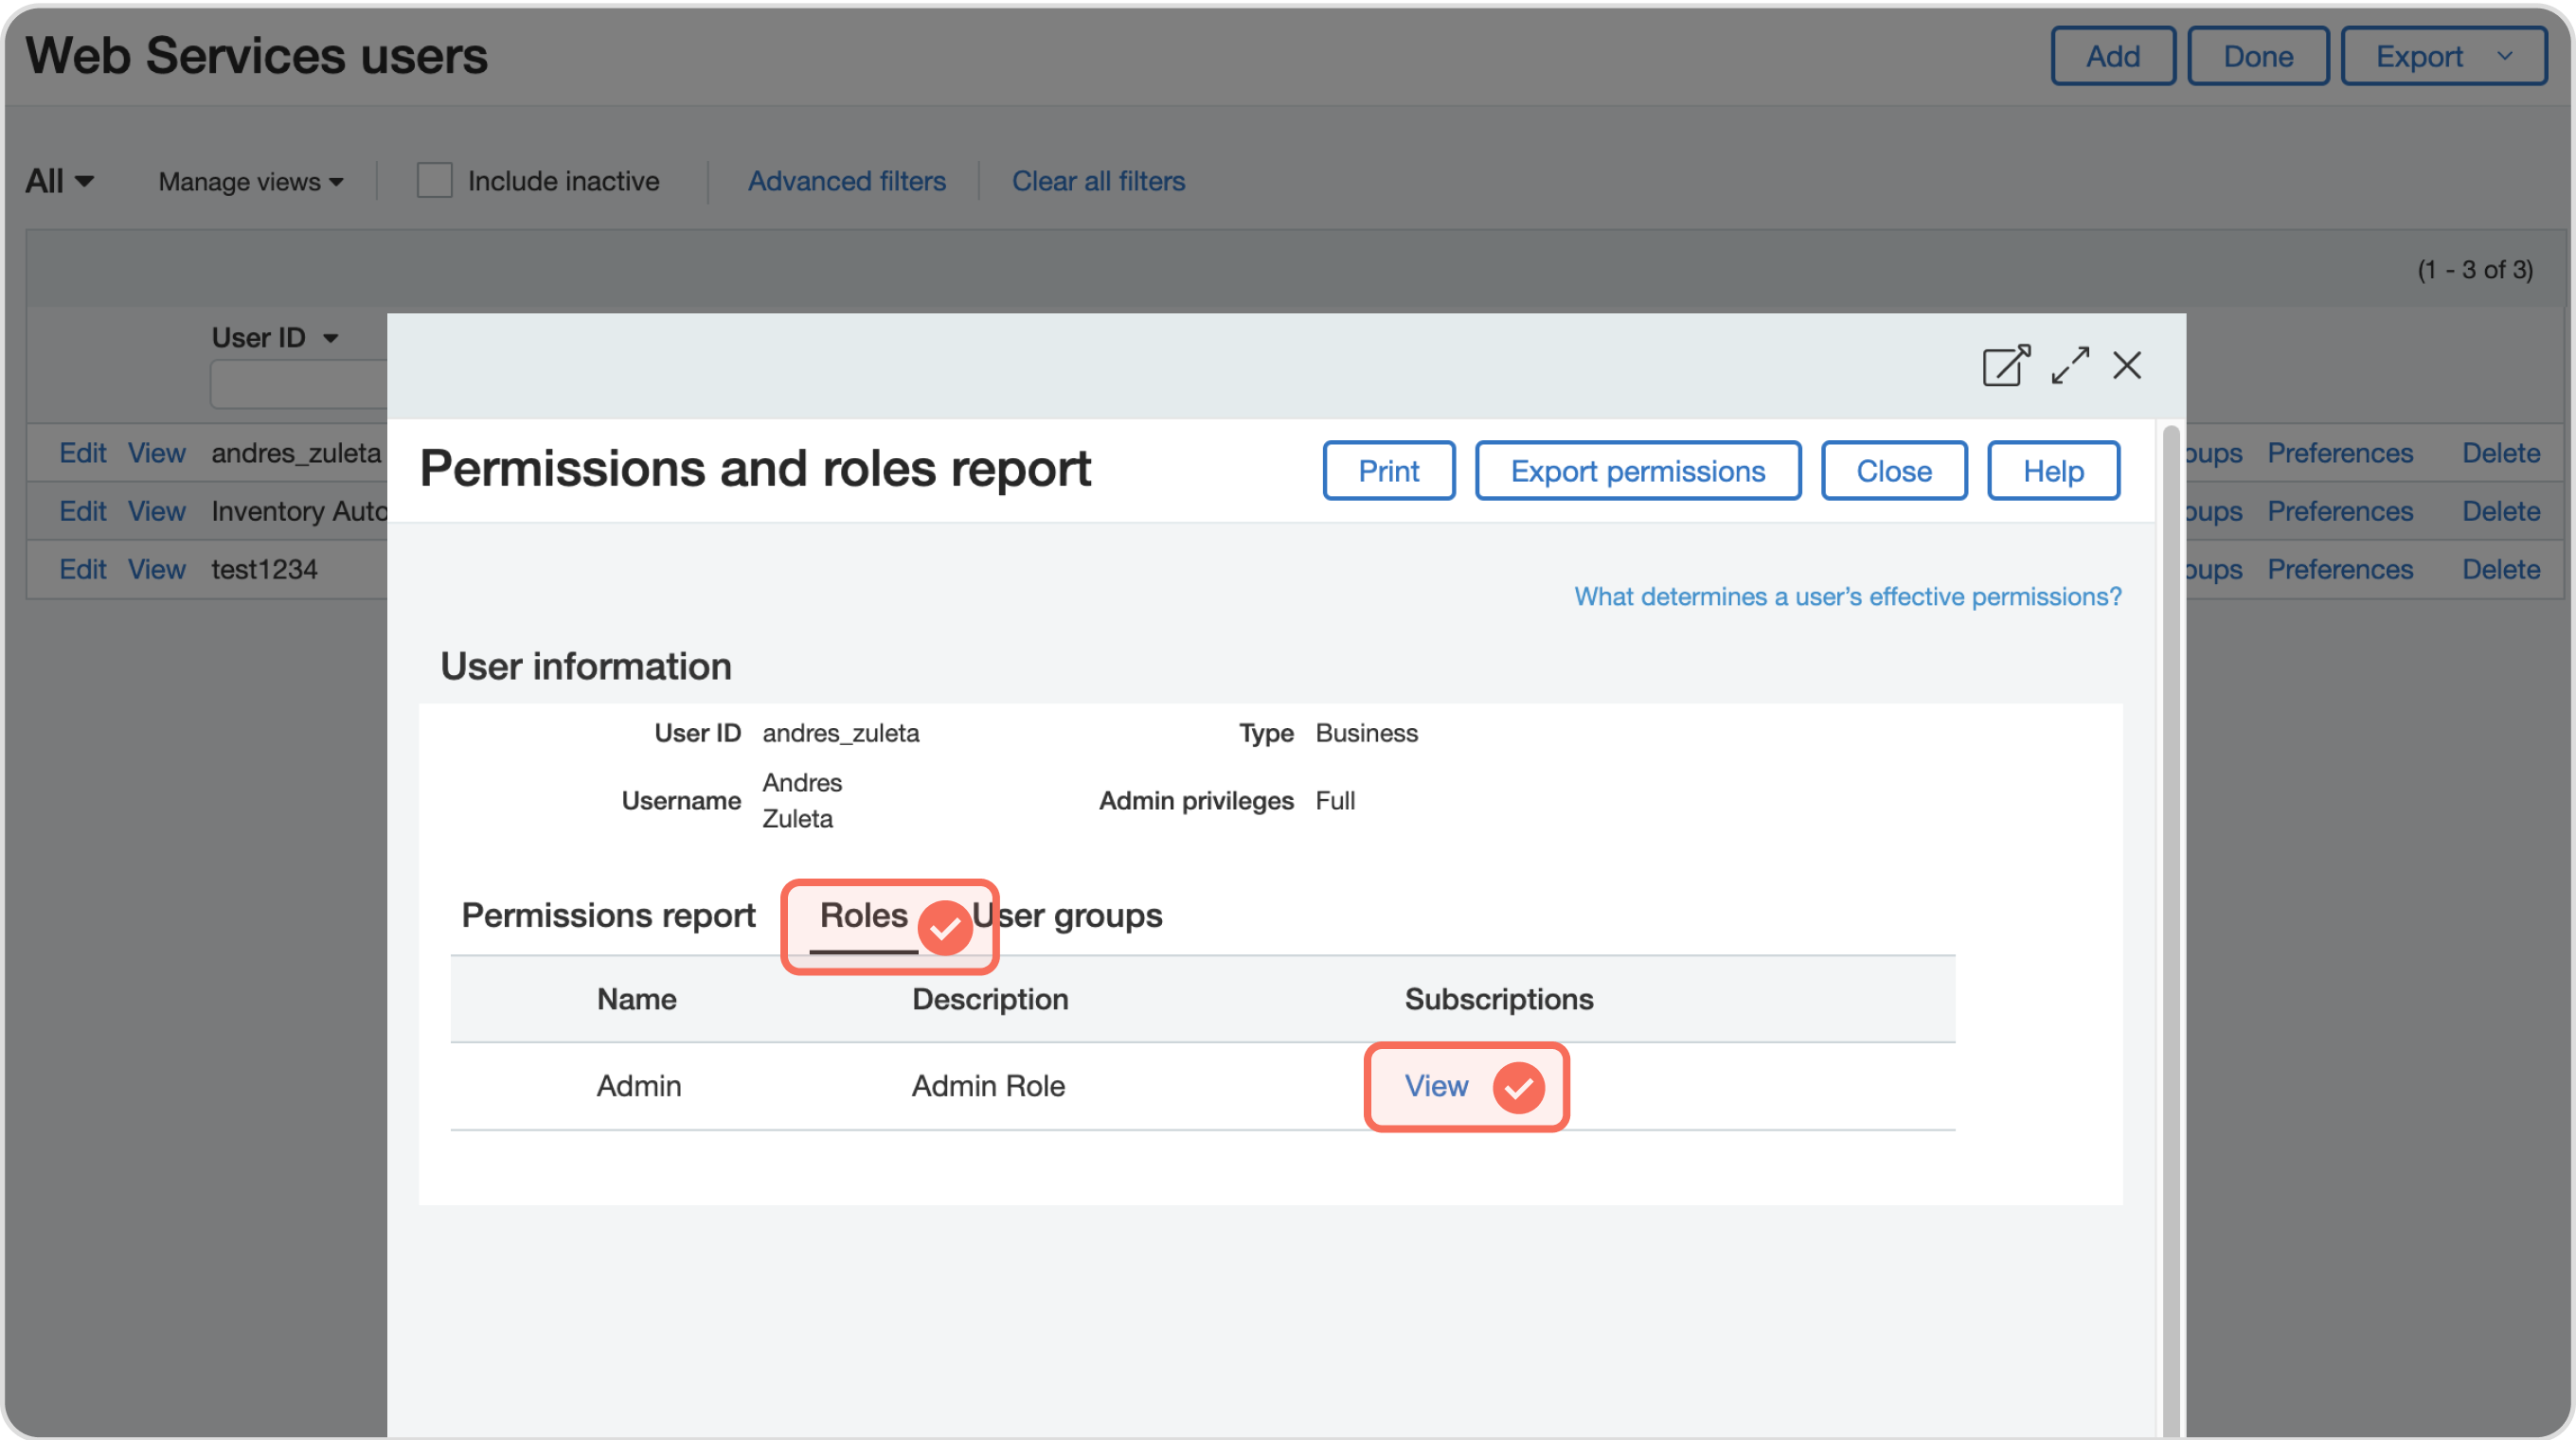
✅ Step 4 - The last step would be to assign a role and grant permissions to the Web Service User created. First, go to the Web Services User tab.
✅ Step 5 - In the “Roles” tab click on View on the Subscriptions column.
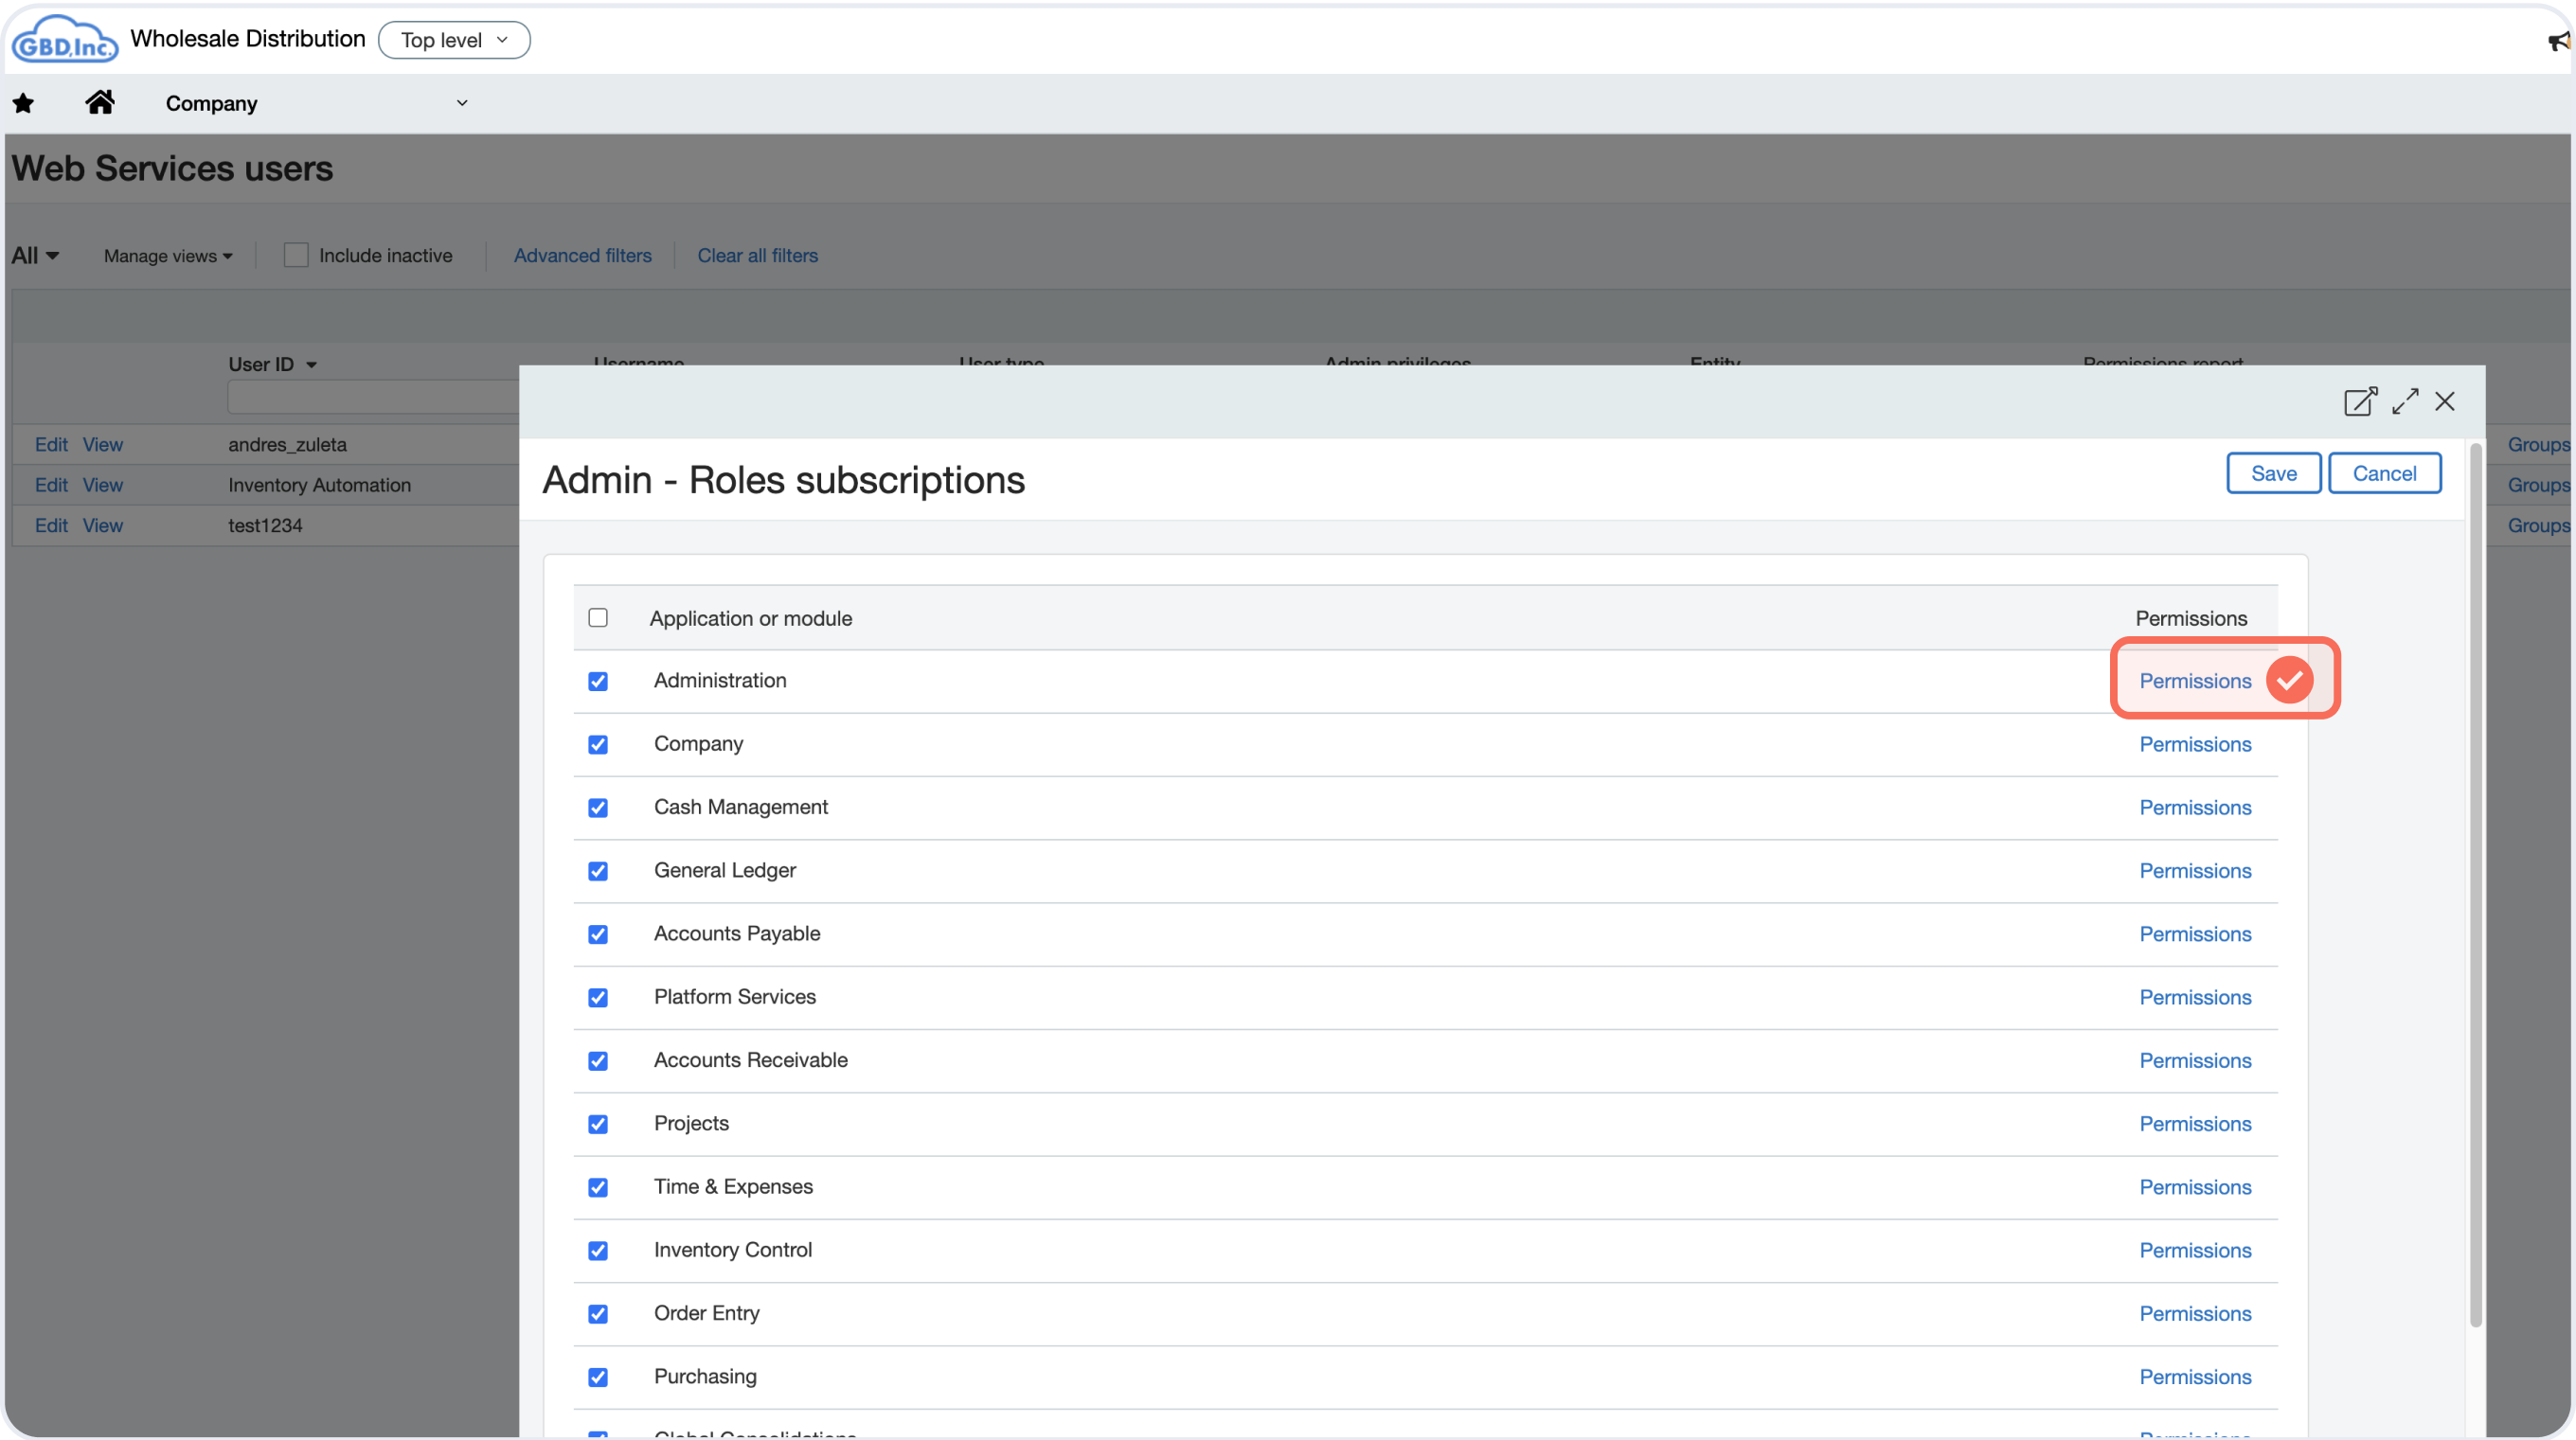
✅ Step 6 -To manage the permissions for each application click on Permissions.
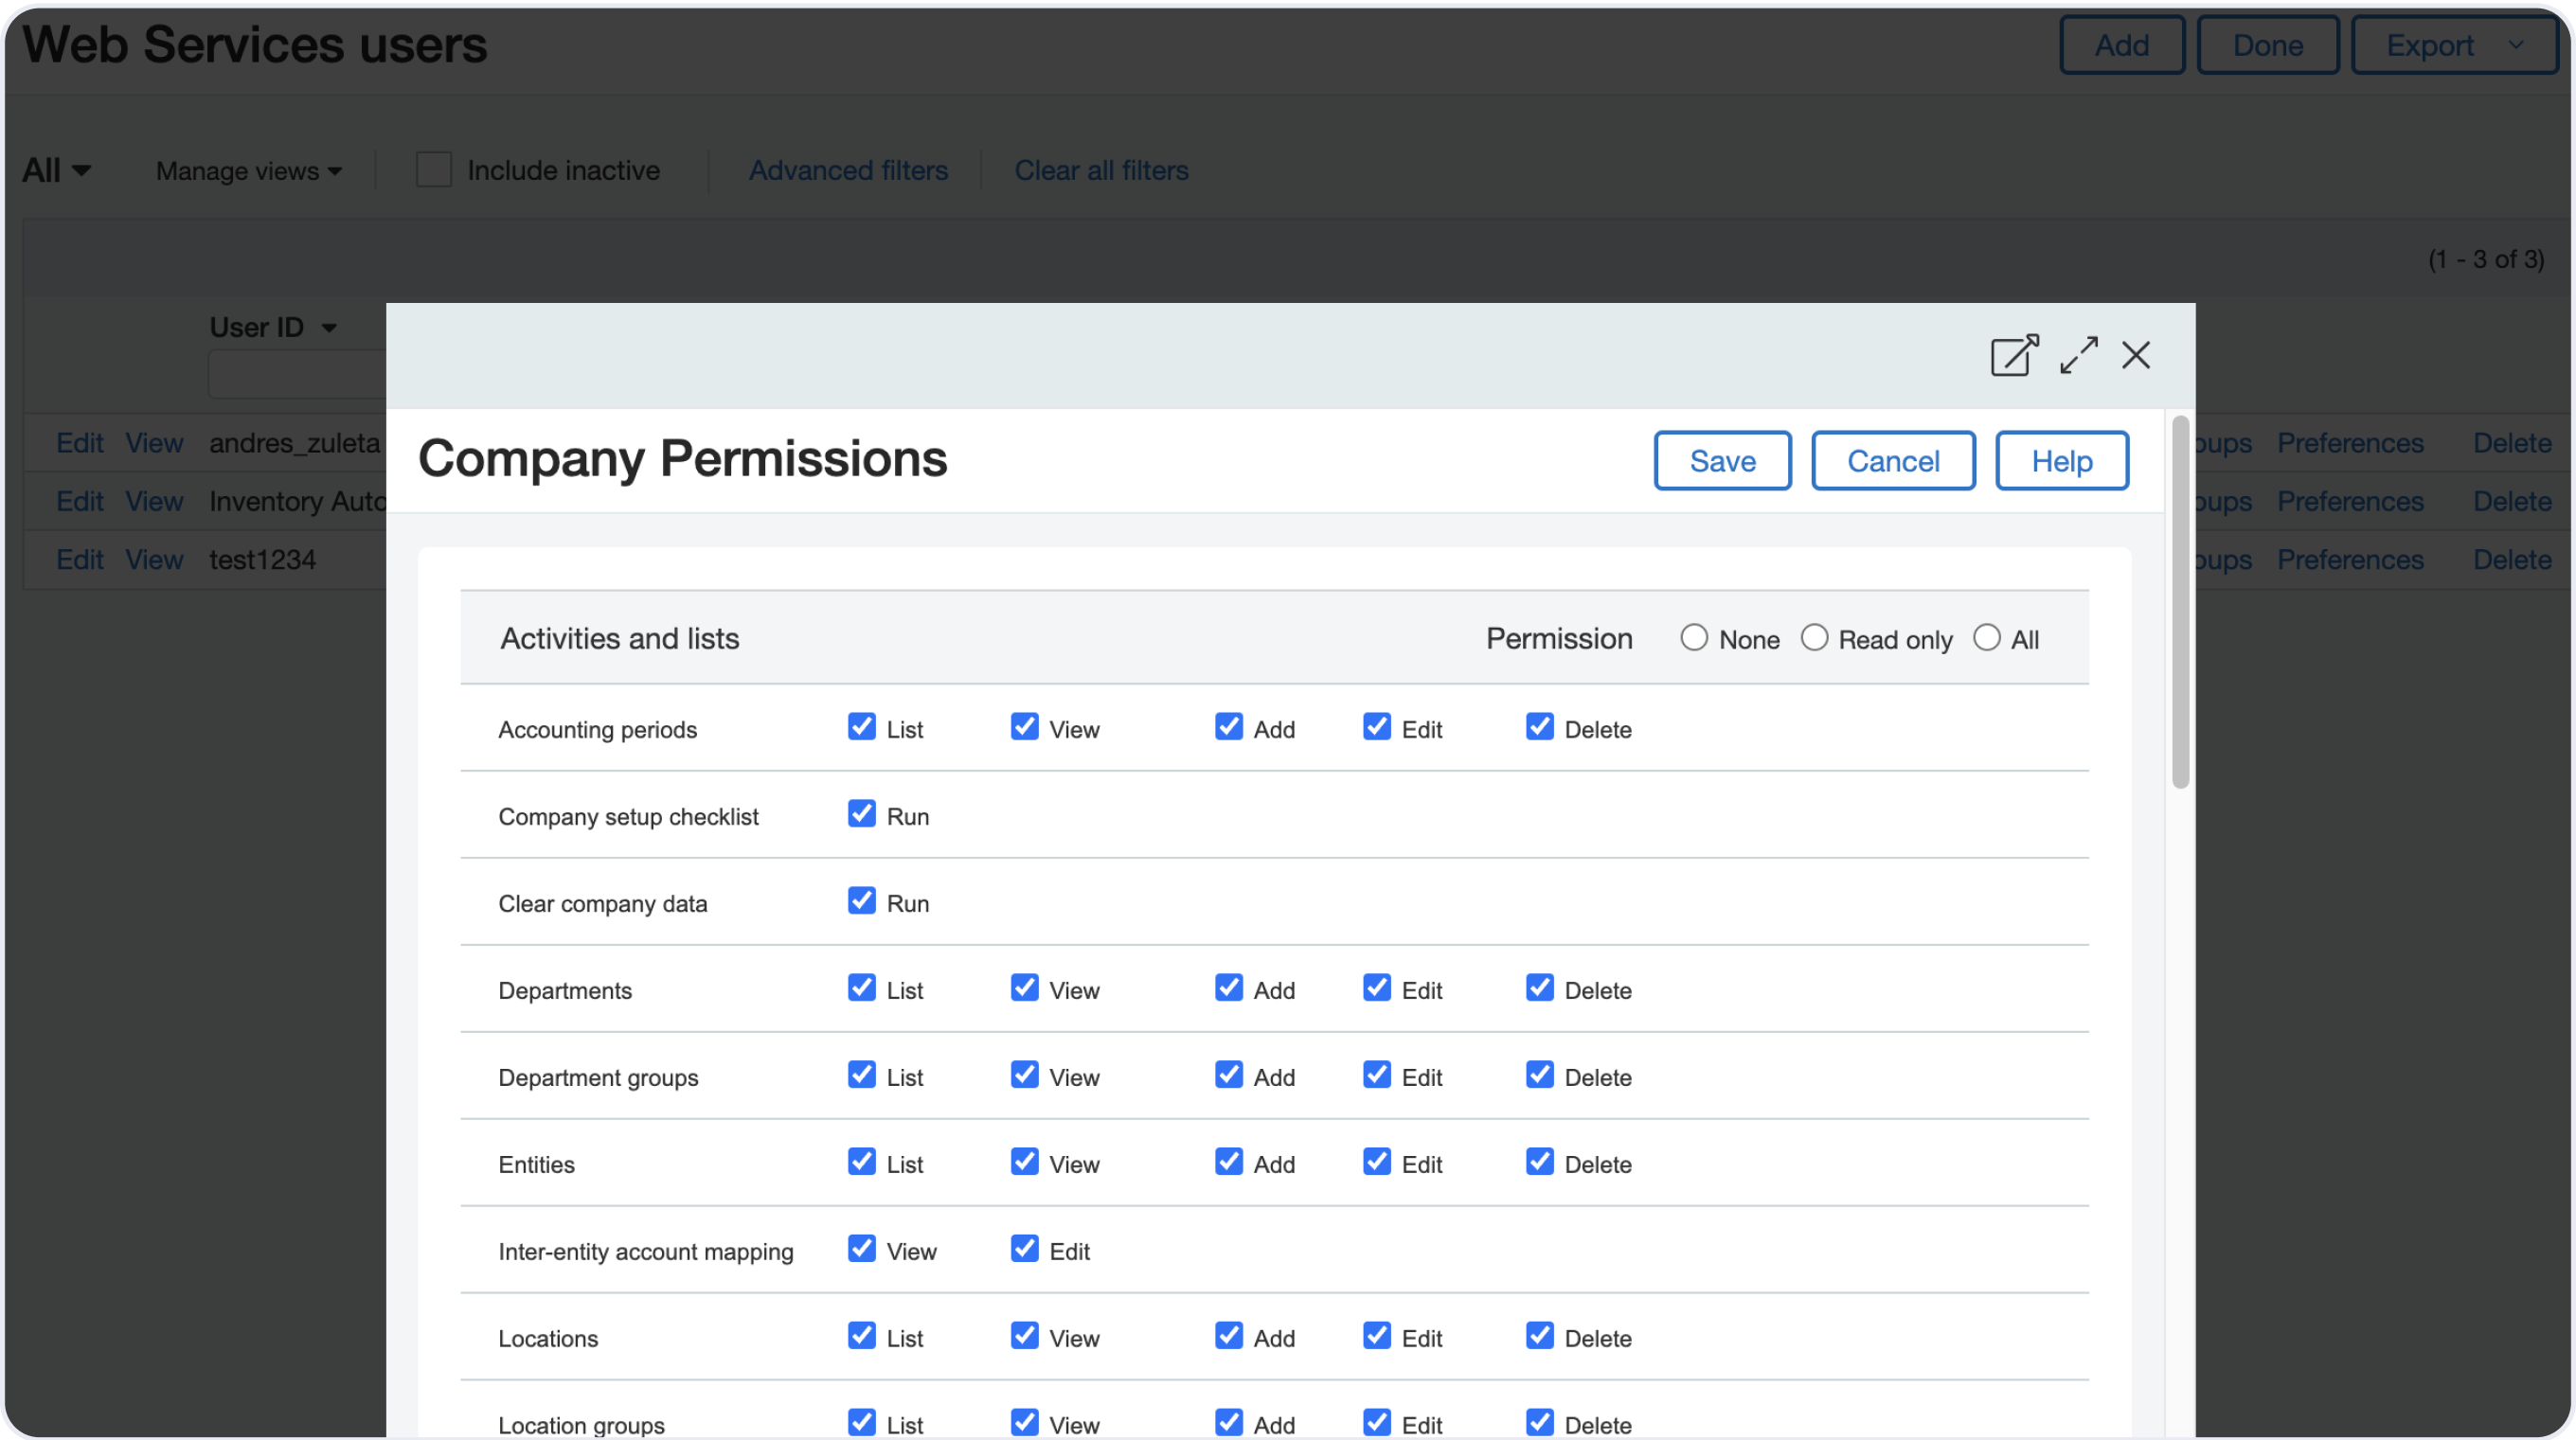
✅ Step 7 - Deel only requires you to have the following permissions enabled:
Company info: View
Departments: List, View
Entities: list, View
Attachment folders: List, View, Add, Edit
Attachments: List, View, Add, Edit, Delete
Vendors: List, View, Add, Edit, Delete
Bills: List, View, Add, Edit, Delete
You can enable them by checking the boxes for each category as listed above. See example bellow.
![]()
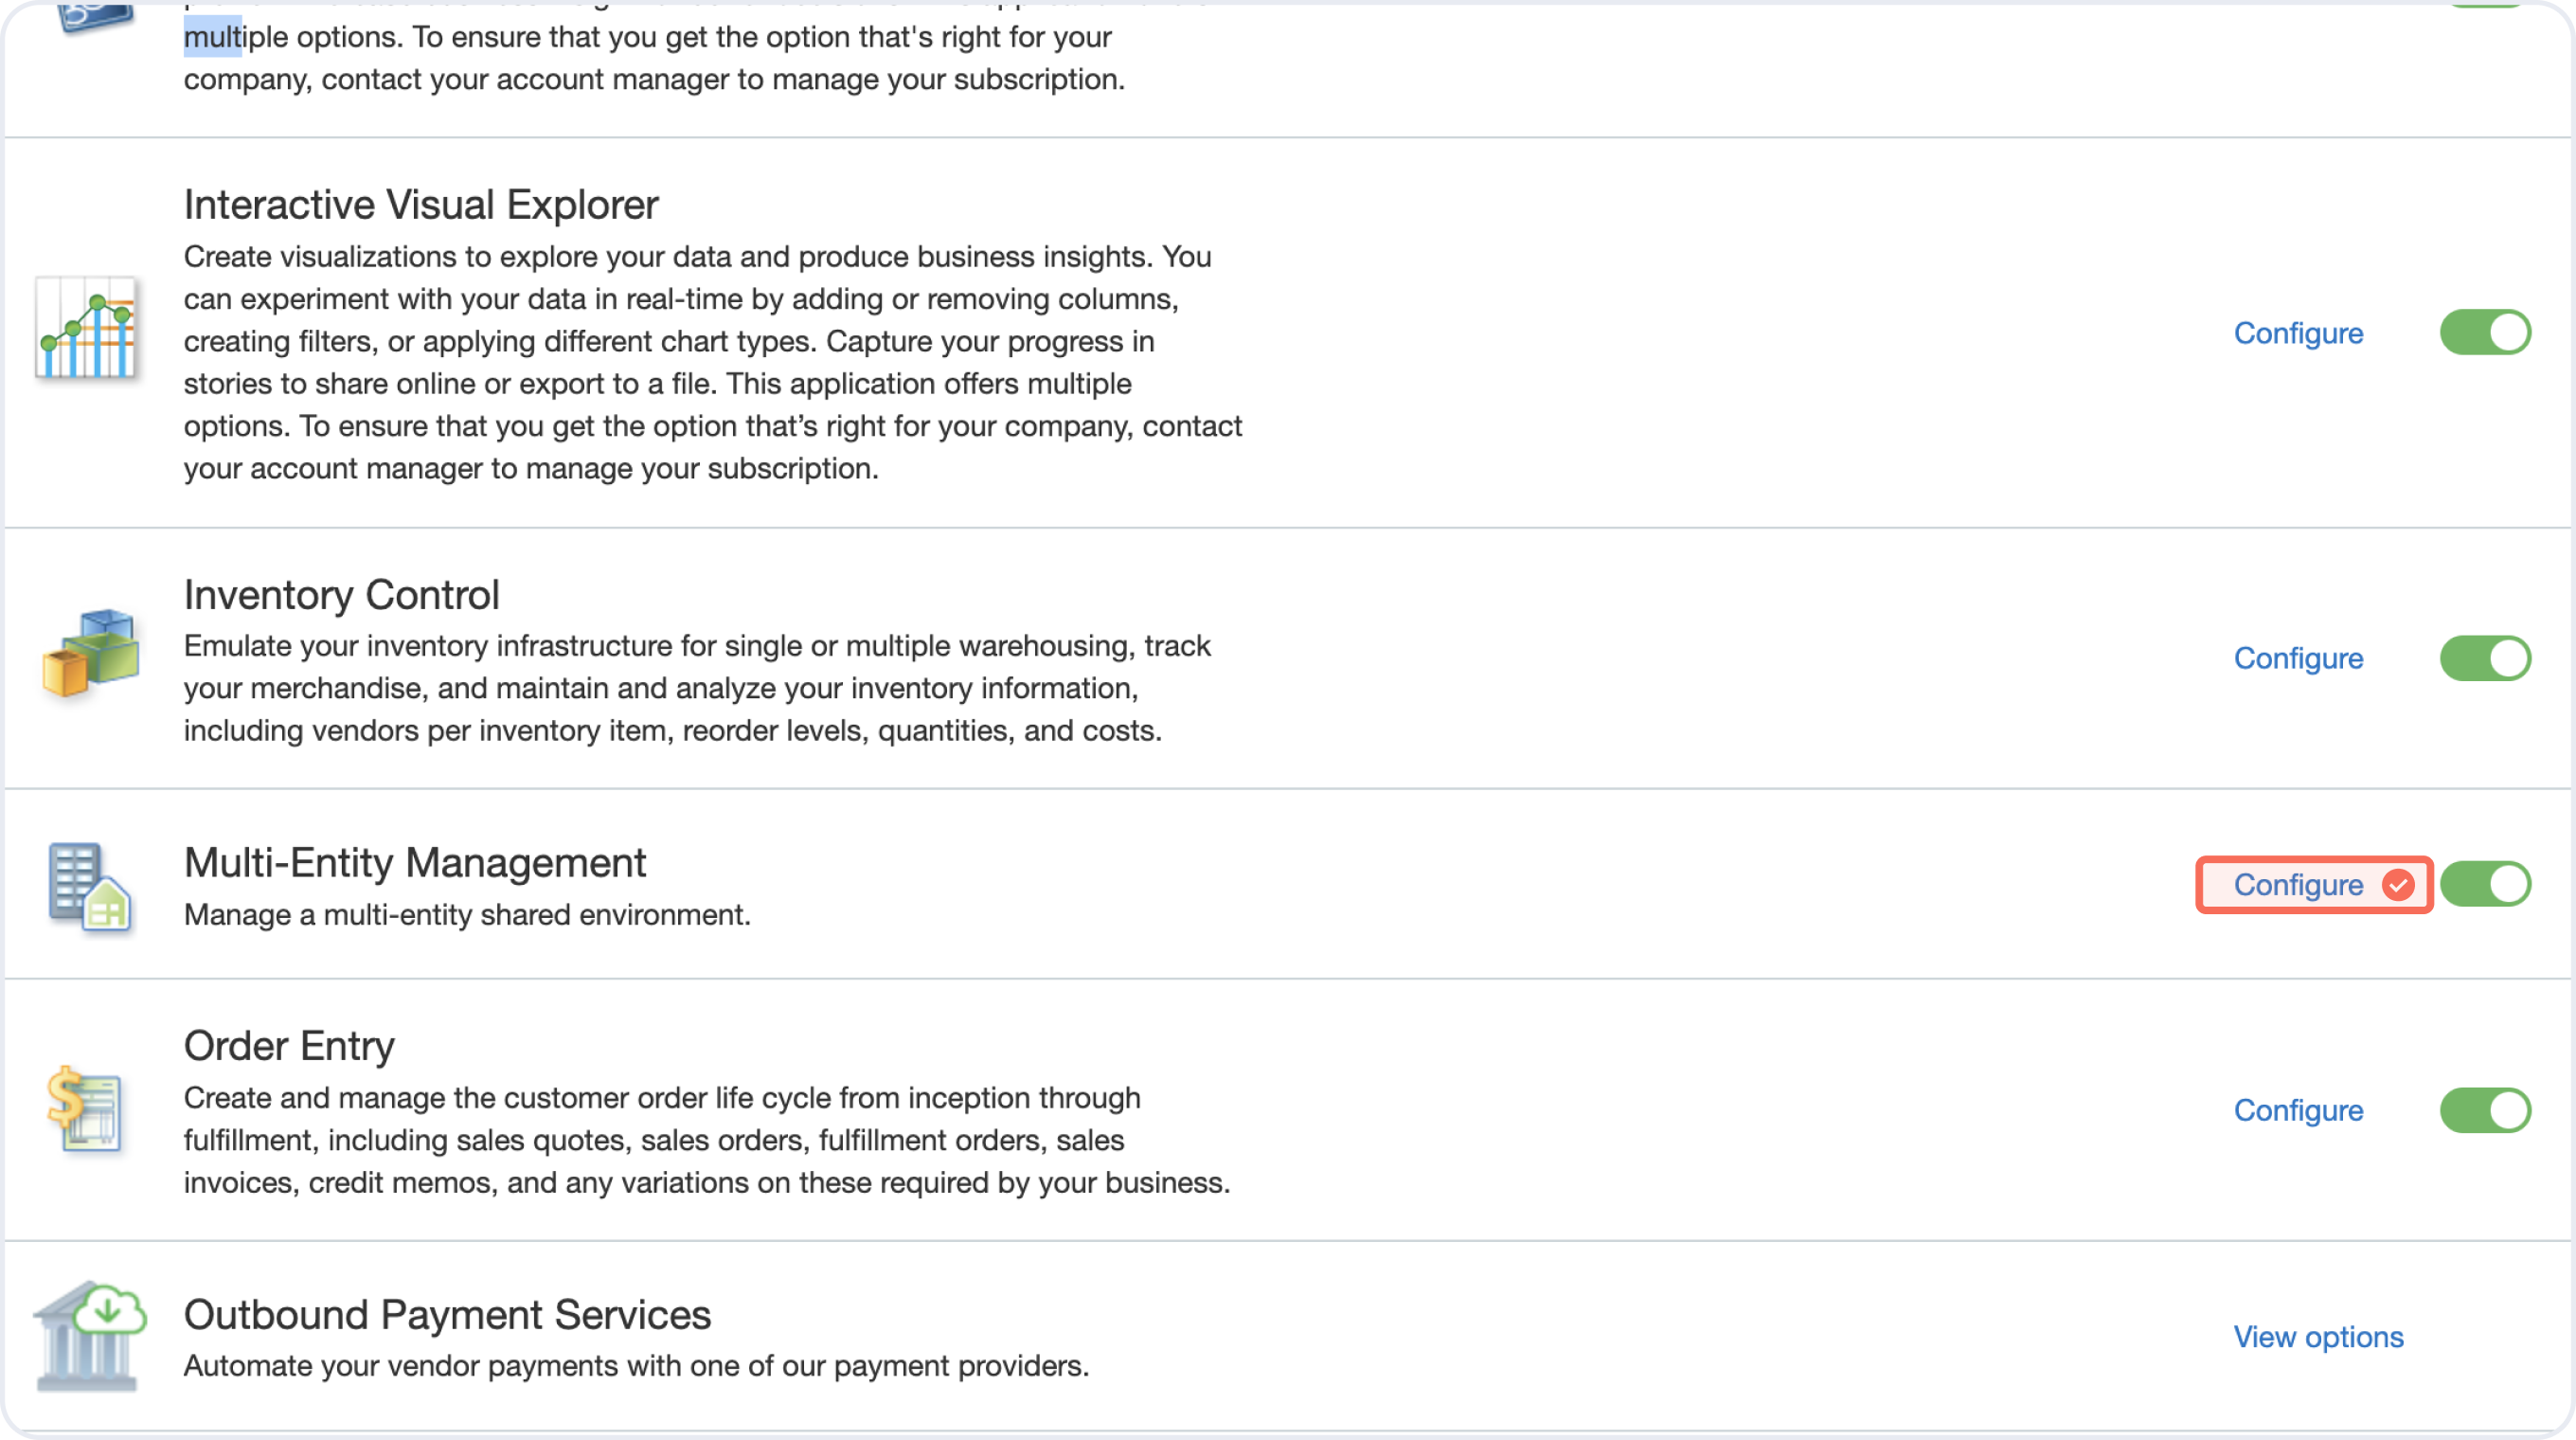
Multi-currency (optional)
If you have more than one currency on Deel, you must enable the multi-currency option.
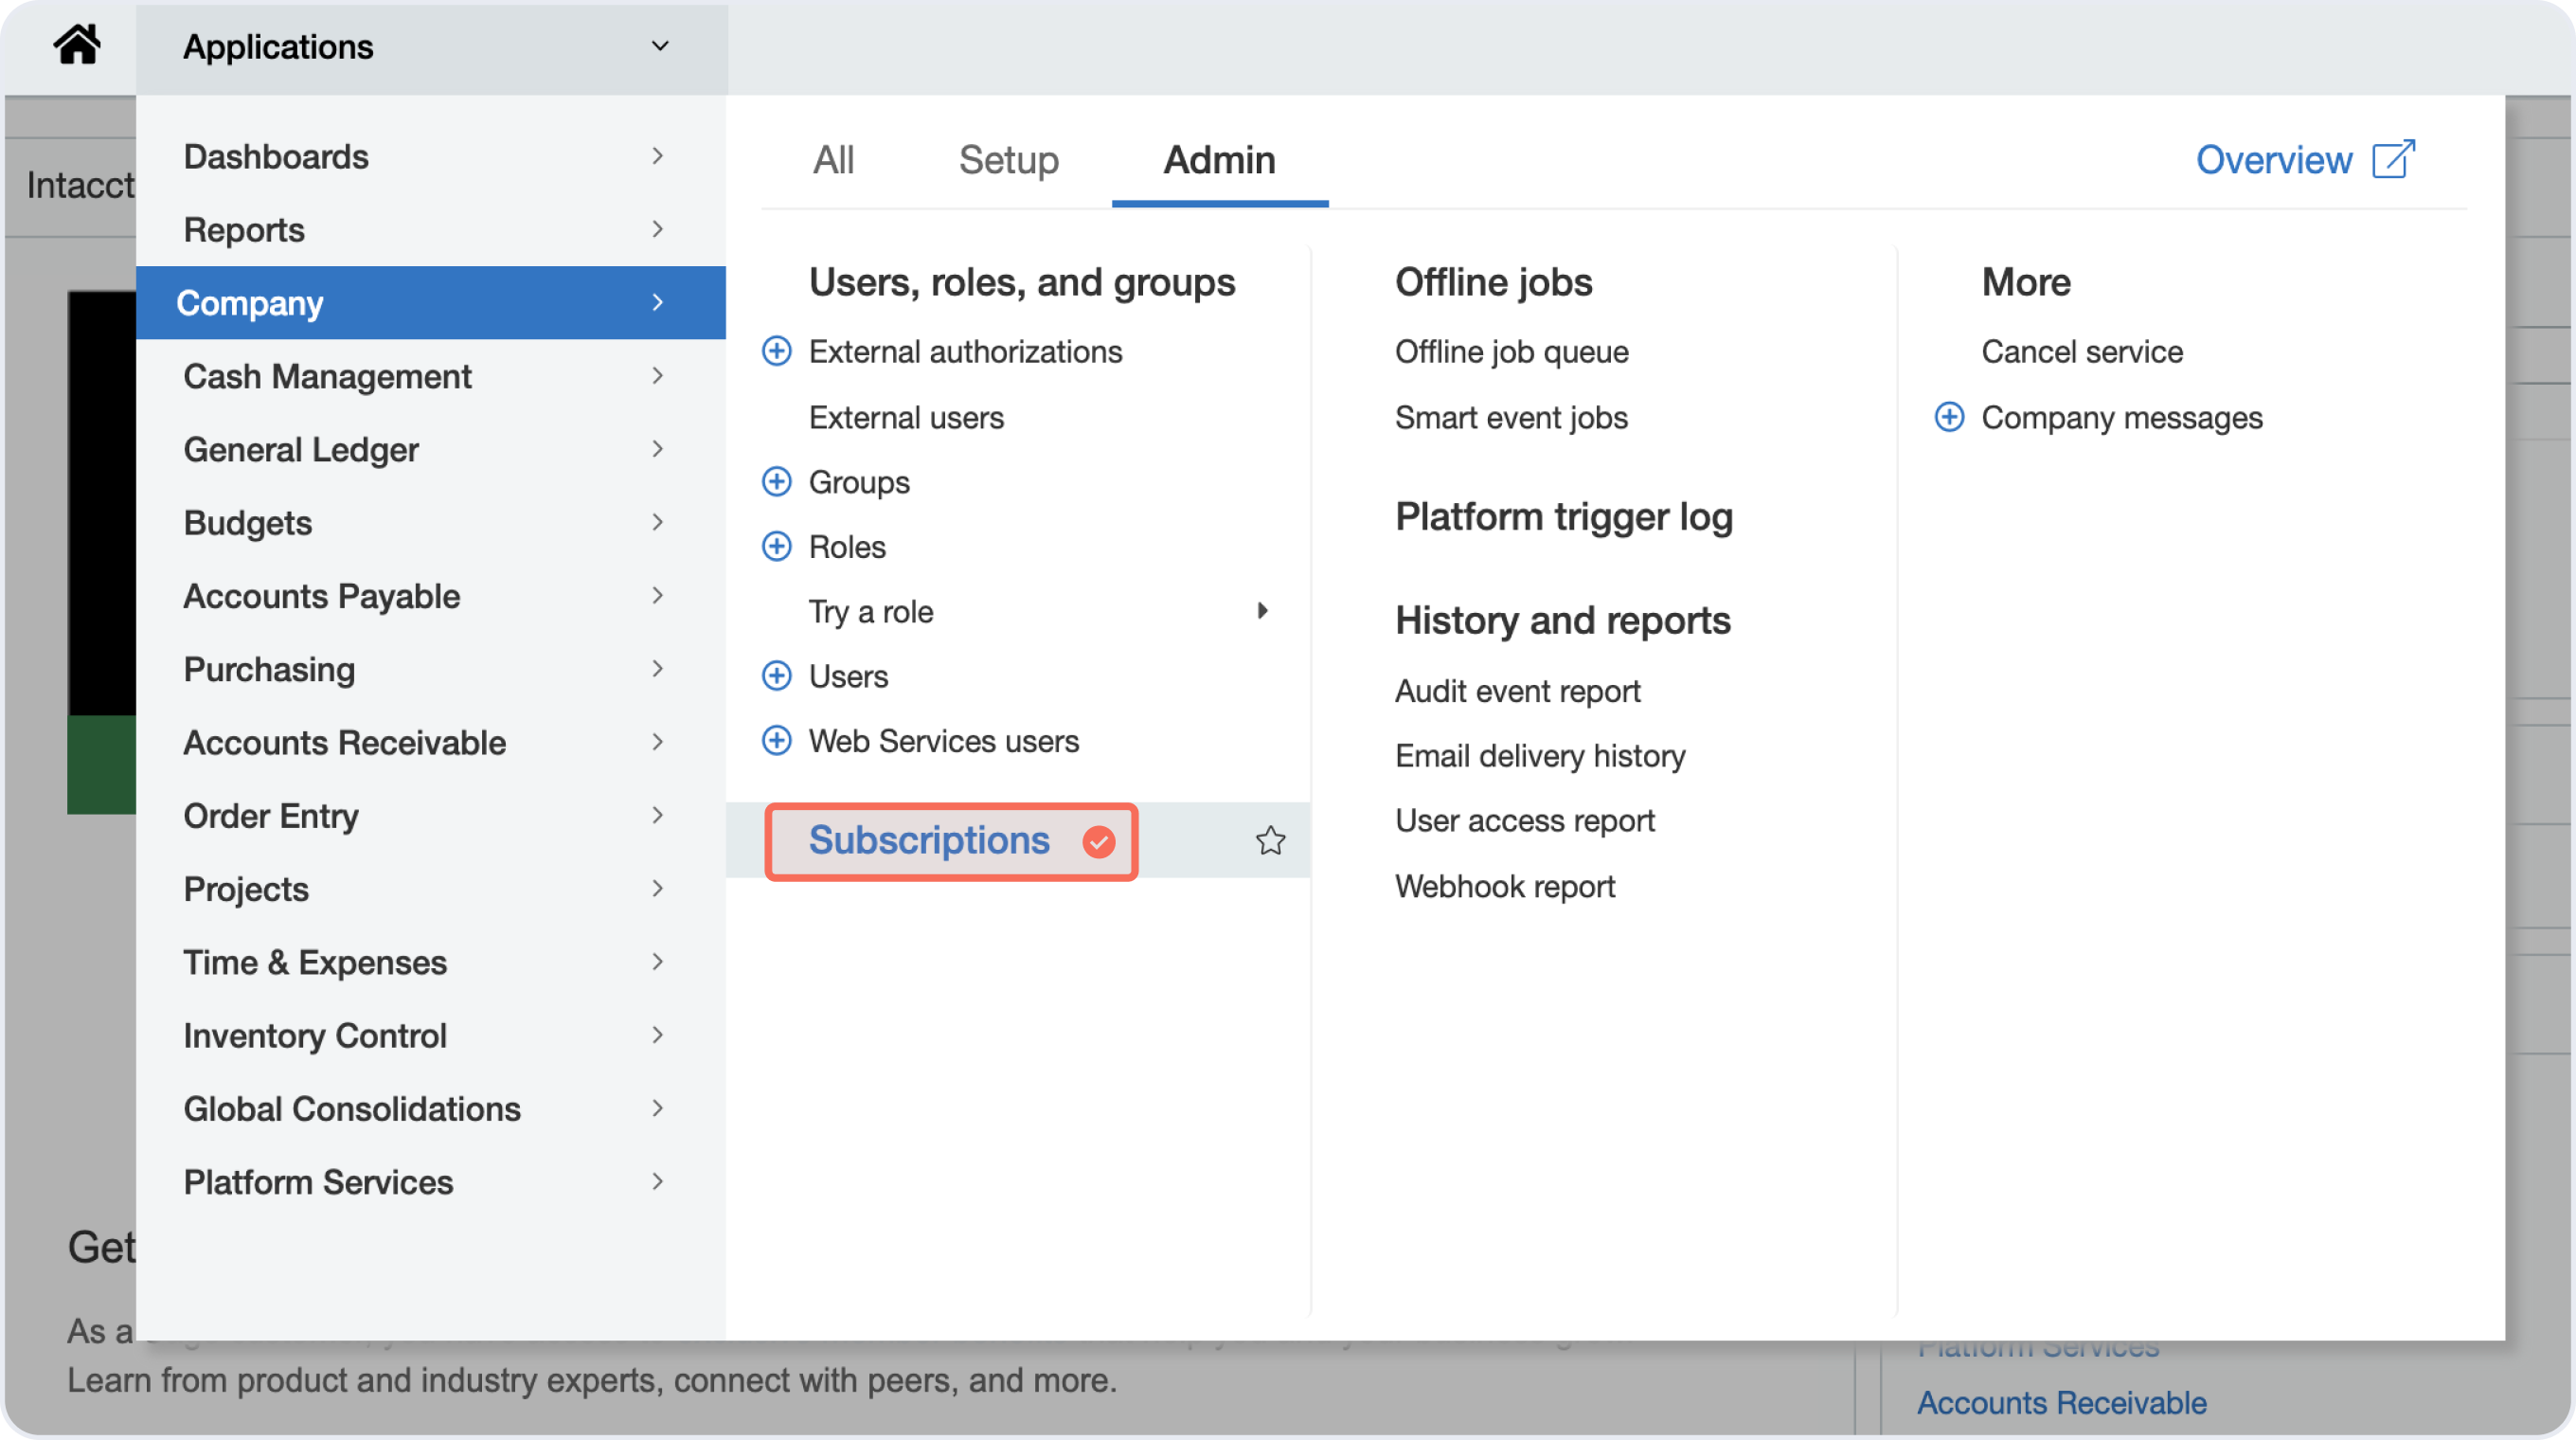
✅ Step 1 - Navigate to: Company > Admin > Subscriptions
✅ Step 2 - Go to Multi-Entity Management and click on Configure
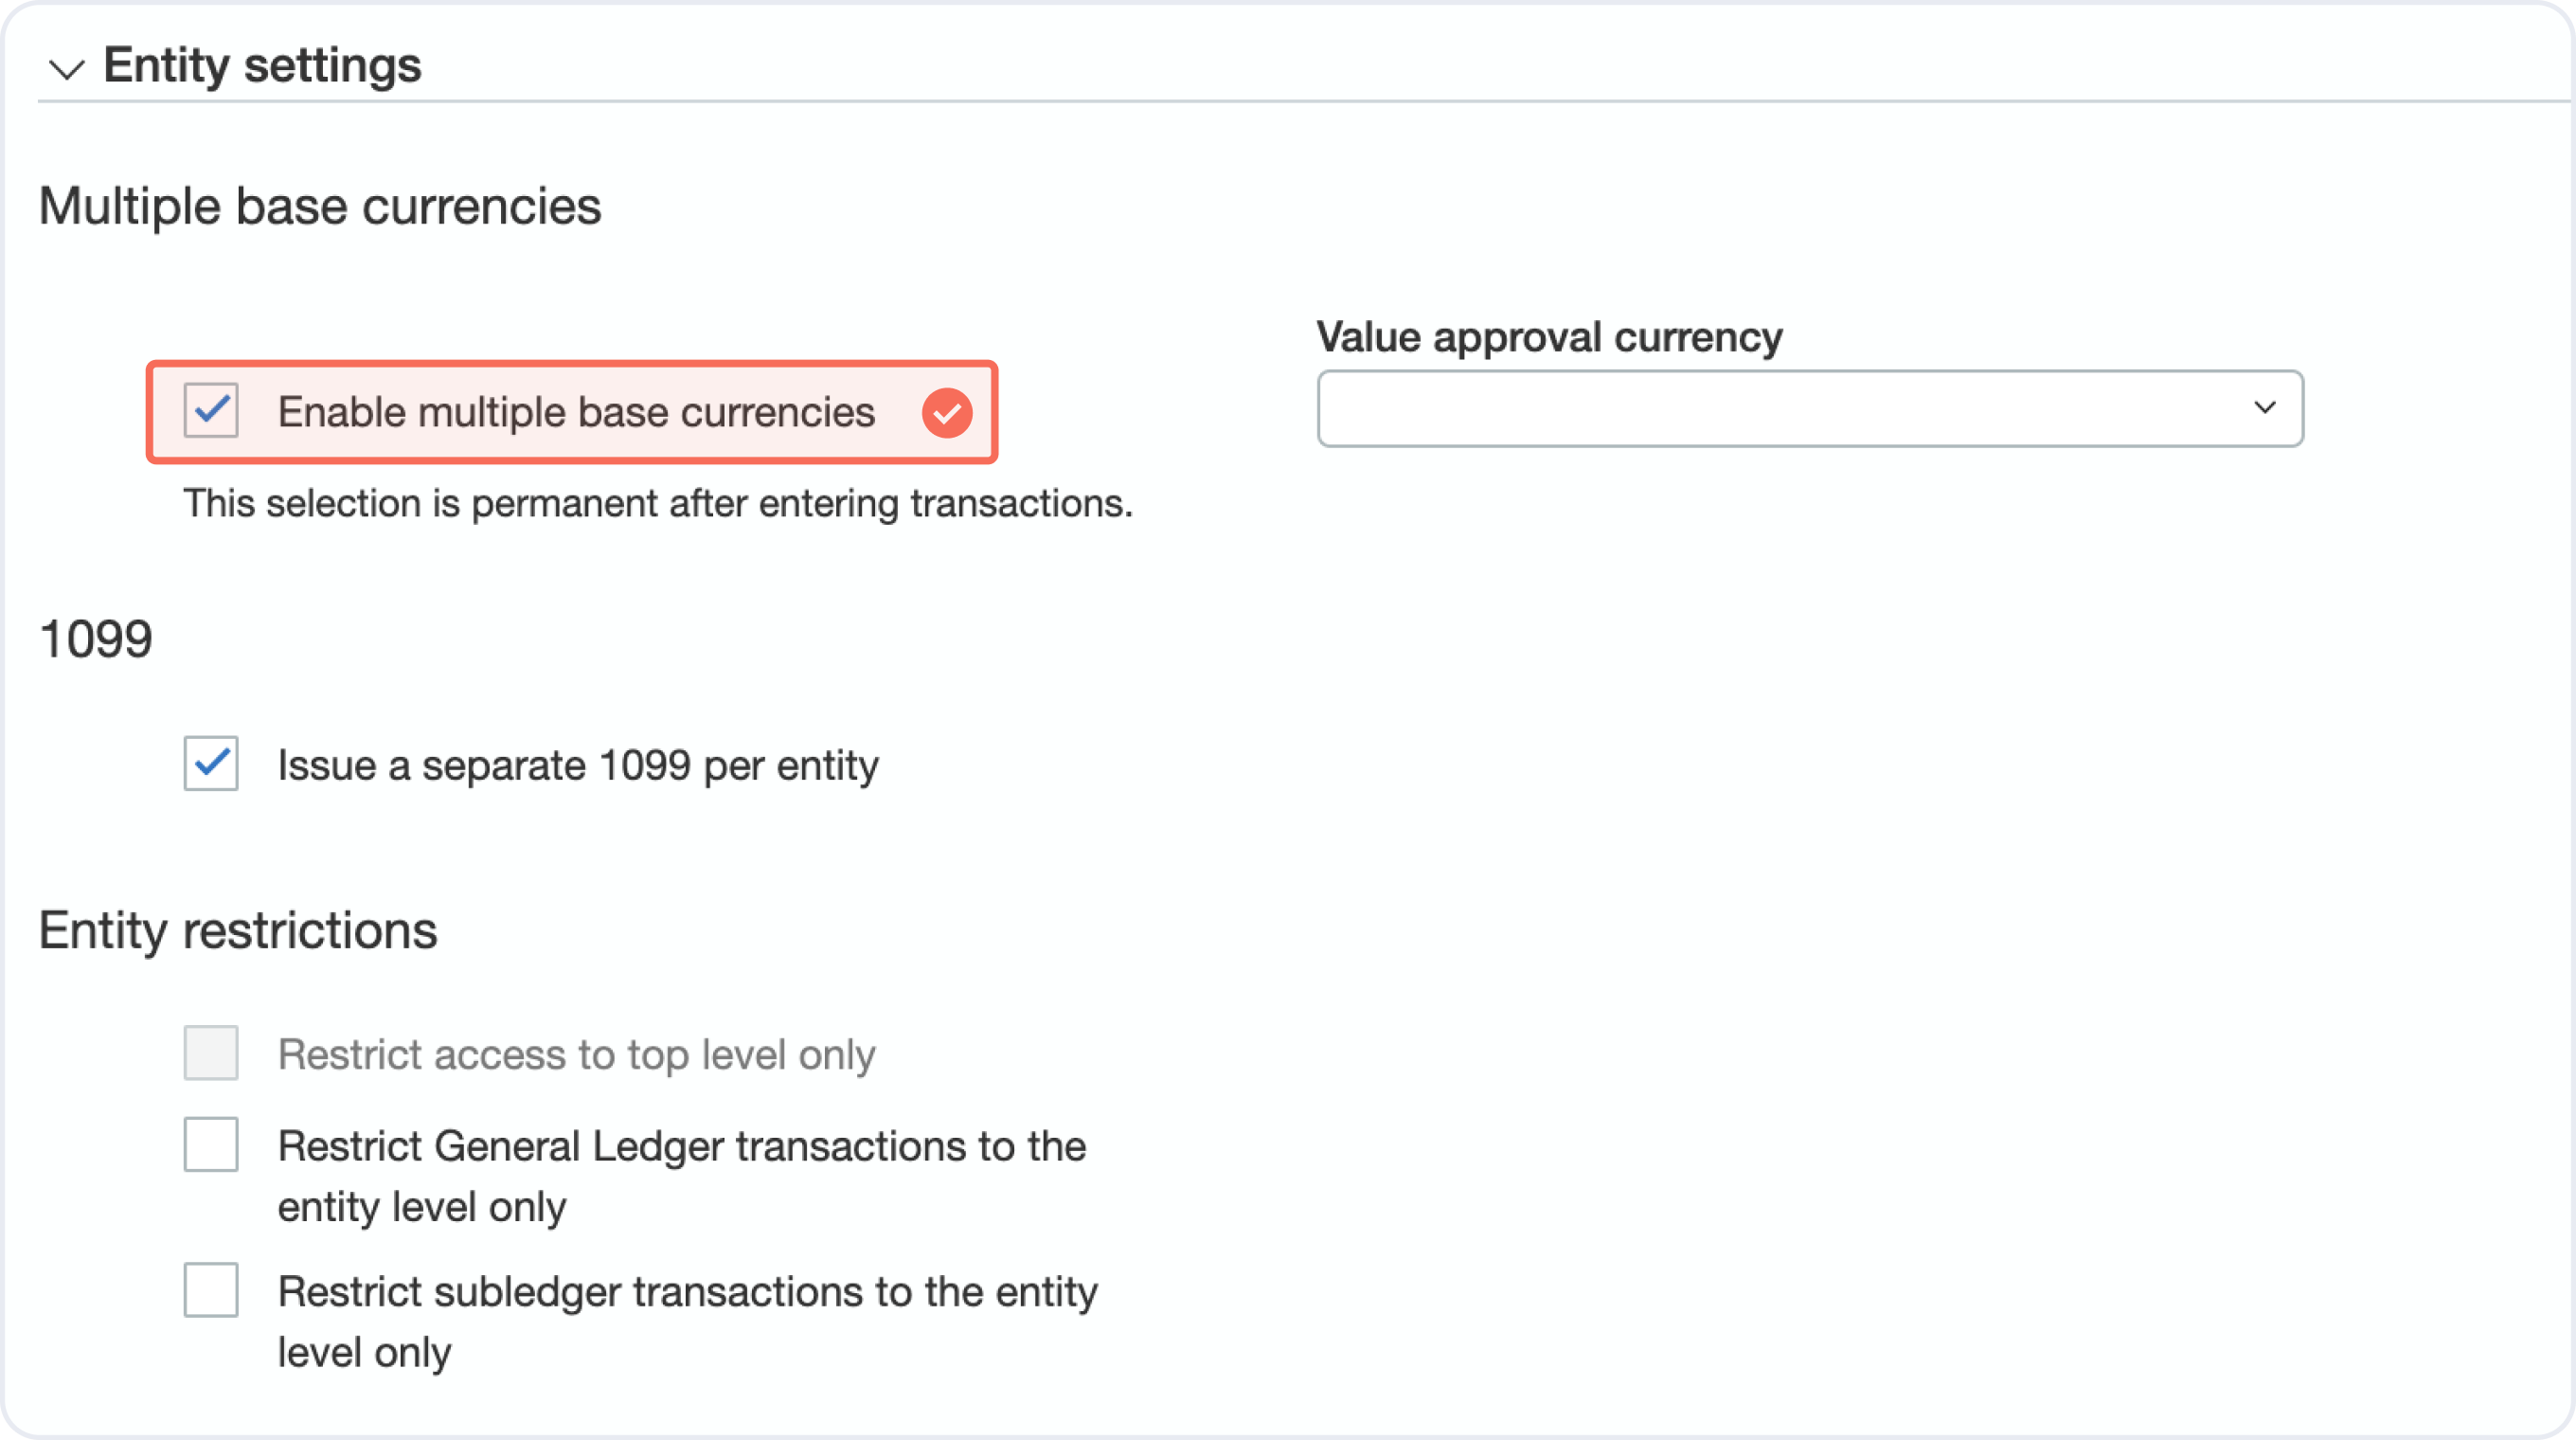
✅ Step 3 - Enable multiple base currencies.
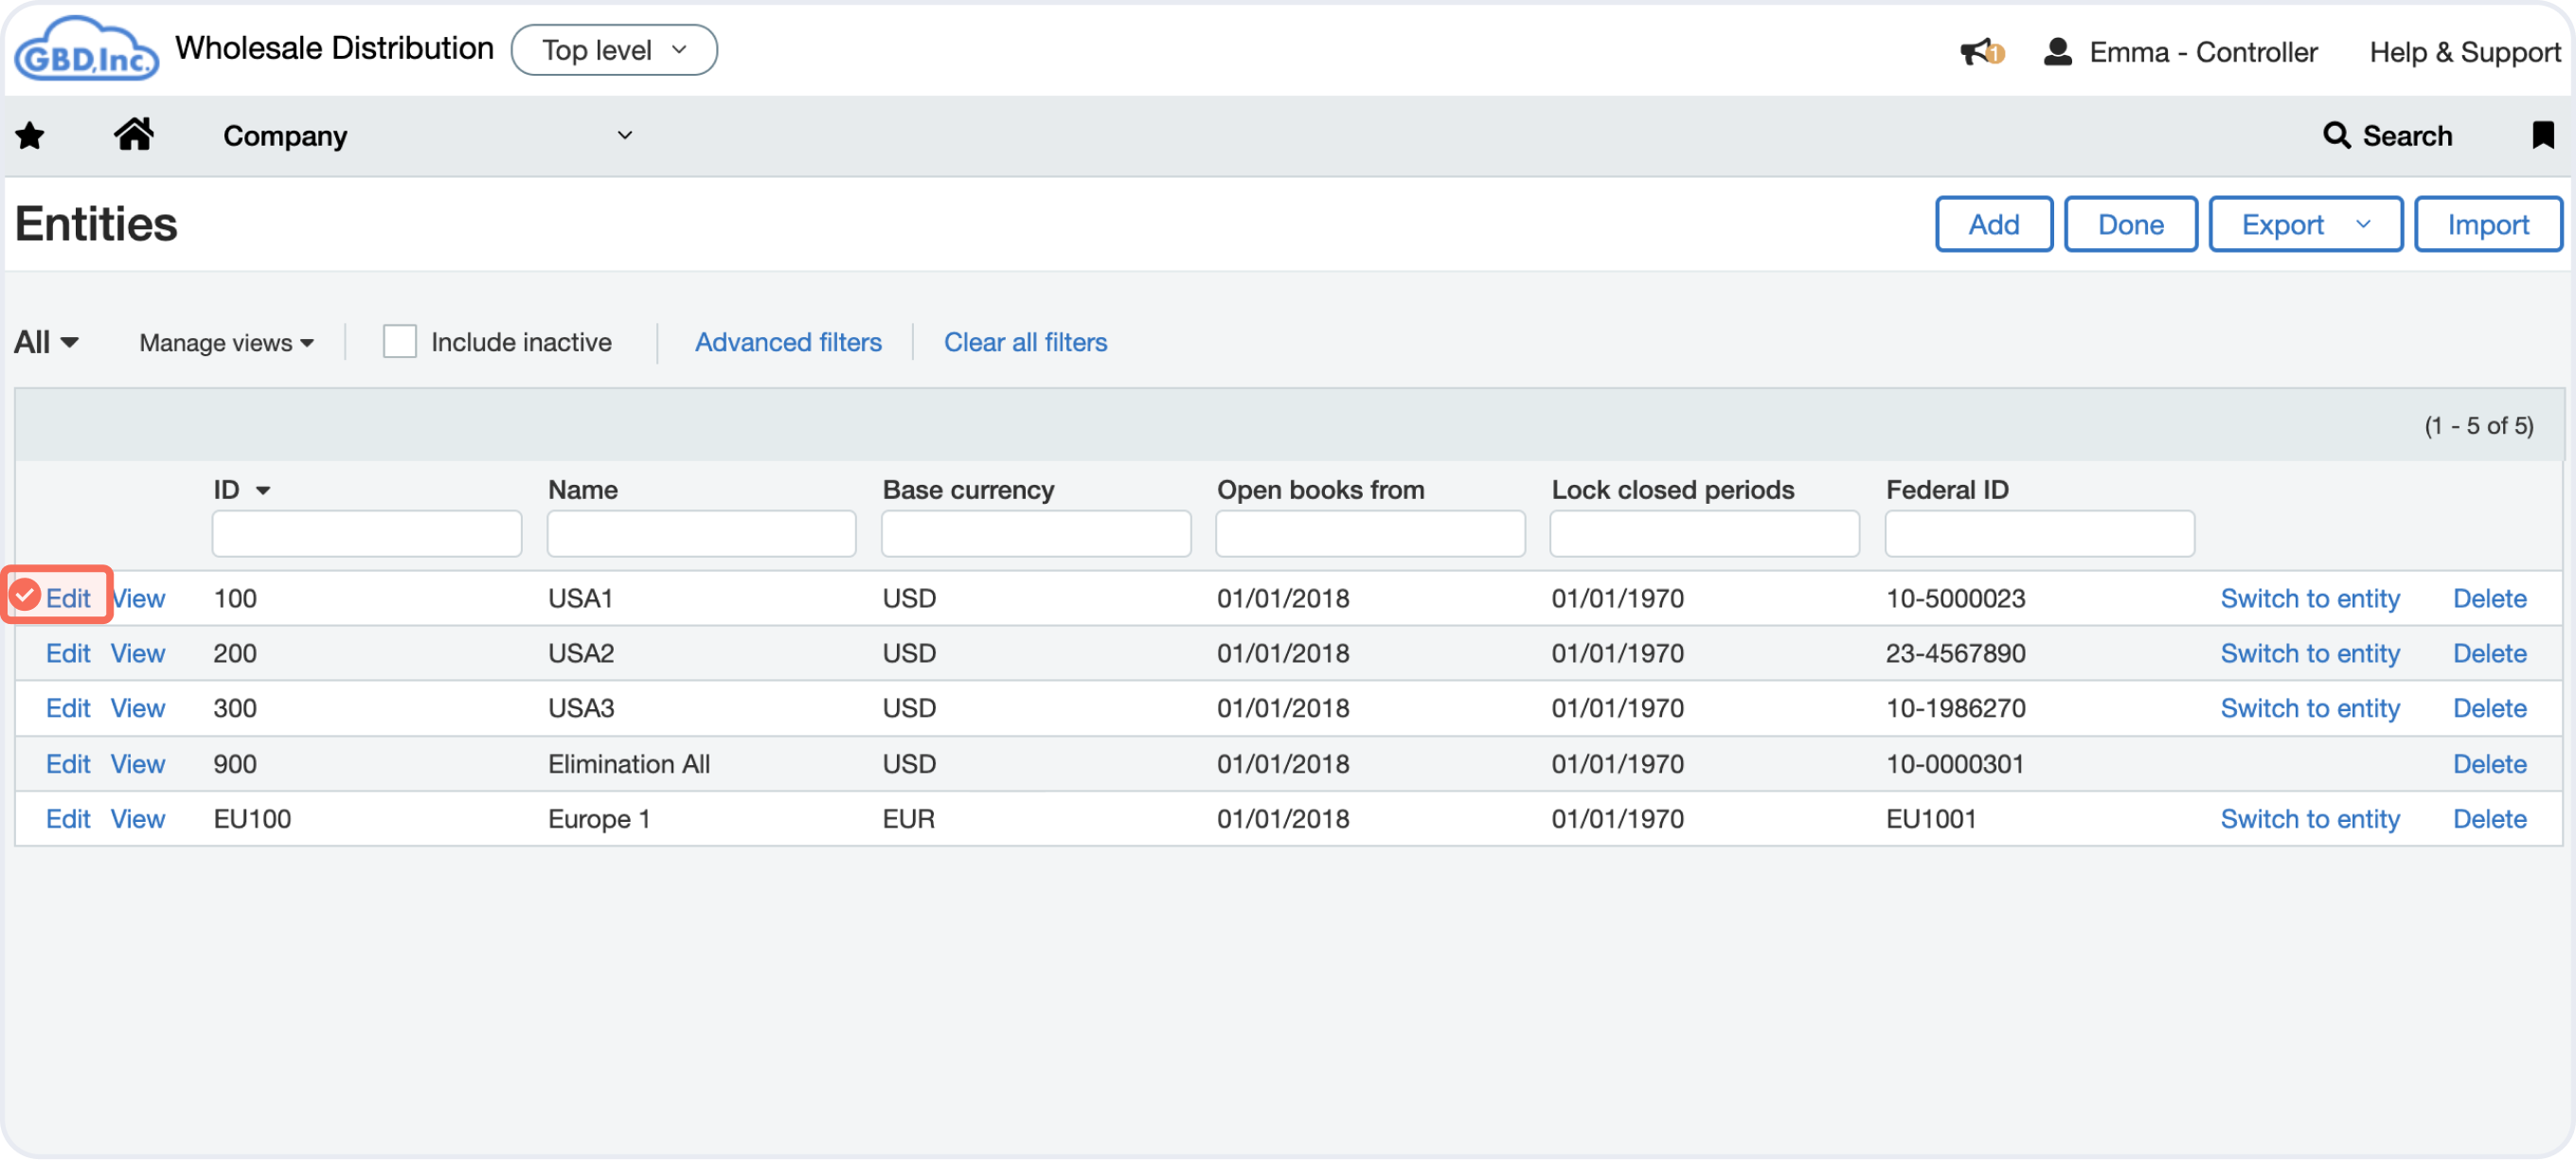
✅ Step 4 - Go to Company, Setup and Entities. In the Entities list you’ll be able to manage the currency related to each entity.

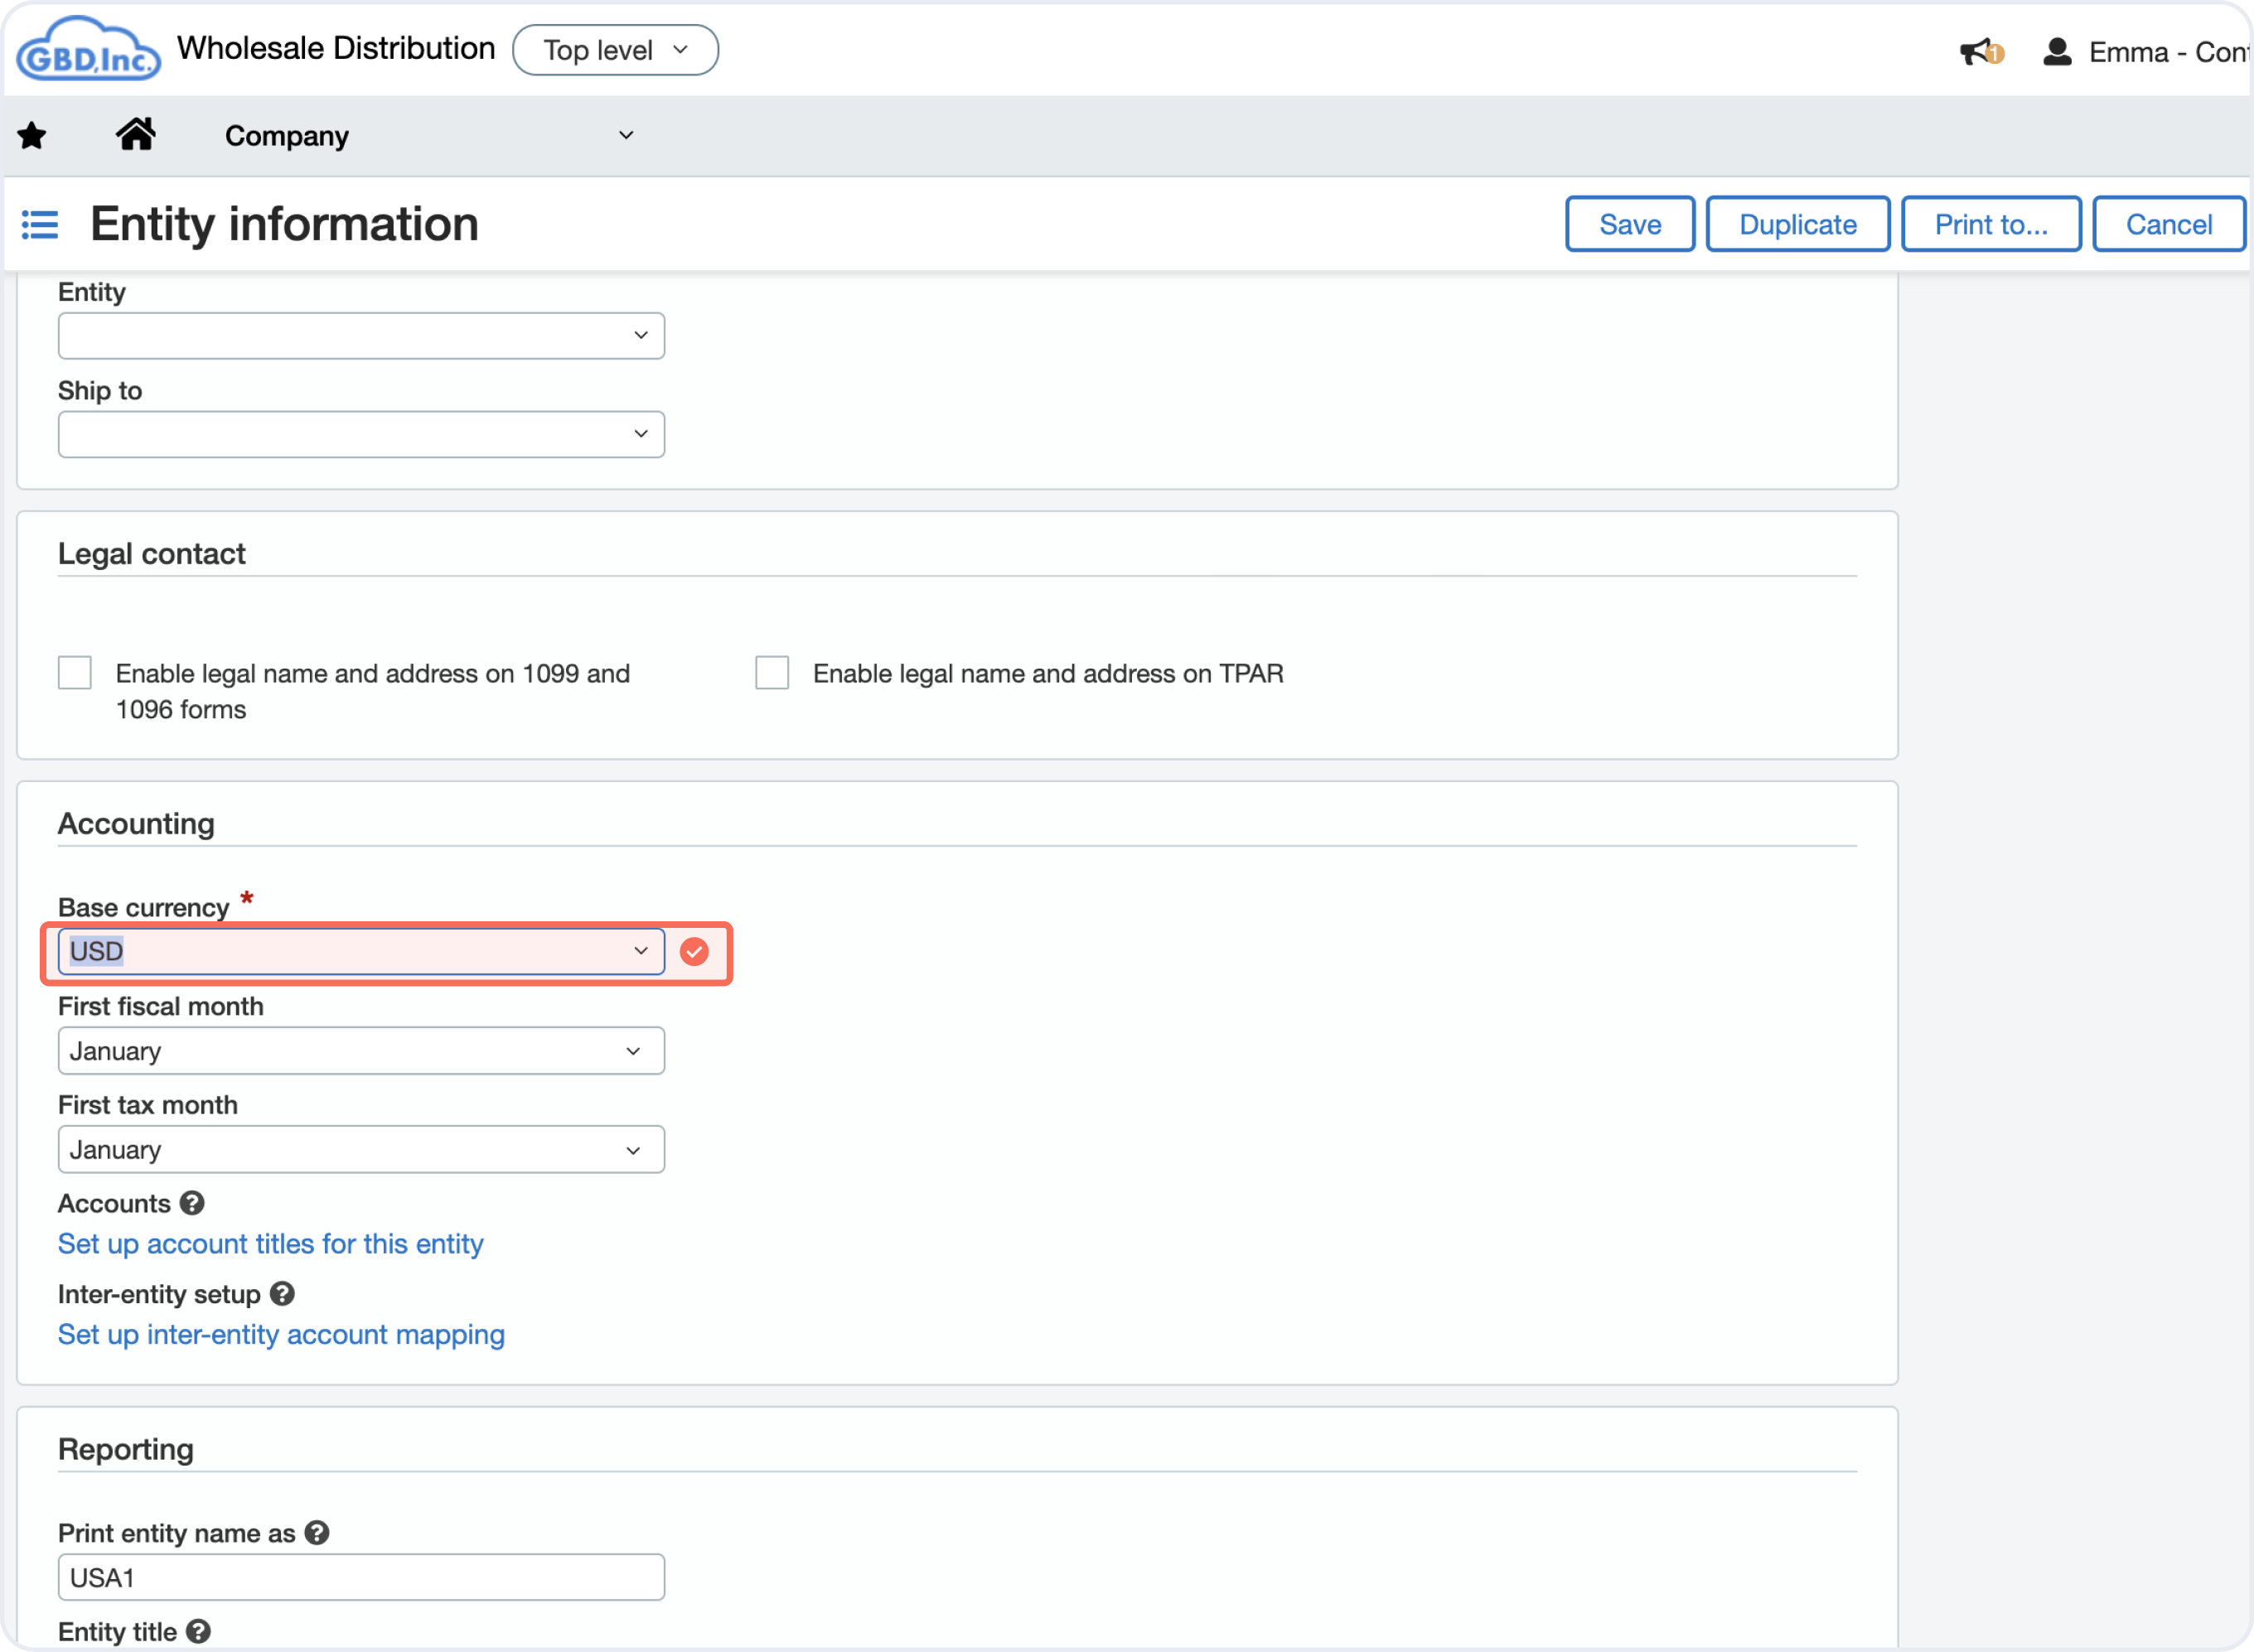
✅ Step 5 - You can change the base currency in each entity by selecting edit and selecting a different currency from the Base currency drop-down in Accounting.