
Hourly Time Tracking is available for EOR employees, PEO employees, and Global Payroll direct employees.
Clients can also review, approve, and submit hours for Pay as-You Go Hourly contracts.
Workers will submit their timesheets for review via their accounts. Clients can view and approve/reject the work time submitted by workers directly in Deel, which is then processed for payroll.
In this article:
How to review and approve worker-submitted timesheets
How to review and approve a specific worker's timesheet
Review & Approve All Worker Timesheets
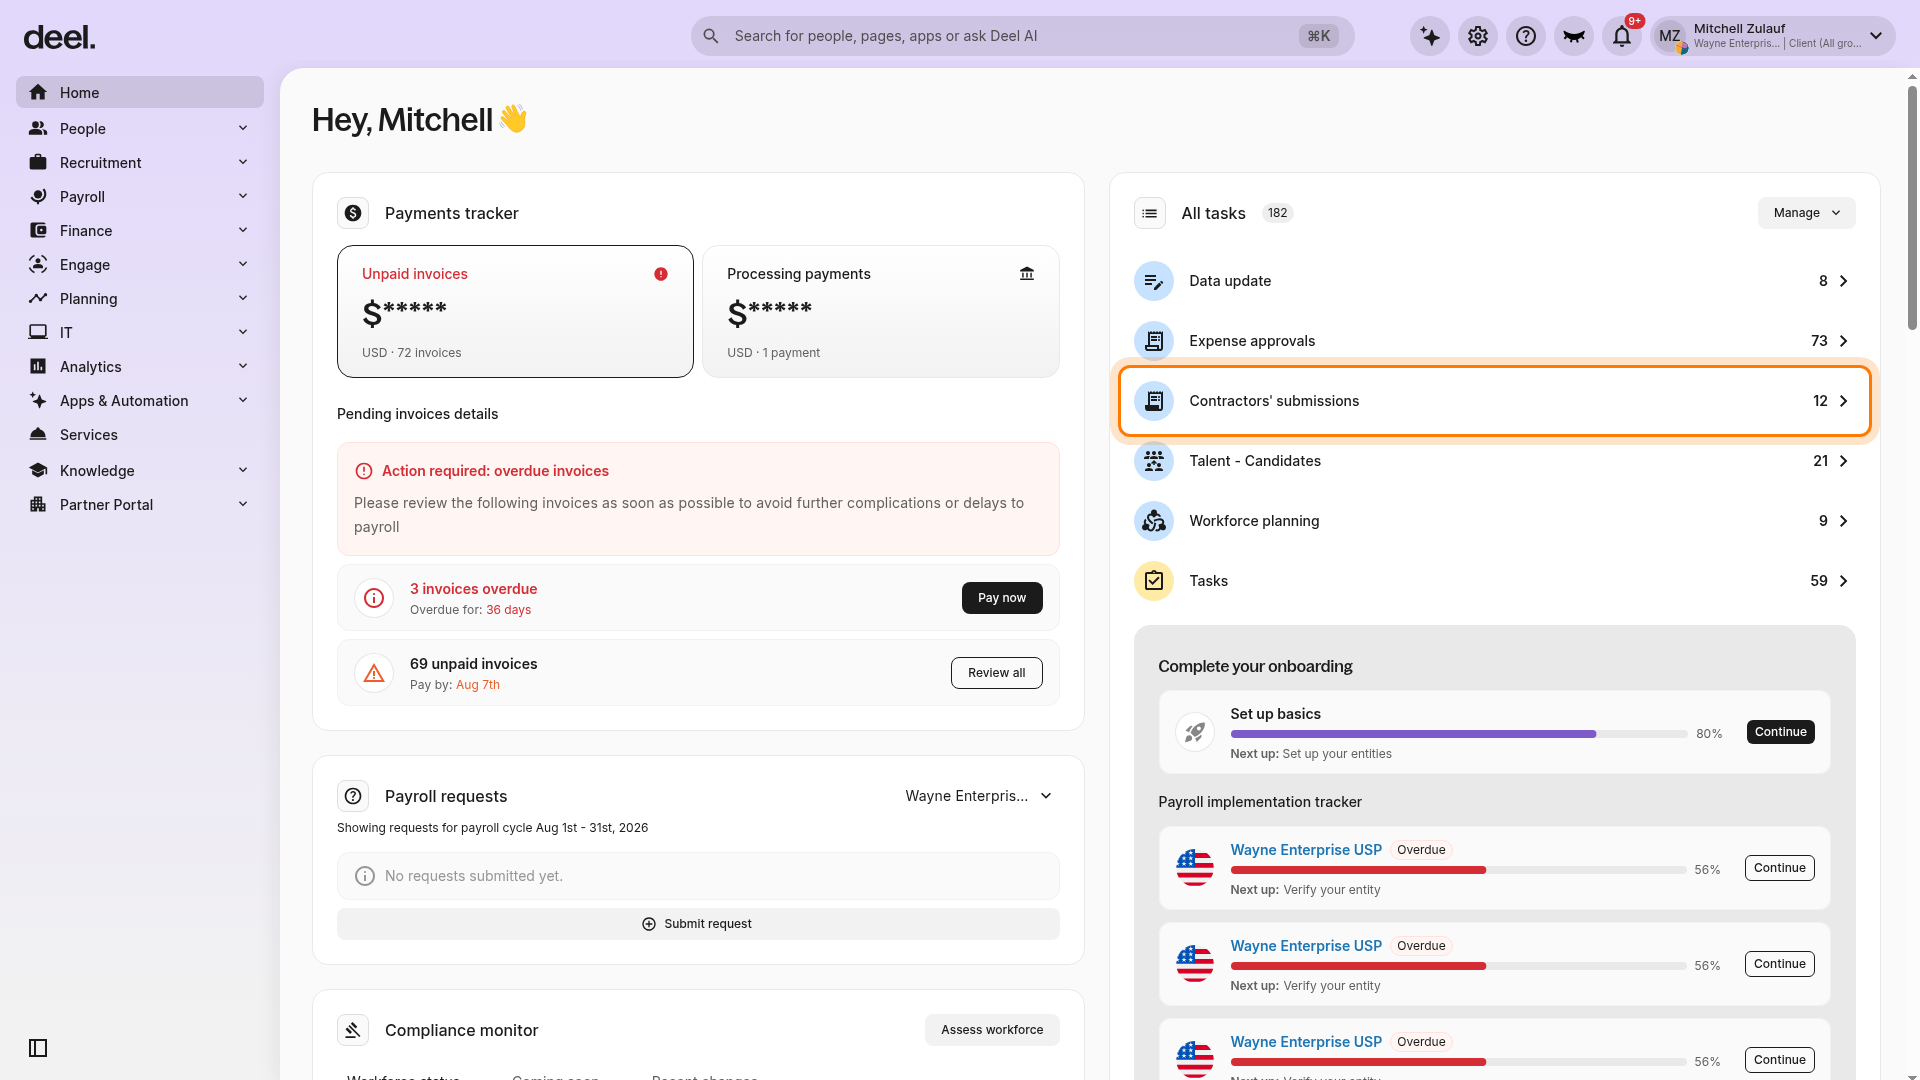
✅ Step 1 – Select Contractors' submissions from the home screen
Start on the Home dashboard. If the All tasks panel is not visible, scroll down until it appears. In the All tasks panel, locate and select Contractors' submissions. Wait for the workspace to load, then confirm that the page heading reads Contractors' submissions and that Pending is the active tab. The page may display summary cards, filters, and a table of pending approval items.
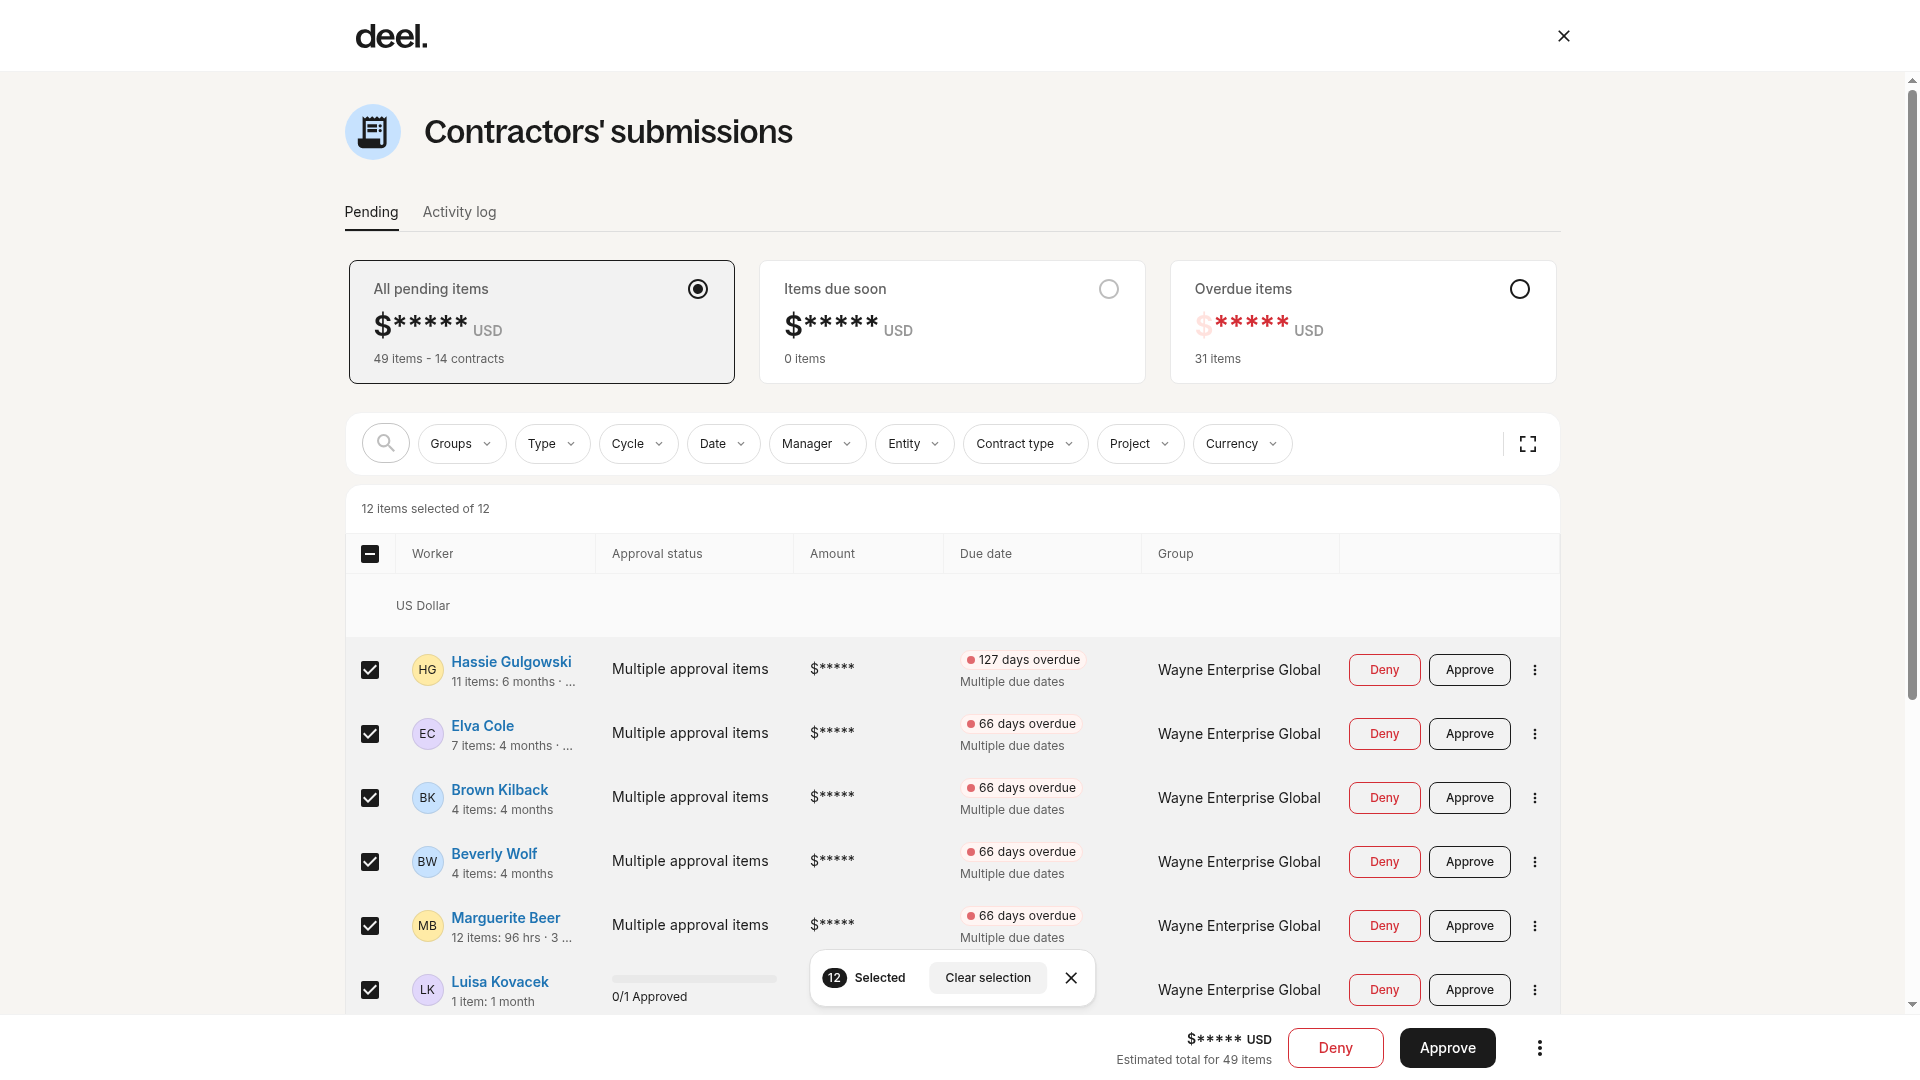
✅ Step 2 – Select Worker Name and review the request
Clients can search for the worker whose worked hours they want to review. Select the worker or their pending submission item to review the shifts available to approve or deny.
✅ Step 3 – Approve Worked Hours
Clients can also mass approve all the pending requests by clicking on Approve All. Or they can approve one entry at a time. Select Approve to submit.
 For Hourly PAYG Contractors, clients can also approve worked hours by selecting pending items directly from the worker's contract page.
How to Review & Approve a specific Worker's timesheet
✅ Step 1 – Open the Worker's profile page
In the left sidebar, select People to expand its navigation options. Select All People, then select the worker's name to open their overview page. Select the Time Tracking section on the worker profile.
✅ Step 2 – Use Filters to review Timesheet Entries
Filter the view to a specific Payroll Cycle, all Approved Hours, hours Pending Approval, and Rejected Hours.
FAQs
[ACCORDION] Can a client submit worked hours on behalf of a contractor?
If the work submission is toggled on, clients can submit hours on behalf of a Pay As You Go contractor.
Step 1 – Select the Contractor from the People icon > All People List
In the left sidebar, select People to expand its navigation options, then select All People. Select the contractor.
Step 2 – Select the Payments, Expenses, and Work Submissions card
Open the Payments, Expenses, and Work Submissions card and select Add Hours.
Step 3 - Click Add Hours
Select Add Hours.
Step 4 - Enter hours
Enter all the hours owed for the current pay cycle. It can be submitted in one batch. You may add additional details like a description, or supporting documentation like a receipt.
Step 5 - Approve the hours you have submitted for the contractor
Approve the submitted hours in the Invoice Details card, exactly like you would click approve if the submitted hours came directly from the contractor.
[ACCORDION] Can clients reject shifts that have already been approved?
Clients or team managers can delete approved shifts until the timesheet cut-off date. If the timesheet cut-off is passed and payroll is processed, please raise the adjustment request via support.
[ACCORDION]Who can review and approve timesheet hours in the organization?
Clients can configure and set approvers to review and approve timesheet hours in their organization. Please refer to this article to learn more about setting approvers for timesheets.
[ACCORDION] How to get a summary of all the hours worked by workers?
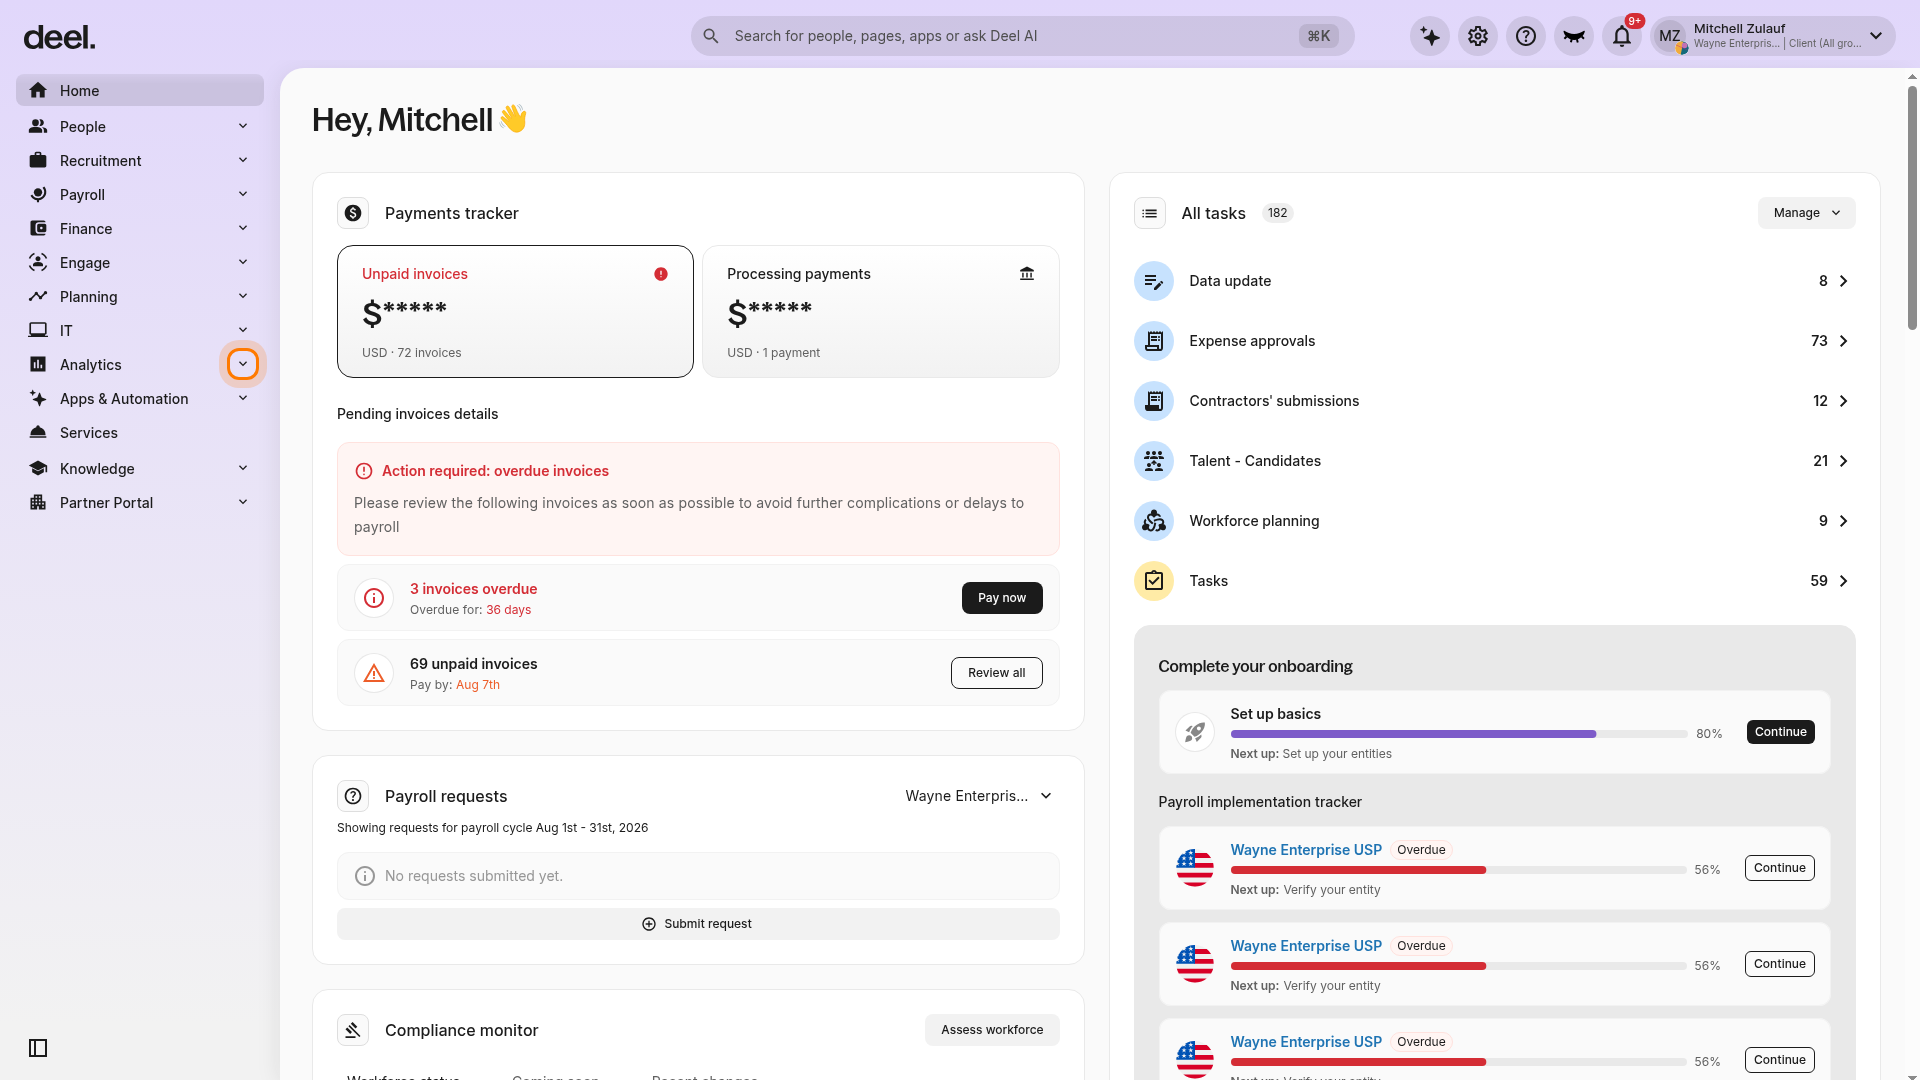
The clients can view the time tracking summary report by selecting Analytics in the left sidebar, then selecting Reports. Under Report categories, select Time Off & Time Tracking, then select Time Tracking Report. Do not select Time Tracking — Overtime Breakdown (Pivoted).
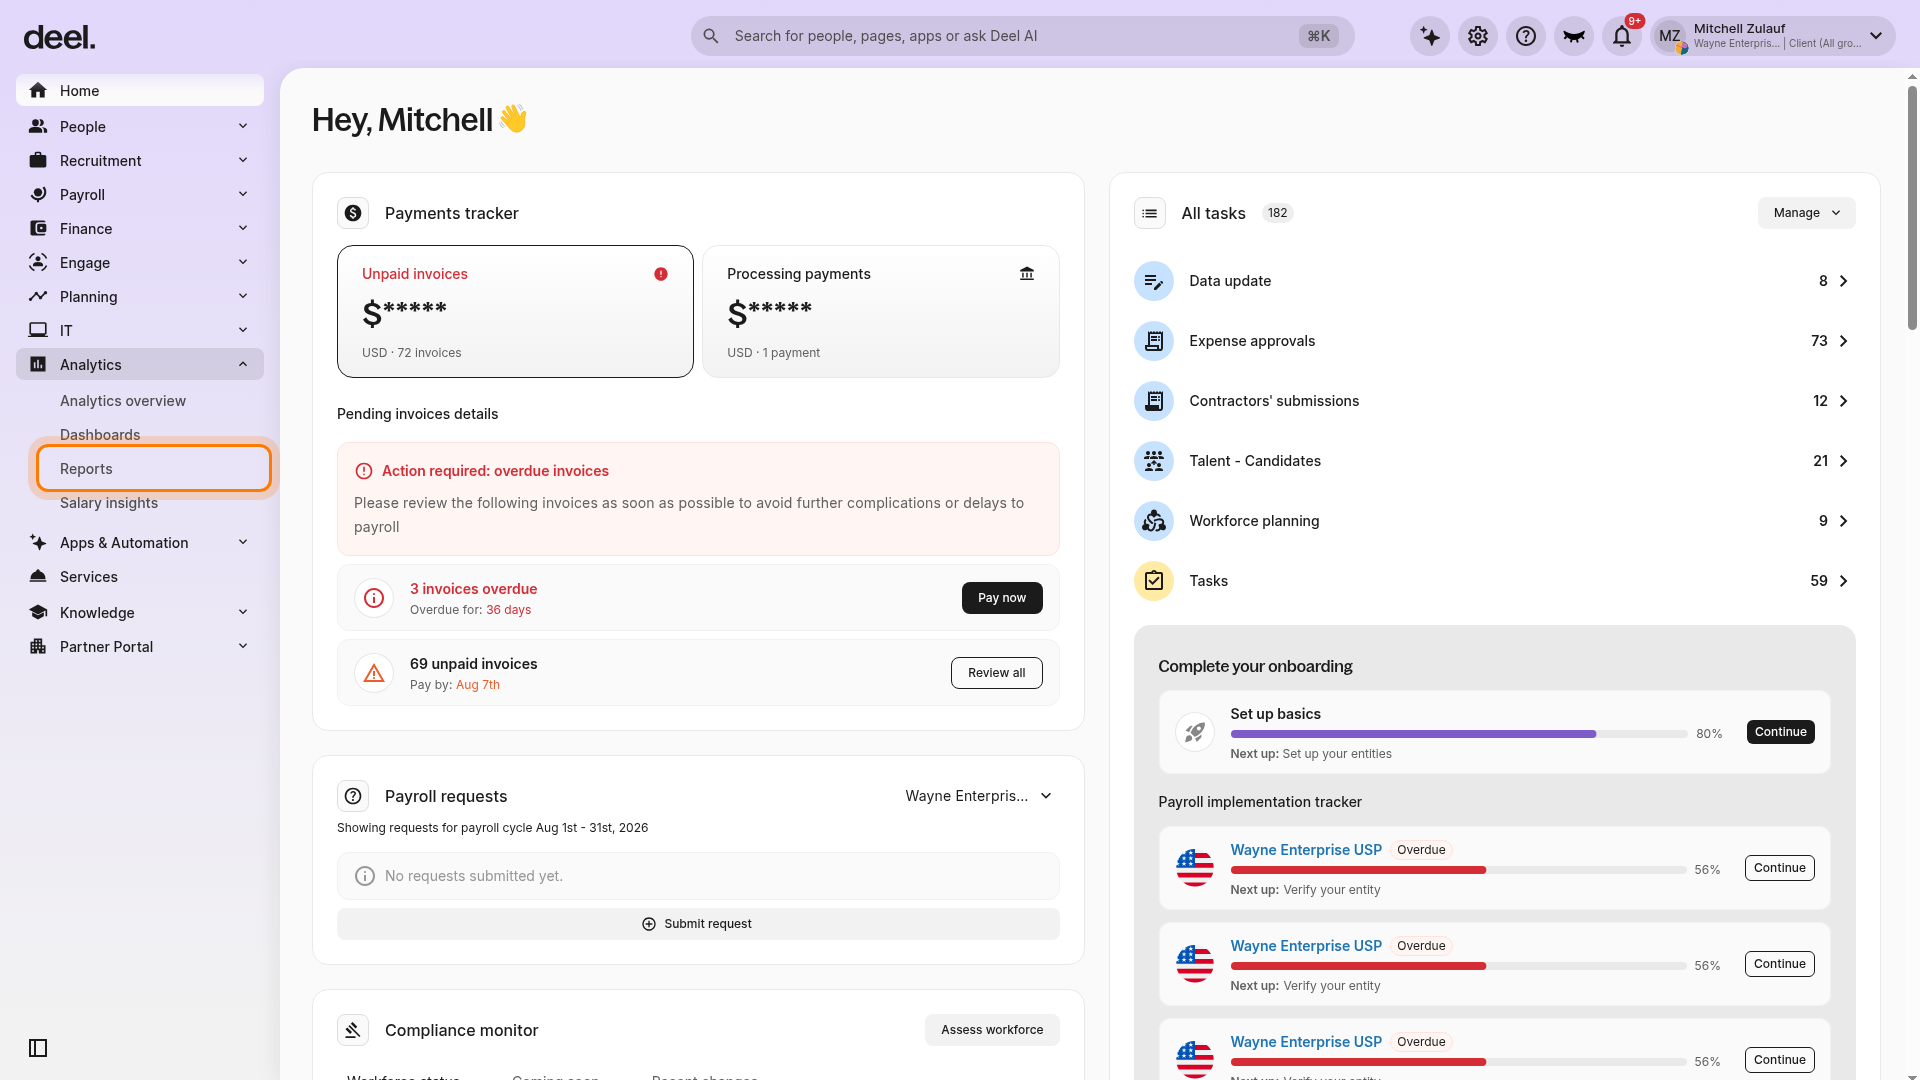
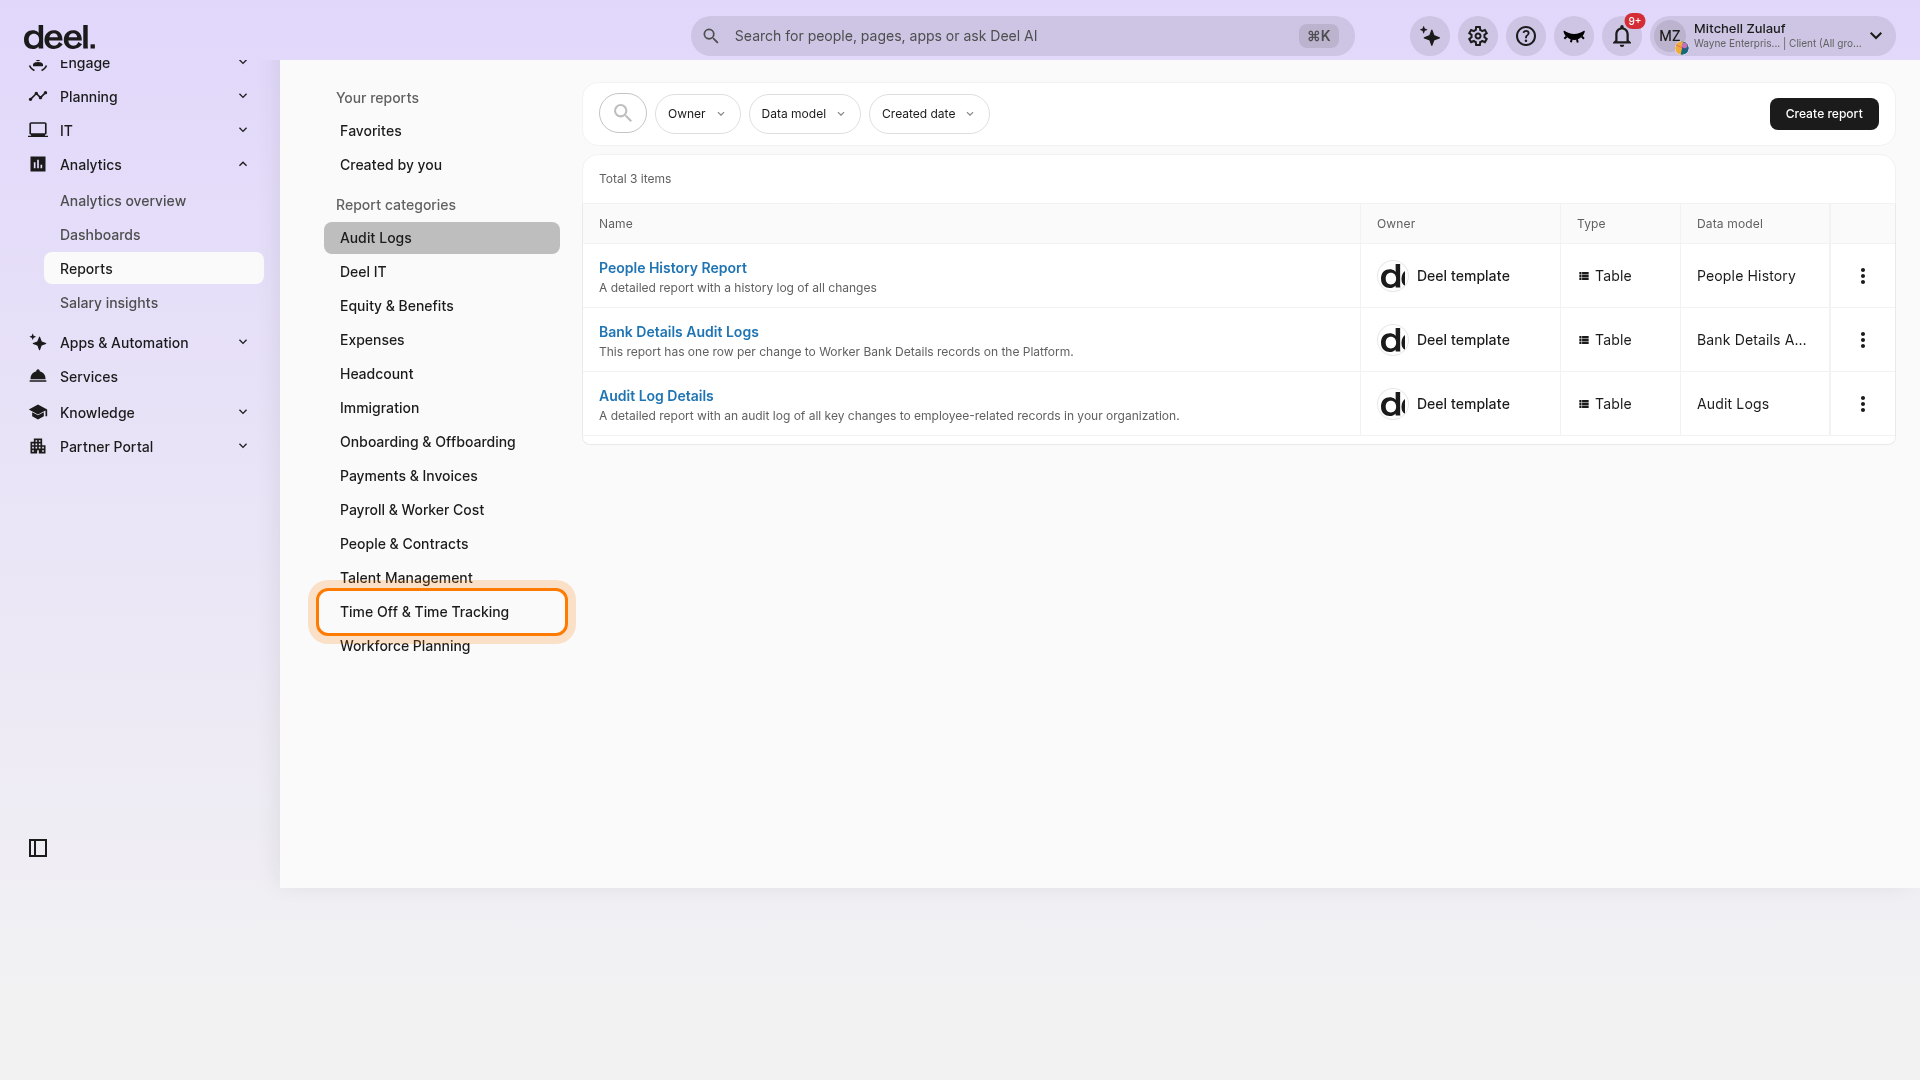
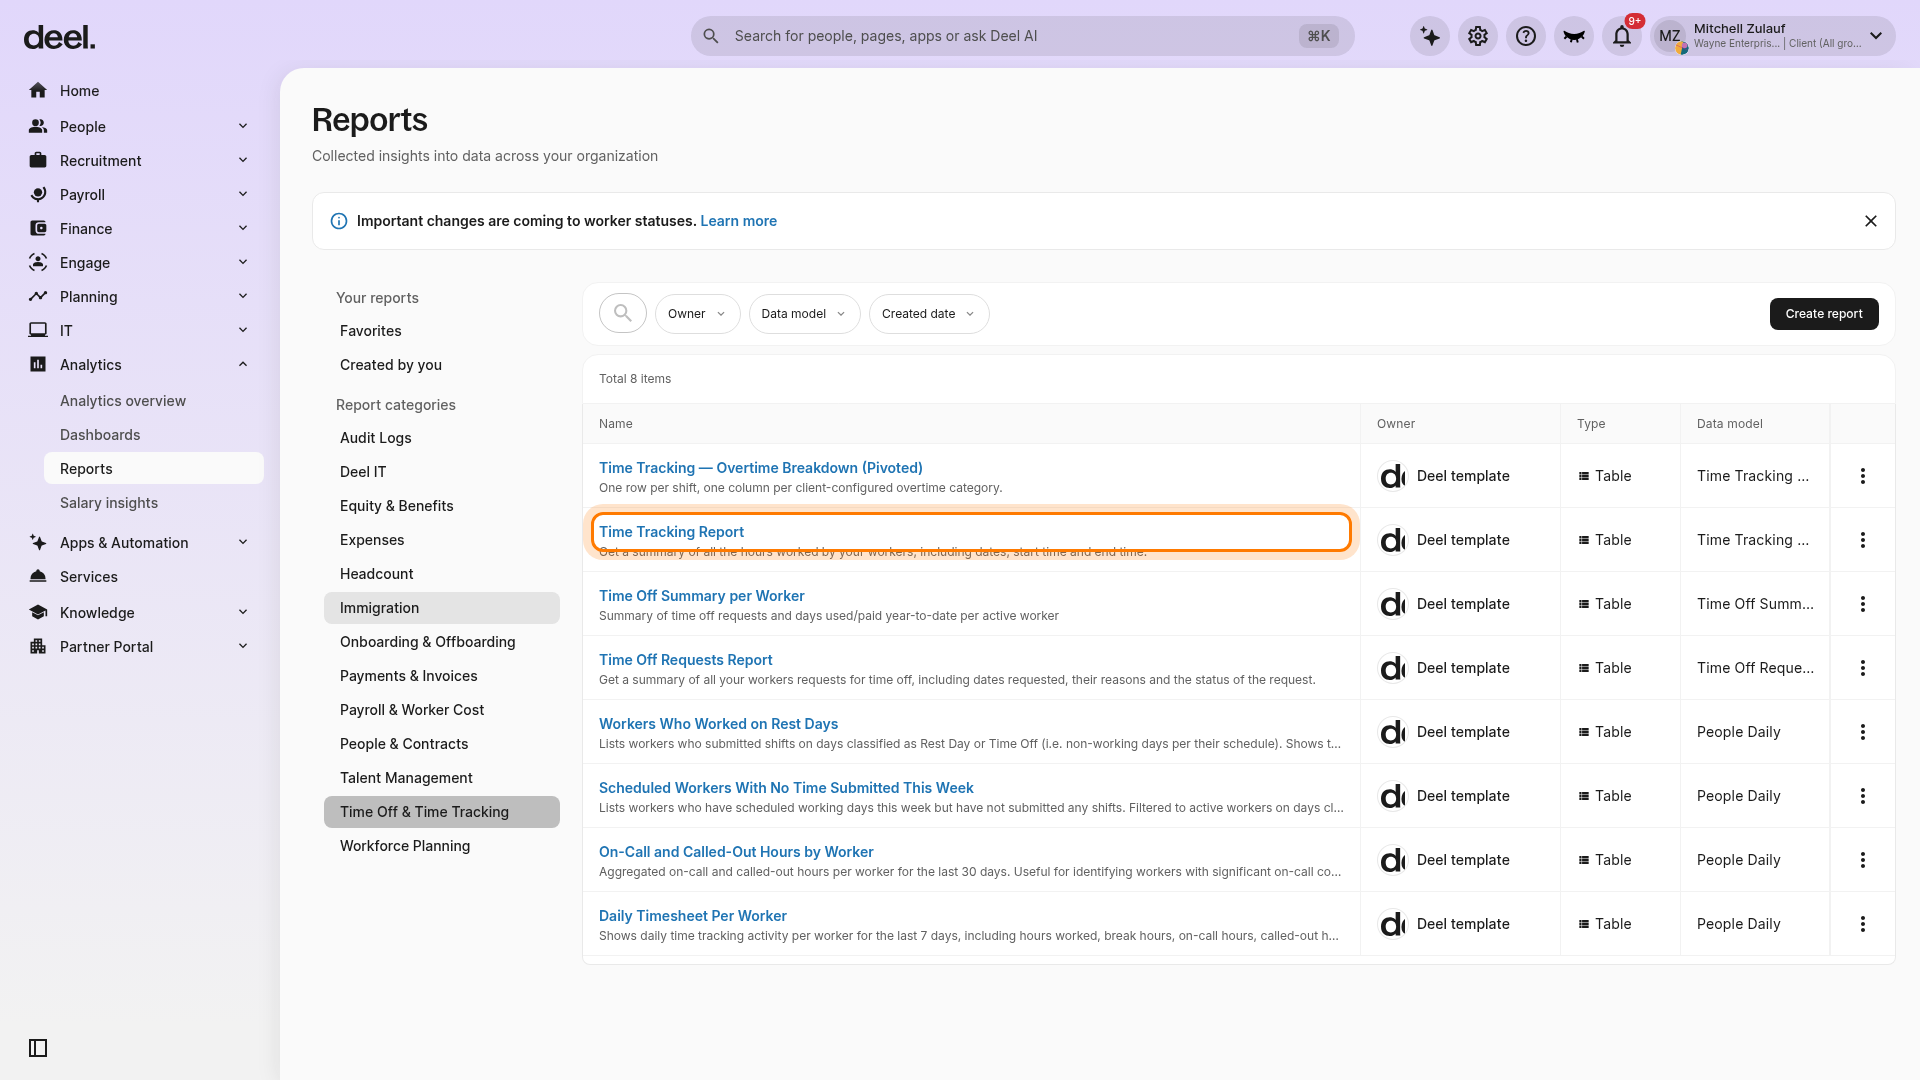
The time tracking summary report will show a breakdown of all the hours worked by workers, including dates, start time, and end time.
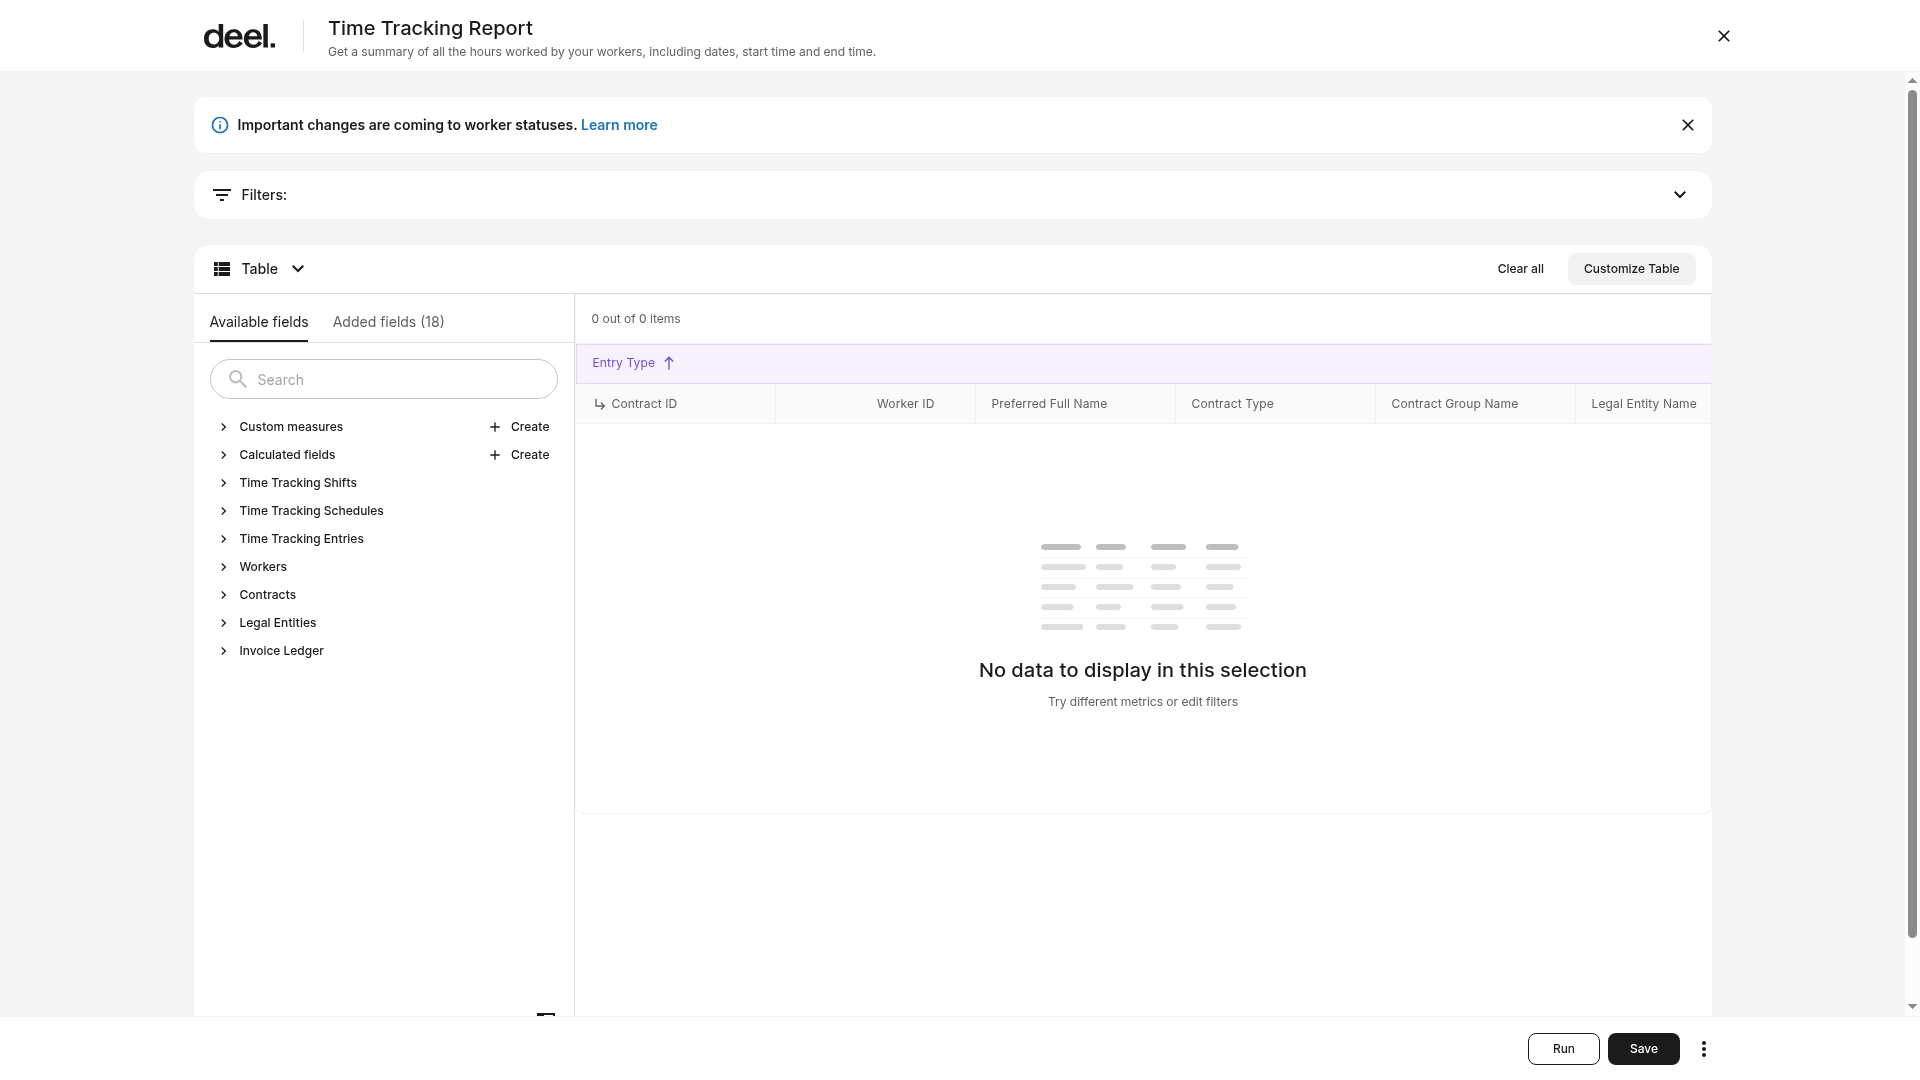
The client can also filter and customize the time tracking summary report based on time sheet period, entity and country. Confirm that the report header reads Time Tracking Report and that Filters, Customize Table, Run, and Save are available. If the editor shows No data to display in this selection, adjust the filters, metrics, or table configuration.
[ACCORDION] How does Deel Time Tracking calculate Night Differential and Holiday Pay?
Deel Time Tracking calculates both Night Differential and Holiday Pay based on the start time of the shift. This means that if a shift begins on a holiday or during the night differential window, the system applies the relevant pay rates on the shift start time through to the next day, rather than the actual hours worked during a specific holiday period.
For example - if June 6 is a holiday and the employee’s shift is from 10 PM (June 6) thru 6 AM (June 7), the system will calculate Holiday Pay until the end of the shift on June 7 - even though much of the hours worked didn't fall on the holiday anymore.
However, if the shift starts on June 5 and ends on June 6, the system will not apply Holiday Pay, as the shift did not start on the holiday
[ACCORDION]How do I request Payroll Support from Deel?
Clients with active entities can submit support tickets about payroll report generation, payroll processing, payroll packages, and more.
Once a ticket is submitted, we aim to respond to your query in 1 business day.
Step 1 - Open the Payroll requests card on Home
On Home, scroll down to locate the Payroll requests card. Check the entity selector in the upper-right area of the card and ensure it shows the entity for which you need to submit the request.
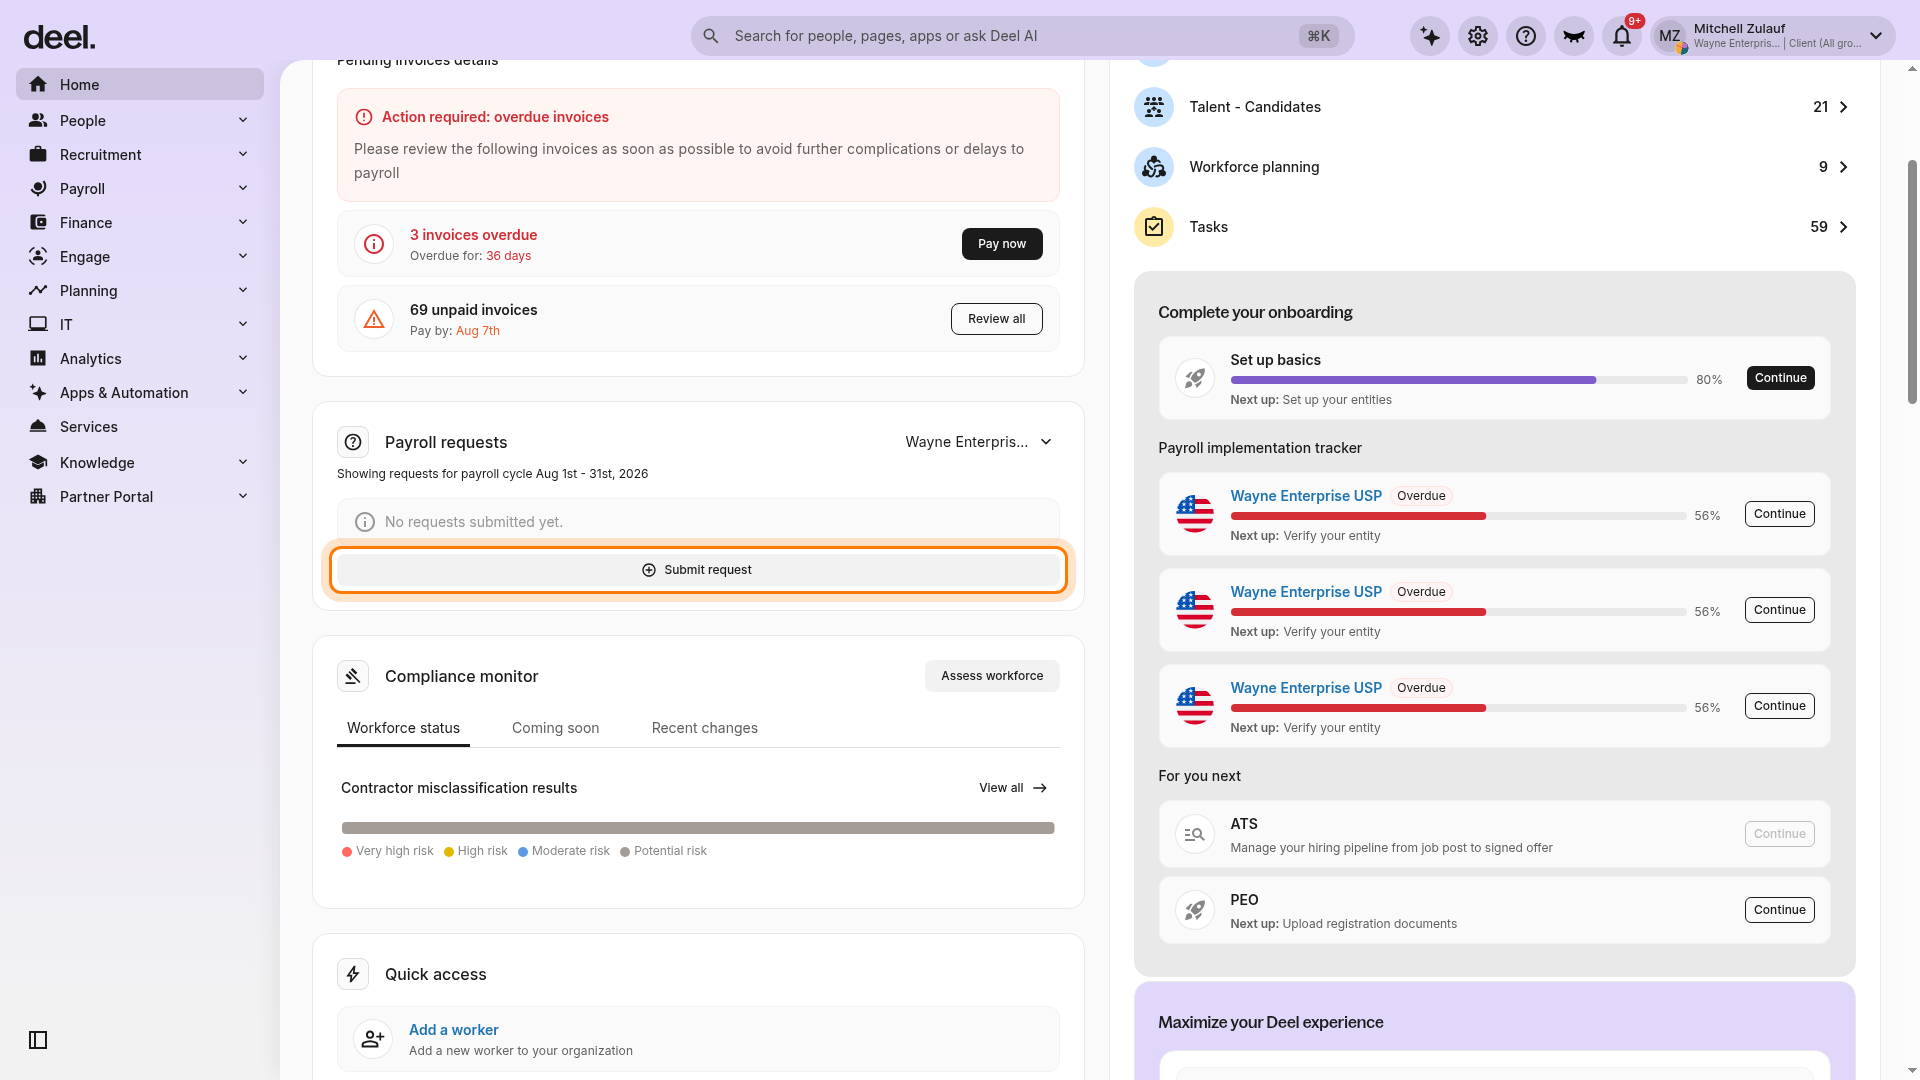
Step 2 - Select Submit request
Select Submit request at the bottom of the Payroll requests card. Verify that the centered dialog is titled Submit a payroll request.
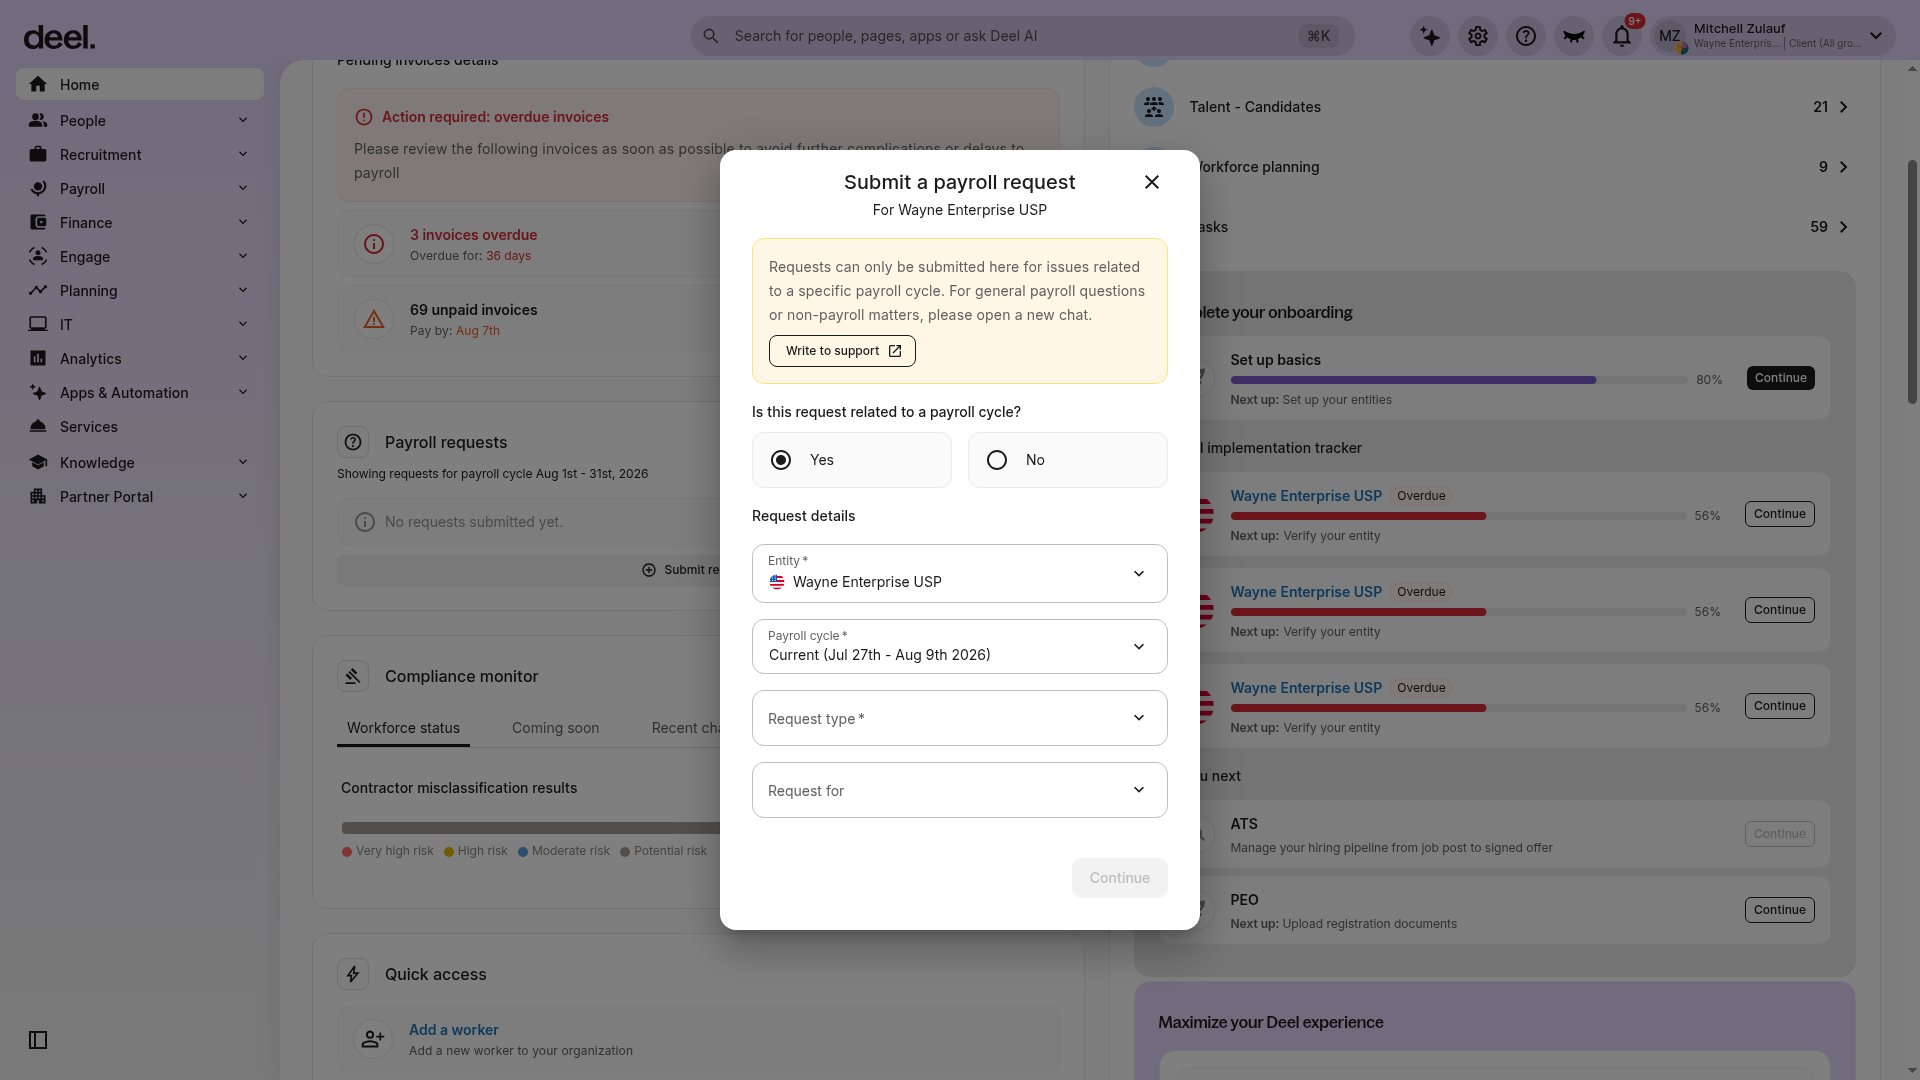
Step 3 - Complete the payroll request fields and click Continue
The form shows the selected entity, asks whether the request is related to a payroll cycle, and includes Entity, Payroll cycle, Request type, and Request for fields. Complete the required fields, then select Continue. The Continue button is unavailable until required fields are completed.
If you have a query about payroll report submission, please note that all details should be sent before payroll is submitted for processing. If an issue is created after the cut-off date, then changes will be processed either on the following pay cycle or as an off-cycle.
Step 4 - Submit the request
Complete all remaining fields and submit the request. Please add as much detail as possible and upload supporting documentation that will help our team investigate. Use Write to support only for general payroll questions; it opens a separate support channel rather than the payroll-cycle request workflow.