
This article explains how client admins can create, review, edit, and manage work schedules for workers in one or multiple countries. Work schedules define workers’ working and rest days, support time-off allocation, and help calculate regular and overtime hours.
Before you begin
You must:
- Be a client admin with permission to access Organization settings and manage Work schedules
- Have permission to access People and the worker’s contract to view a worker’s schedule on their contract
- Start from the Deel Home dashboard or another page where the Organization settings gear icon is available
How to Create a Work Schedule for Your Workers
Step 1 - Open Work schedules and start a new schedule
In the settings navigation on the left, select Work schedules under Time tracking. If available, you can instead select Go to work schedules from the informational banner on the Time tracking page.
On the Work schedules page, keep Weekly schedules selected and select Create schedule.
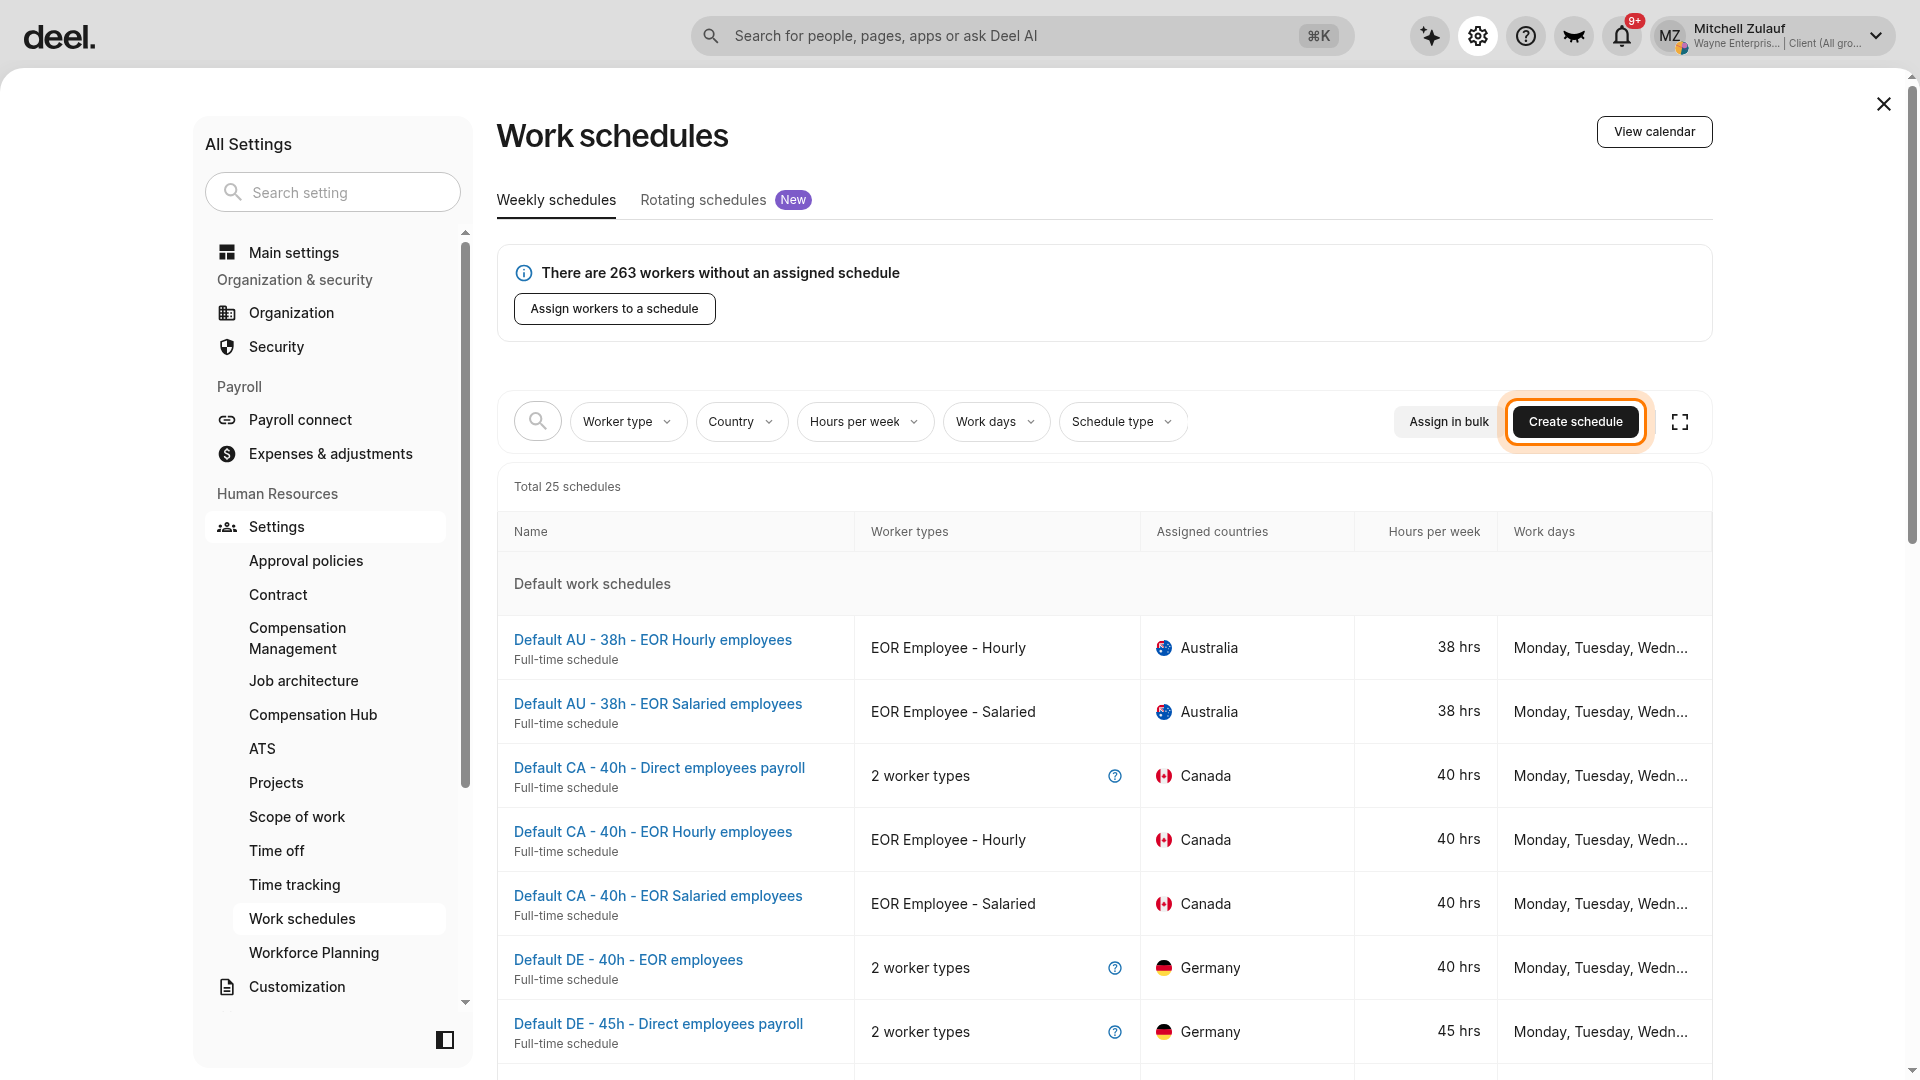
Step 3 - Name the schedule and choose worker types
Enter a unique Schedule name and select the applicable Worker type group.
- A unique name makes the schedule easier to identify during contract creation and assignment.
- For Deel Employees (EOR), select the applicable hourly or salaried worker group when prompted.
- Restrictions may apply based on the selected worker type.
Select Continue.
Step 4 - Define and finish the schedule
Complete the remaining setup steps:
- Select the countries where the schedule is available.
- Enter working-time details, including total weekly hours, work days, daily hours, and breaks where required.
- Review the configuration and select Finish.
Step 5 - Open an existing work schedule
Select Organization settings, select Time tracking, and then select Work schedules in the left settings navigation.
On the Work schedules page, select the Weekly schedules tab. If a Rotating schedules announcement dialog appears, close it with the X.
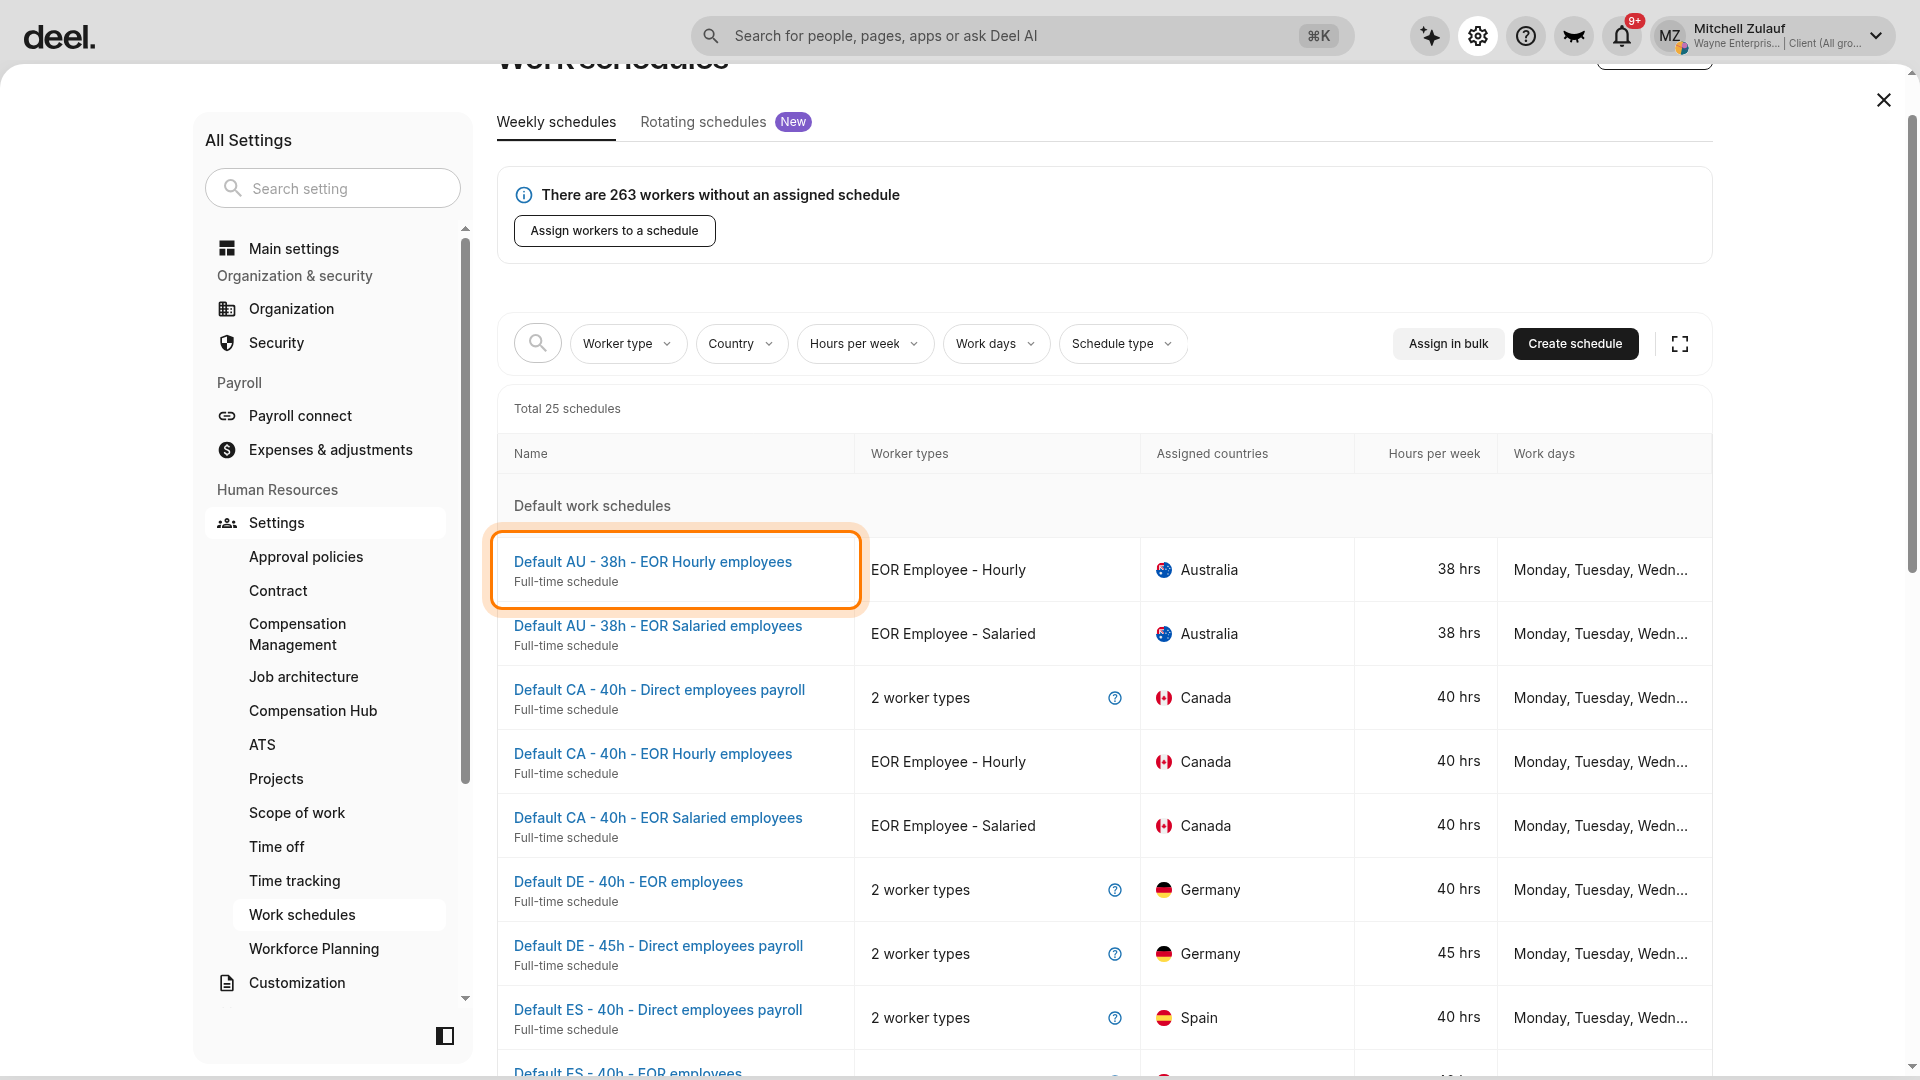
In the Weekly schedules table, select the schedule name you want to review. Use filters such as Worker type, Country, Hours per week, Work days, or Schedule type to find a schedule when needed.
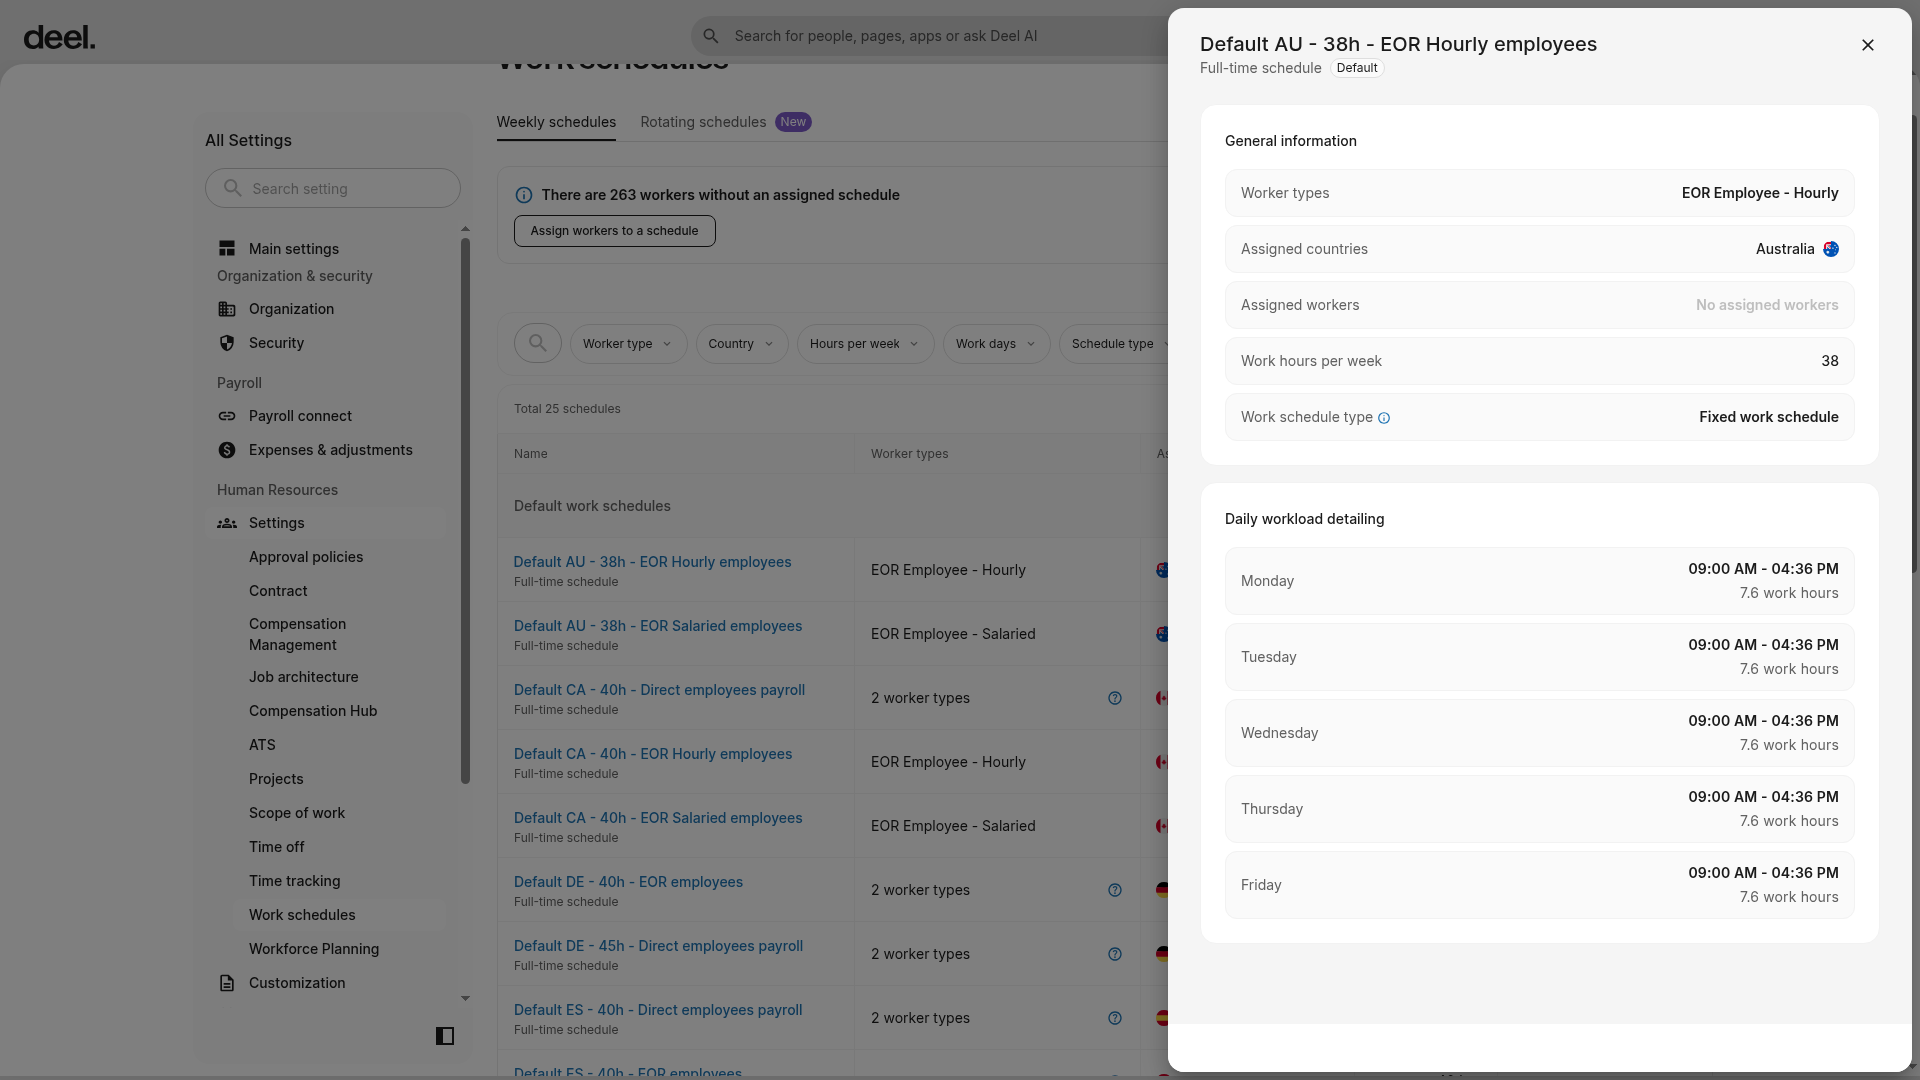
Verify: A details drawer opens on the right. It shows information such as worker types, assigned countries, work hours per week, schedule type, and daily workload details.
Step 6 - Edit and save the schedule
Update any fields that are available for editing and select Save.
Changes apply immediately to workers linked to the schedule.
Frequently Asked Questions
How do I view the existing work schedules of my workers?
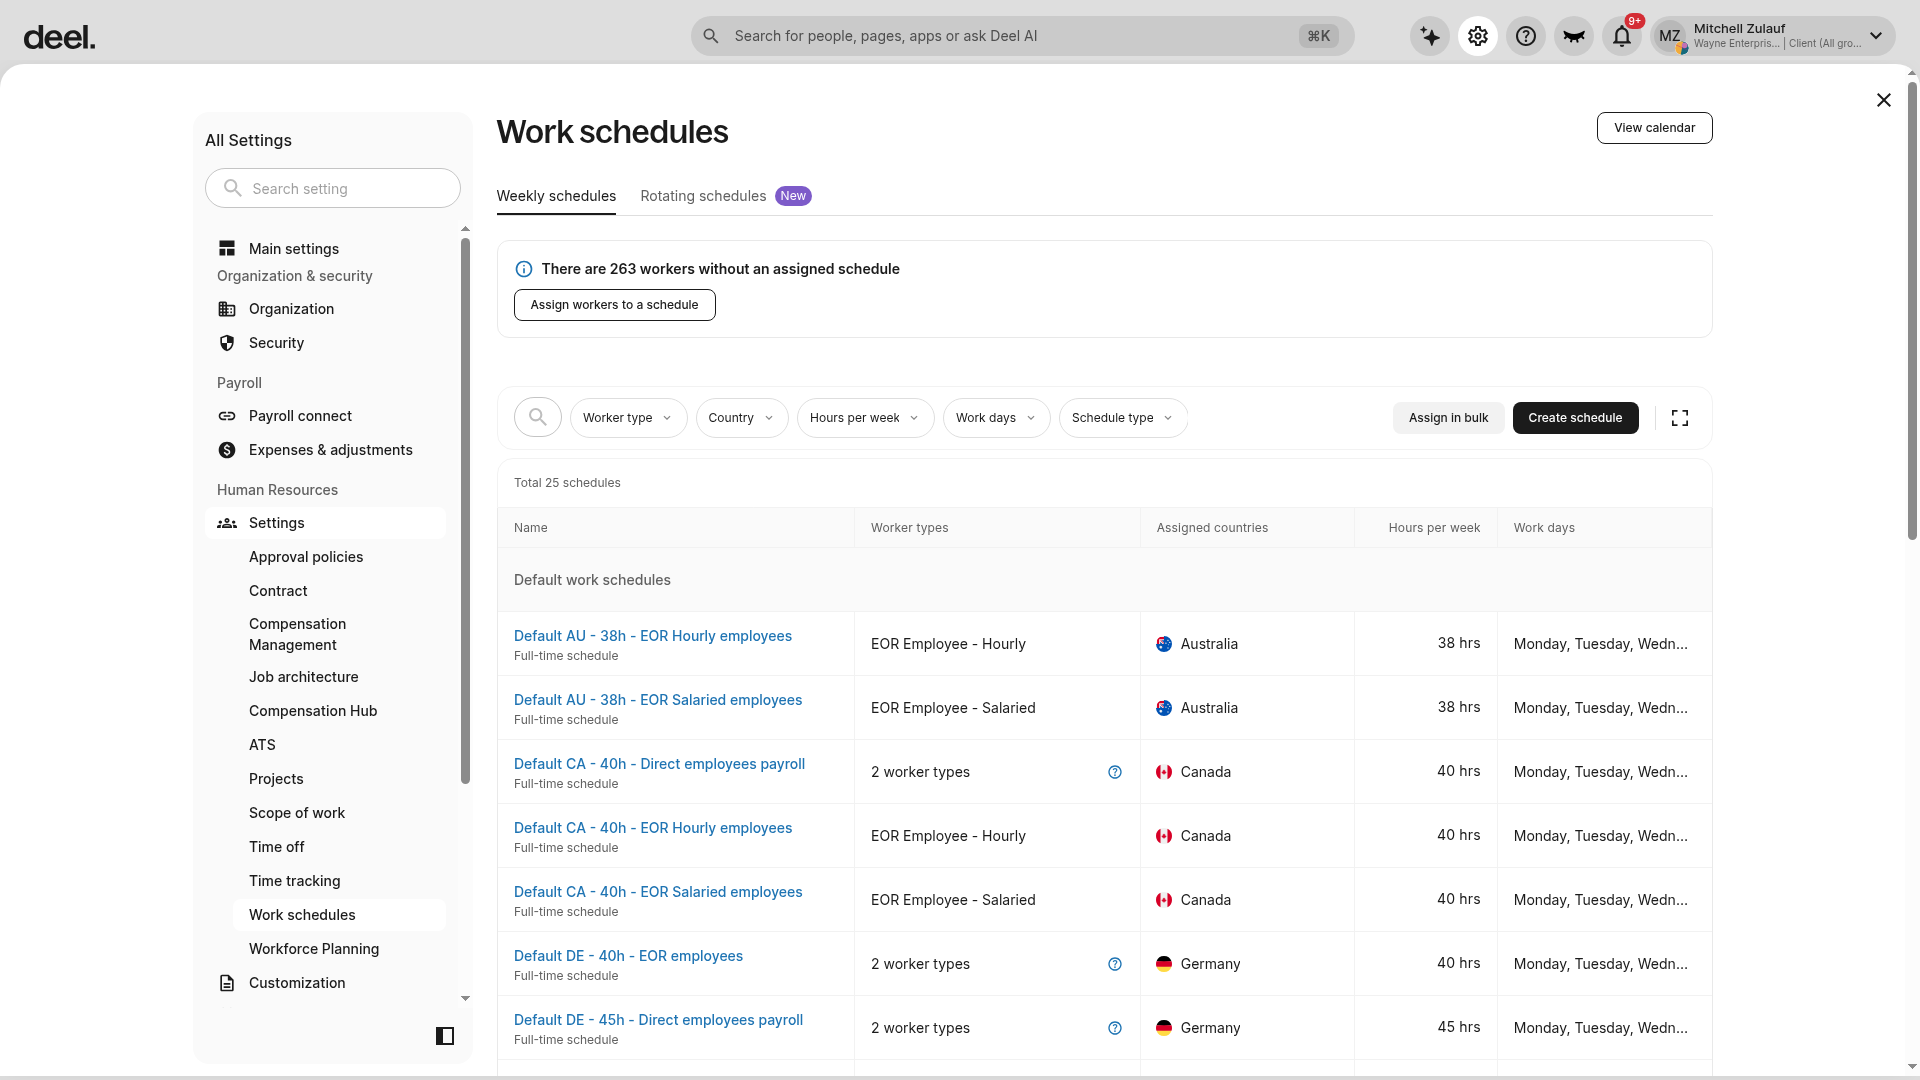
Select Organization settings > Work schedules in the left settings navigation. The page opens with Weekly schedules selected.
The schedule table includes columns such as Name, Worker types, Assigned countries, Hours per week, and Work days. You may also have actions such as Assign in bulk and Create schedule.
How do I view the work schedule of a specific worker?
- In the left sidebar, select People to expand the menu.
- Select Directory.
- Select the worker’s name. Confirm the intended worker by reviewing columns such as Worker type and Worker status.
- On the worker profile, open Contracts and select View contract for the relevant contract.
- On the Contract details tab, find Agreement details and locate the Work schedule row.
Verify: The Work schedule field is visible. It may show a configured schedule or Not specified.