
This article explains how contractors can create fixed-rate, pay-as-you-go, or milestone contract types on Deel without the need to create a client account.
Contractors themselves can create legal contracts for the following agreements:
- Fixed Rate - For contracts that have a fixed rate each payment cycle
- Pay As You Go - For contracts that require time sheets or work submissions each payment cycle
- Milestone - For contracts with milestones that get paid each time they're completed
In This Article
How to create a Fixed Rate contract
How to create a Pay As You Go contract
How to create a Milestone contract
How to Create a Fixed Rate Contract
✅ Step 1 – Select a contract type
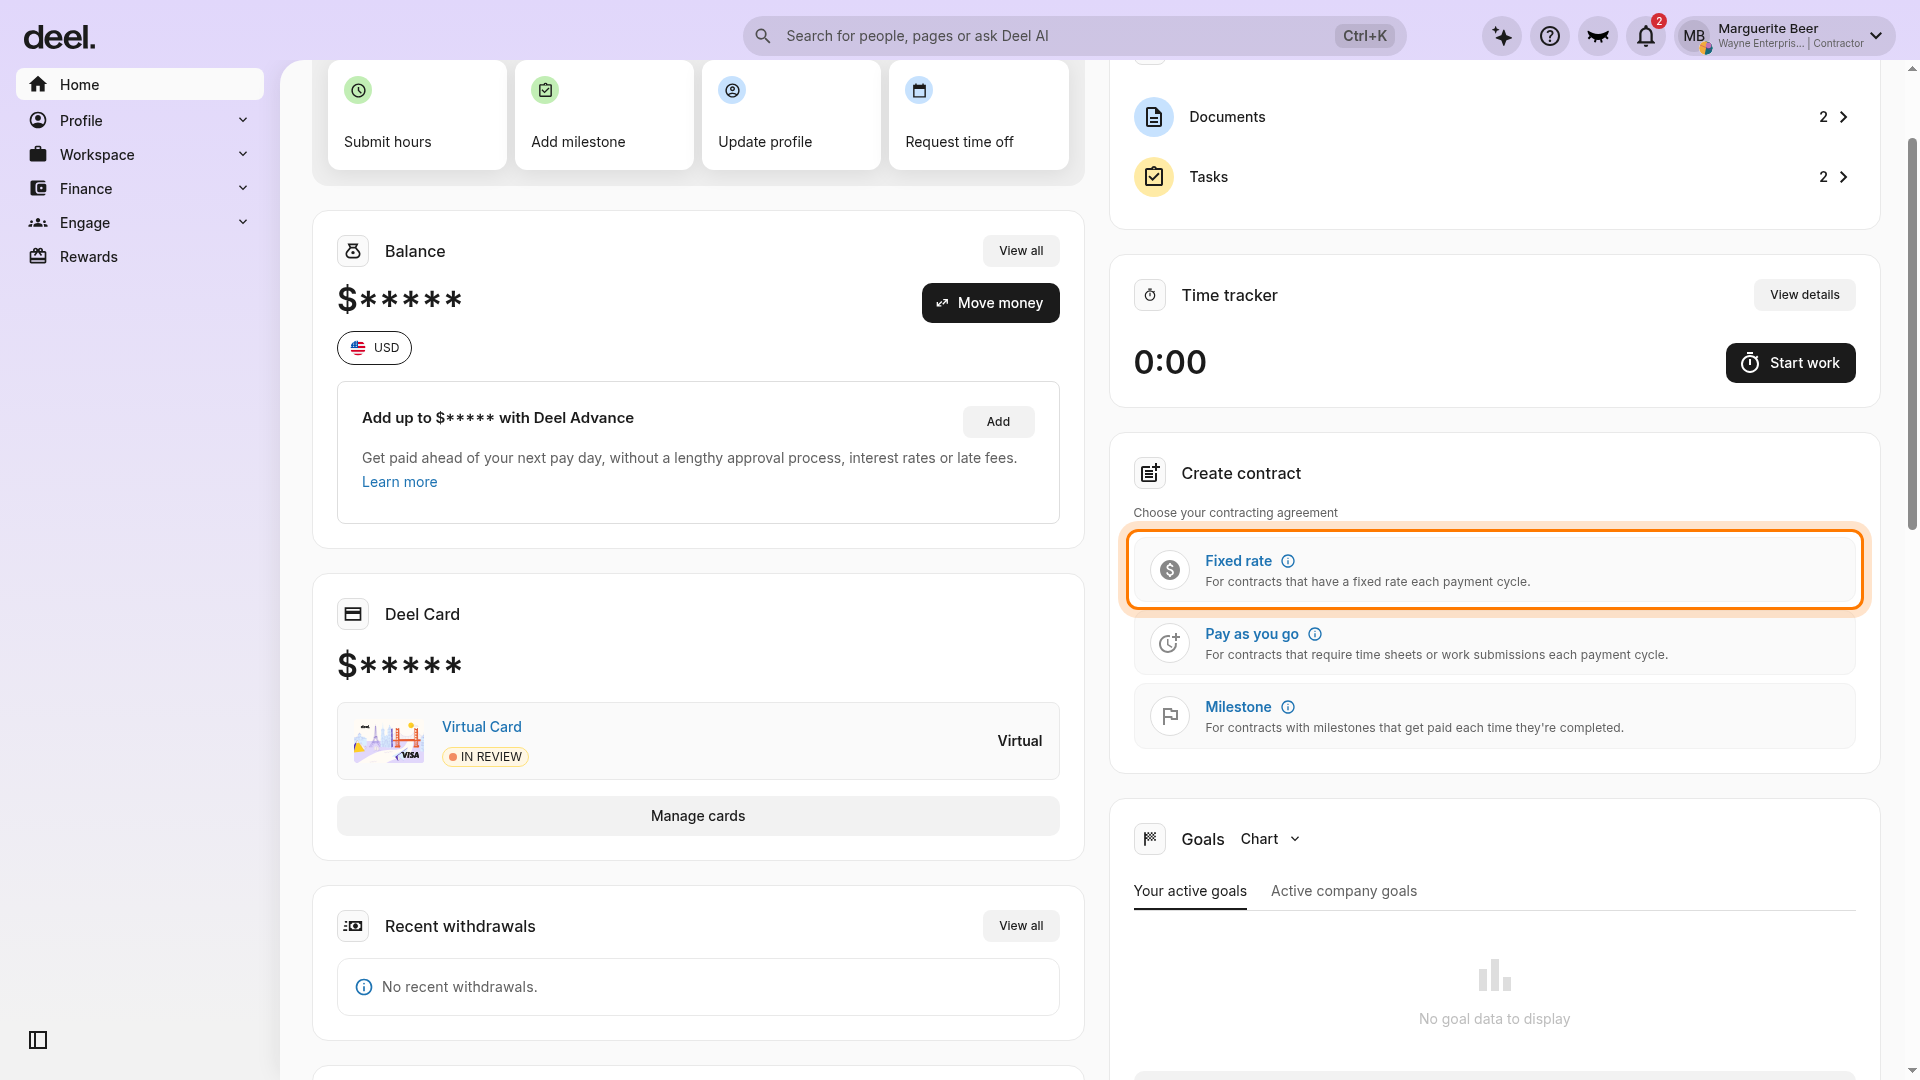
On the Home dashboard, scroll to the Create contract card. Under Choose your contracting agreement, select Fixed rate, then choose For contracts that have a fixed rate each payment cycle.
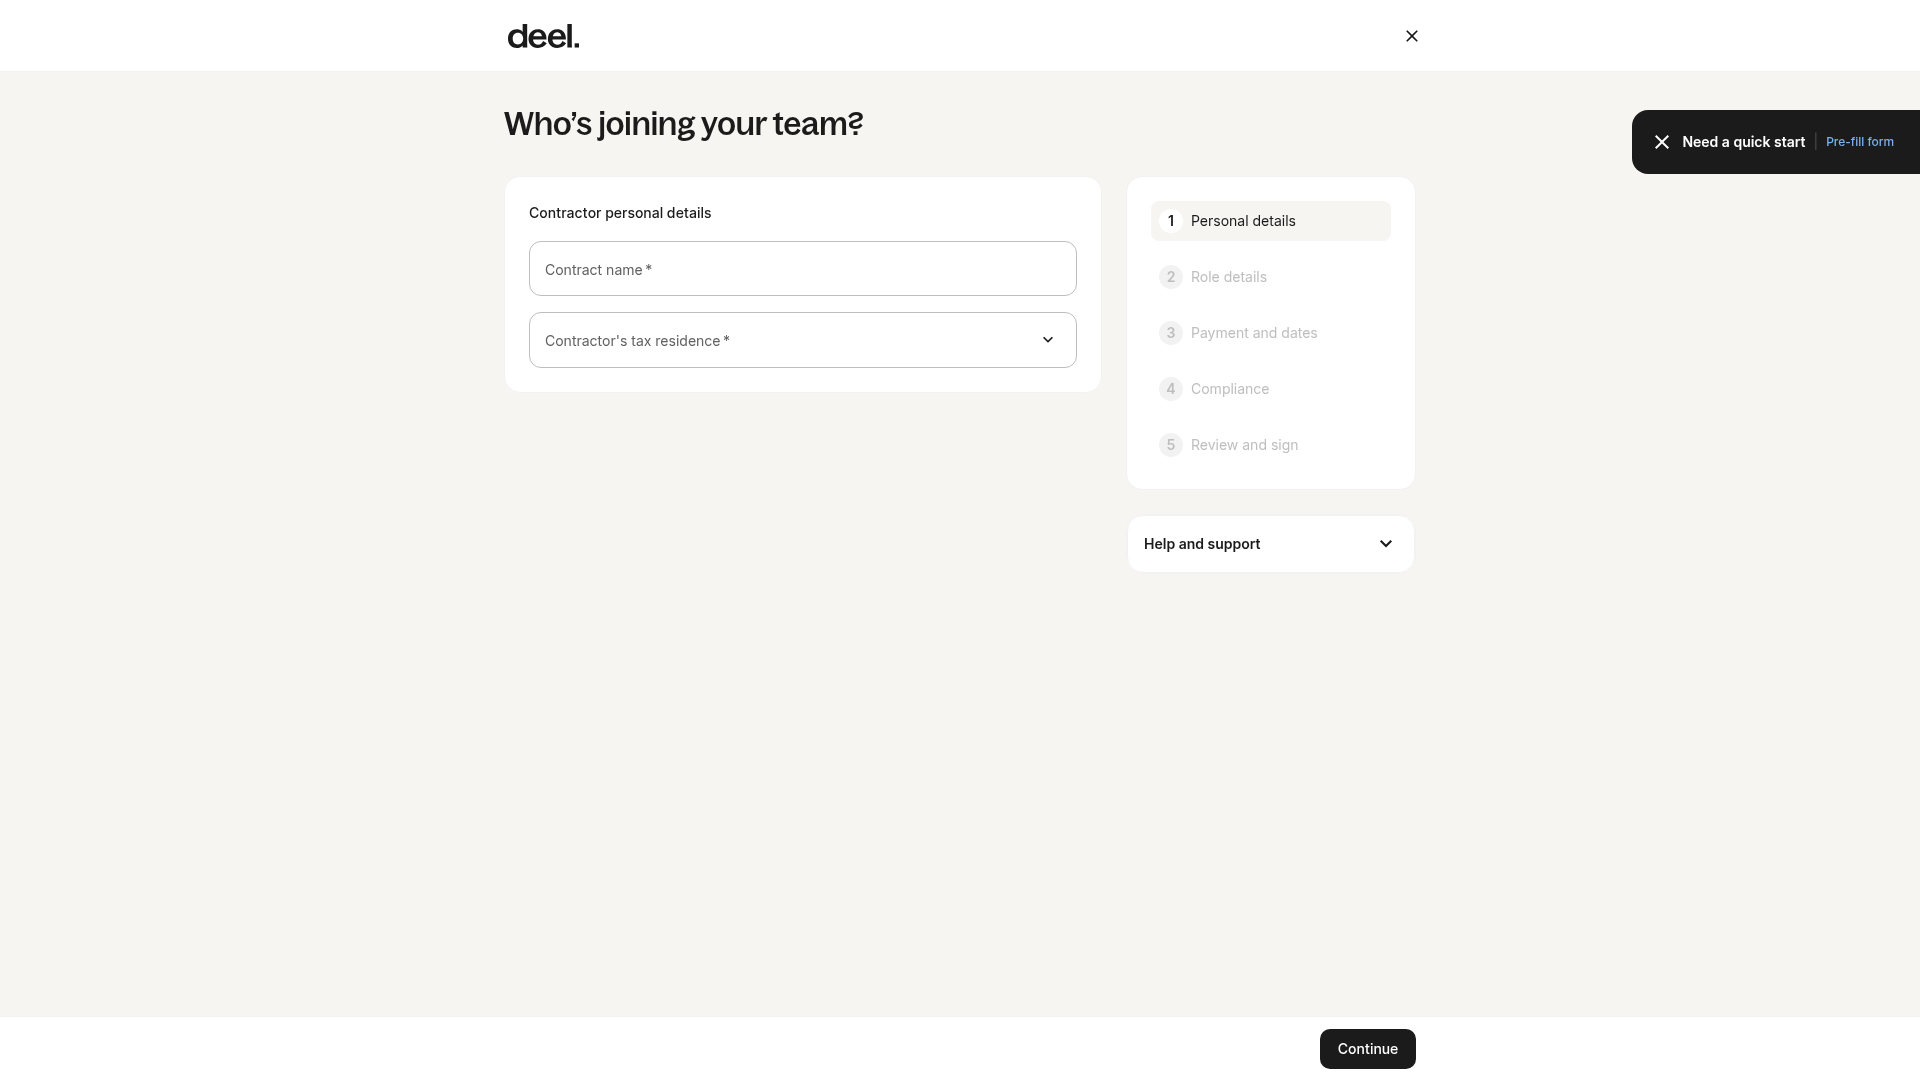
The contract creation form opens automatically. Verify that the heading reads Who’s joining your team?, the form shows Contractor personal details, and 1 Personal details is active, followed by Role details, Payment and dates, Compliance, and Review and sign. Verify that the required Contract name and Contractor's tax residence fields are visible.
✅ Step 2 - Enter personal details
Enter a contract name and the tax residence.
✅ Step 3 - Enter role details
Provide some basic information about the role, including Role Description and Scope of Work.
✅ Step 4 - Define payment and date details
Select the payment currency and the payment frequency: Weekly, bi-weekly, semi-monthly, or monthly.
Every week, select a day when the payment is due
Every two weeks, select a day when the payment is due every other week
Every month, select the last day of the month or any other specific date as the payment due date.
Twice per month - select the 15th and the last day of the month, or two specific dates as payment due dates.
If you want to absorb the platform fee on behalf of your client, you can ask them to include it in your contract.
Clients can do this in two ways:
- During contract creation: by adding the SaaS fee as a recurring item.
- After the contract is active: by adding it as an adjustment in the next payment cycle.
At this time, contractors can’t add this fee themselves, it must be added by the client.
✅ Step 5 - Add first payment details
Choose the date to receive the first payment, and how the first payment amount will be calculated.
For the first payment, select to receive the full amount or a custom amount:
- Full Amount: Receive the full weekly amount for the first payment, regardless of the start date.
- Custom Amount: Receive the customized amount entered for the first payment.
A notice period can be created where either party can terminate the contract after the designated notice period. Contractors can also choose a date to terminate the contract.
✅ Step 6 - Upload contract
Opt to upload a custom pre-signed contract, or use Deel's standard contract that is locally compliant.
Note: If a contractor is using their own custom contract, please ensure the PDF has been signed before uploading.
✅ Step 7 - Create the contract
Add any additional document or/and special clause, and select Create Contract.
How to Create a Pay As You Go Contract
✅ Step 1 – Select a contract type
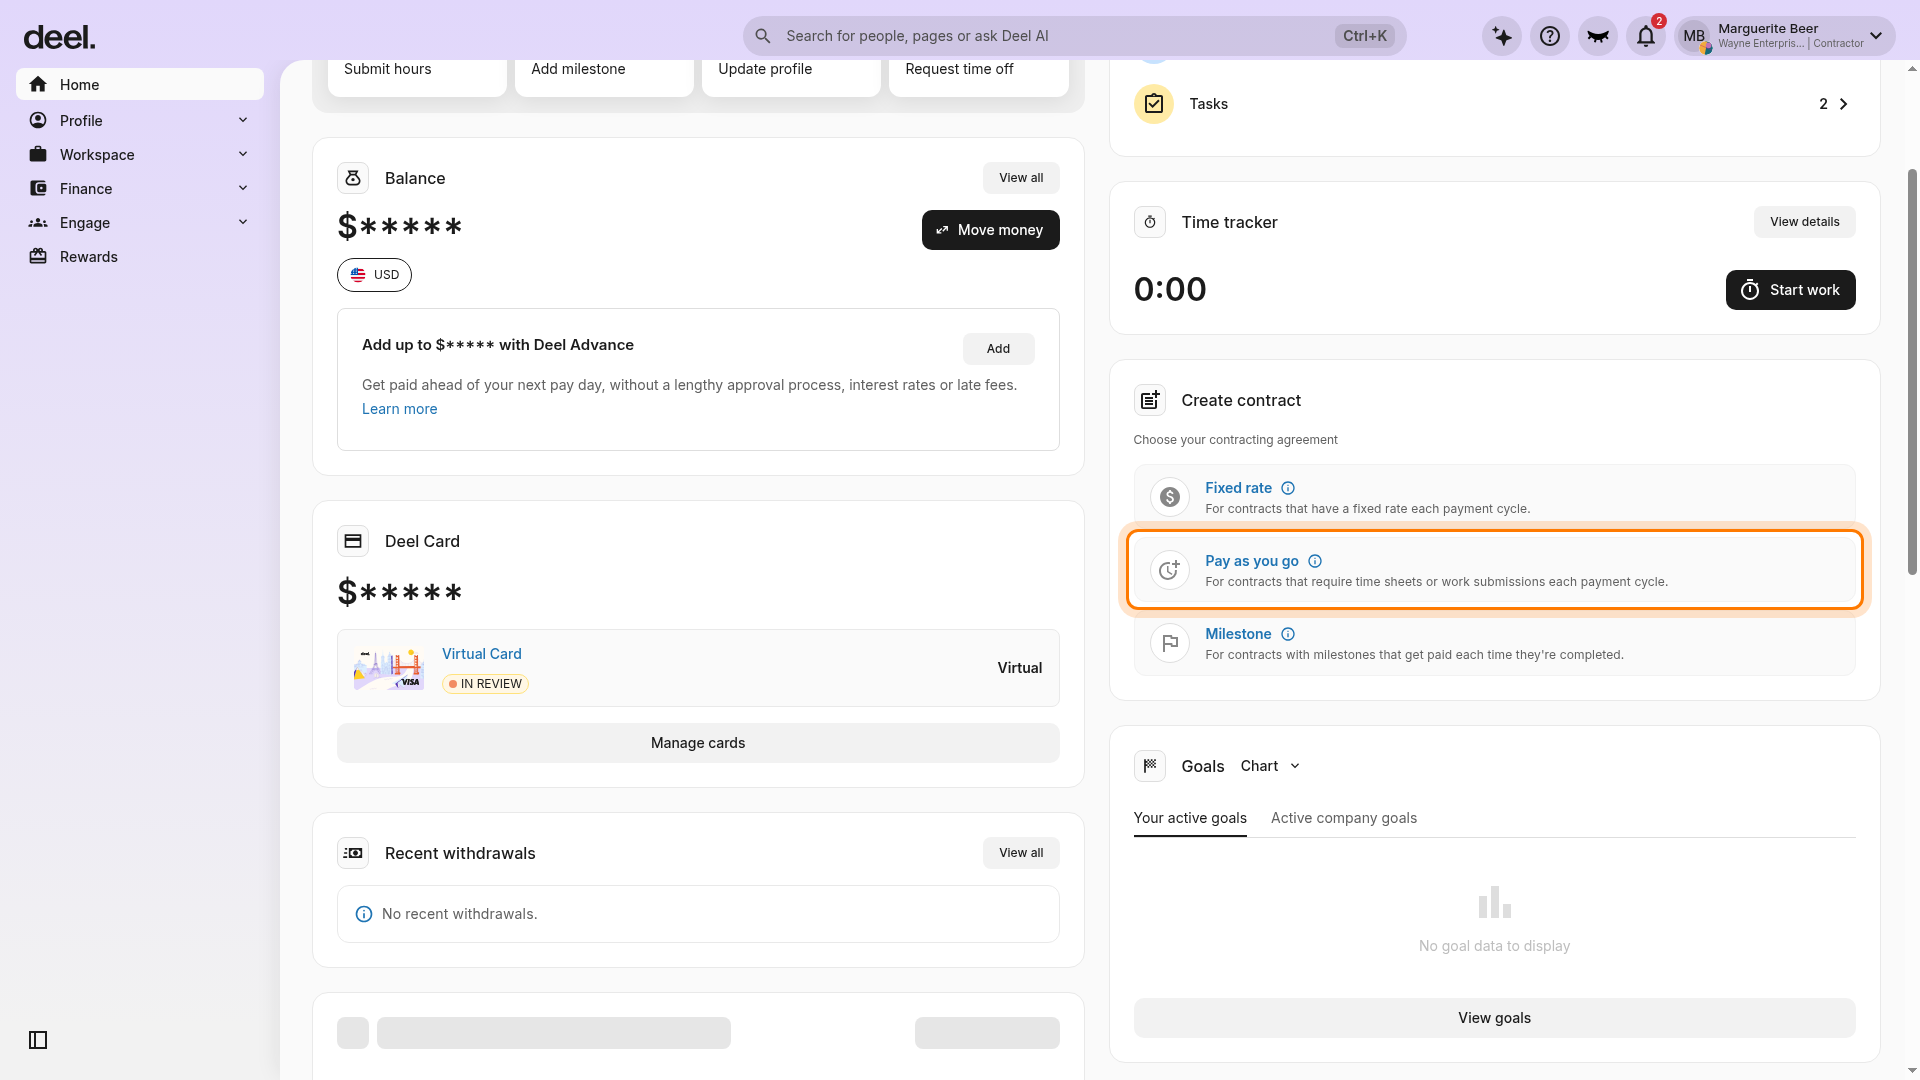
On the Home dashboard, scroll to the Create contract card. Under Choose your contracting agreement, select Pay as you go, then choose For contracts that require time sheets or work submissions each payment cycle. The contract creation form opens automatically.
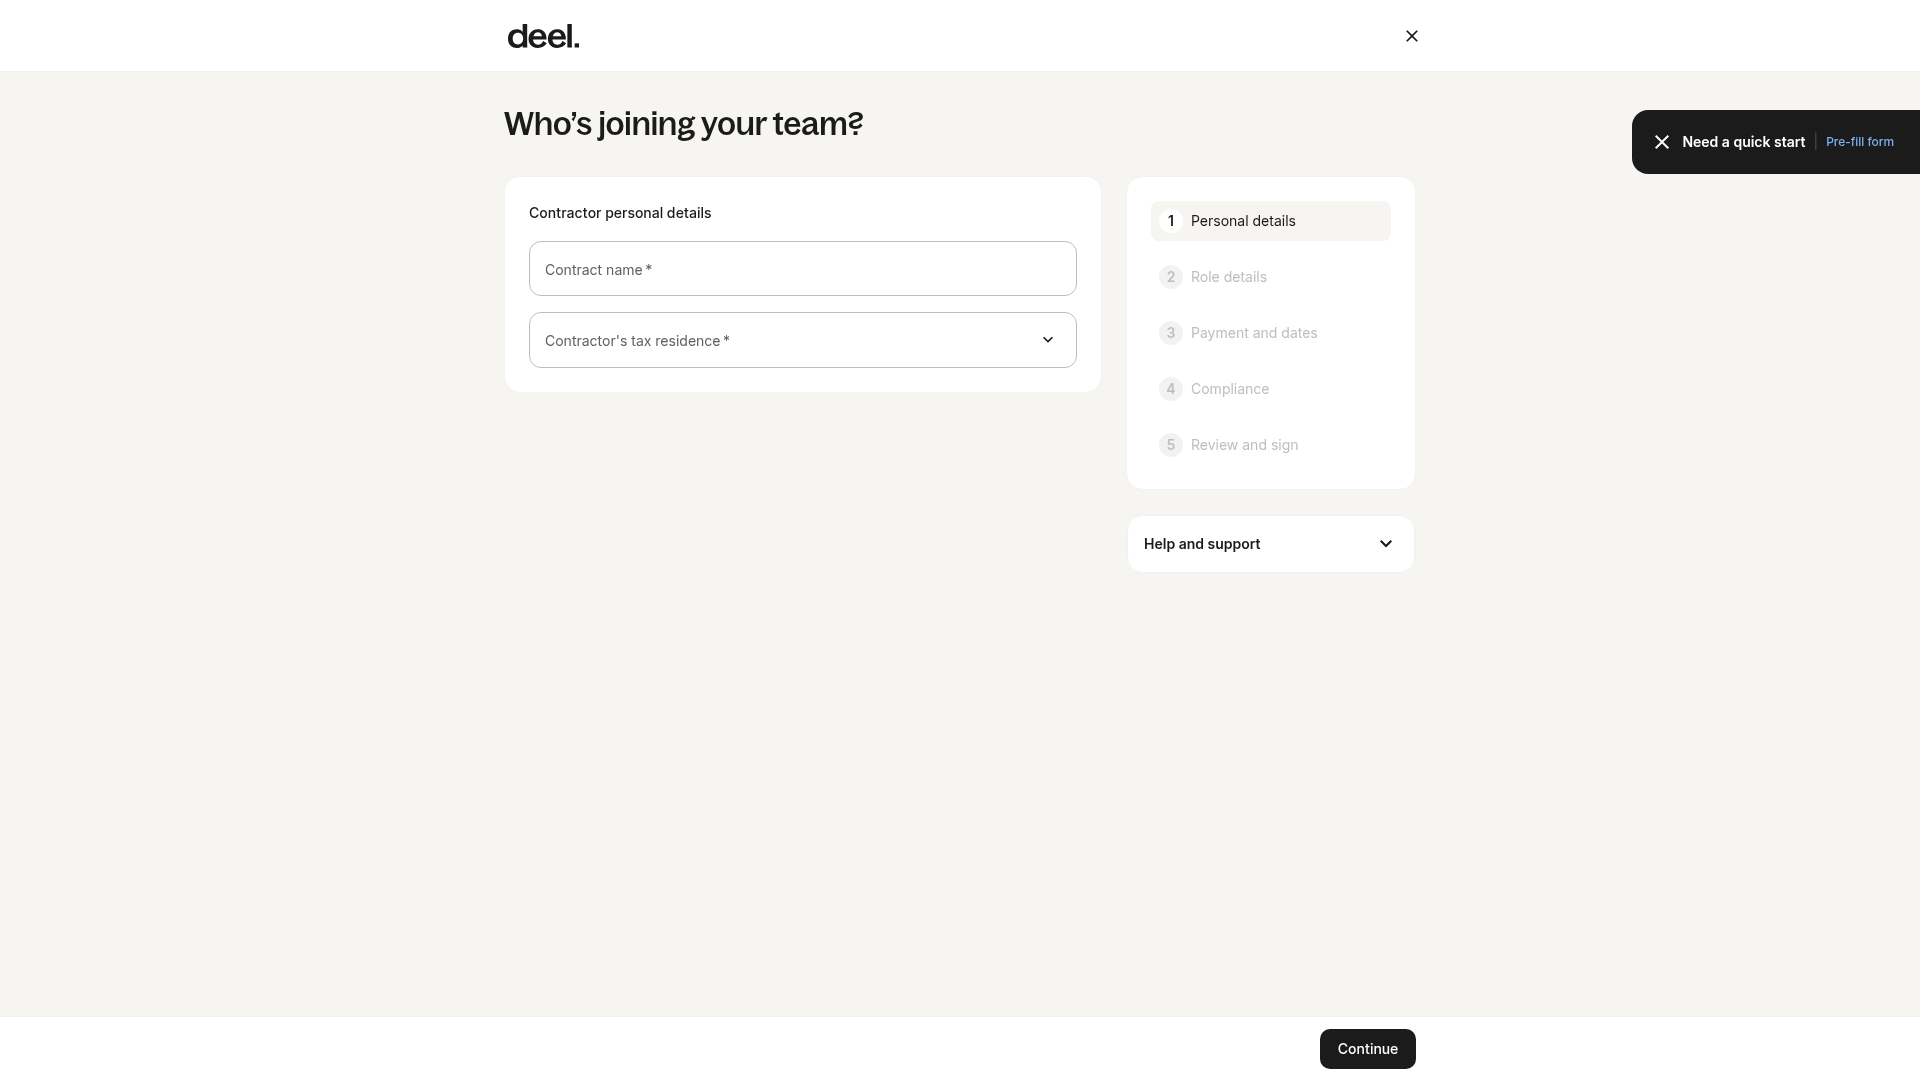
Verify the heading Who’s joining your team? and the Contractor personal details section. Verify the required Contract name and Contractor's tax residence fields, and that 1 Personal details is active, followed by Role details, Payment and dates, Compliance, and Review and sign.
✅ Step 2 - Enter details
Enter a contract name and the tax residence.
✅ Step 3 - Enter role details
Provide some basic information about the role, including Role Description and Scope of Work. Also, define who can submit the work: the client, the contractor, or both. Toggle to select a preferred option.
✅ Step 4 - Define when the contract will be paid and the invoice cycle
Define whether the contract will be paid per task or at a fixed rate.
Define the invoicing cycle: weekly, biweekly, semimonthly, or monthly.
Note: Covering the Platform Fee
If you want to absorb the platform fee on behalf of your client, you can ask them to include it in your contract.
Clients can do this in two ways:
- During contract creation: by adding the SaaS fee as a recurring item.
- After the contract is active: by adding it as an adjustment in the next payment cycle.
At this time, contractors can’t add this fee themselves, it must be added by the client.
✅ Step 5 - Select the start date and first payment date
Select the start date and first payment date. A notice period can be created where either party can terminate the contract after the designated notice period. Contractors can also choose a date to terminate the contract.
✅ Step 6 - Upload contract
Opt to upload a custom pre-signed contract, or use Deel's standard contract that is locally compliant.
Note: If a contractor is using their own custom contract, please ensure the PDF has been signed before uploading.
✅ Step 7 - Create the contract
Add any additional document or/and special clause, and select Create Contract.
How to Create a Milestone Contract
✅ Step 1 – Select a contract type
In the left sidebar, select Home. If the sidebar section containing Home is collapsed, select its section header to expand it, then select Home. On the Home dashboard, scroll to Create contract. Under Choose your contracting agreement, select Milestone.
✅ Step 2 - Enter details
Enter a contract name and the tax residence.
✅ Step 3 - Enter role details
Provide some basic information about the role, including Role Description, Scope of Work and Payment Currency.
✅ Step 4 - Provide milestone details
For each milestone, enter the milestone title, description (optional but recommended), due date (optional), and amount and currency. Select Add a milestone to include additional milestones.
✅ Step 5 - Select the start date and first payment date
Select the start date and first payment date. A notice period can be created where either party can terminate the contract after the designated notice period. Contractors can also choose a date to terminate the contract.
✅ Step 6 - Upload contract
Opt to upload a custom pre-signed contract, or use Deel's standard contract that is locally compliant.
Note: If a contractor is using their own custom contract, please ensure the PDF has been signed before uploading.
✅ Step 7 - Create the contract
Add any additional document or/and special clause, and select Create Contract.
How to Sign a Contract
In the left sidebar, select Contracts. If its sidebar section is collapsed, select the section header to expand it, then select Contracts. Locate the draft contract and select Review & Sign. Review the contract, then select Sign. Next, the contractor can invite the client to sign as well.
Optional: Click Switch Signing Order to have the client sign first.
The contract will only be activated when both parties have signed.
FAQs
[ACCORDION] Can contractors add more than one milestone to their contract?
Yes. While creating the milestone details for the contract, contractors will see the option to Add A Milestone, where they can add more milestones.
That can also be done via Contracts in the left sidebar. If needed, expand the relevant sidebar section first, then select Contracts.
[ACCORDION] Can a contractor delete a specific clause in the Deel contractor contract?
Yes, contractors can delete a clause in a contractor generated contract. If they opt to customize the contract, the edited version will take the place of the Deel contractor contract.
Deel's contractor contracts in each region have been rigorously reviewed by local lawyers to minimize as much risk as possible when working with contractors in that region. While it's completely up to the contractor to choose whether to edit a contract or not, we recommend leaving it as is to remain as compliant as possible.
After selecting to Review and Sign the contract, contractor will have the option to Create a New Contract Template. The new template will include the content of the Deel contractor contract as a starting point. Contractors may edit the customizable template as needed, including the removal of clauses. After saving and appling the changes, the new contract template will be used in place of the Deel contractor contract.
[ACCORDION] How can a contractor cancel a contract?
From Contracts in the left sidebar, click on the three dots next to the contract to be cancelled, and then select Cancel Contract. Contractors will be given the option to delete it after the cancellation process is complete.
[ACCORDION] When does a contract become active?
The contract will only be activated when both parties have signed.