
Deel ATS integrates with your organization’s Microsoft Outlook account to make candidate email management seamless and secure. By connecting through Microsoft Azure, you can centralize email handling, streamline authentication, and ensure that all communications are sent directly from your company’s Outlook accounts within Deel ATS.
This article explains how to connect your organization’s Microsoft Azure account to Deel ATS to enable Outlook email integration.
Before you begin
You must be:
- A user with an org or ATS admin role on Deel who can view ATS settings and email-management options.
- A user with a Global Administrator role on Microsoft Azure.
To set up automatic secret rotation (optional), you also need:
- The Azure CLI installed on your computer.
- A Microsoft Entra work or school tenant. Automatic secret rotation cannot be set up with a personal Microsoft account.
Workflow
Step 1 - Get a Microsoft Entra client ID and tenant ID
- In the Microsoft Azure portal, search for Microsoft Entra ID (formerly Azure Active Directory).
- On the Entra ID overview page, select Add > App registration.
- Name the app and select Register.
- On the app details page, copy the Application (client) ID and Tenant ID.
Step 2 - Get a Microsoft Azure private key
- On the app homepage, go to Certificates & secrets > Client secrets.
- Select New client secret.
- Enter a description, choose an expiration date, and select Add.
- Copy the generated client secret.
Step 3 - Customize API permissions
- Go to the app’s API permissions tab.
- Remove any default configured permissions.
- Select Add a permission > Microsoft Graph > Application permissions.
- Add the following permissions:
| API | Permission name | Type | Description |
|---|---|---|---|
| Mail.ReadWrite | Application | Read and write access to mail | |
| Mail.Send | Application | Send mail as any user |
- On the API permissions page, under Configured permissions, grant admin consent for the default directory.
Step 4 - (Optional) Prepare the app for automatic secret rotation
Client secrets in Microsoft Entra expire. When the client secret expires, Deel ATS can no longer send or sync email until someone enters a new one.
With automatic secret rotation, Deel creates a replacement client secret before the current one expires and switches to it without interrupting email sync. This step gives your Azure app the access Deel needs to do this.
If you prefer to replace the client secret manually, skip to Step 5.
Step 4a - Grant the rotation permission
Deel creates each replacement secret by calling the Microsoft Graph addPassword API on your app registration. This requires the Application.ReadWrite.OwnedBy application permission.
- On the app’s API permissions tab, select Add a permission > Microsoft Graph > Application permissions.
- Add the following permission:
| API | Permission name | Type | Description |
|---|---|---|---|
| Application | Application.ReadWrite.OwnedBy | Application | Manage apps that this app creates or owns |
- Under Configured permissions, select Grant admin consent for your tenant, and confirm that the permission shows as granted.
Step 4b - Make the app an owner of itself
The Application.ReadWrite.OwnedBy permission only lets an app manage app registrations it owns. Granting the permission is not enough on its own: the app’s own service principal must also be an owner of its app registration.
The Owners page in the Azure portal only accepts users, so you must add this owner with the Azure CLI. You need two different object IDs:
| Value | Where to find it |
|---|---|
| App registration object ID | App registrations > your app > Overview > Object ID. This is not the Application (client) ID. |
| Service principal object ID | Enterprise applications > your app > Overview > Object ID. This is a different value from the app registration object ID. |
- Sign in to your tenant with the Azure CLI:
az login --tenant <tenantId> --allow-no-subscriptions
- Add the service principal as an owner of the app registration:
az ad app owner add \
  --id <appRegistrationObjectId> \
  --owner-object-id <servicePrincipalObjectId>
- Confirm that the service principal is now an owner. The output must include the service principal object ID:
az ad app owner list --id <appRegistrationObjectId> --query "[].id"
Step 4c - Check your tenant’s client secret lifetime policy
Deel creates each replacement secret with a lifetime of about six months. If your tenant has an app management policy that limits client secret lifetimes, the limit must be at least 184 days. Otherwise, Microsoft rejects every replacement secret and rotation cannot succeed.
If such a policy applies to your tenant, do one of the following:
- Exempt this app registration from the policy.
- Raise the limit to at least 184 days.
- Leave automatic secret rotation turned off and replace the client secret manually.
Step 5 - Connect your Microsoft Outlook account to Deel ATS
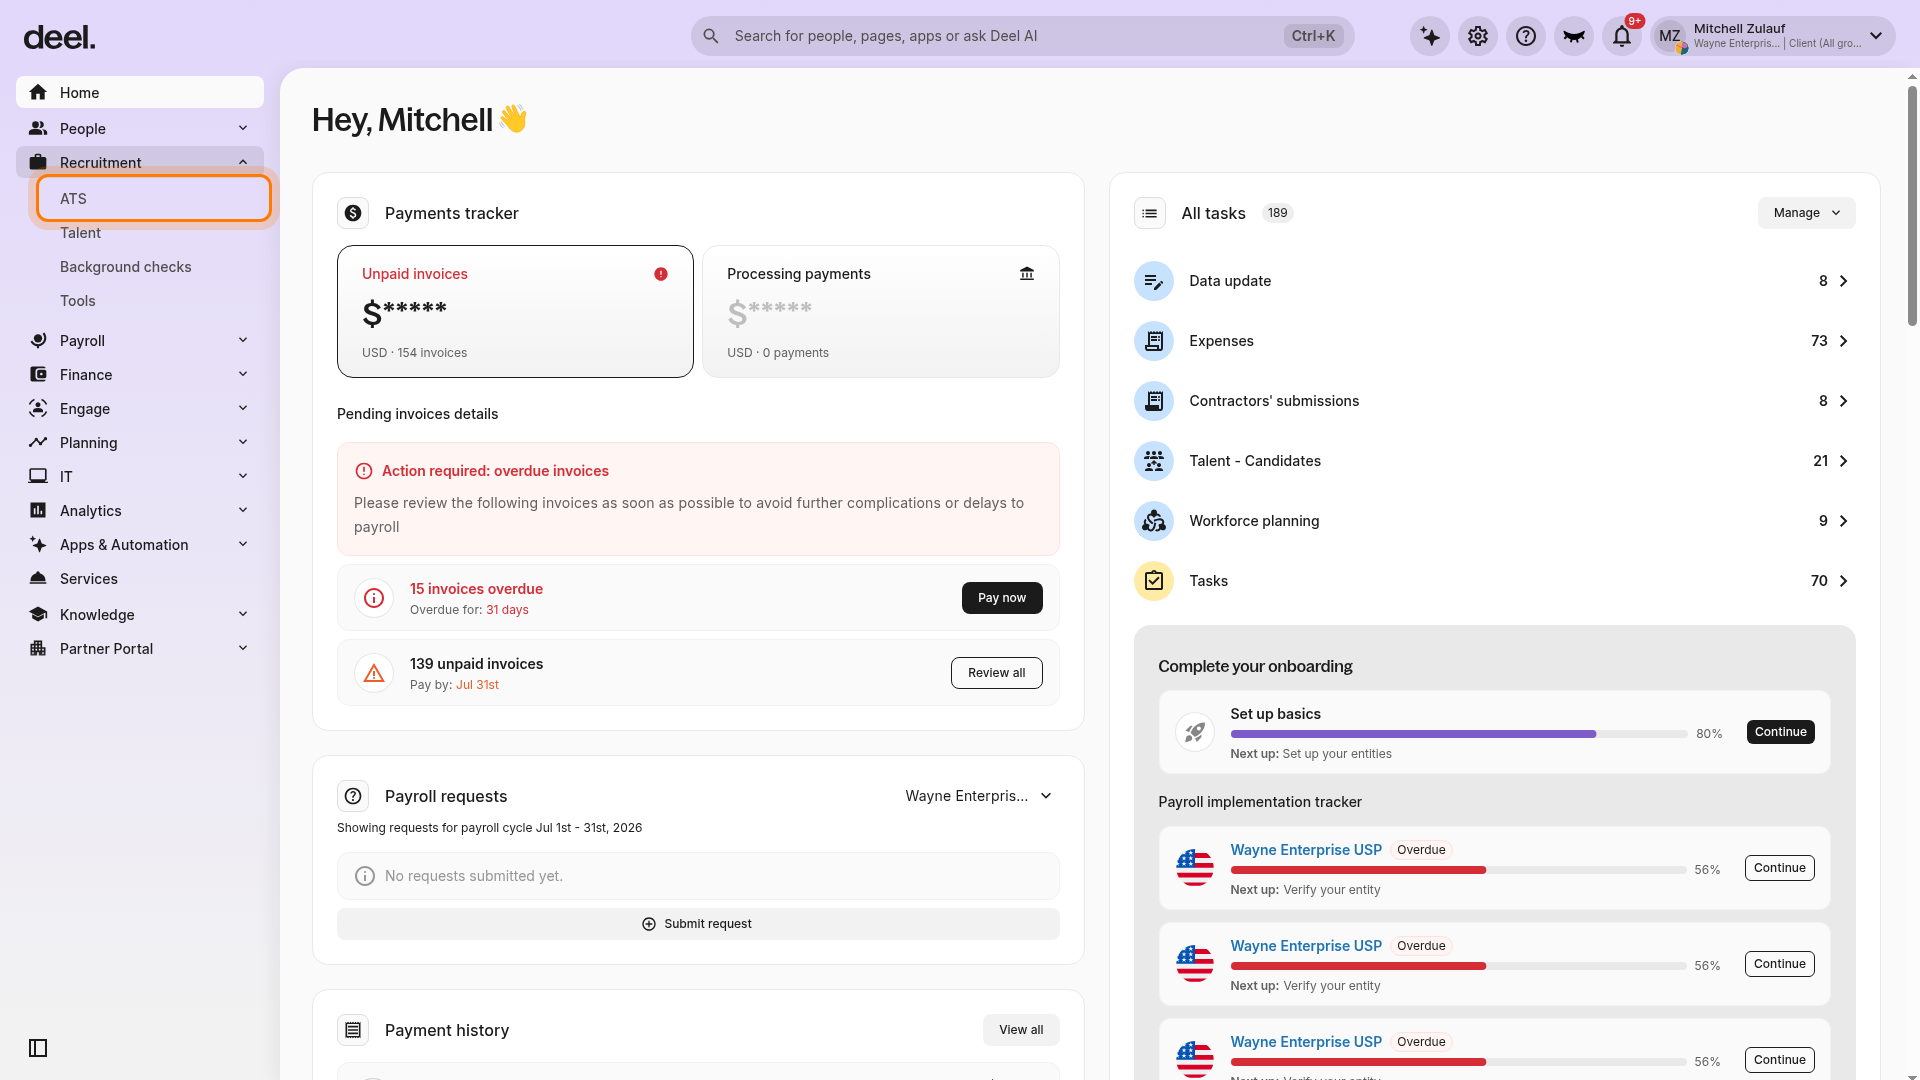
- In Deel’s left sidebar, select Recruitment to expand its submenu.
- Select ATS.
- If an announcement dialog appears over the ATS page, close it using the X in its upper-right corner.
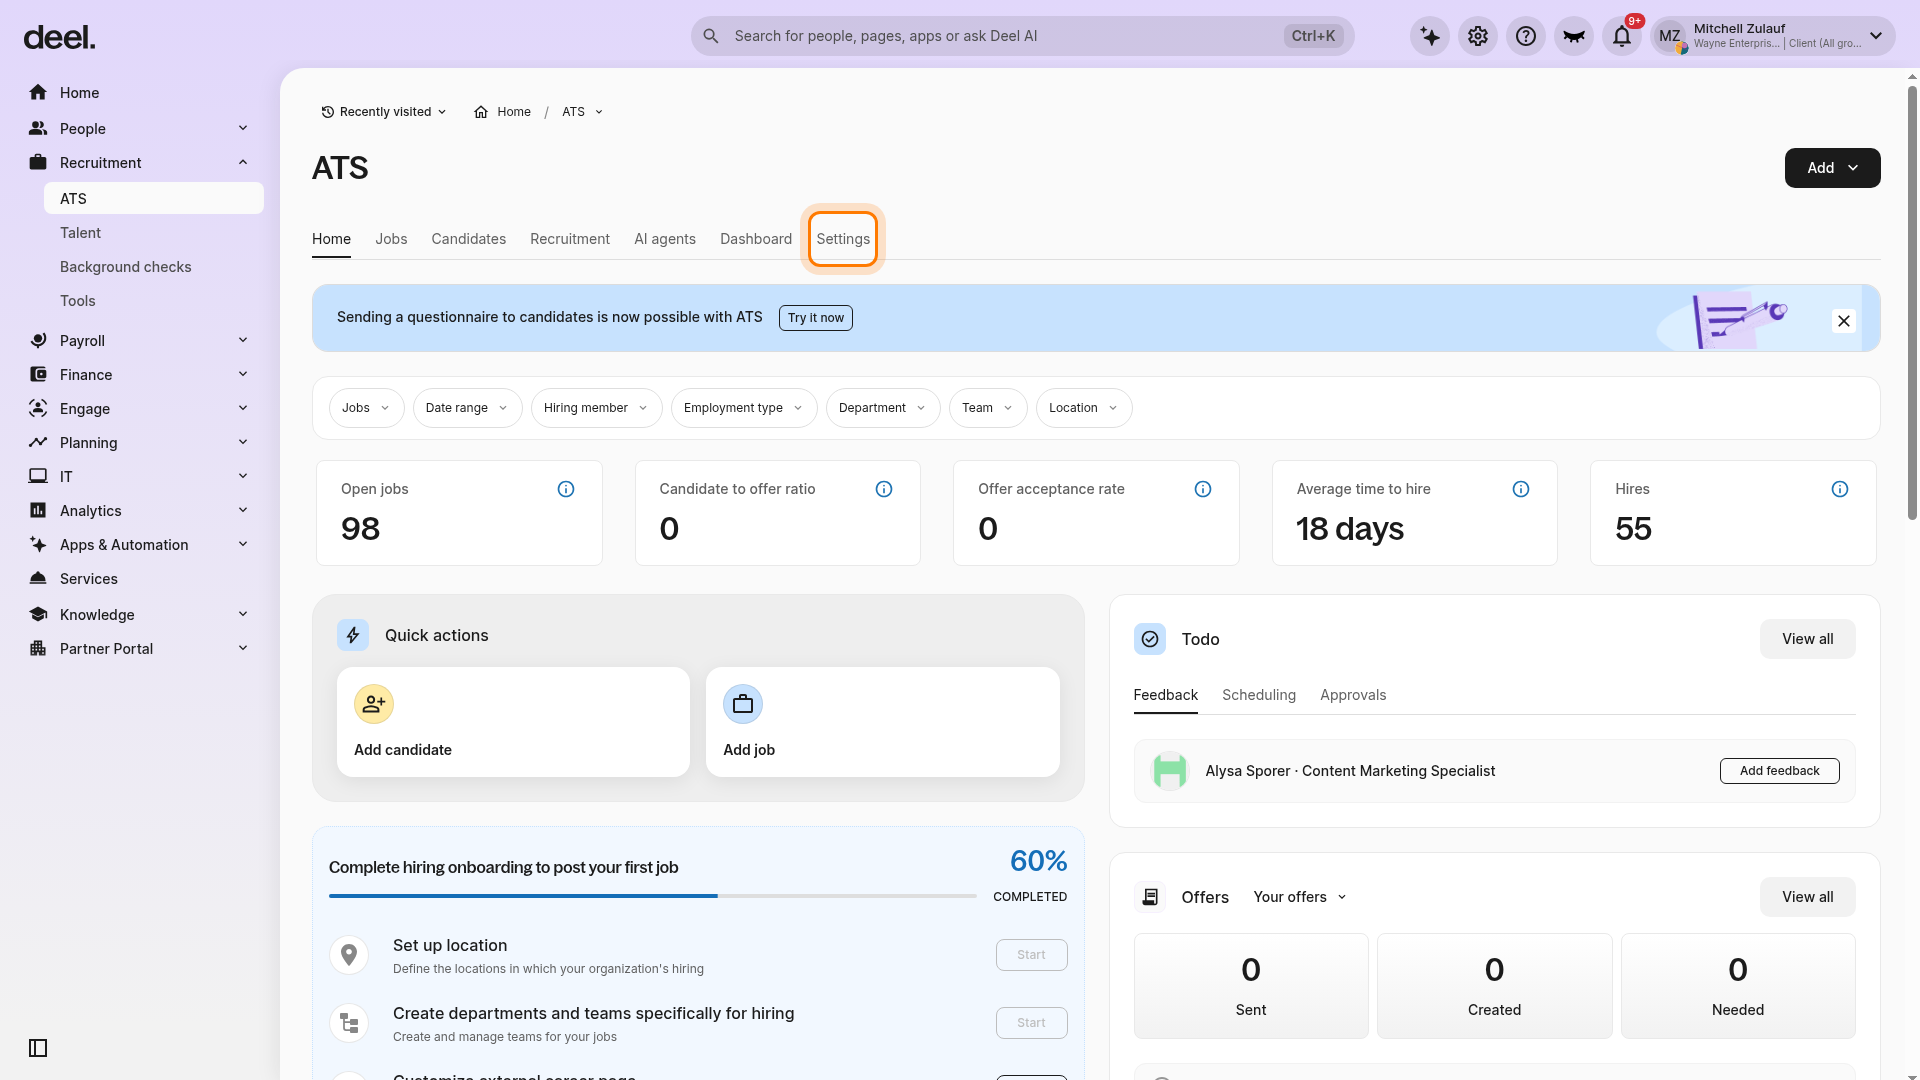
- In the ATS workspace, select the Settings tab in the horizontal ATS navigation.
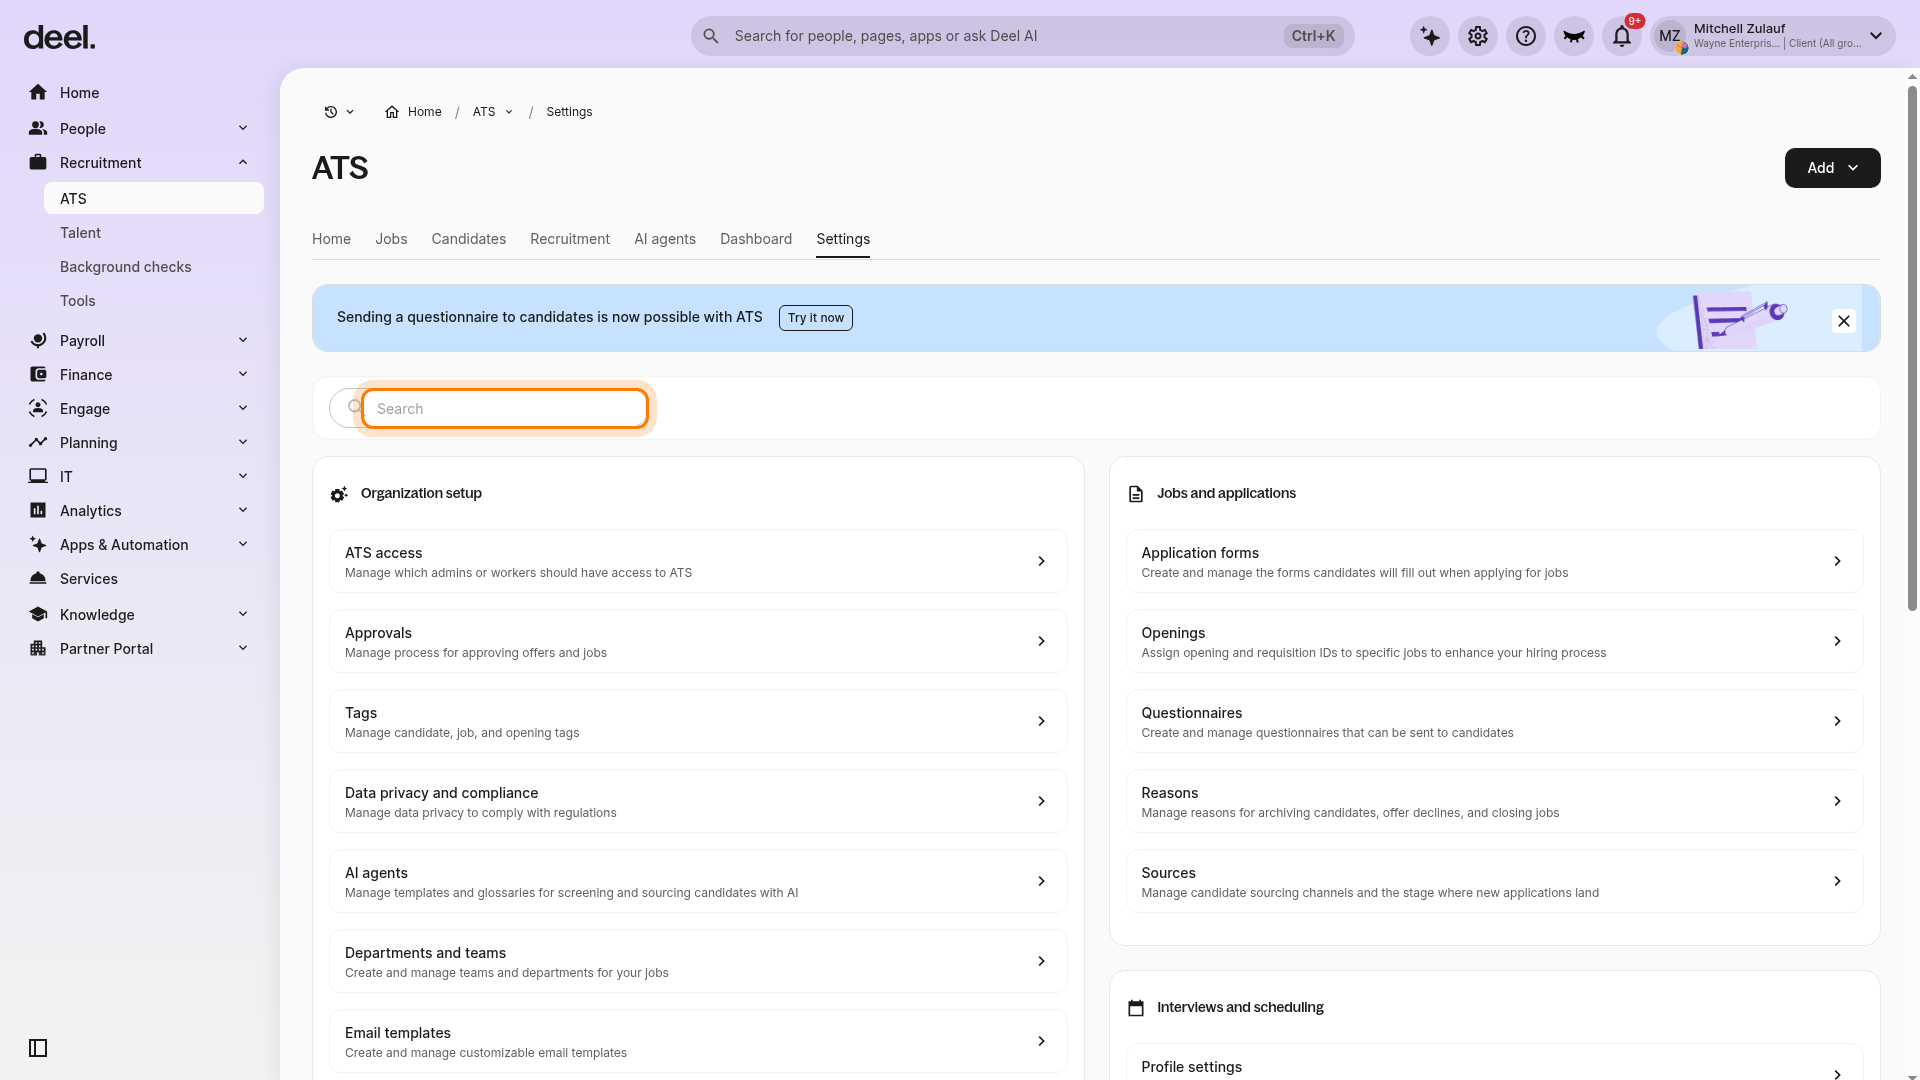
- In the Settings catalog, use the Search field to search for Email Management.
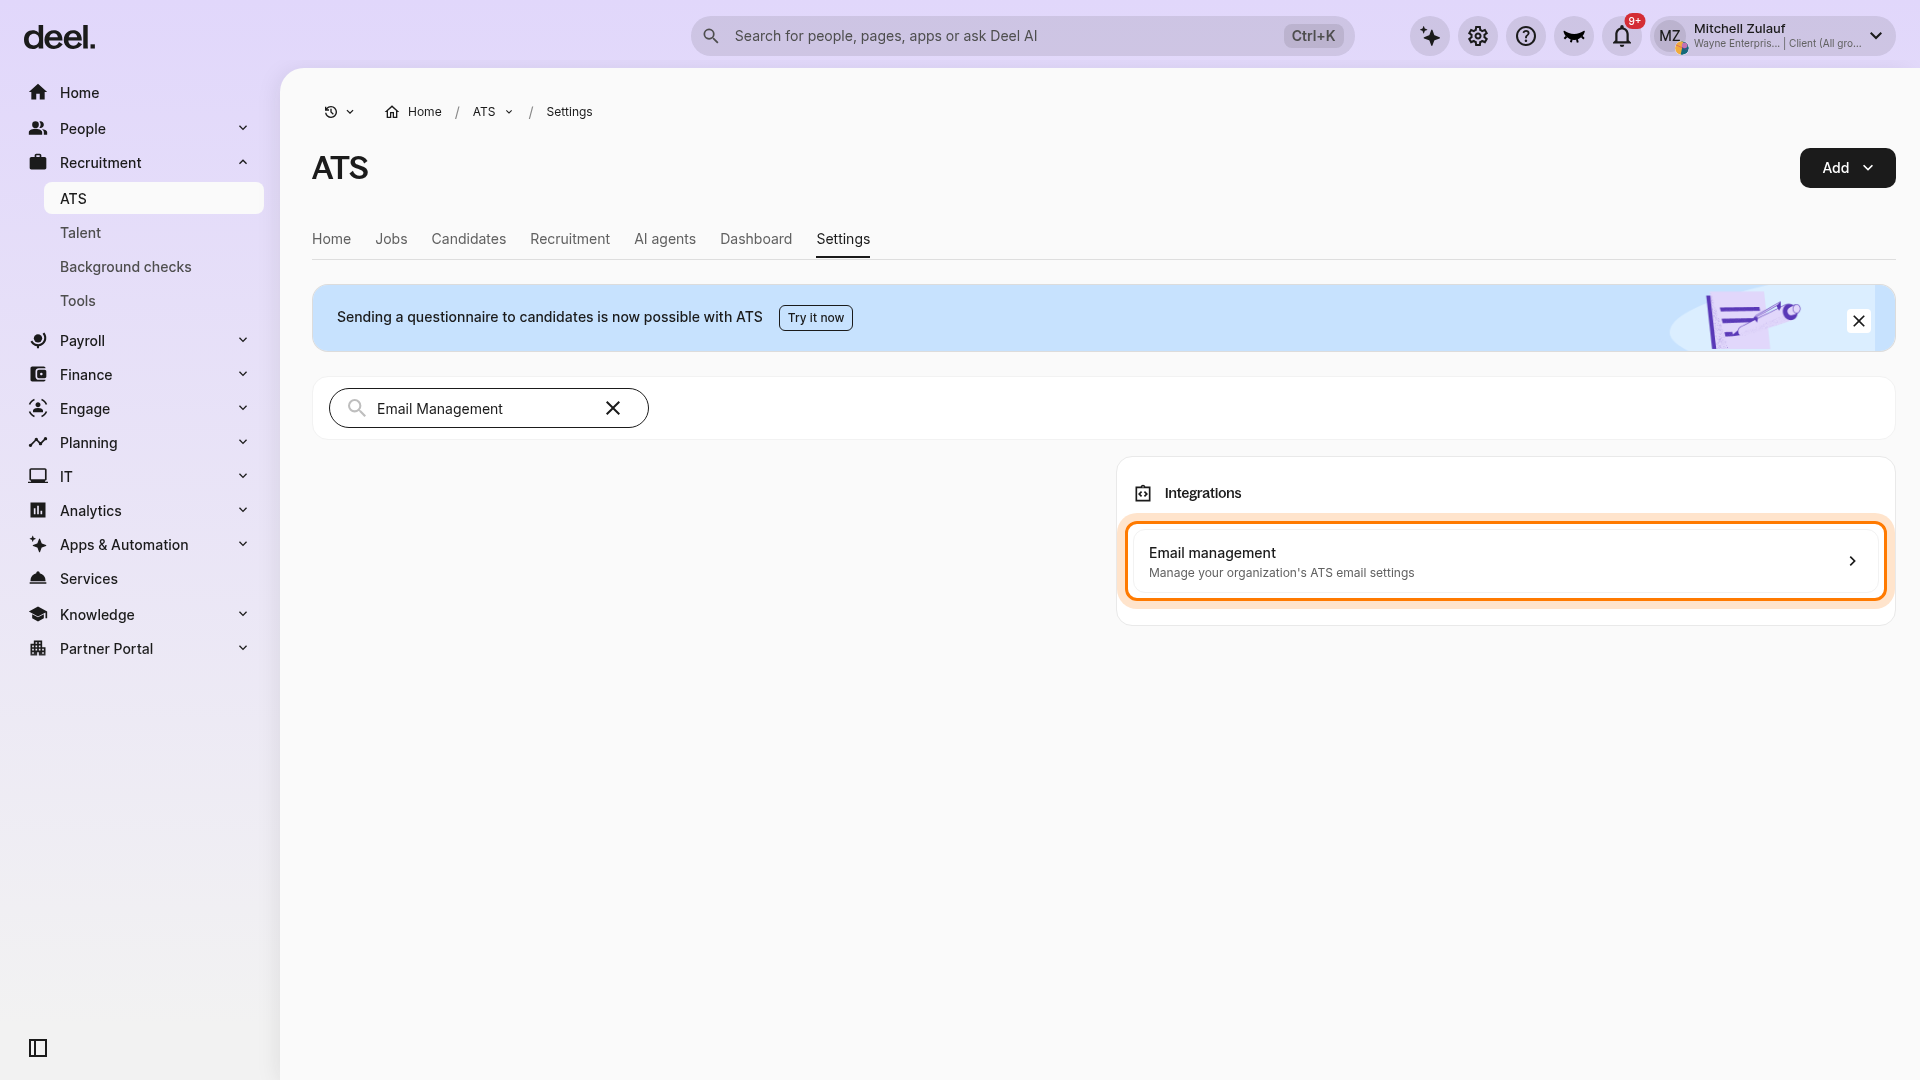
- Select the Email management result.
- It is listed with the description, “Manage your organization’s ATS email settings.”
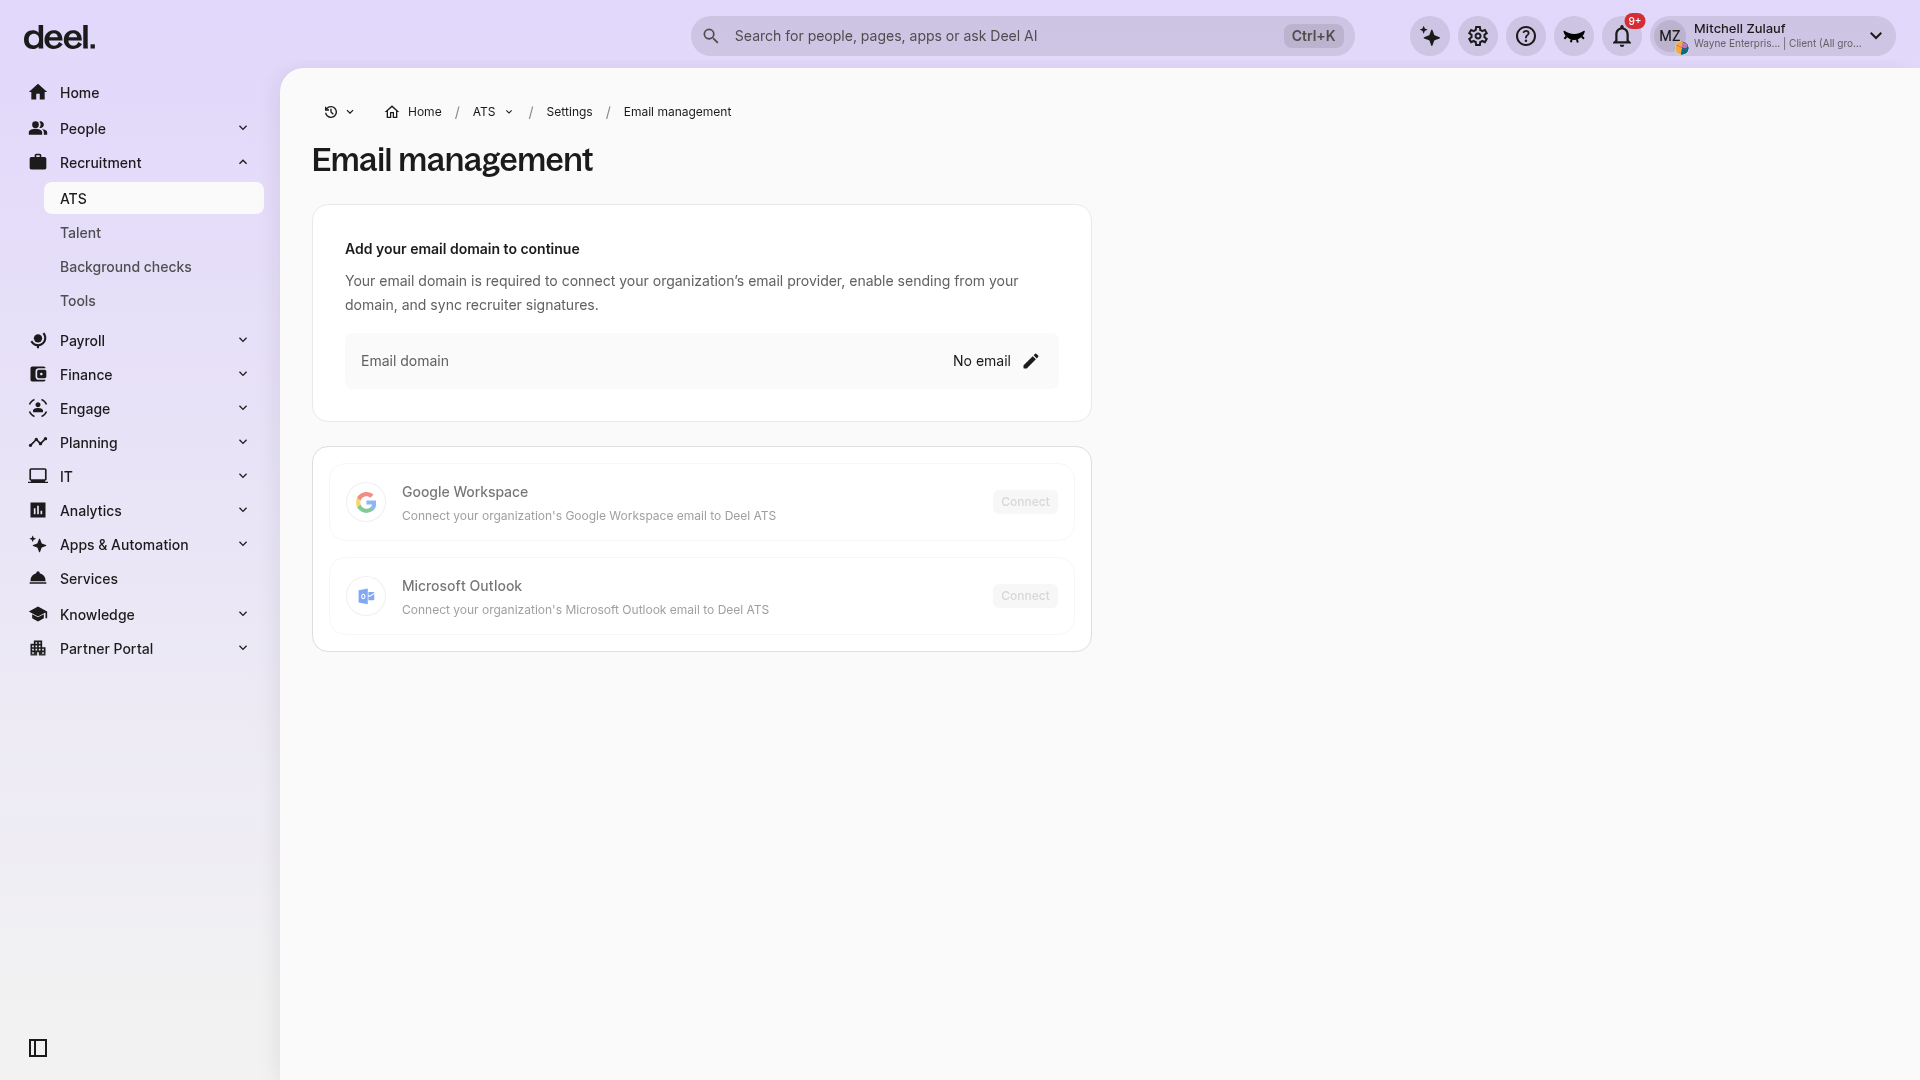
- Confirm that the page heading is Email management and the breadcrumb shows Home / ATS / Settings / Email management.
- Depending on your organization’s configuration, add an email domain if prompted before provider connections are available.
- Under Microsoft Outlook, select Connect.
- Enter the Tenant ID, Client ID, and Client Secret you generated in the previous steps.
- If you completed Step 4, turn on Automatic secret rotation. Otherwise, leave it off.
- Select Submit.
When Automatic secret rotation is on, Deel verifies your Azure setup before saving the connection. To do this, it creates a temporary client secret named Deel ATS rotation probe and removes it immediately. If the setup is incomplete, the connection is not saved and an error message explains what is missing. See Troubleshooting automatic secret rotation.
Once complete, Deel ATS can send and manage candidate emails through your organization’s Microsoft Outlook account.
Troubleshooting
| Problem | Did you try? | How to fix |
|---|---|---|
| The Settings tab is unavailable | Confirm that the ATS workspace has finished loading after you select ATS. | Close any announcement dialog covering the page, then select Settings again. |
| Email management does not appear in the Settings catalog | Search for Email Management using the Settings Search field. | Select the result labeled Email management; the second word uses a lowercase “m.” |
| The Email management option is missing after searching | Your role may not have permission to view ATS email settings. | Contact an administrator to confirm that you have the required ATS settings access. |
Appendix: Automatic secret rotation
Automatic secret rotation is available for both Microsoft integrations in Deel ATS: the Microsoft Outlook email integration and the Microsoft Azure interview scheduling integration. It works the same way for both, but each integration has its own client secret and its own rotation setting.
| Integration | Where to manage it |
|---|---|
| Microsoft Outlook email integration | ATS Settings > Email management > Microsoft Outlook card |
| Microsoft Azure interview scheduling integration | ATS Settings > Interview settings > Microsoft Azure card |
The actions described below are in the menu on the integration’s card.
How automatic secret rotation works
When automatic secret rotation is on:
- About seven days before the current client secret expires, Deel creates a replacement secret on your app registration. The replacement secret is valid for about six months.
- Deel waits about an hour for the new secret to become active in Microsoft Entra, confirms that it works, and then switches to it. The integration keeps working without interruption.
- Deel does not delete the previous secret. It stays listed under Certificates & secrets until it expires. This is expected.
- The integration’s card shows Auto-rotation on and the expiry date of the current client secret.
When automatic secret rotation is off, ATS admins receive email reminders before the client secret expires, and the integration’s card shows an alert starting 14 days before the expiry date. To avoid interrupting the integration, replace the client secret before the current one expires, as described in Replacing the client secret manually.
Turning automatic secret rotation on or off later
You can turn automatic secret rotation on for an existing connection without disconnecting the integration.
- Complete Step 4.
- On the integration’s card, select Enable automatic secret rotation.
- For the Microsoft Azure interview scheduling integration only, enter the Tenant ID, Client ID, and Client secret again, leave Automatic secret rotation turned on, and select Submit.
For the Microsoft Outlook email integration, Deel verifies your Azure setup using the credentials that are already saved, so you do not need to enter them again. For the Microsoft Azure interview scheduling integration, Deel needs the client secret again to verify your Azure setup.
To verify the setup, Deel creates a temporary client secret named Deel ATS rotation probe and removes it immediately. If the setup is incomplete, rotation stays off and an error message explains what is missing. See Troubleshooting automatic secret rotation.
To turn automatic secret rotation off, select Disable automatic secret rotation on the integration’s card. The current client secret keeps working until it expires.
Replacing the client secret manually
You can replace the client secret at any time without disconnecting the integration:
- Create a new client secret for your app, as described in Step 2.
- On the integration’s card, select Update secret.
- Enter the Tenant ID, Client ID, and the new Client secret, and select Submit.
If automatic secret rotation is paused, entering a new client secret also resumes it.
Troubleshooting automatic secret rotation
| Problem | Did you try? | How to fix |
|---|---|---|
| “Azure setup incomplete for automatic secret rotation” when turning rotation on | Confirm that Application.ReadWrite.OwnedBy shows as granted under Configured permissions. | Repeat Step 4a and Step 4b. The app must be an owner of itself. |
| “Azure tenant policy blocks creating client secrets with the required lifetime” | Check your tenant’s app management policy for a client secret lifetime limit. | See Step 4c. |
| “Microsoft Azure rejected the credentials: the client secret is expired” | Check the secret’s expiry date under Certificates & secrets. | Create a new client secret, as described in Step 2, and enter it. |
| “Microsoft Azure rejected the credentials: authentication failed” | Check that the Tenant ID, Client ID, and Client secret are correct. | Copy the values again from Step 1 and Step 2. |
| “Could not verify the Azure setup for automatic secret rotation, please try again” | Try again after a few minutes. | If the error persists, check Step 4b. An app that is not an owner of itself can also produce this error. |
Rotation is paused because creating the replacement secret failed (secret_mint_failed) |
Check Step 4a, Step 4b, and Step 4c. Microsoft refused to create the replacement secret. | Fix the configuration, then select Resume rotation on the integration’s card. Alternatively, select Update secret and enter a new client secret. |
Rotation is paused because the replacement secret couldn’t be verified (secret_promotion_failed) |
Check that no Conditional Access policy blocks app-only sign-ins (client credentials) for this app. The replacement secret was created, but it could not be used to sign in. | Fix the policy, then select Resume rotation on the integration’s card. Alternatively, select Update secret and enter a new client secret. |