
This article explains how clients can create and tailor contractors' Data Processing agreements (DPA).
A Data Processing Agreement (DPA) is an agreement between a client and a worker that outlines how personal data is processed, protected, and managed.
We’ve made staying compliant with GDPR and privacy laws around the world even more effortless.
How to Create a Data Processing Agreement
Clients can add an DPA for the following independent contractor types:
- Fixed Rate
- Pay As You Go
- Milestone
- Deel COR
- Deel Premium
✅ Step 1 - Open Custom Documents
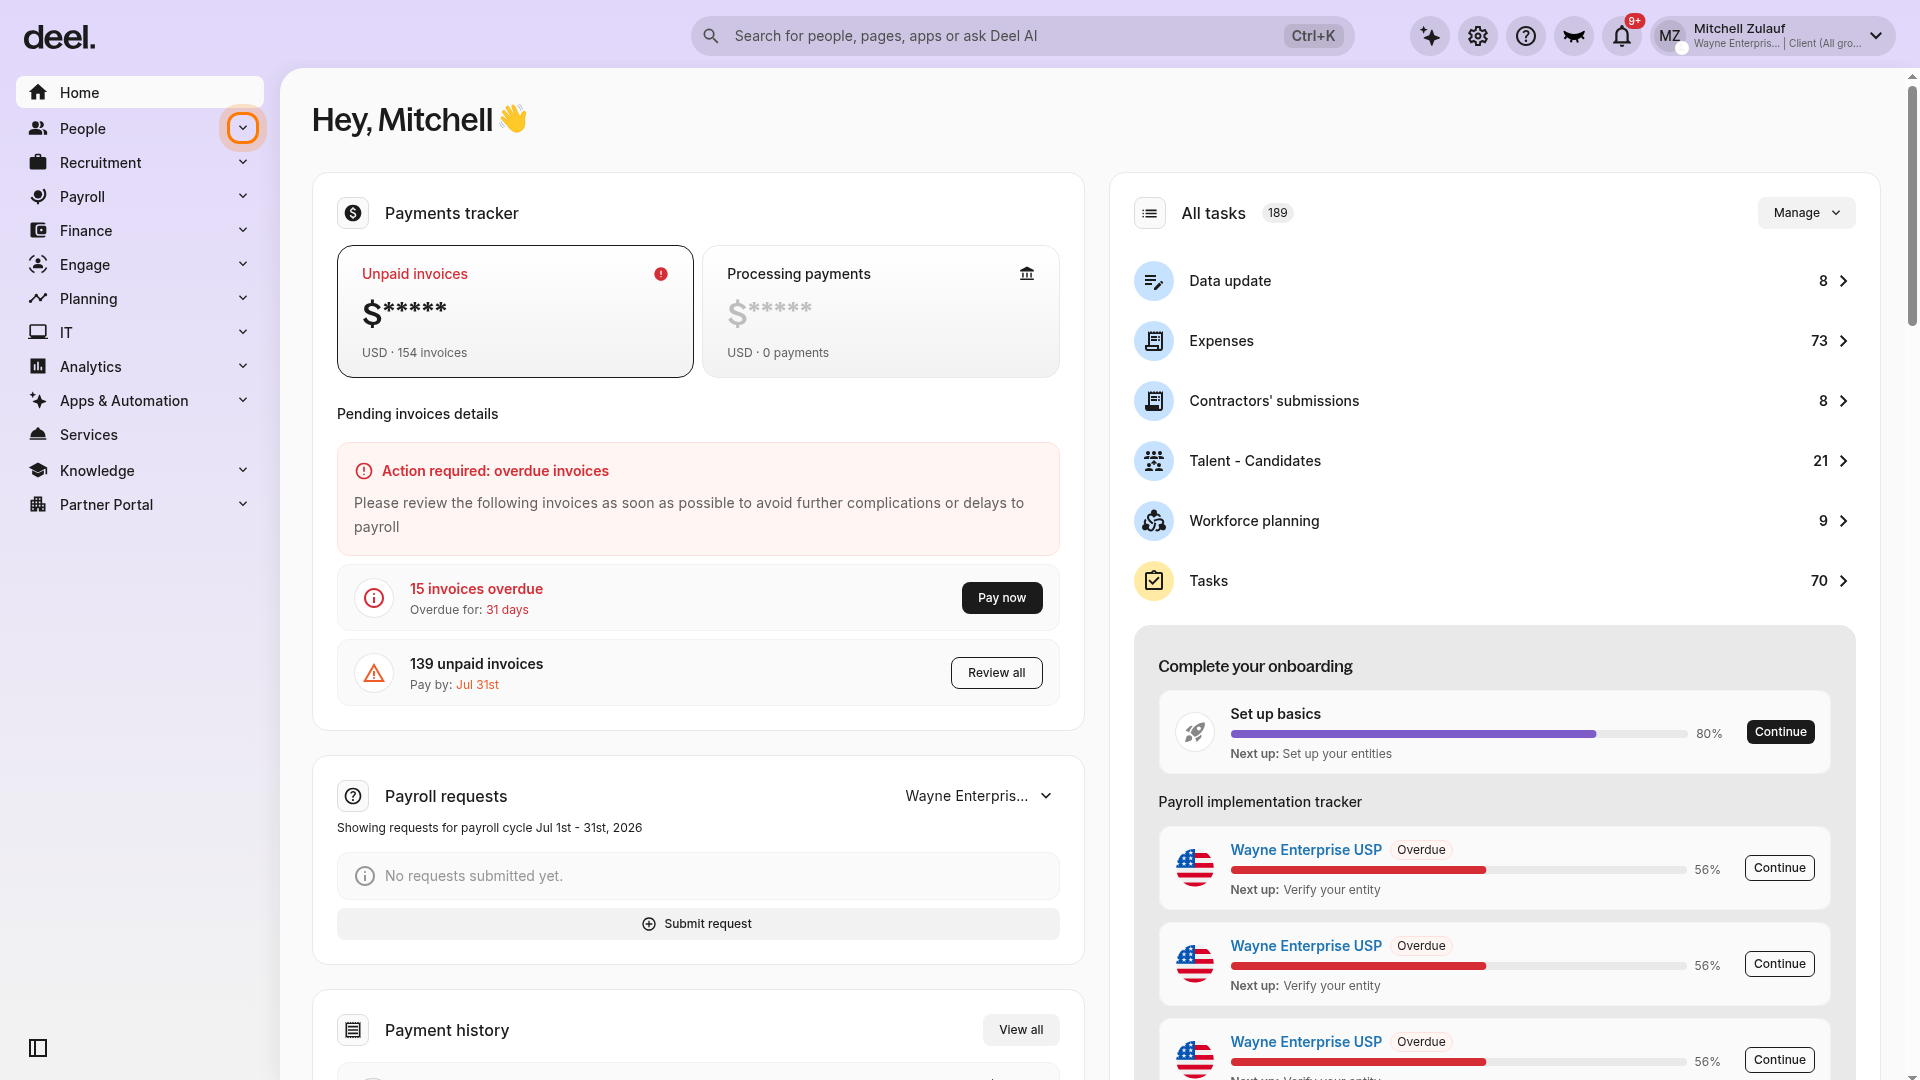
In the left sidebar, select the chevron next to People to expand the section.
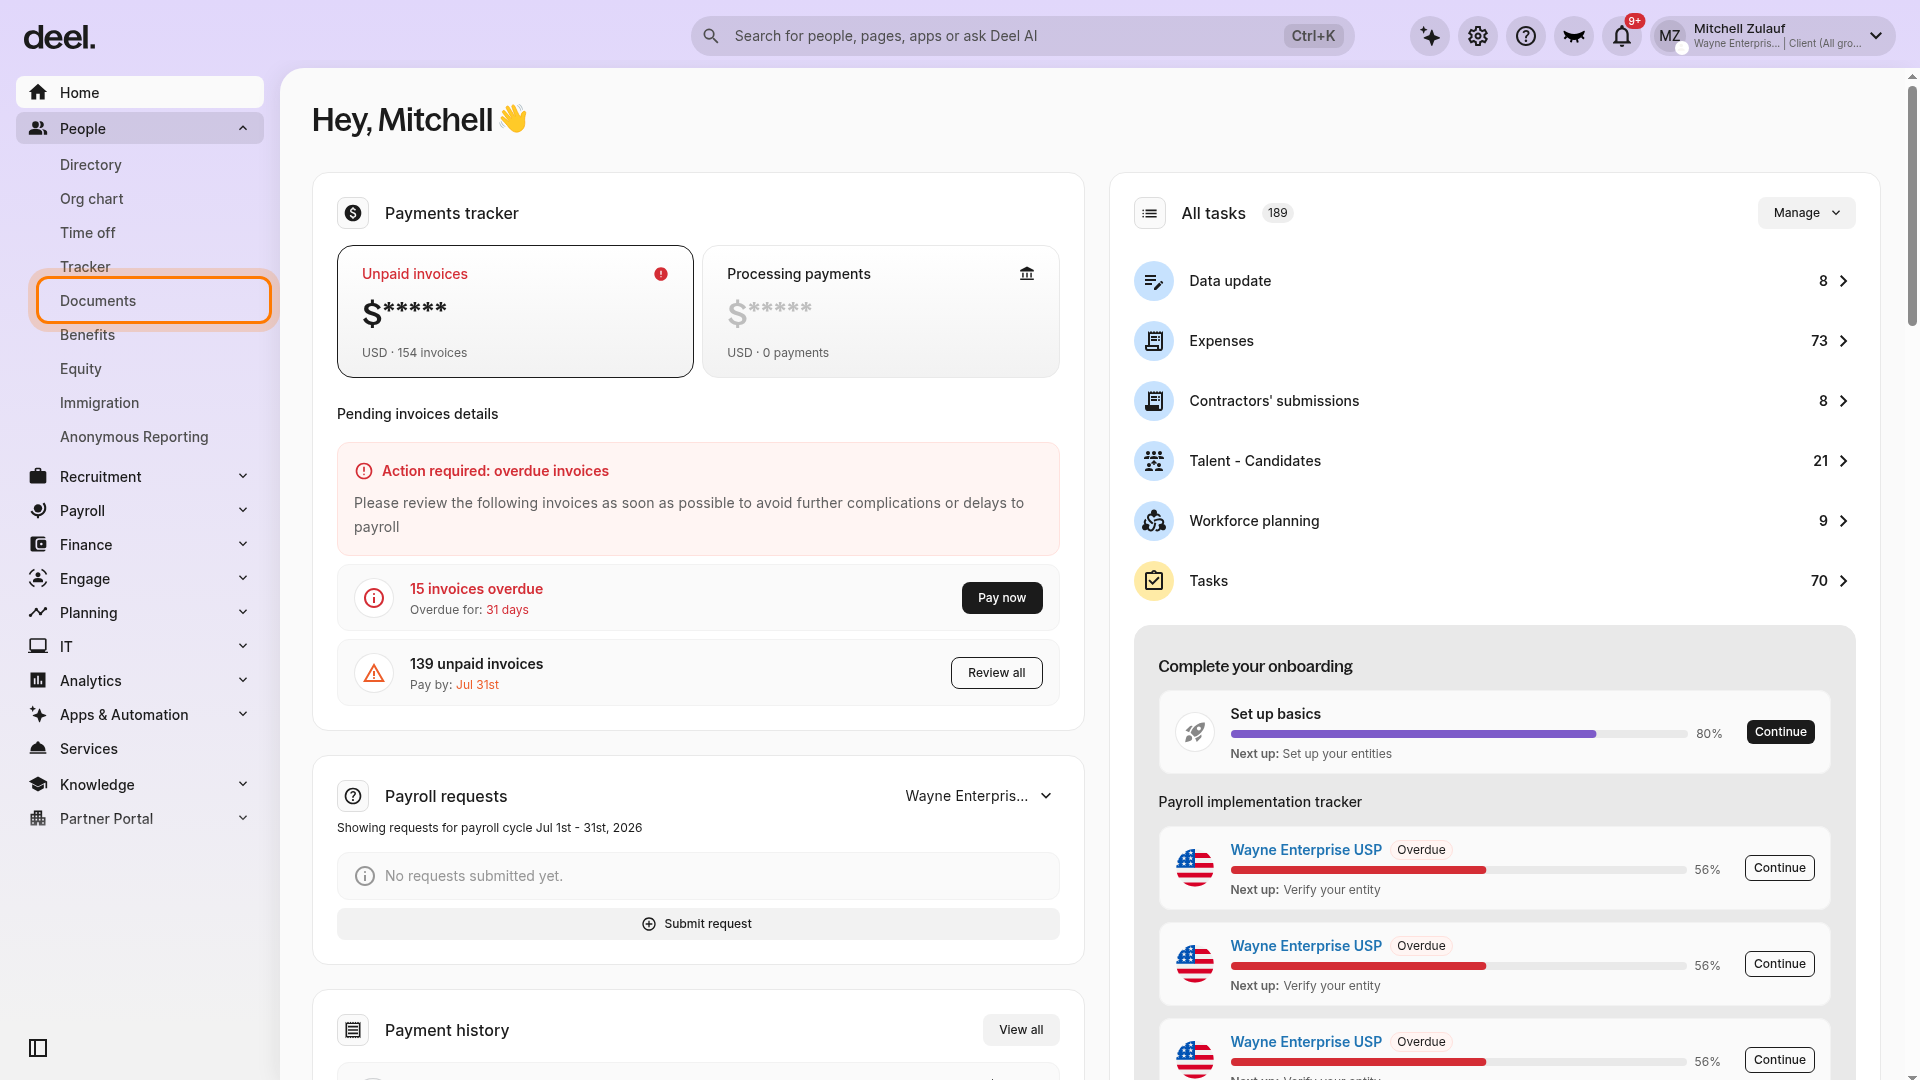
Select Documents from the expanded People menu.
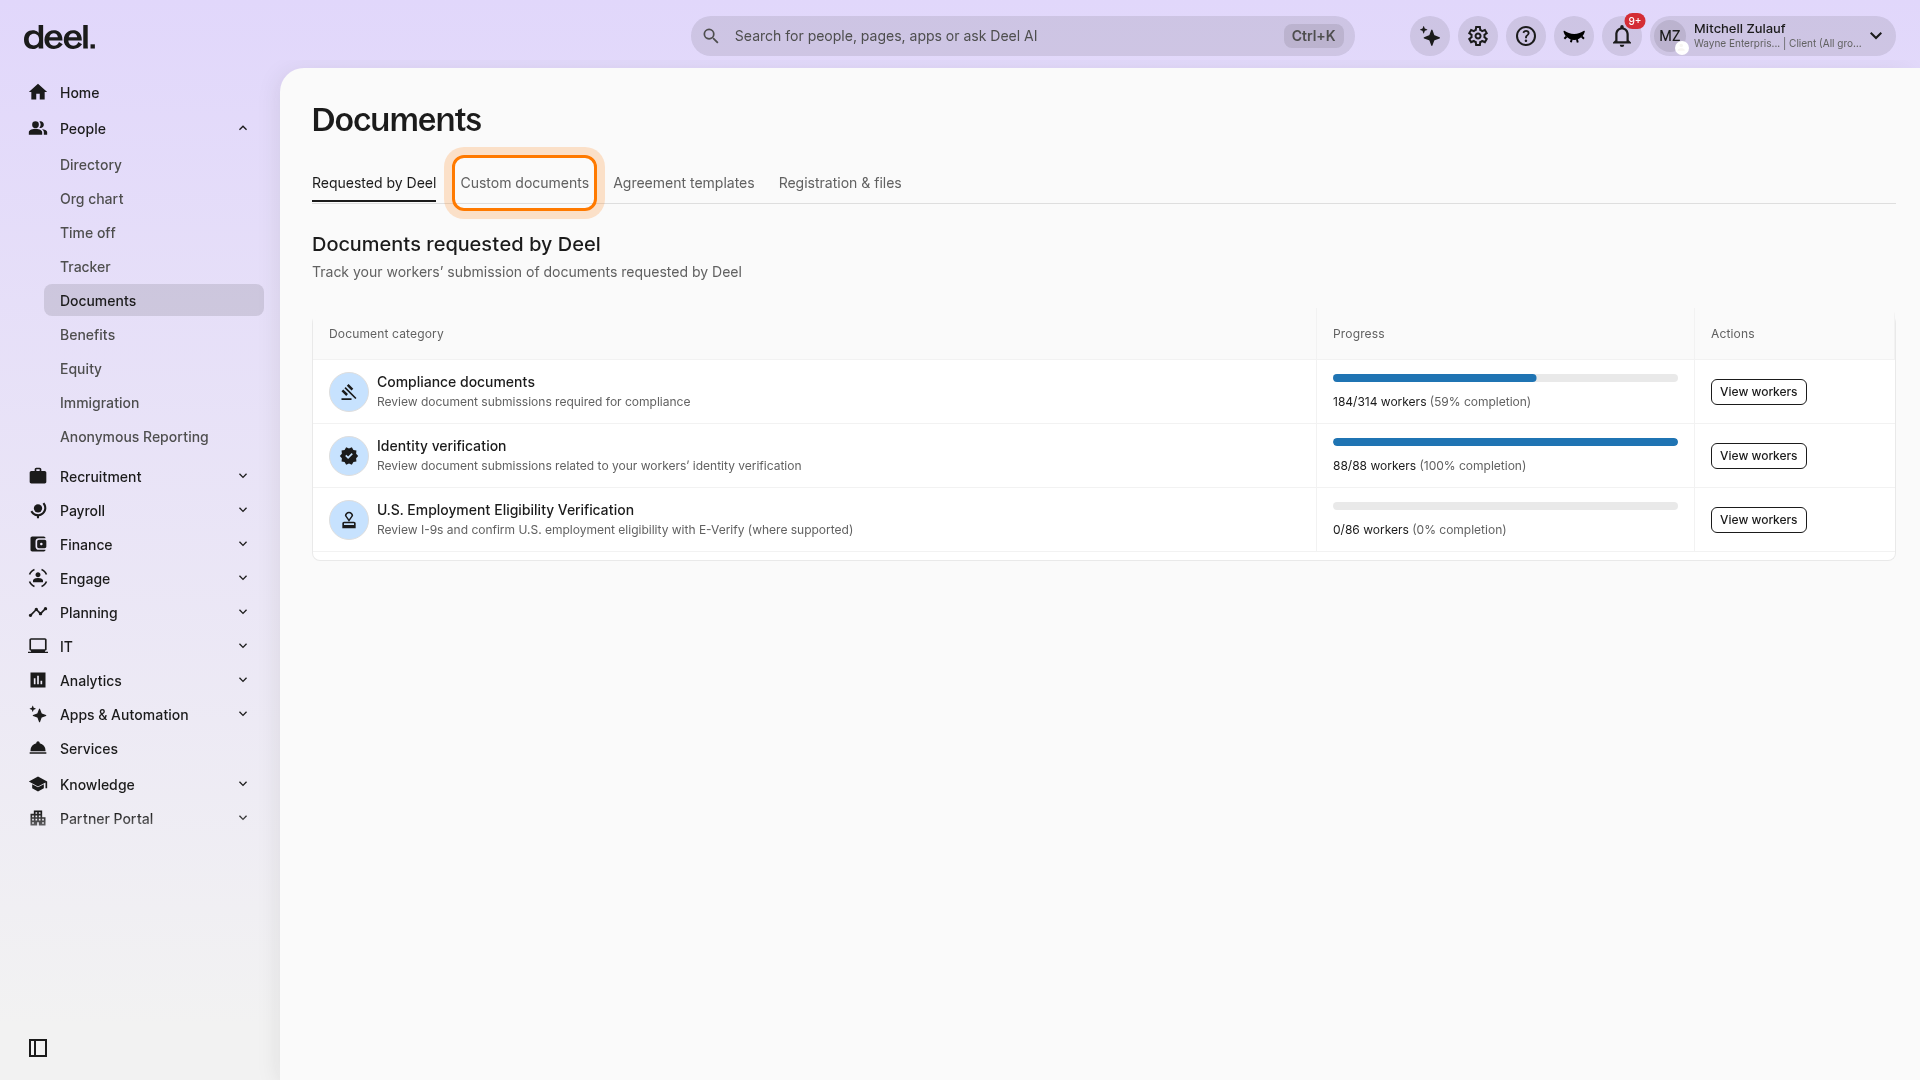
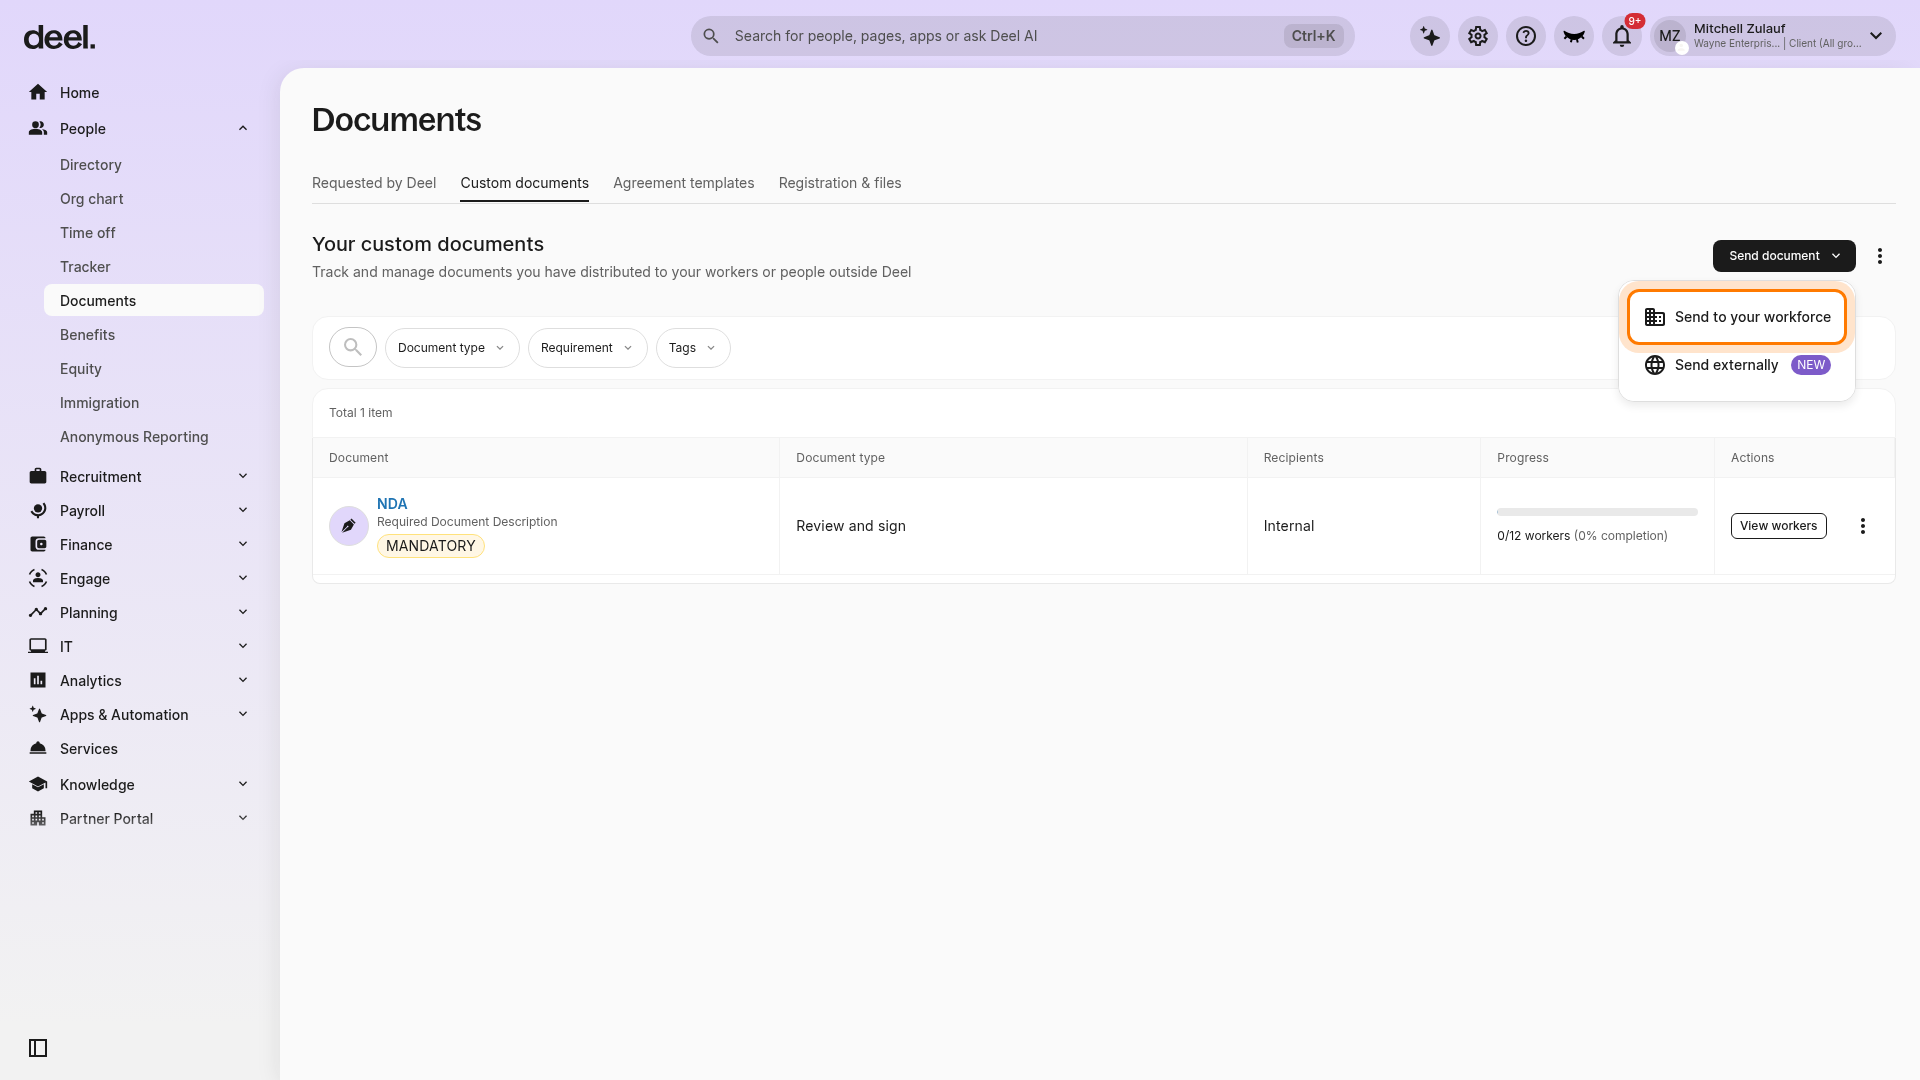
On the Documents page, select the Custom documents tab. The page heading changes to Your custom documents.
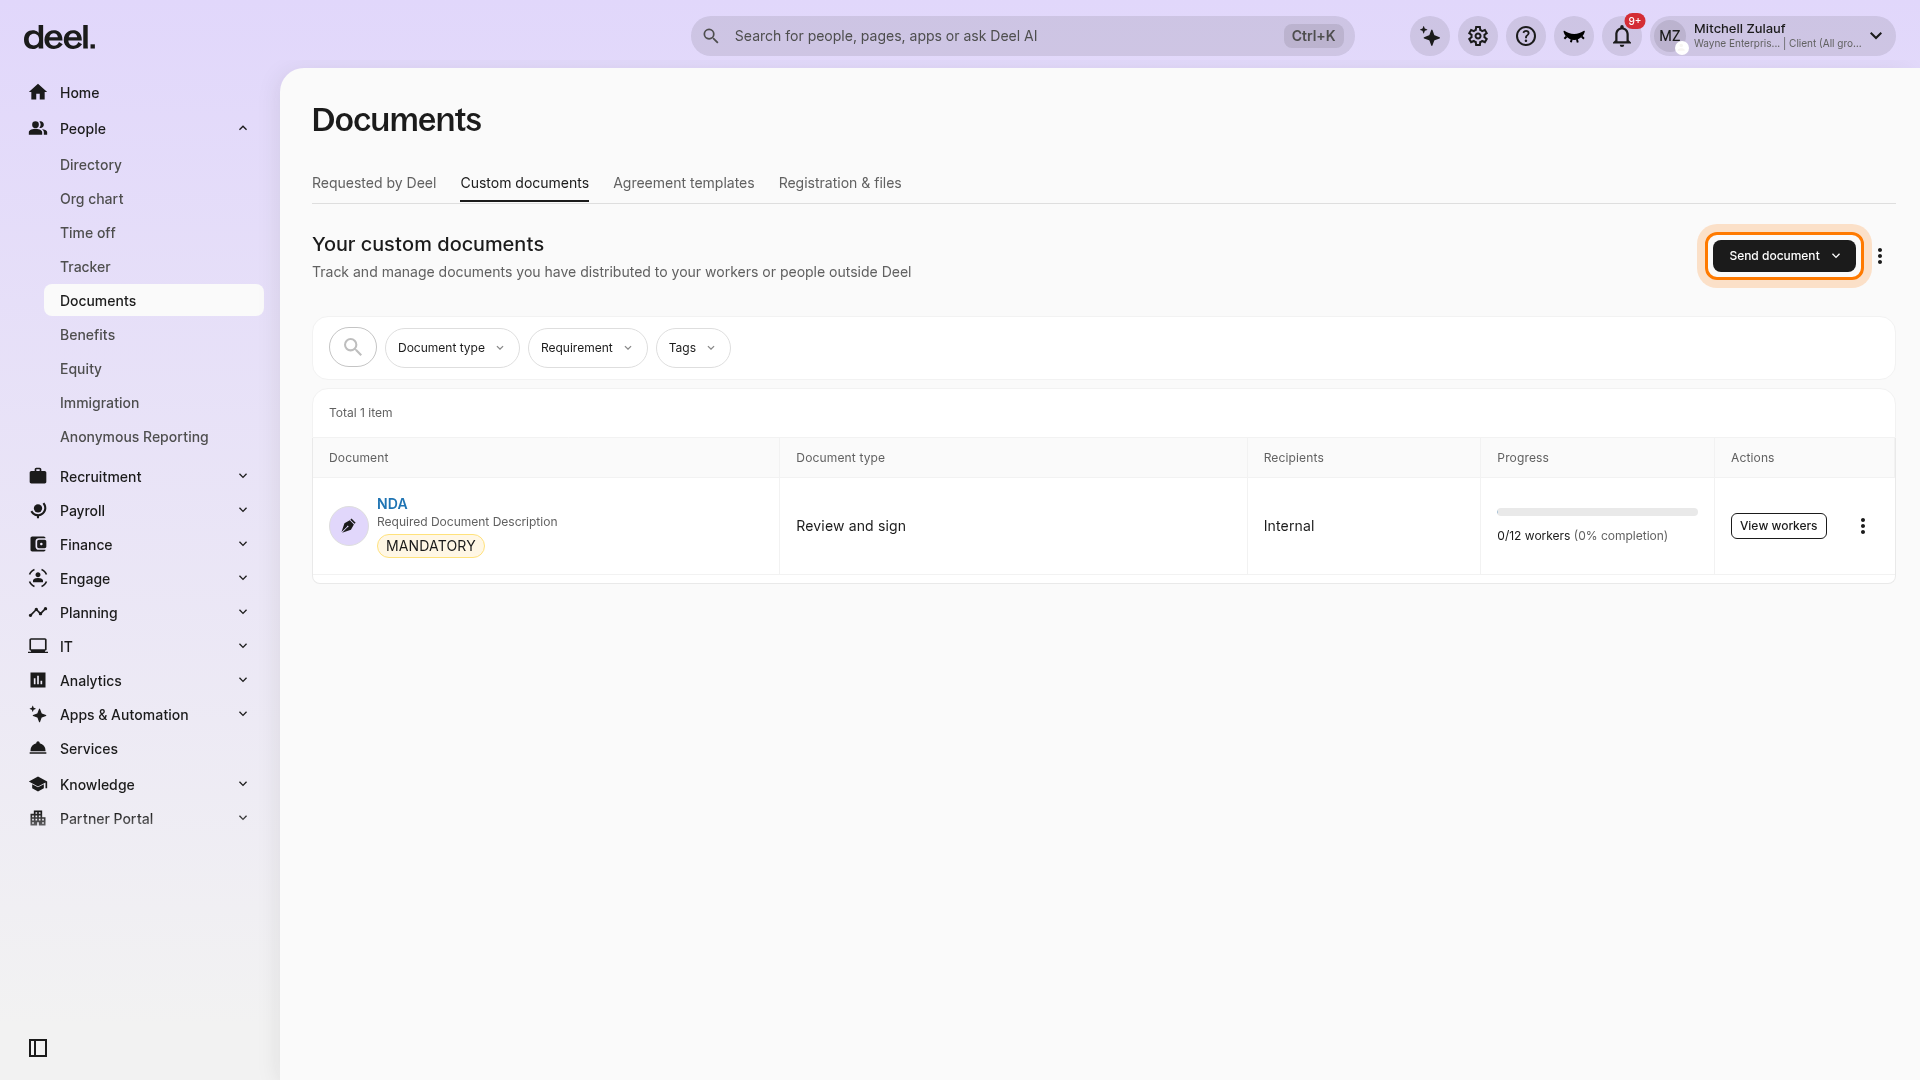
Select Send document in the upper-right corner.
Select Send to your workforce. Do not select Send externally, which starts a separate workflow for people outside Deel.
Wait for the Add new document form to load. Confirm that the required Type of document* field is visible and that the progress panel begins with 1 Type of document.
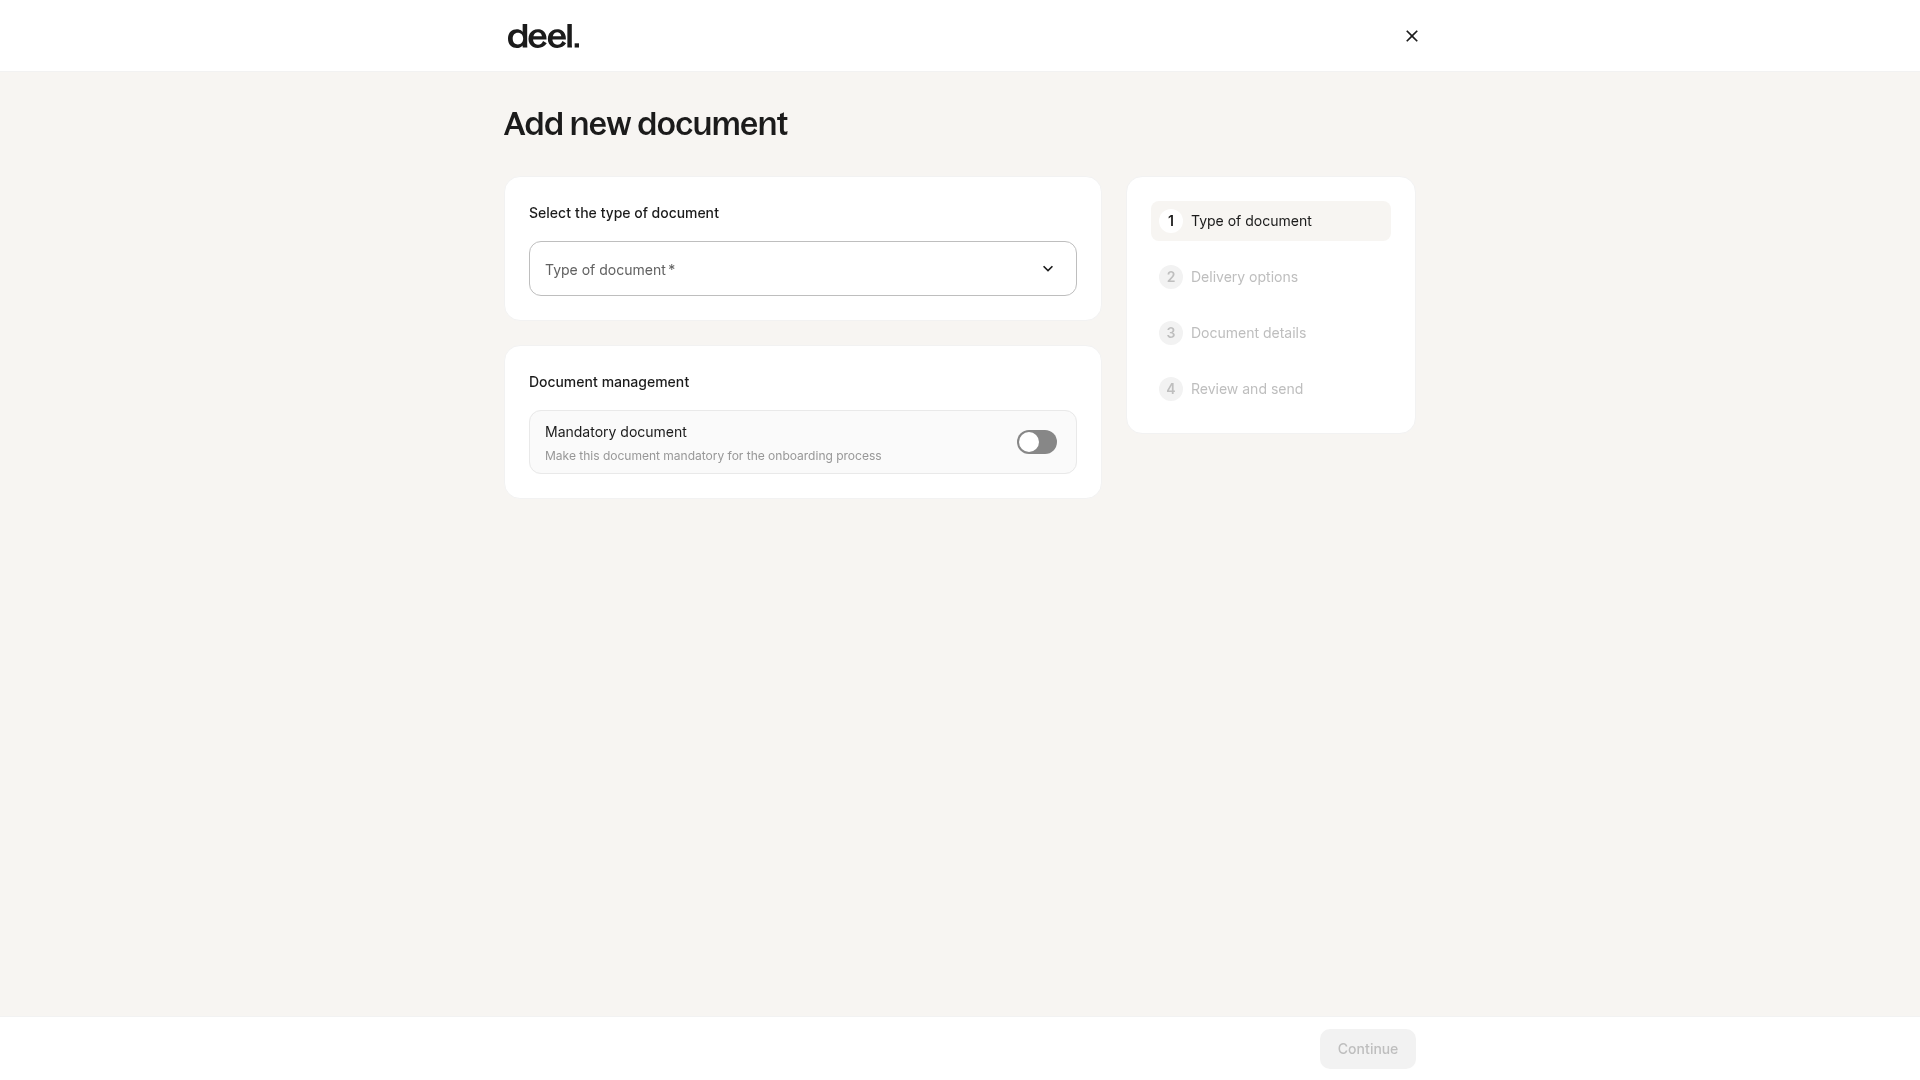
✅ Step 2 - Select the document type and start creating the document
Select the Standard Deel template option and choose DPA as the template type.
Click Start for Create DPA template.
✅ Step 3 - Check eligibility
A signed Data Processing Agreement (DPA) is a legal requirement in the EEA, Switzerland, and the UK. It is strongly recommended for compliance in Brazil, Canada, and California. If the worker will not be exposed to personal data in these locations, a DPA may not be necessary.
✅ Step 4 - Data processing
Select whether the client is a controller or processor of the personal data that will be shared with the contractor.
✅ Step 5 - Personal data
Select who the personal data pertains to, what the data is about, and whether it includes any sensitive categories.
✅ Step 6 - Security
Select the required technical and organizational security measures implemented by the Contractor.
✅ Step 7 - Indemnification clause
Clients can include an indemnification clause if they want. By toggling the option on, they will see a pre-filled clause that can be edited.
Review the information and select Preview and Save.
Clients will have the option to save and download the PDF.
✅ Step 8 - Review and sign
After creating the template, clients can select who needs to sign the document and whether it will be mandatory or optional. The DPA must be signed by the contractor, so this option cannot be changed. Clients can also choose the delivery options and add tags and document details, such as the name.
Once everything is done click Sign and Send. The document will then be sent to the contractor for their signature.
Clients can find the DPA in People > Documents > Custom documents, where they can track the progress of document signatures and see how many workers have signed or not.