
This guide explains how clients can view and manage an EOR employee’s visa assessment and application through the Deel platform in a few simple steps.
✅ Step 1 - Log In
From the Deel website, click Log in.
✅ Step 2 - Review and sign the Terms & Conditions
Go to Organization Settings and select Entities.
Select the applicable entity, click View details, then review and sign the Terms & Conditions.
Clients must review and sign this agreement before we begin the employee visa assessment.
✅ Step 3 - Employee signs up to Deel
Once the client has signed the agreement, Deel sends the employee an email invitation to create their Deel account.
✅ Step 4 - Employee confirms visa Information
Employees need to create their Deel account and complete the onboarding checklist, including their visa assessment information.
If the client pre-filled information when creating the EOR contract, the employee can find it in the assessment.
Employees are asked about their current country of residence, citizenship, highest level of education, and how many dependents need a visa. They can also add their LinkedIn profile or additional information.
Once complete, the employee can review and submit their application.
✅ Step 5 - Receive the quote
Once the employee has submitted their visa information, Deel reviews it and contacts the client about the outcome.
If the employee is eligible for a visa in the country of choice, Deel provides a quote that includes the visa type, timelines, costs, required documentation, and next steps for the employee's visa application.
✅ Step 6 - Review the quote
Select the employee’s name and click Review to review the quote and Terms & Conditions.
In the quote, clients can find the costs per employee and dependents, if applicable, and any other costs to be paid, such as documentation or government fees.
✅ Step 7 - Receive the invoice
From the applicable visa quote review form, click View Invoice to complete payment.
Deel begins the visa application only after payment is received.
Note: View Invoice is available from the relevant visa quote review form, not from the Home dashboard.
✅ Step 8 - Next steps
To monitor an existing case, select People in the left navigation sidebar to expand its submenu, then select Immigration.
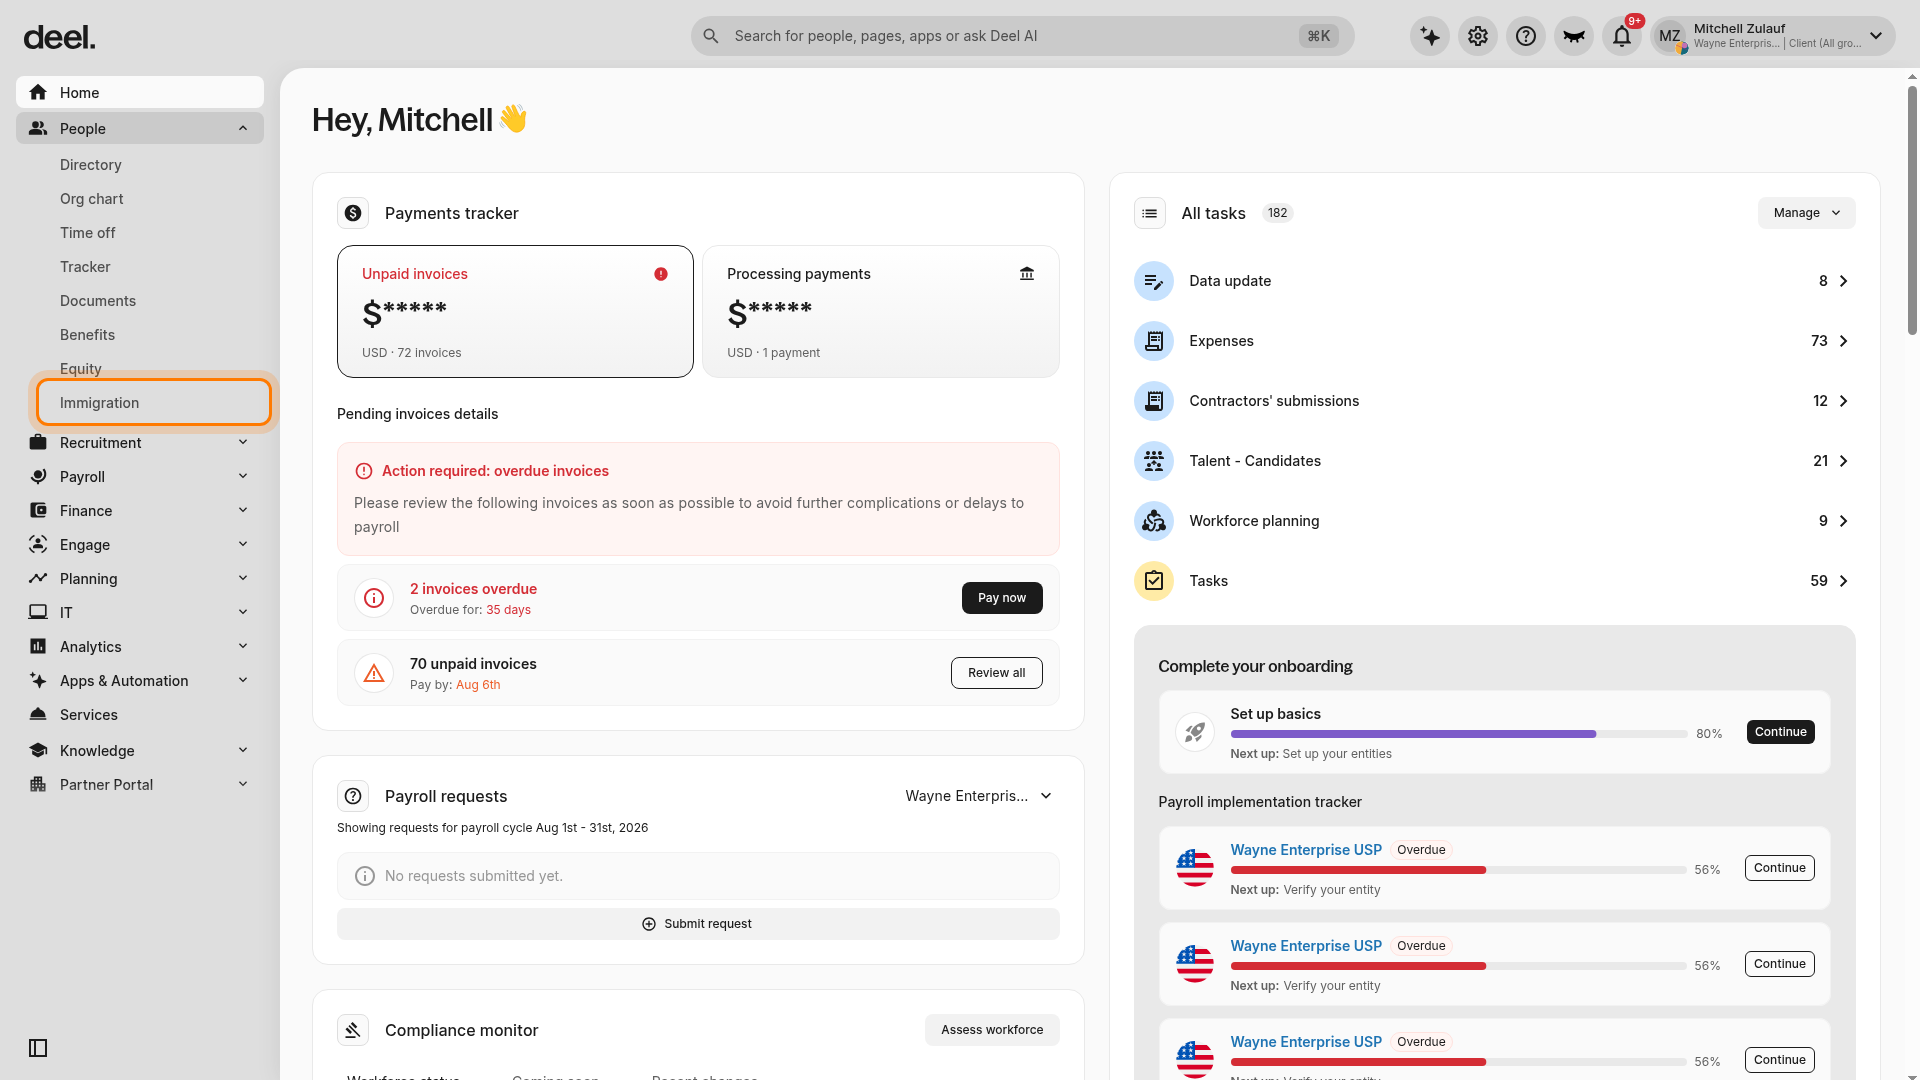
- To monitor an existing case, select People in the left navigation sidebar to expand its submenu.
- Select Immigration.
If the Welcome to Deel Immigration! dialog appears, close it using the X in the upper-right corner.
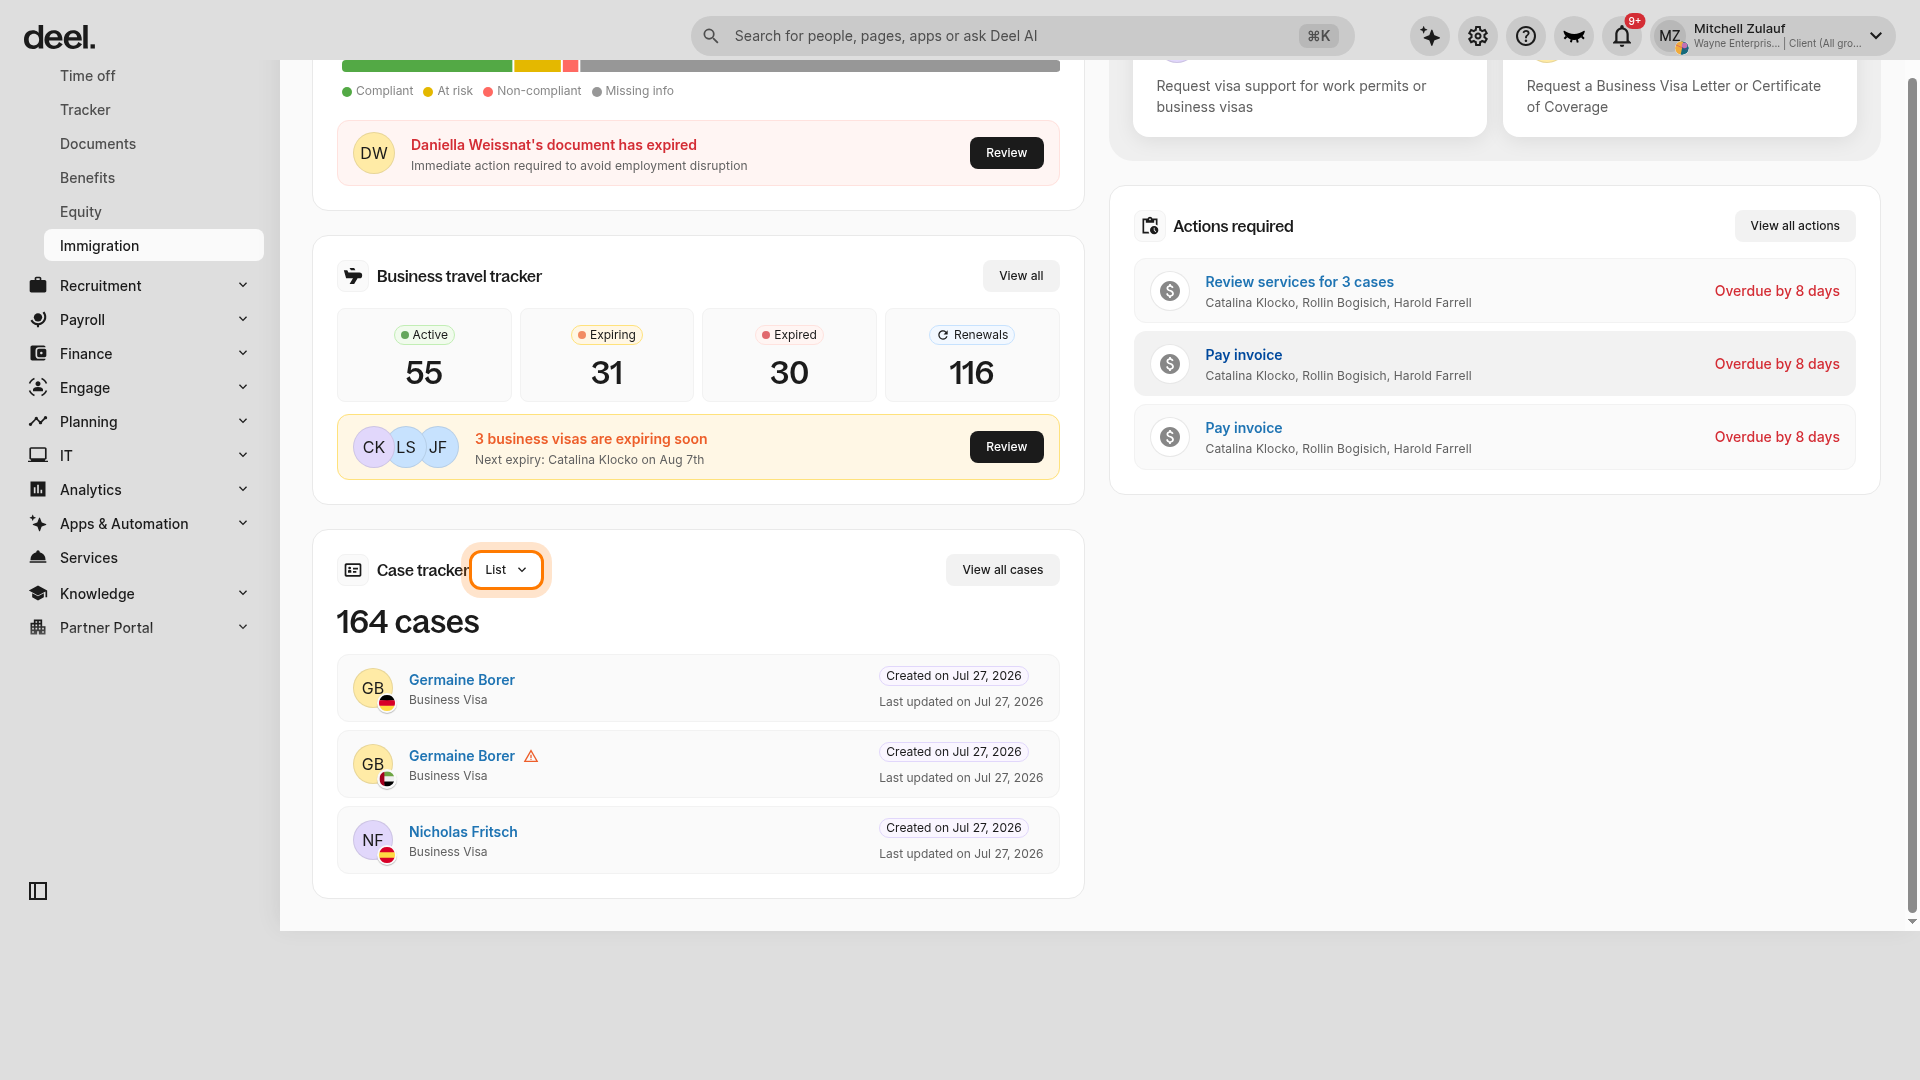
- Scroll to the Case tracker card.
- Use the view control next to Case tracker and select List to display individual employee cases.
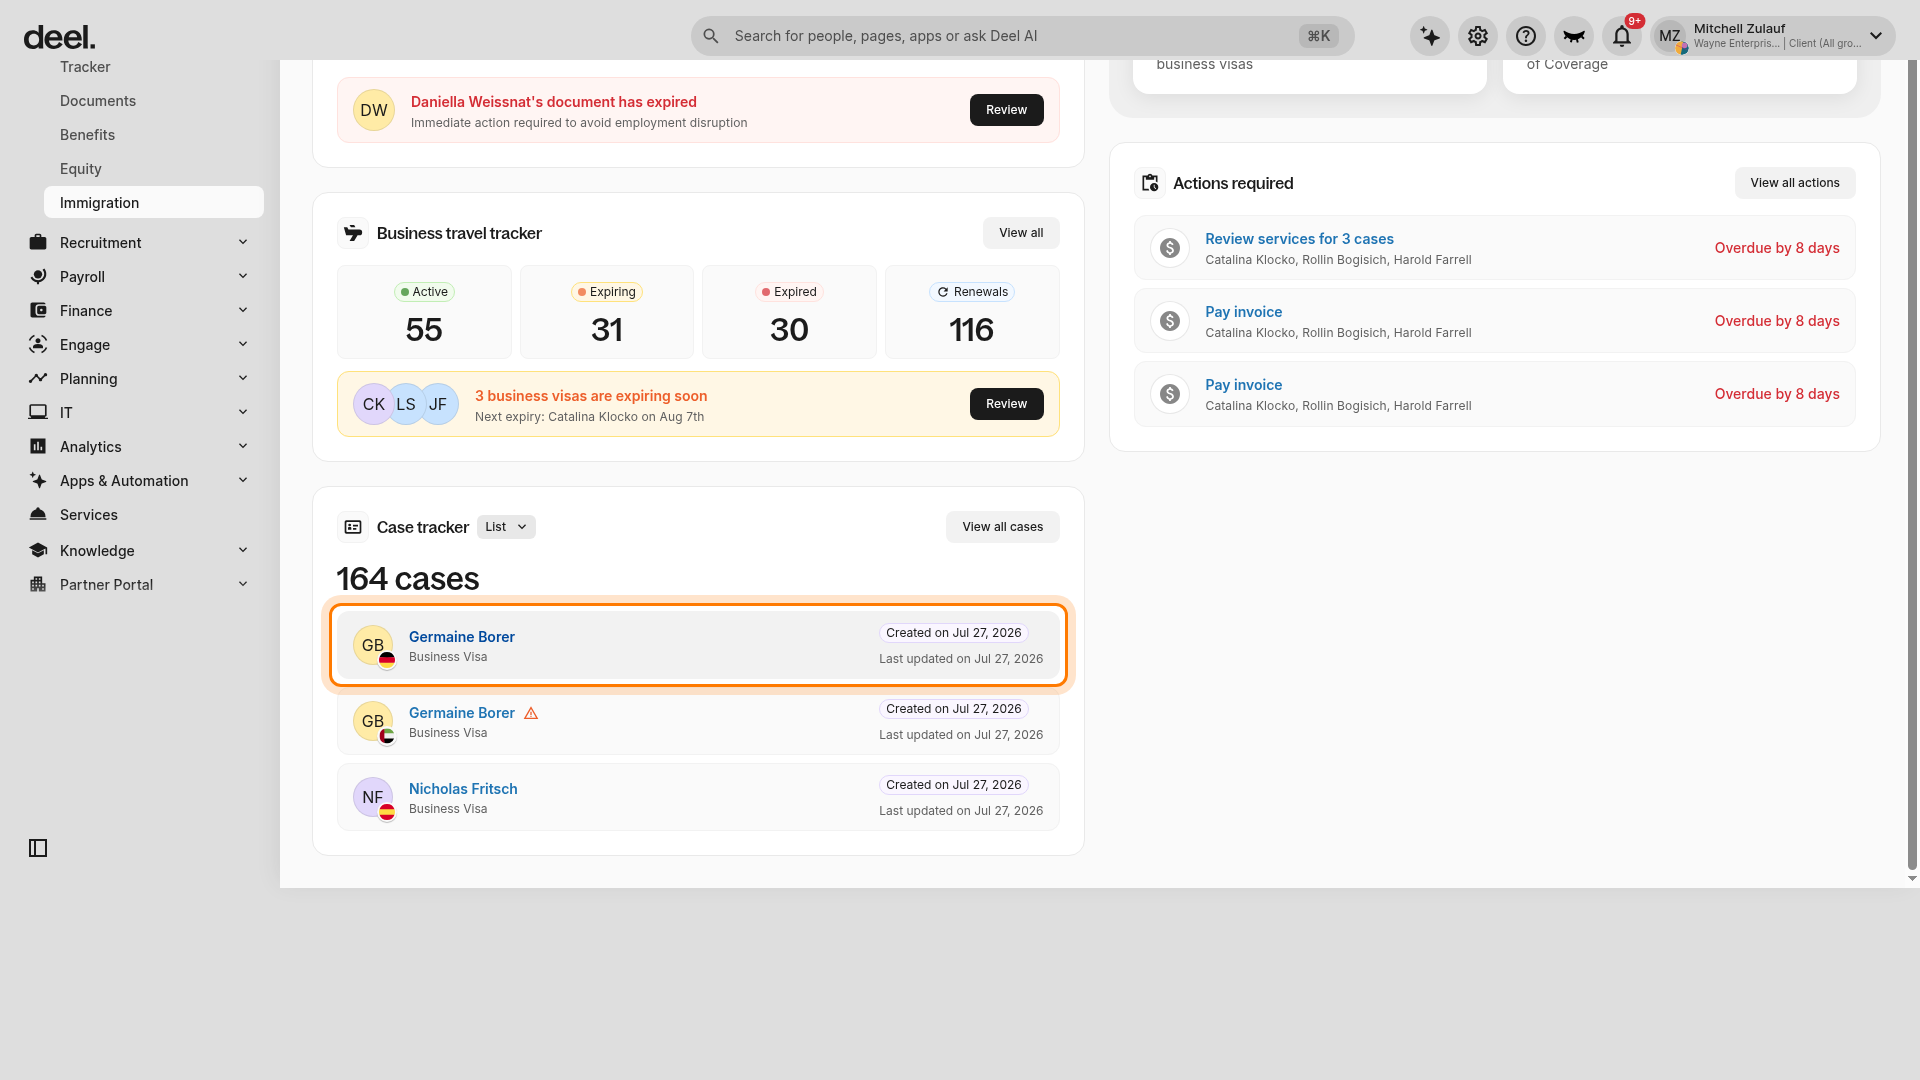
- Select the employee’s name for the case you need to monitor.
- Check the case type shown beneath the employee name before opening the case.
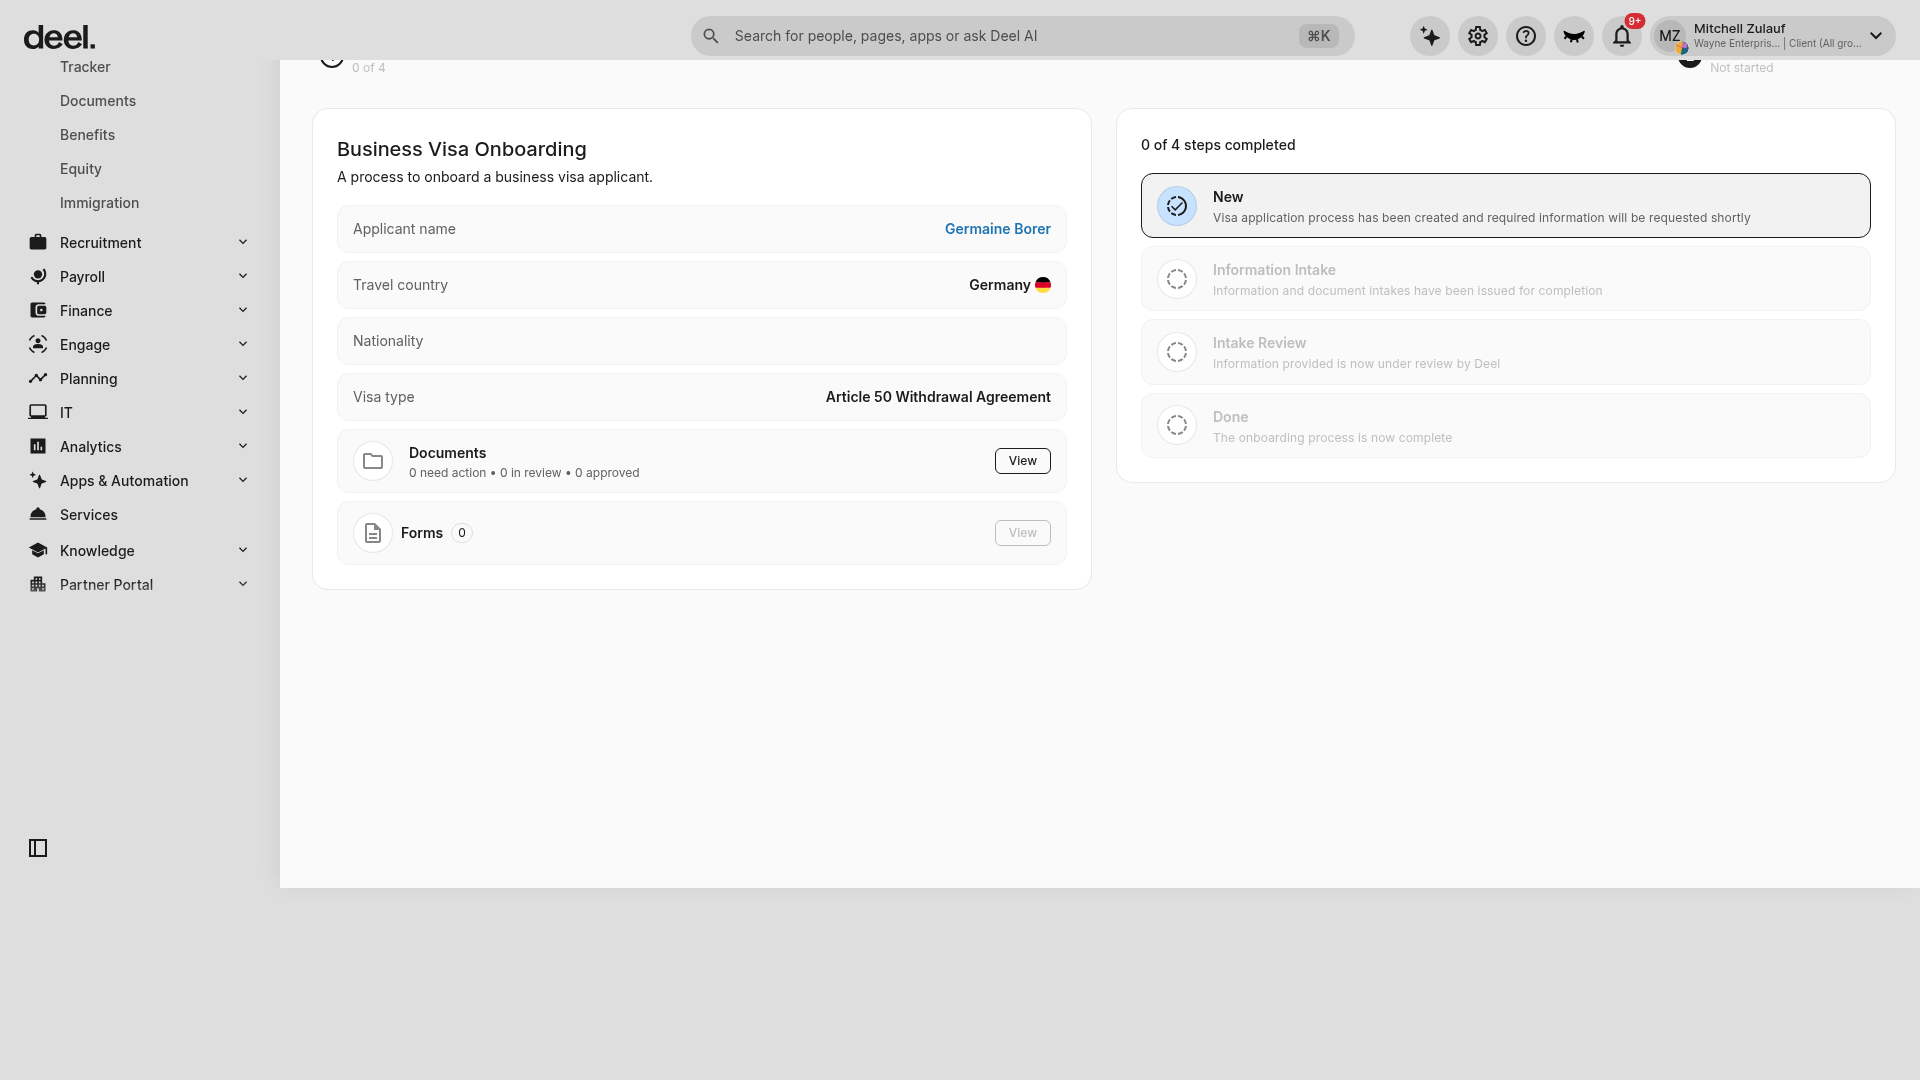
- Review the detailed case page for the onboarding workflow, applicant and visa details, completed-step count, and the status of each stage.
- Stage names vary by case; for example, a case can progress through New, Information Intake, Intake Review, and Done.
The case page is the detailed progress view for the application. Do not make changes to documents, forms, or workflow stages unless a separate process requires them.