
This article explains how clients can create custom group roles on Deel.
We offer several pre-defined group admin roles with set permissions and restrictions, but if more flexibility and precision are needed clients can customize their group members' roles and permission levels.

In this article:
How to Create a Custom Role
✅ Step 1 - Create Custom Roles
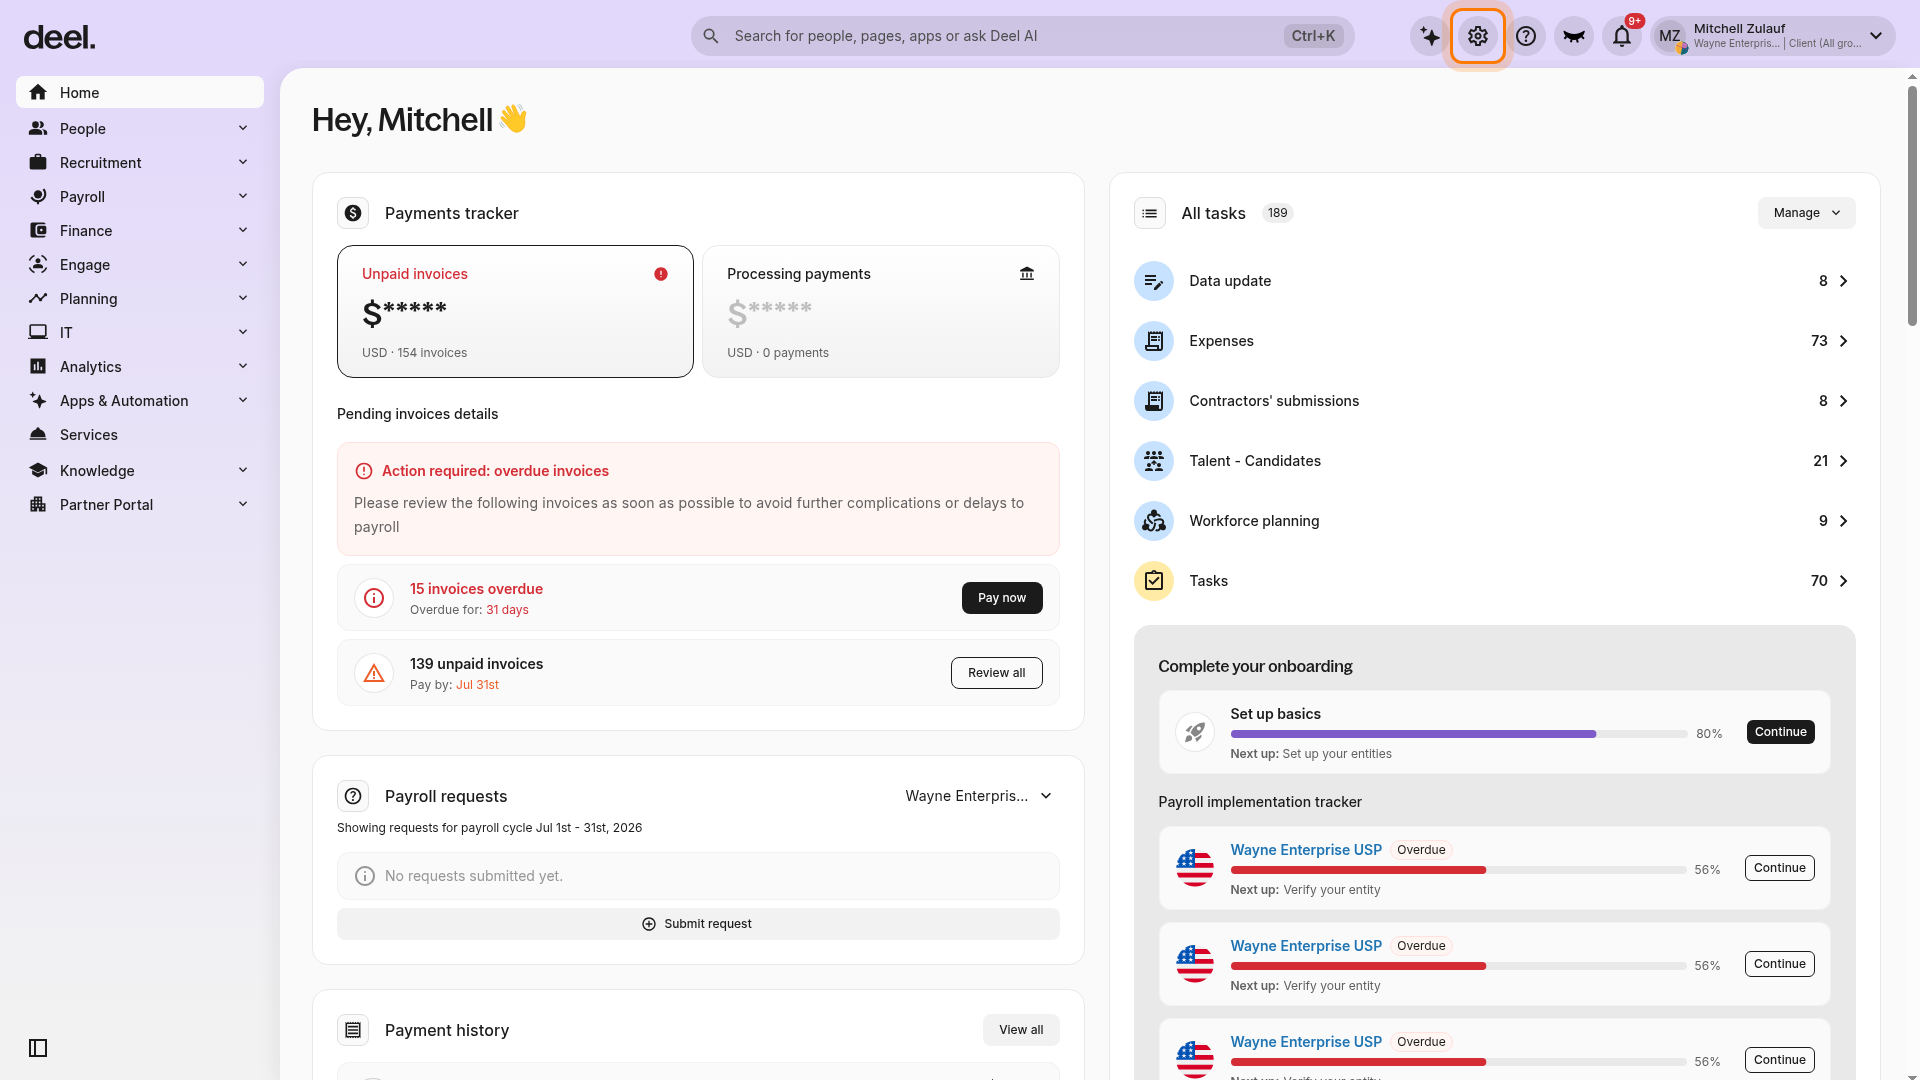
From the Deel Home dashboard, select the Organization settings gear icon in the upper-right corner.
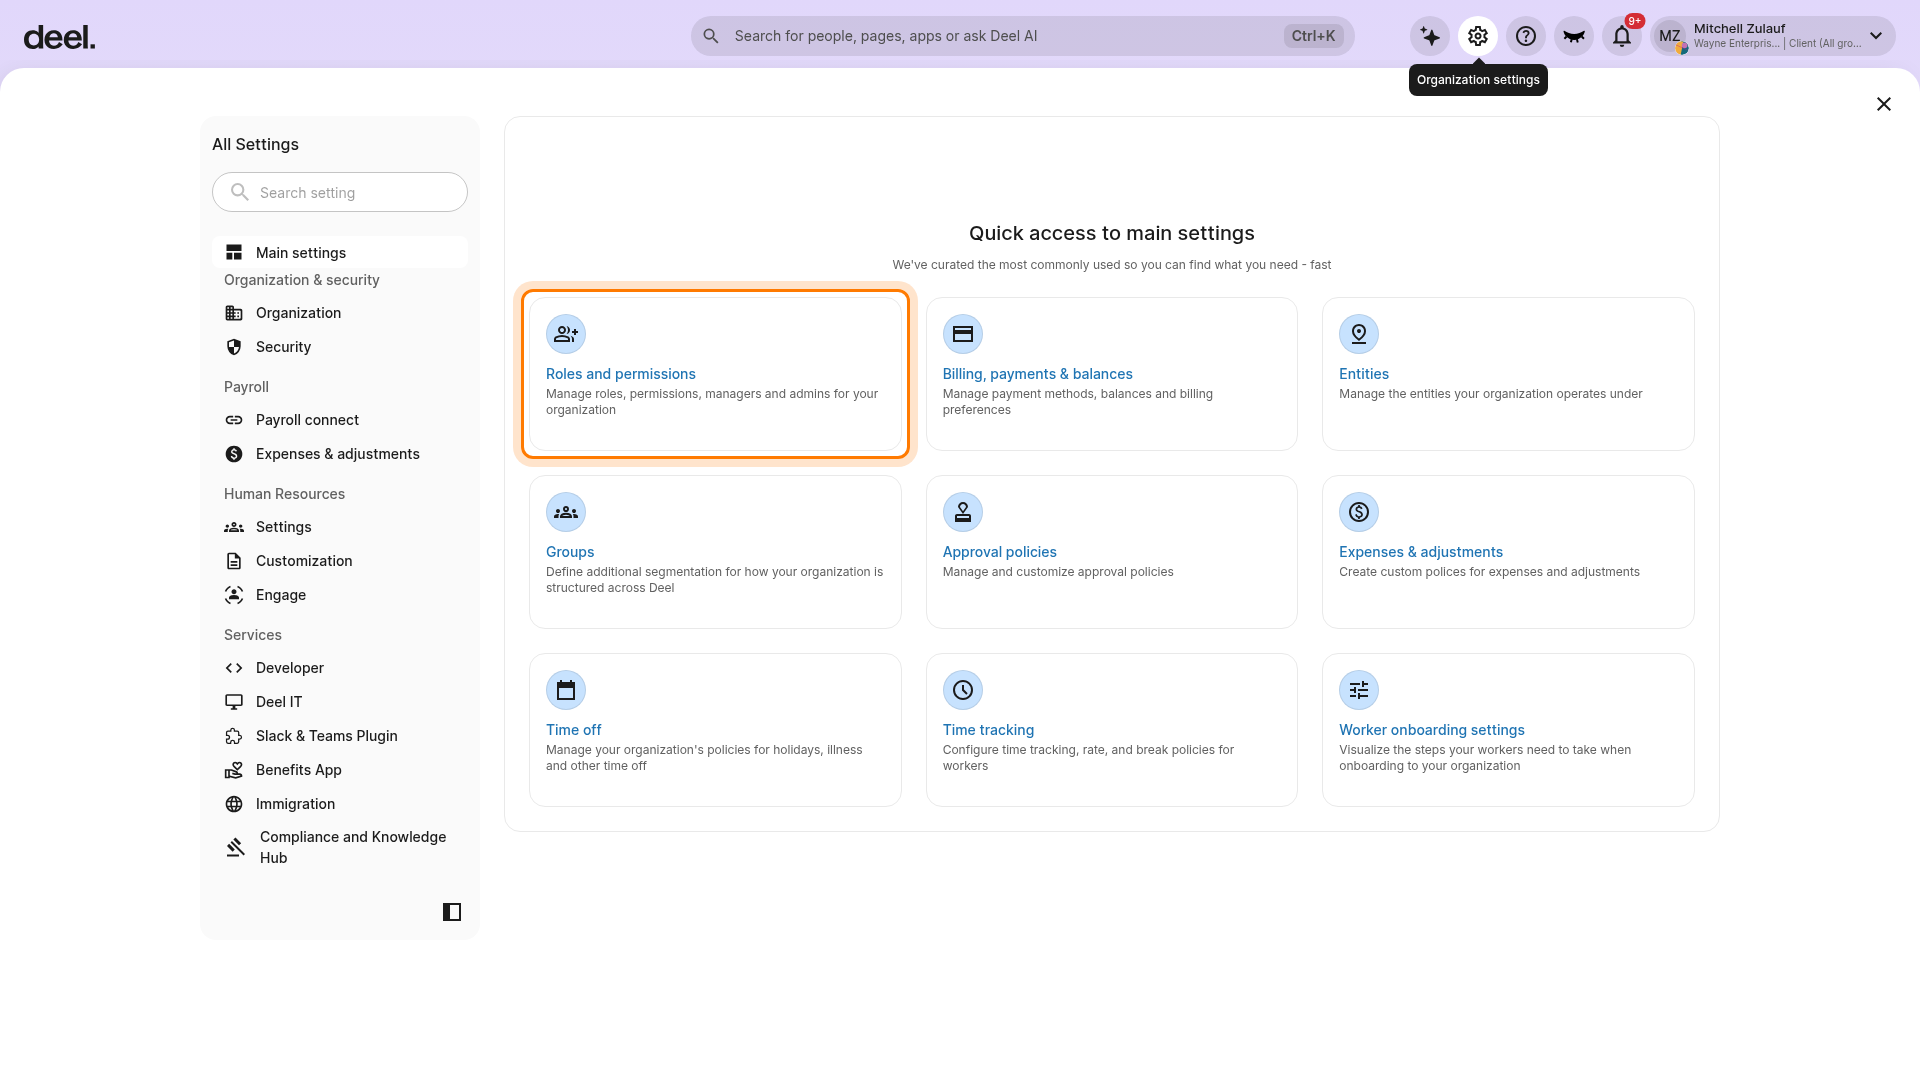
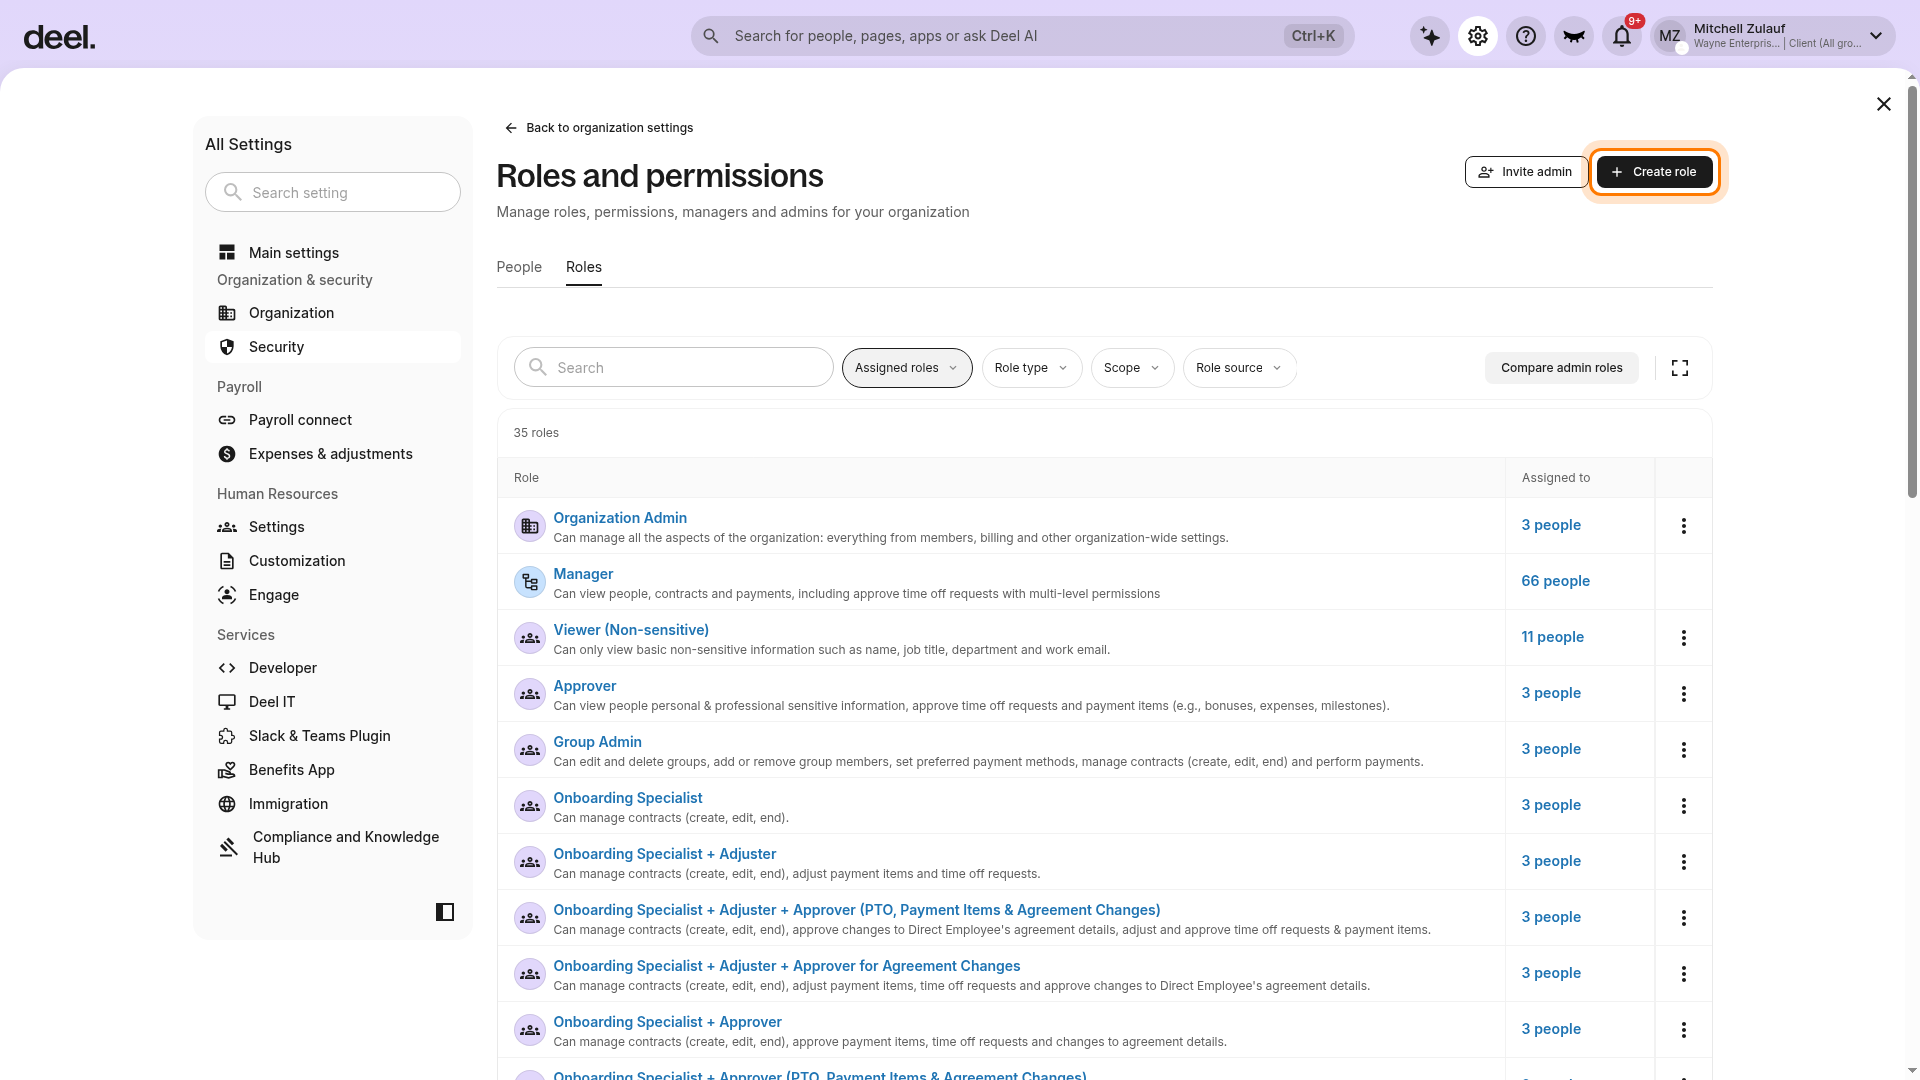
Under Quick access to main settings, select Roles and permissions. Its description is Manage roles, permissions, managers and admins for your organization.
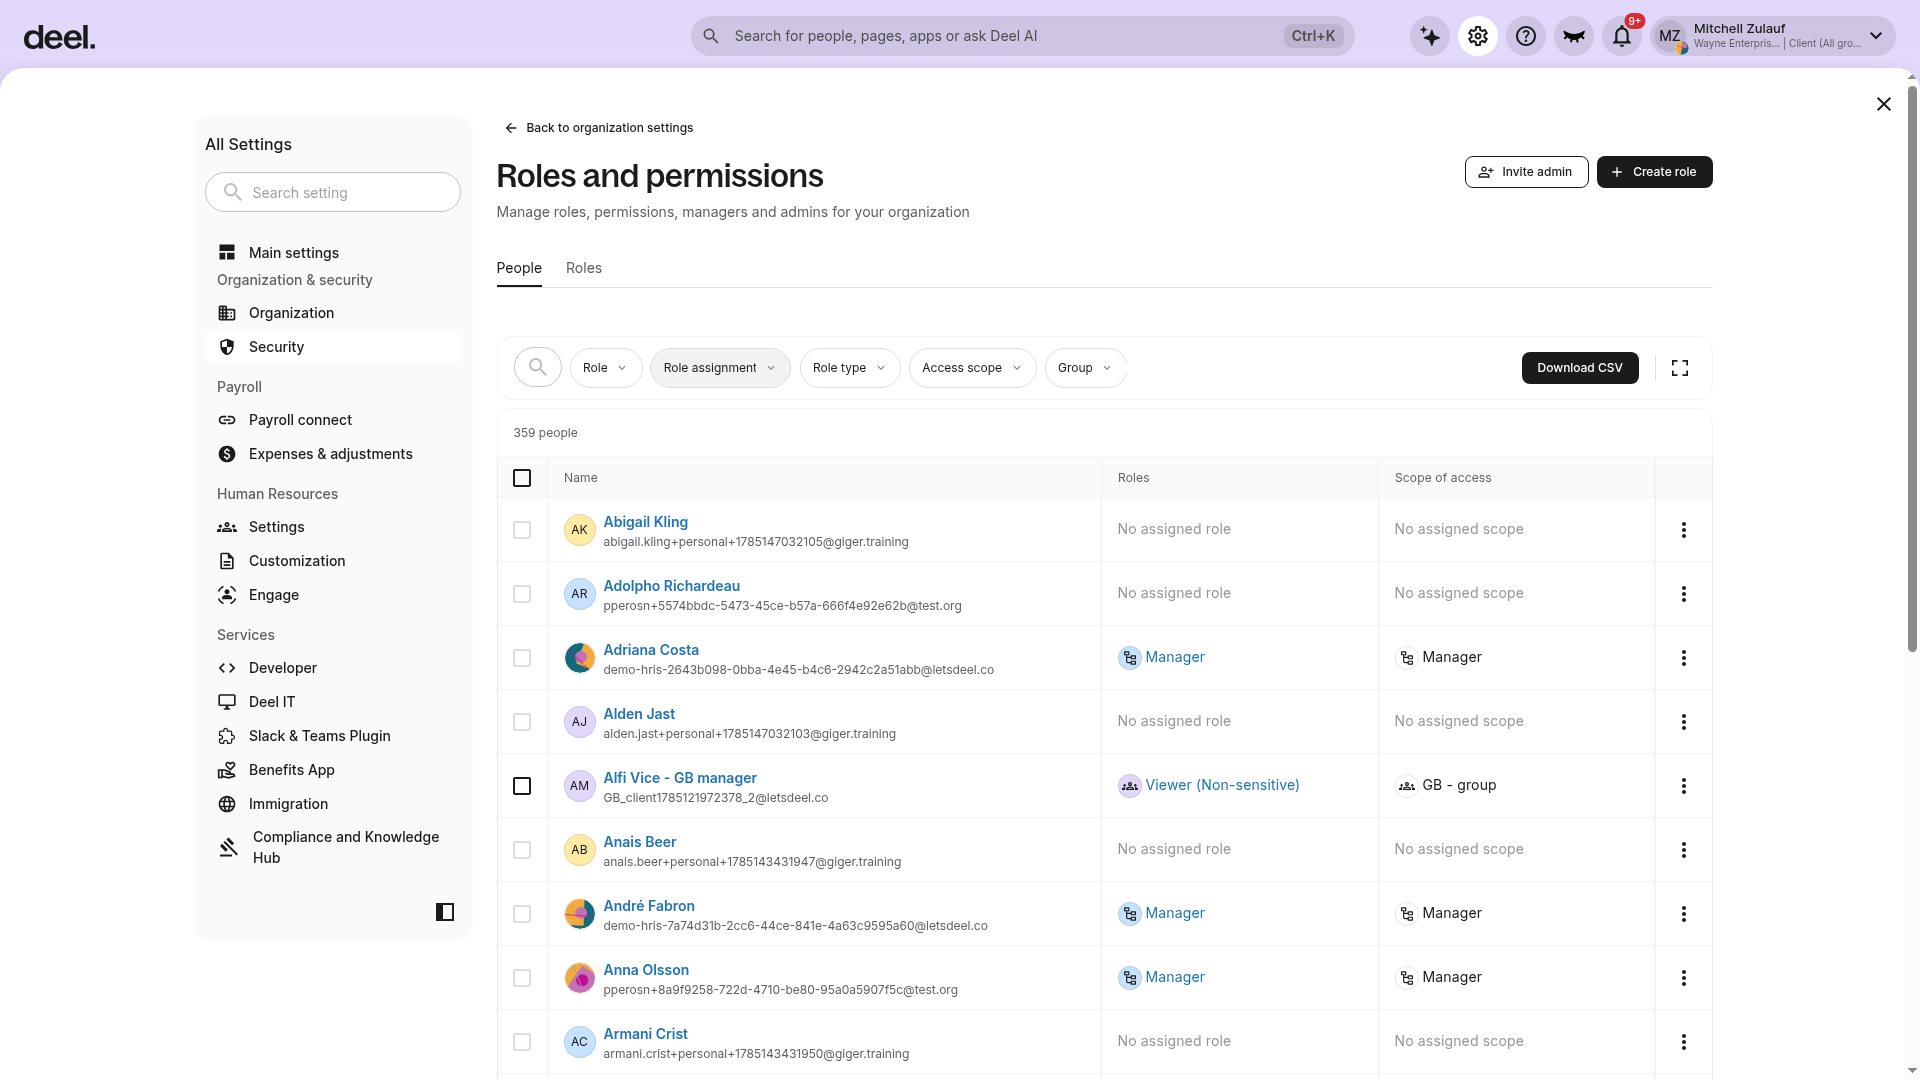
The page is ready when the Roles and permissions heading and the People and Roles tabs are visible.
✅ Step 2 -Define the scope of role
Select the Roles tab. This is the current location for managing manager and custom roles; it replaces the older Manager Roles label.
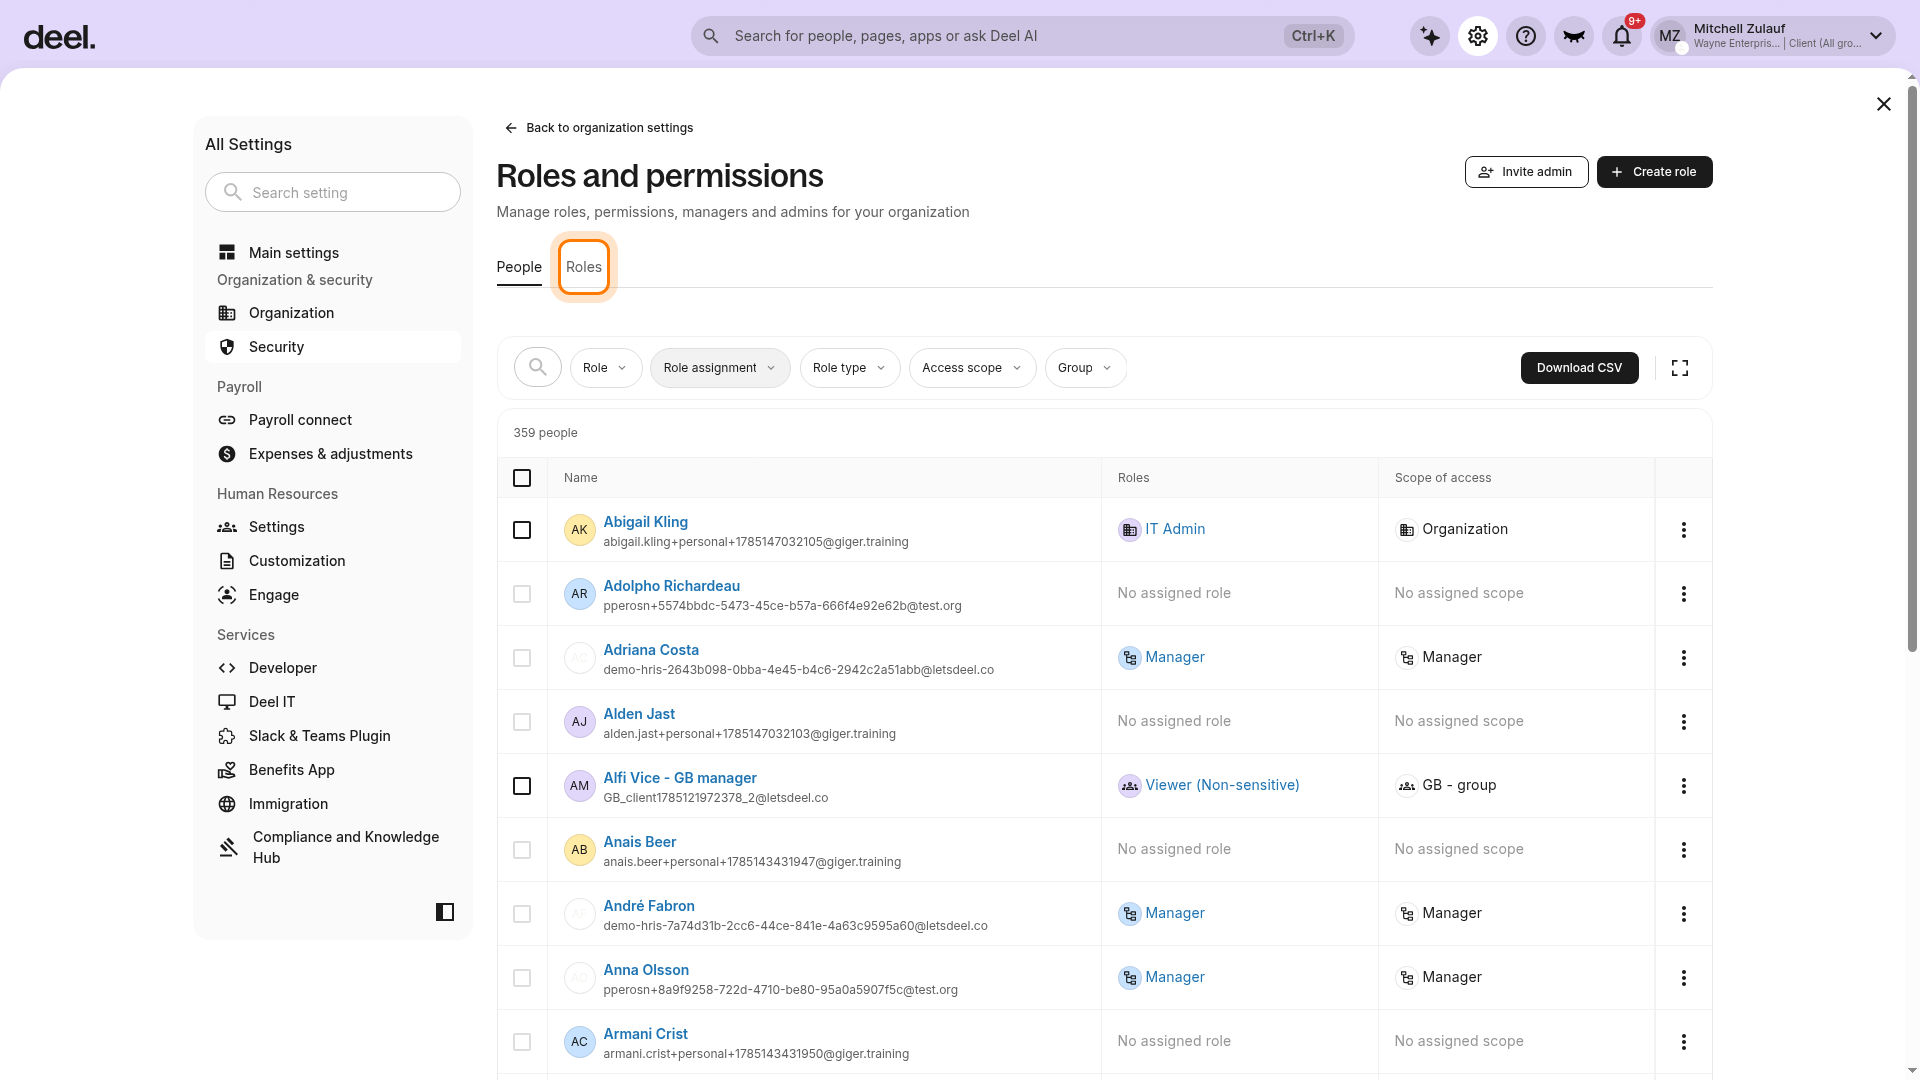
Select Create role in the upper-right corner.
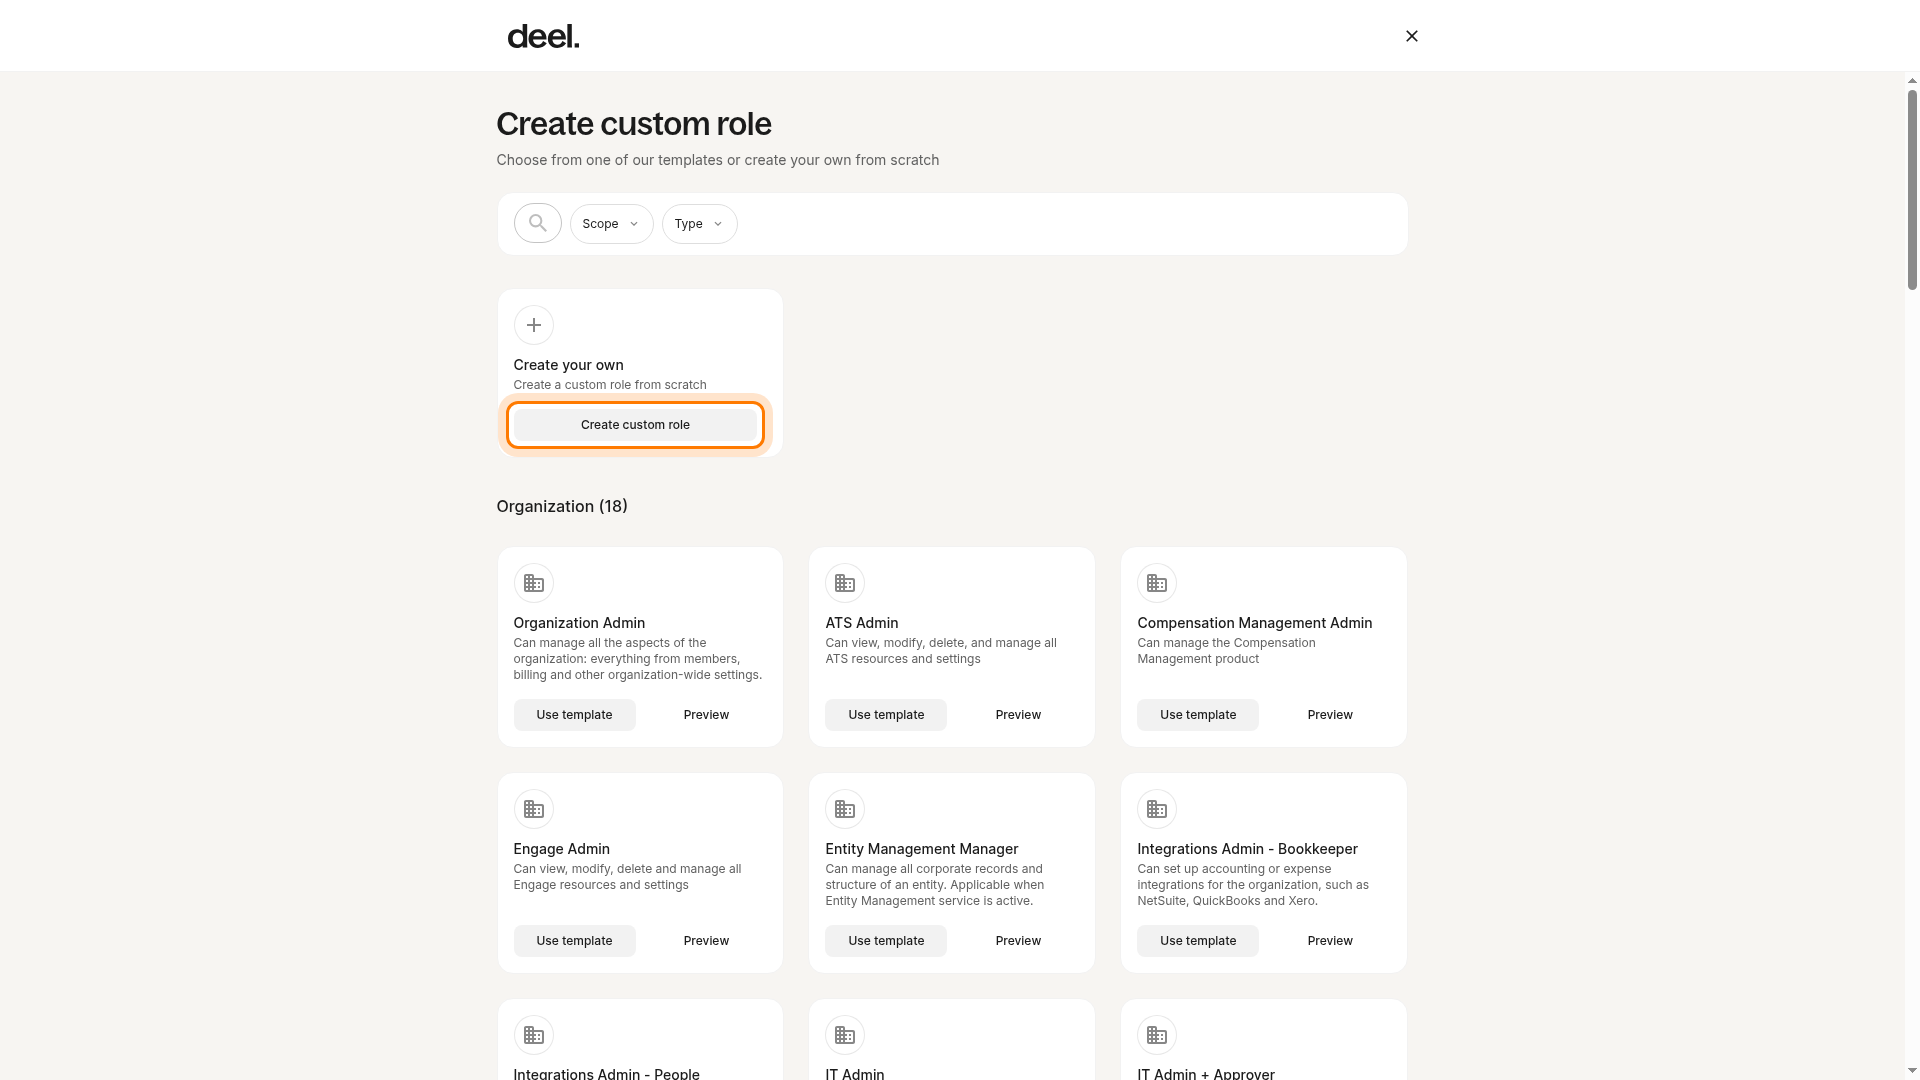
On the Create custom role page, select Create custom role in the Create your own card to start from scratch. To start with a Deel-provided template instead, select Use template on the relevant template card.
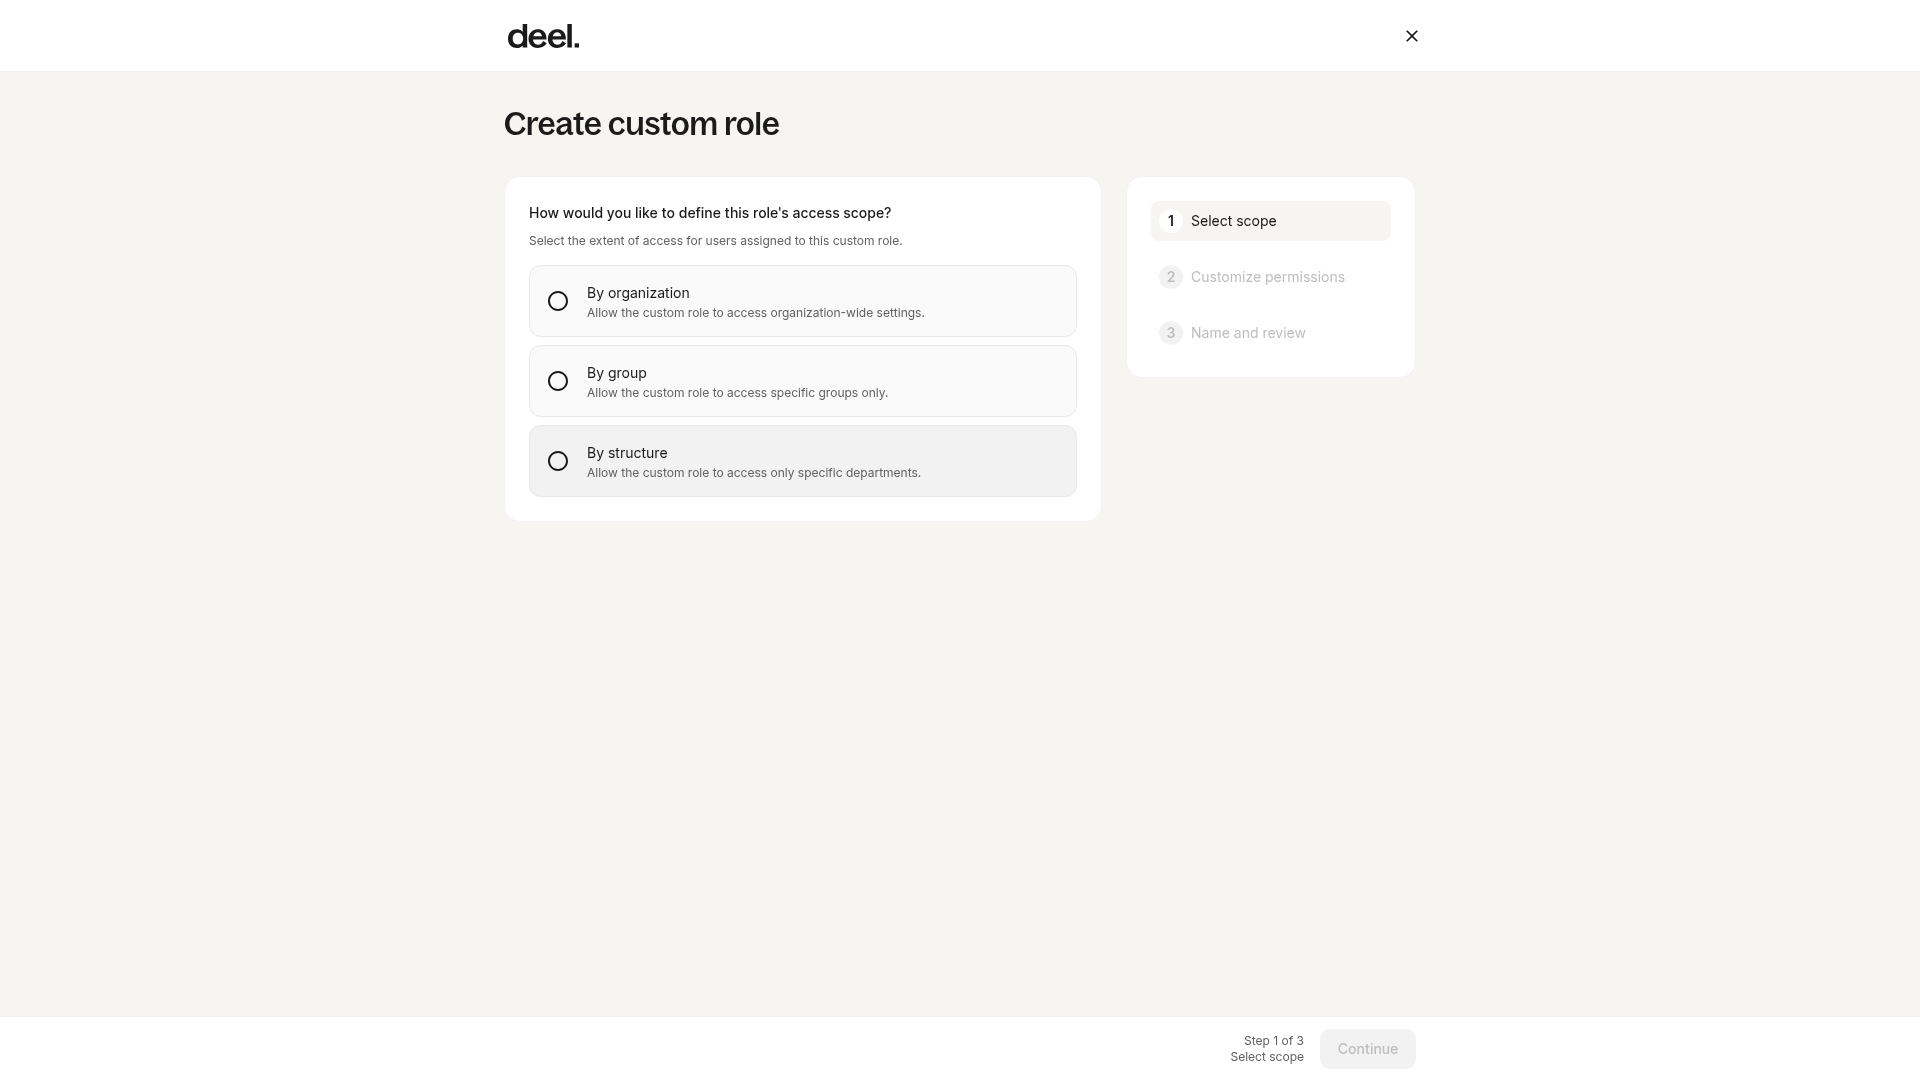
Choose the access scope for the custom role:
- By organization: Allows the role to access organization-wide settings.
- By group: Allows the role to access specific groups only.
- By structure: Allows the role to access only specific departments.
After selecting a scope, select Continue to customize permissions. If you selected a template, its permission settings are pre-filled. Review and adjust them as needed.
✅ Step 3 - Configure Permissions
In Customize permissions, configure the access the role should have. Permissions can include, but are not limited to:
- People and contracts
- Time-off requests
- Payroll and payments
- Documents
- Analytics and reports
Select Continue when you have finished configuring permissions.
✅ Step 4 - Name and review
In Name and review, enter a name for the custom role and add a description if needed.
Review the scope and permissions, then click Create.
Clients can now assign group members to the role.
✅ Step 5 - Assign group members to custom role
Return to Organization settings > Roles and permissions. On the People tab, find the worker you want to assign.
Select the ellipsis (three-dot) menu next to the worker and select Manage access. Assign the new custom role and save the changes.
Org admins can preview the behavior of a custom role by navigating to the Roles tab, clicking the ellipsis next to the custom role, and selecting Simulate.