
This article explains how Deel employees, Deel Payroll direct employees, US Payroll employees, and PEO employees can add up to five bank accounts in Deel and, where enabled, split their salary between them.
Before you begin
You must:
- Have permission to manage your personal bank accounts
- Have your bank account number or IBAN, routing details, and branch details ready
- Use the employee Payment Settings experience, rather than organization-level payment methods
- Use bank accounts in the same currency as your employment contract to avoid delays or extra fees
Workflow
Step 1 - Open Payment Settings
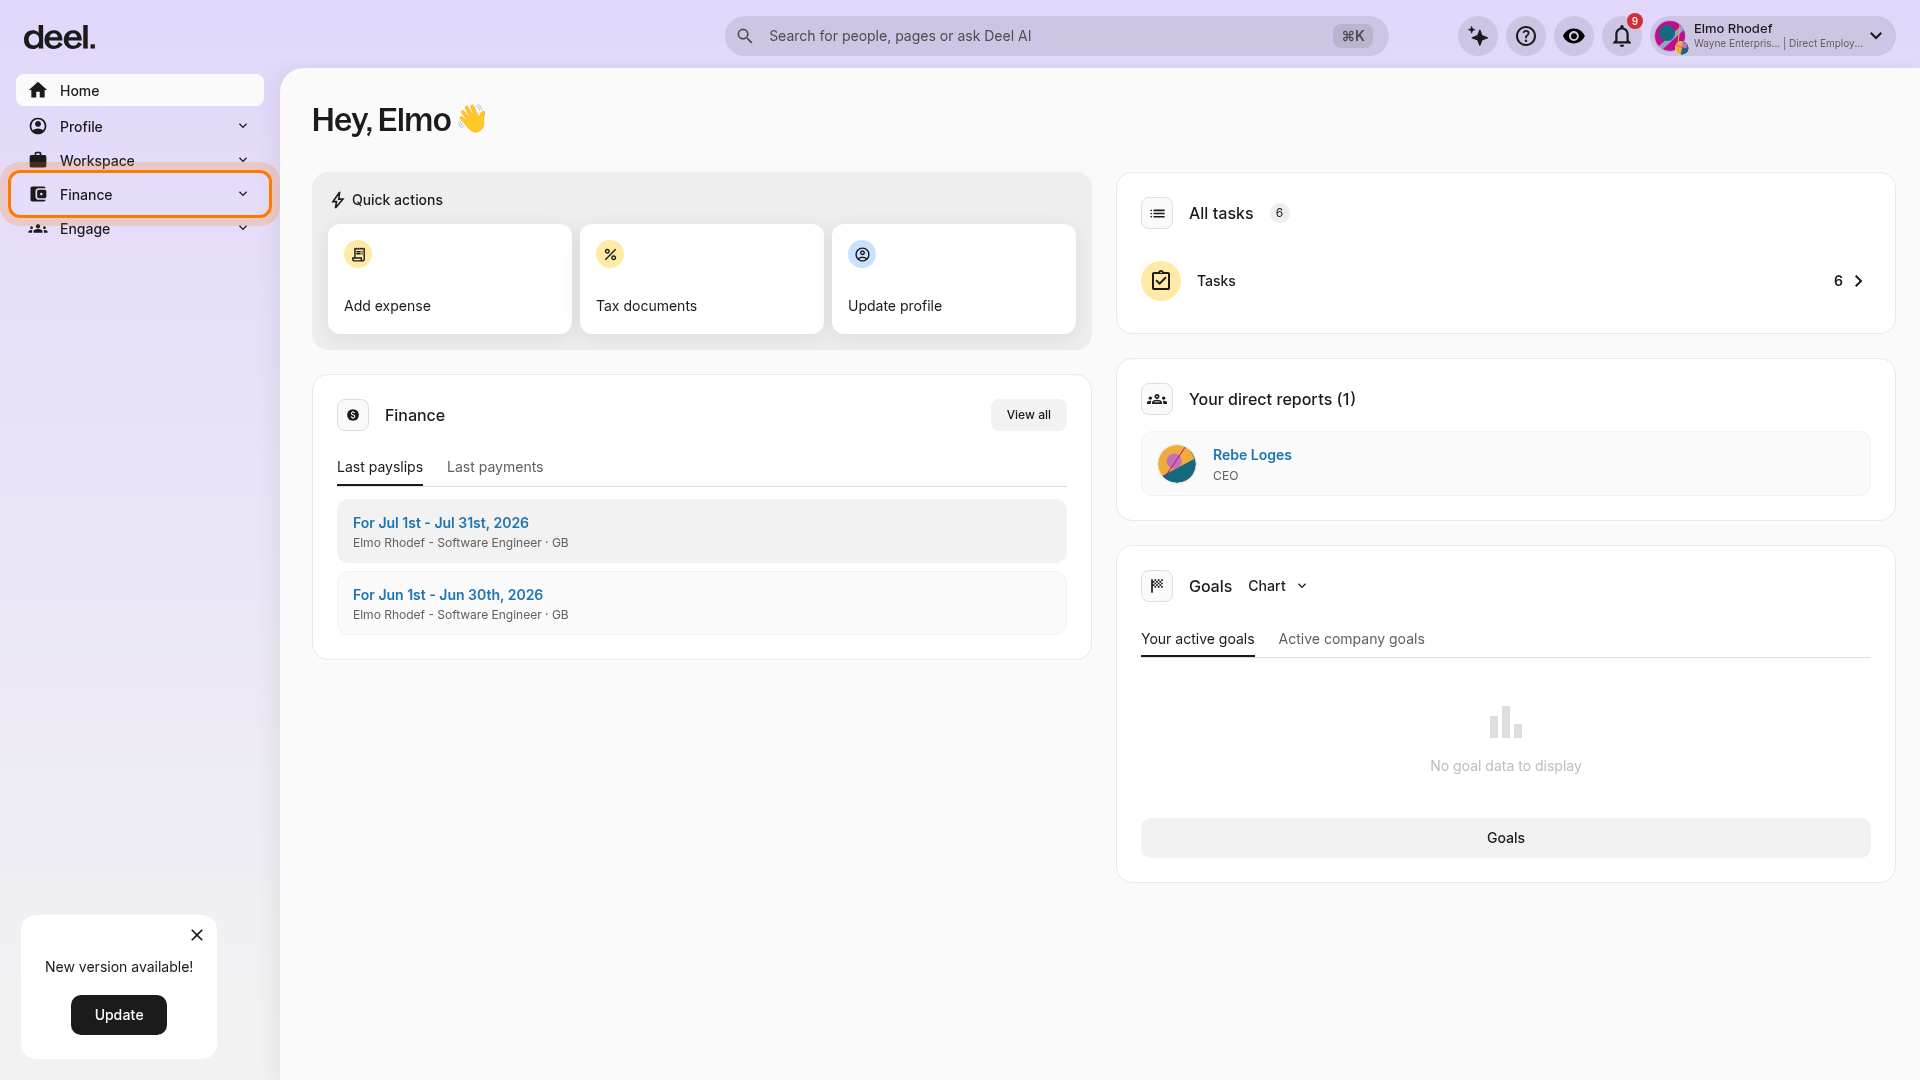
- From the Deel Home dashboard, select Finance in the left sidebar to expand its submenu.
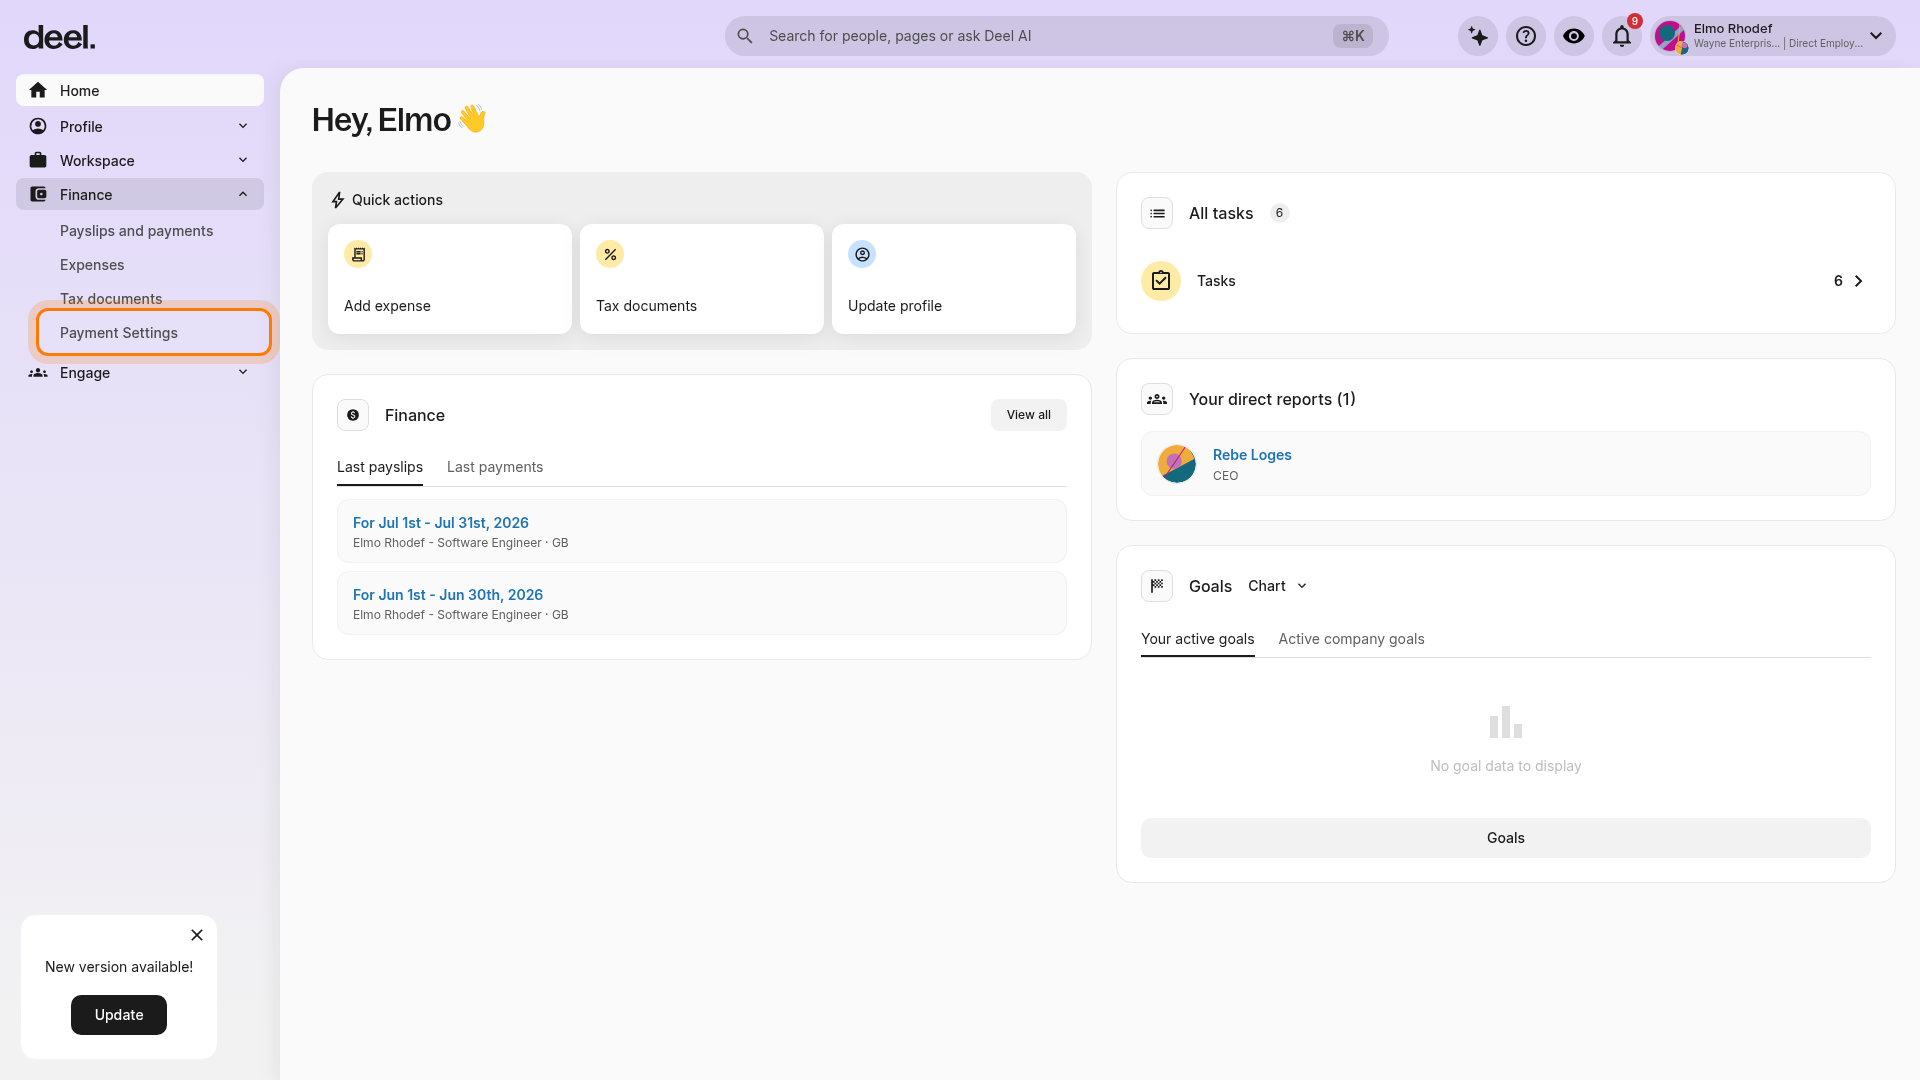
- Select Payment Settings.
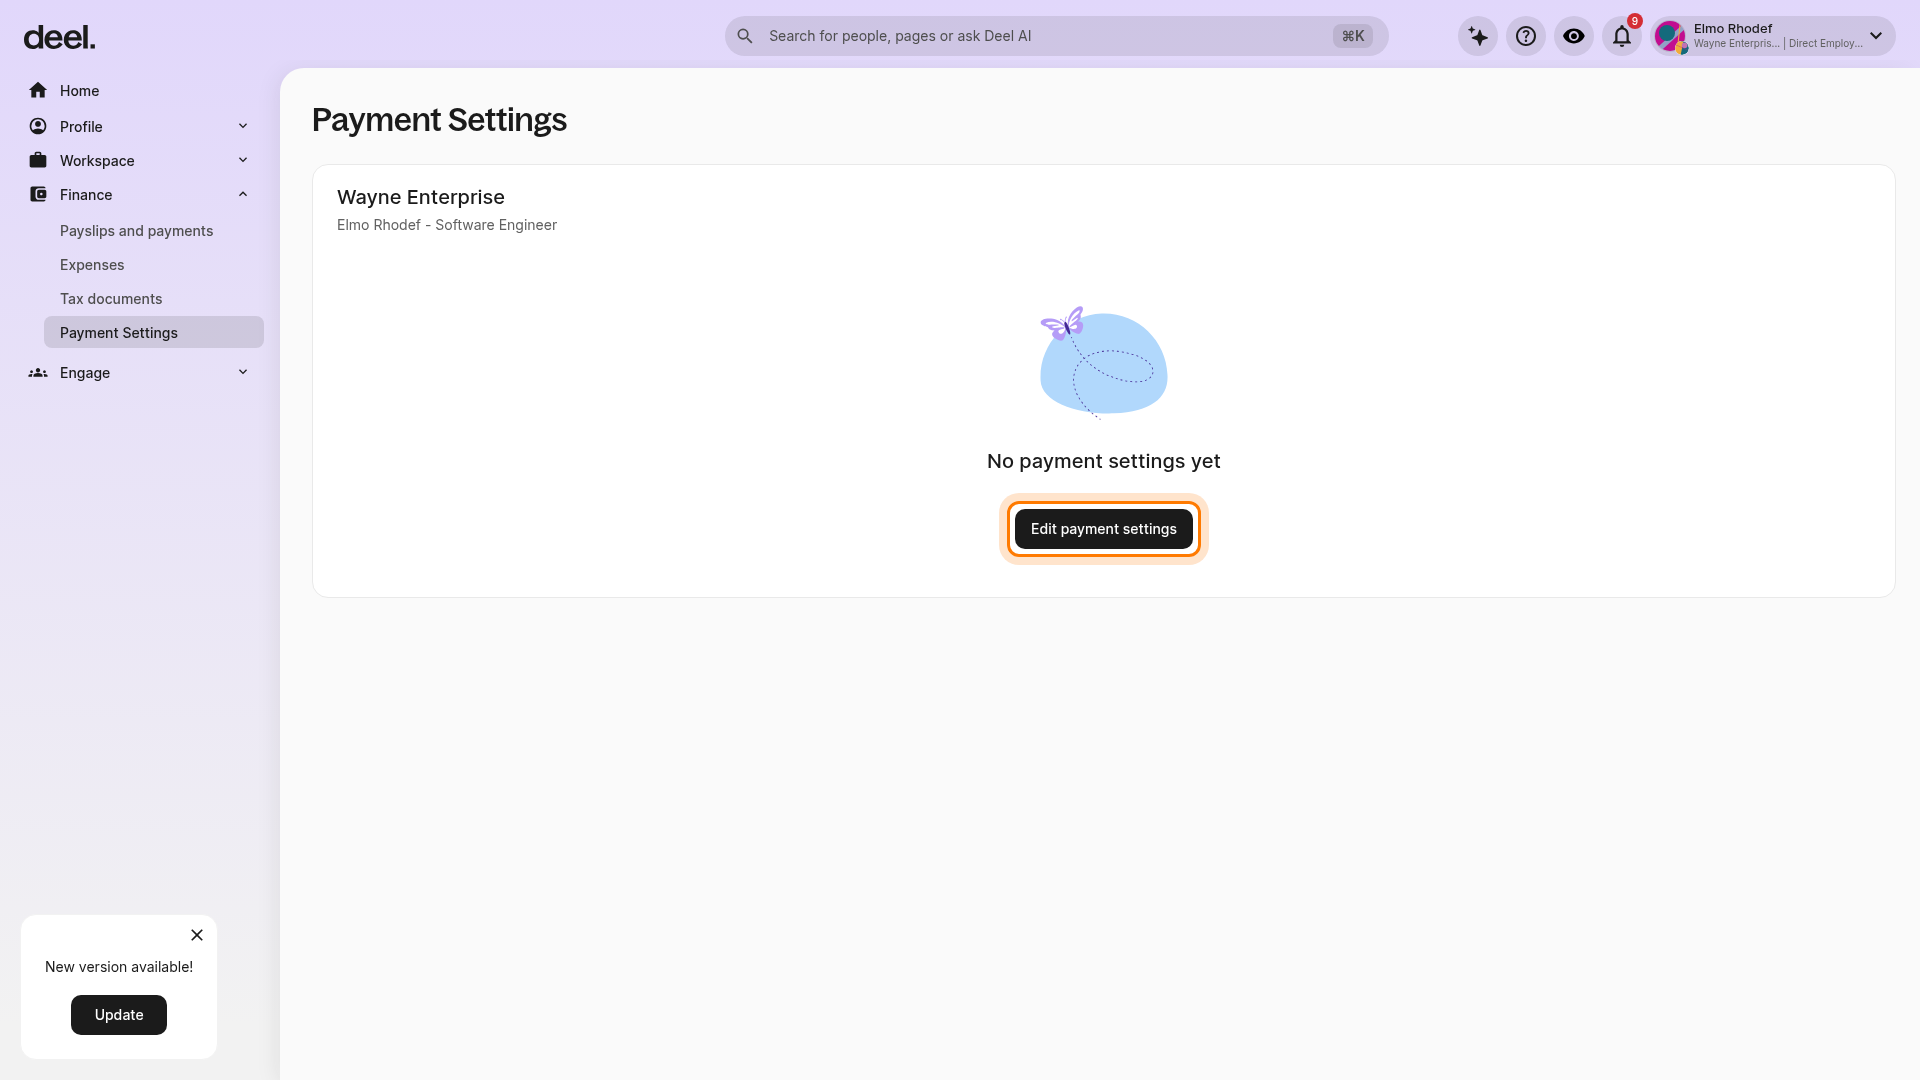
- Select Edit payment settings.
- If the page says No payment settings yet, select Edit payment settings to continue.
Step 2 - Start adding a bank account
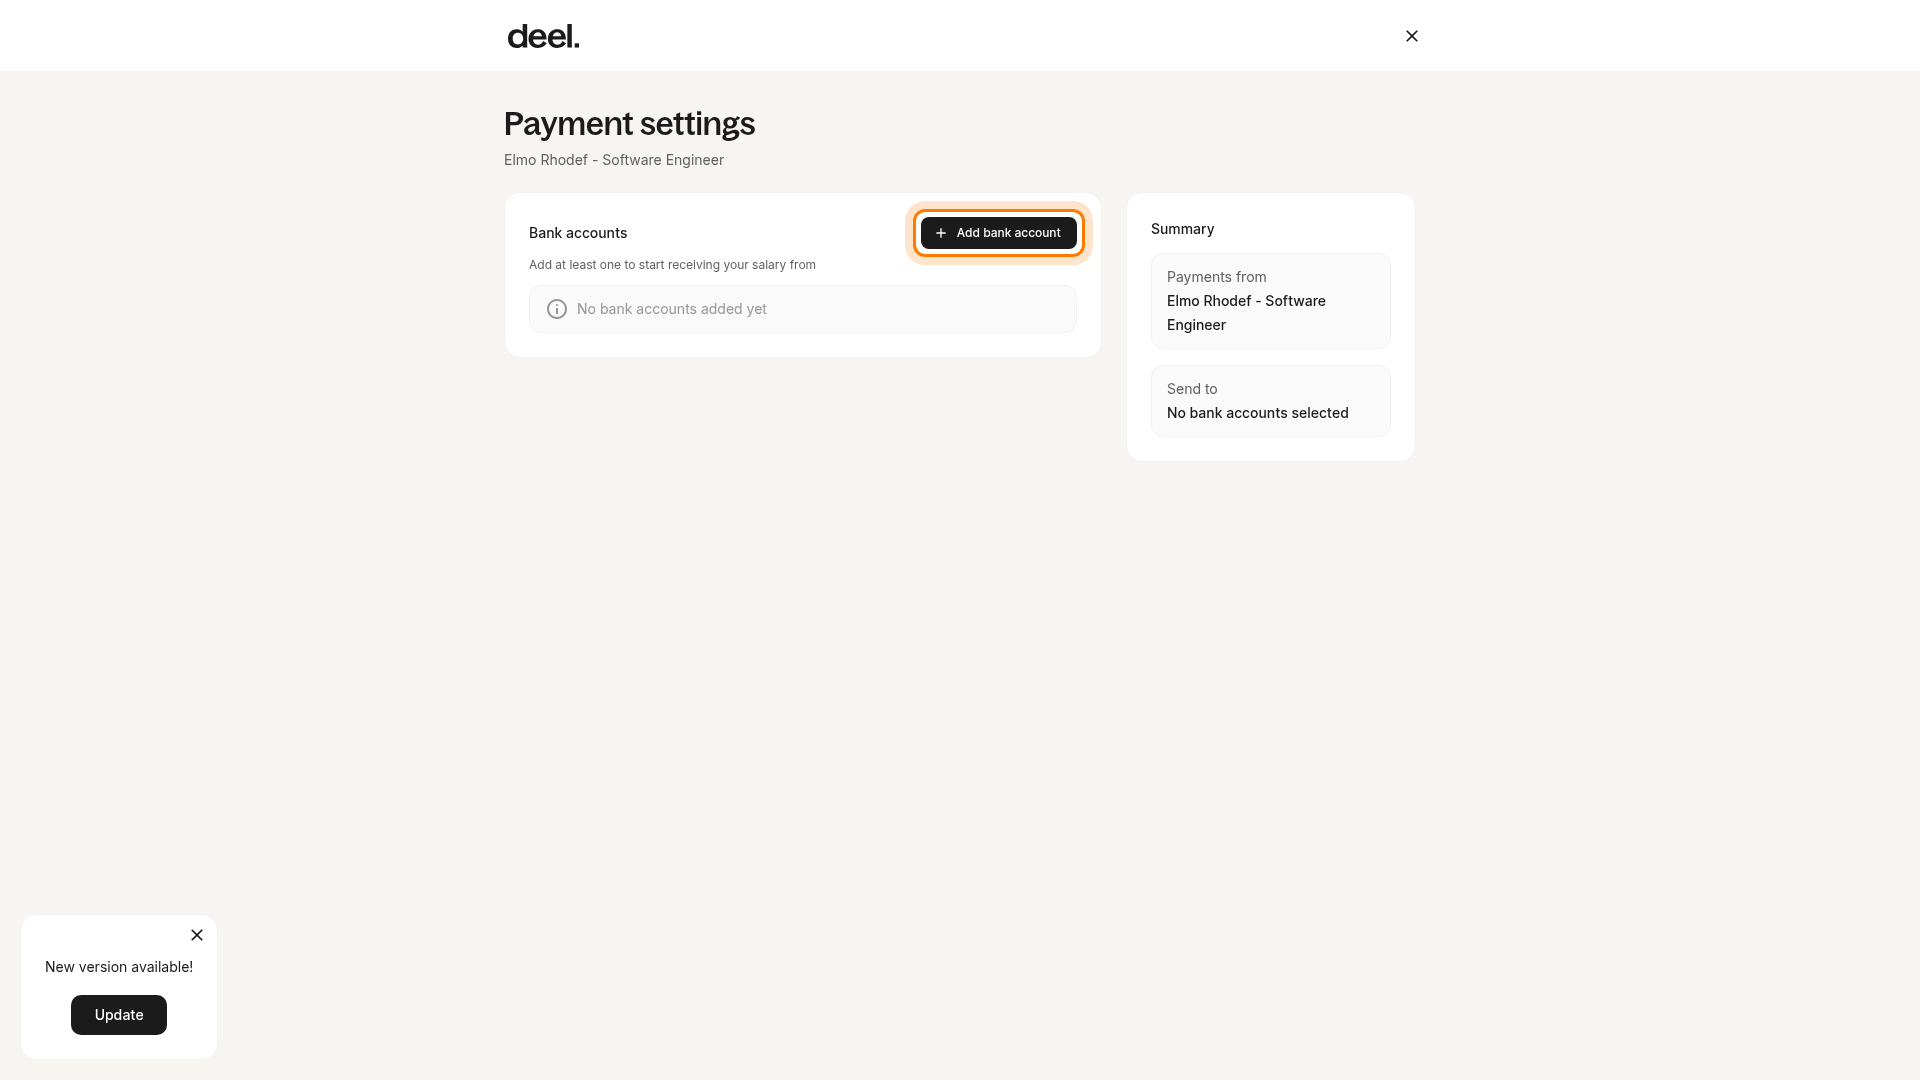
- In the Bank accounts section, select Add bank account.
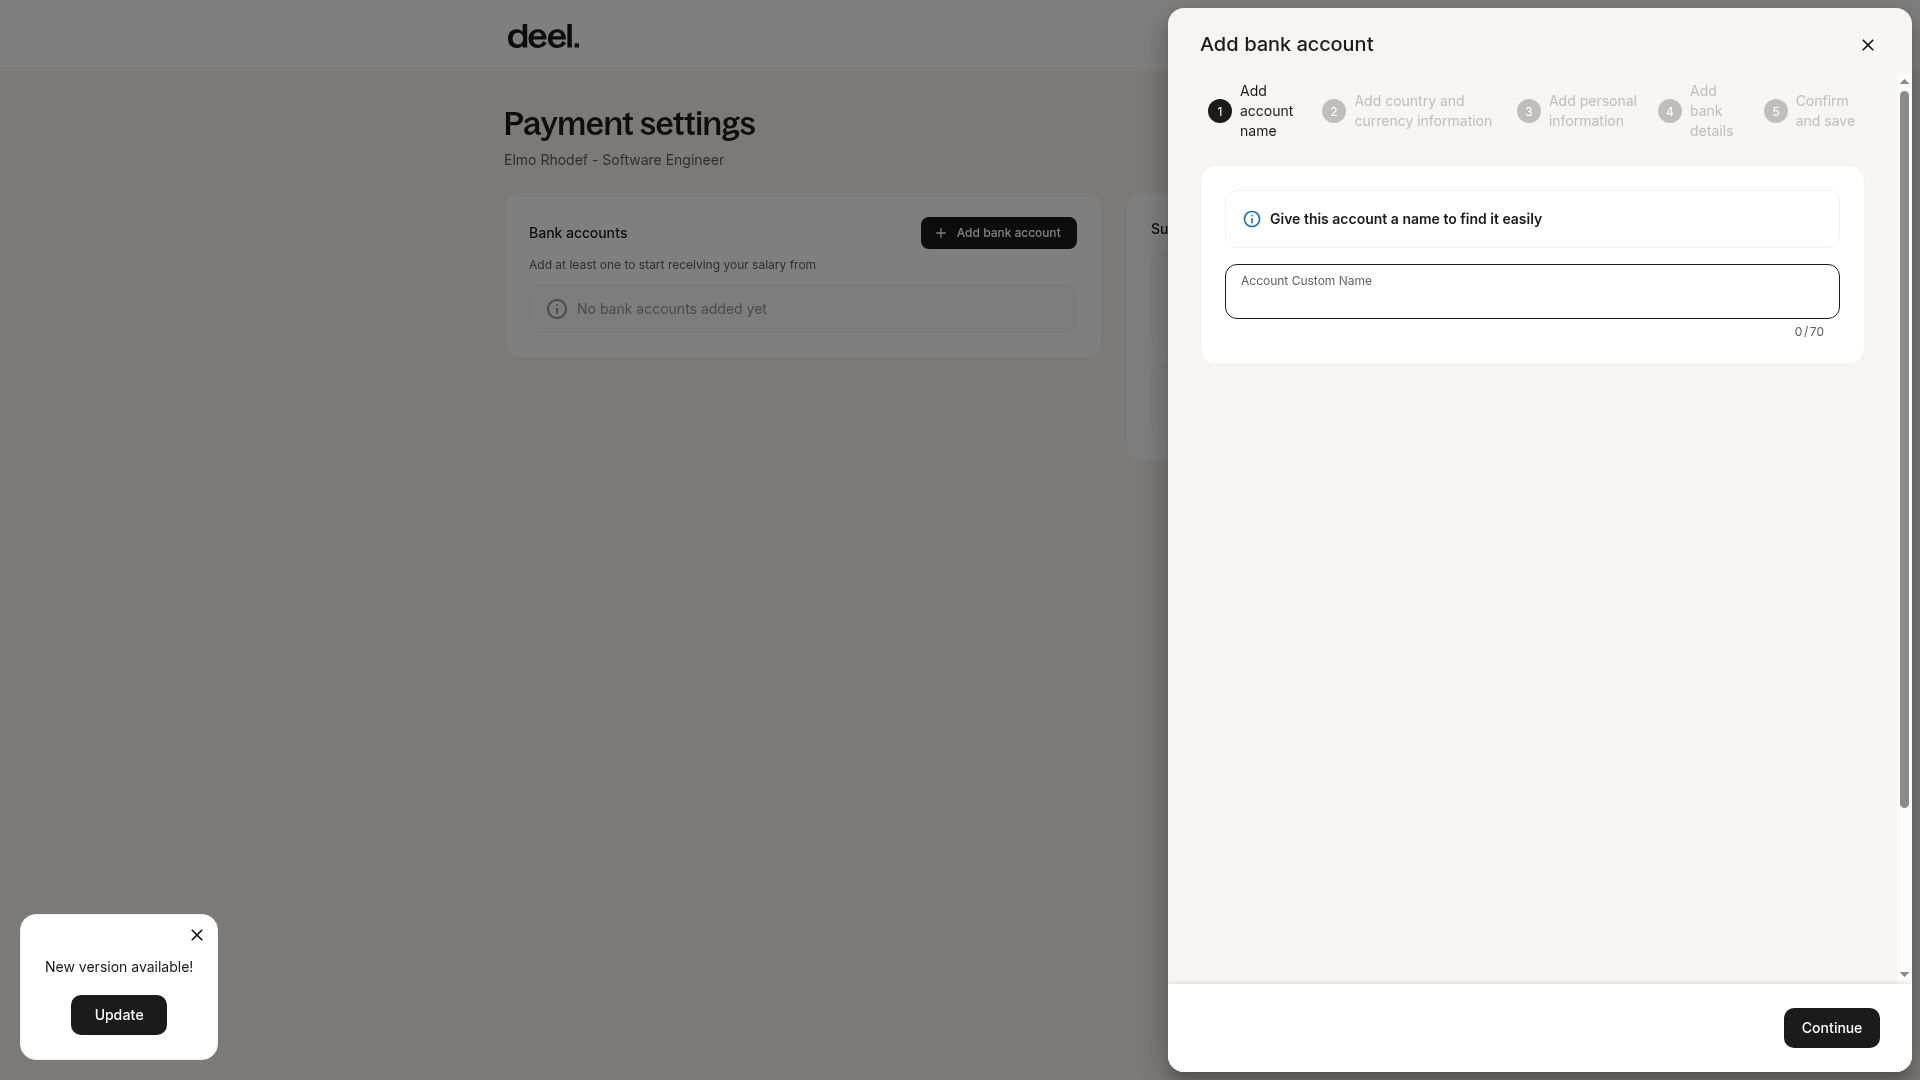
- The Add bank account panel opens on the right.
- Enter an Account Custom Name to help identify the account.
Step 3 - Enter the account name, country, and currency
- Enter an optional custom name for the account, then select Continue.
- Choose the country where the bank is located.
- Select the currency that matches your employment contract.
Note: The Add bank account panel guides you through country and currency, personal information, bank details, and confirmation.
Step 4 - Enter the account details
Provide the requested bank information, which may include:
- Account number or IBAN
- Routing number and bank or branch details
- Account type, such as checking or savings
Step 5 - Enter your personal information
Provide the requested personal information, including:
- Your full legal name, exactly as it appears on the bank account
- Your residential address, matching the bank’s records
- Your contact phone number and email address
Step 6 - Review and save the bank account
- Review the account and personal information for accuracy.
- Complete the confirmation step and save the bank account.
The new account appears in the Bank accounts section of Payment Settings.
Note: After saving, we'll send a small test deposit to confirm the account is valid. See Verifying your bank account (penny test) for how to check and confirm it.
Step 7 - Open Salary distribution
- In the left sidebar, select Finance to expand its submenu.
- Select Payment Settings.
- Open Edit payment settings, if shown.
- In the Salary distribution panel, select Edit.
You will see Edit only if your organization allows multiple bank accounts and salary distributions.
Note: This feature is available in all Deel countries, but clients may restrict it by entity. Clients must also ask Support or their CSM to enable fixed-amount distributions.
Step 8 - Set the salary distribution
- Enter the percentage for each account using whole numbers; each allocation must be at least 1%.
- Confirm that the total allocation is correct and review the summary panel for the effective-date notice.
- Save your changes.
Changes made after the payroll cut-off date apply to the next payroll cycle. Off-cycle payments and expense reimbursements also follow the selected percentages.
Frequently Asked Questions
Will the client see how salary is split?
Can employees add a bank account from a different country?
What happens if I try to save an account in a different currency?
The account may be rejected, or payments may be delayed and subject to foreign-exchange fees.
How many bank accounts can I add?
Why don’t I see the Bank accounts tab?
Why does the top-right gear or profile menu not take me to my employee bank accounts?
The profile menu contains personal profile options, and organization settings may contain company billing options. For employee bank accounts, use Finance → Payment Settings in the left sidebar.