
This article explains how to set up and use the SAML 2.0 Connect integration so your organization can use single sign-on (SSO) with Okta as the identity provider (IdP). When SSO is enabled, organization members must authenticate through your configured IdP.
Before you begin

How to connect the SAML 2.0 Connector integration
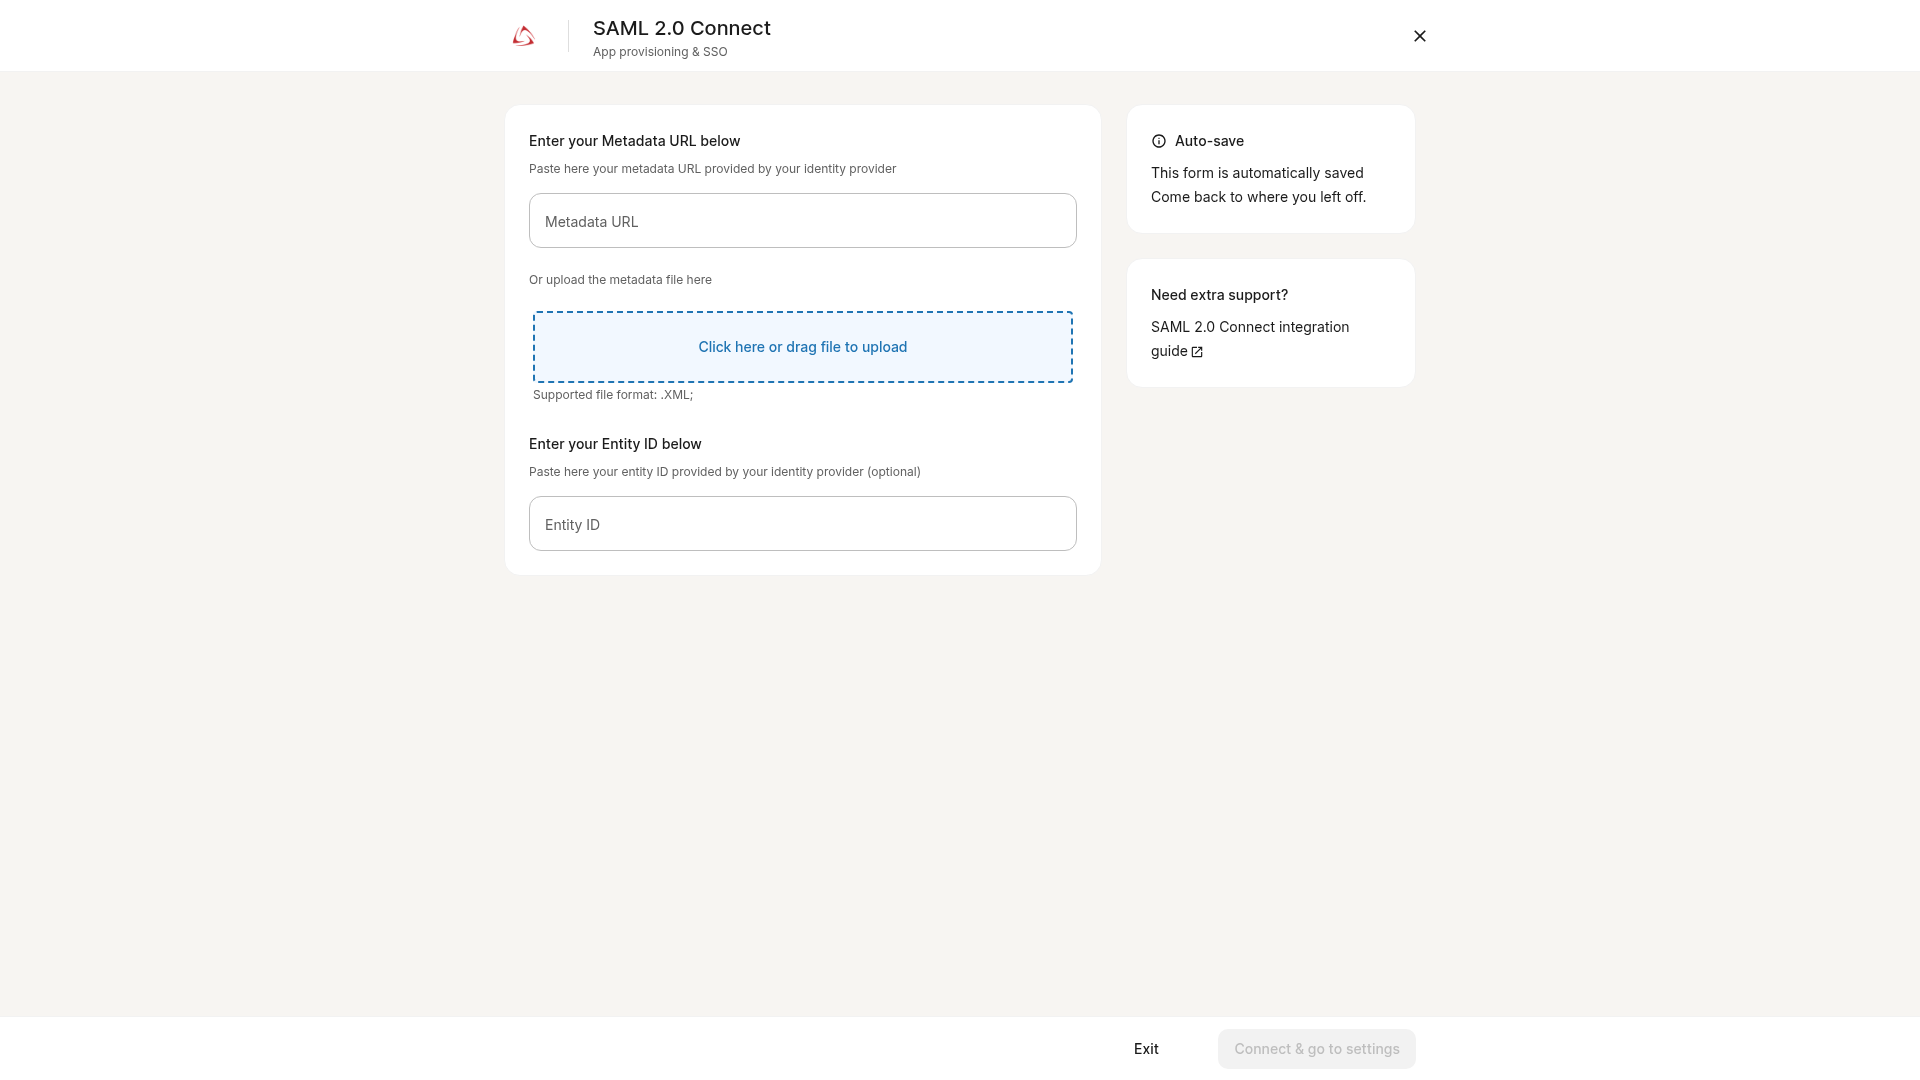
To set up SSO using the SAML protocol, open the SAML 2.0 Connect integration configuration page. Keep this page open while you create and configure the Okta application, as you will need to enter Okta metadata in Deel.
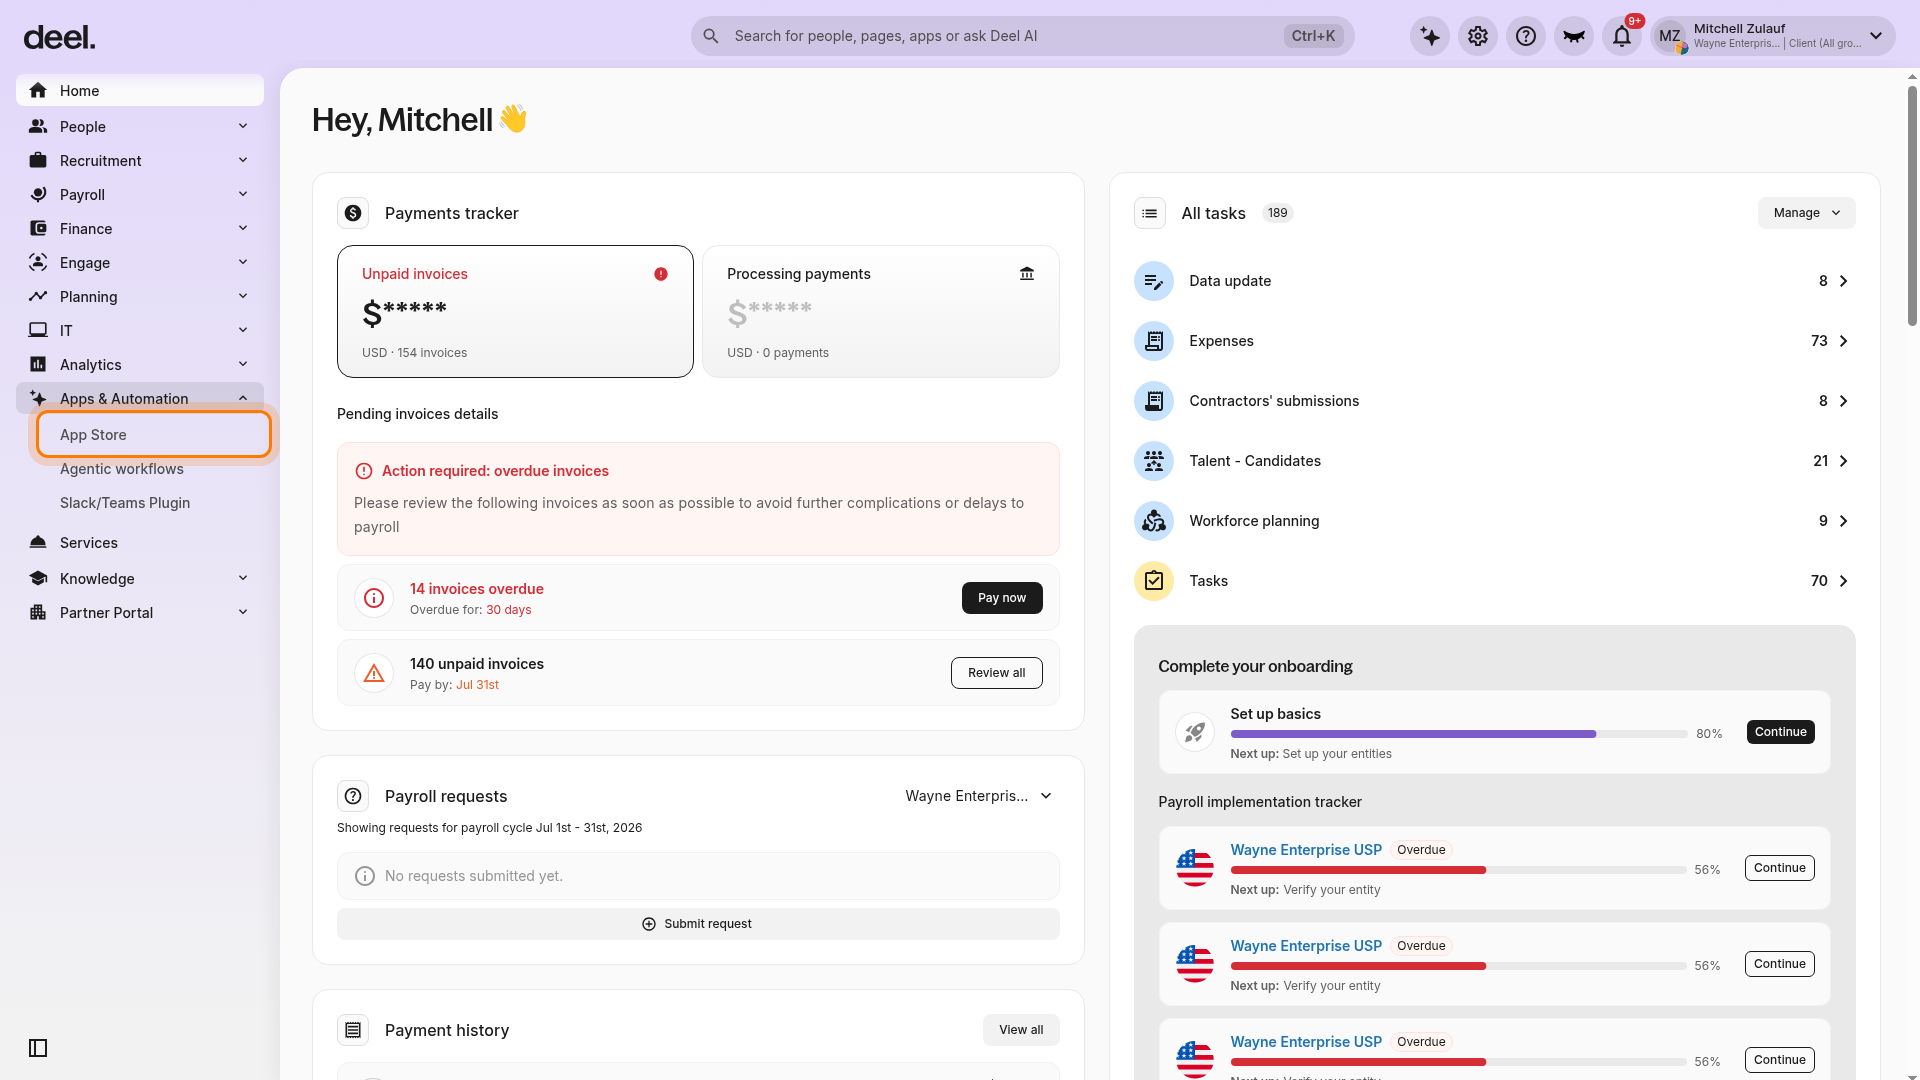
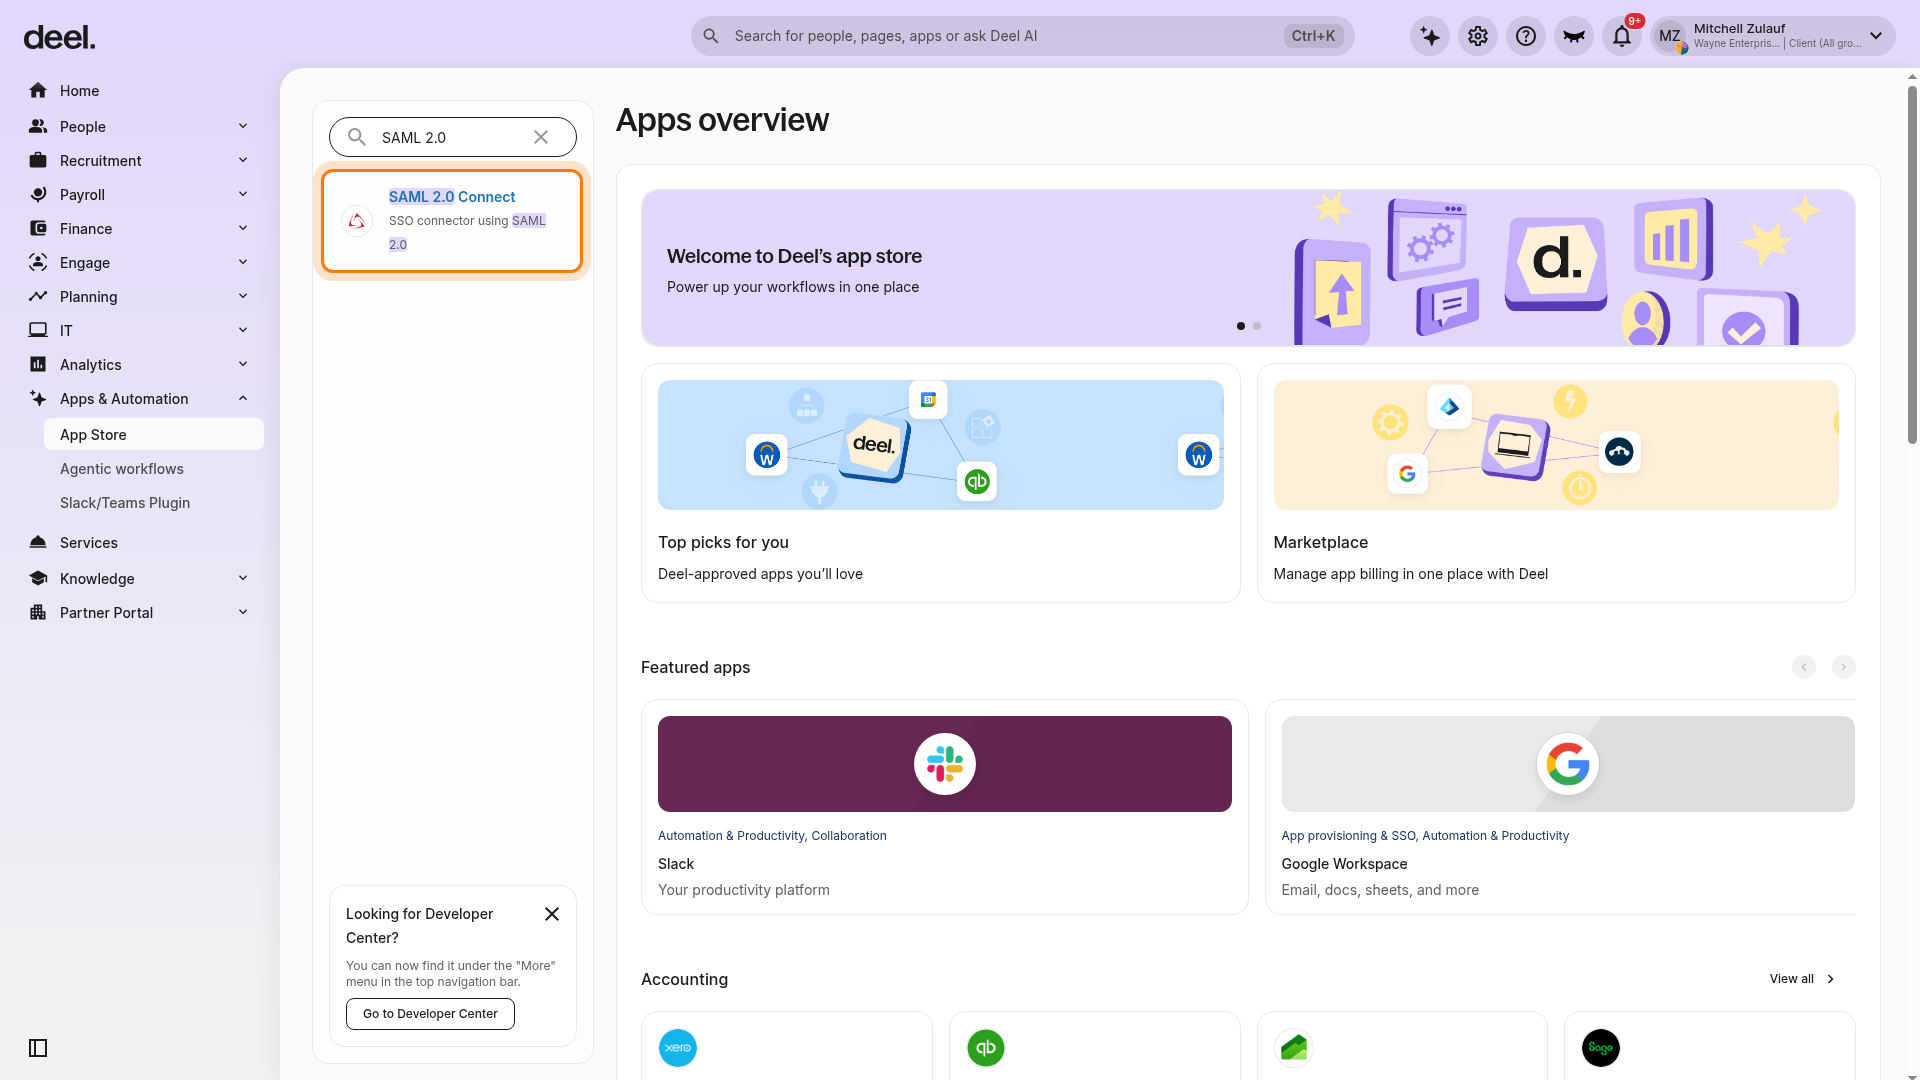
✅ Step 1 - From the Deel Home dashboard, select Apps & Automation in the left sidebar to expand its submenu, then select App Store.
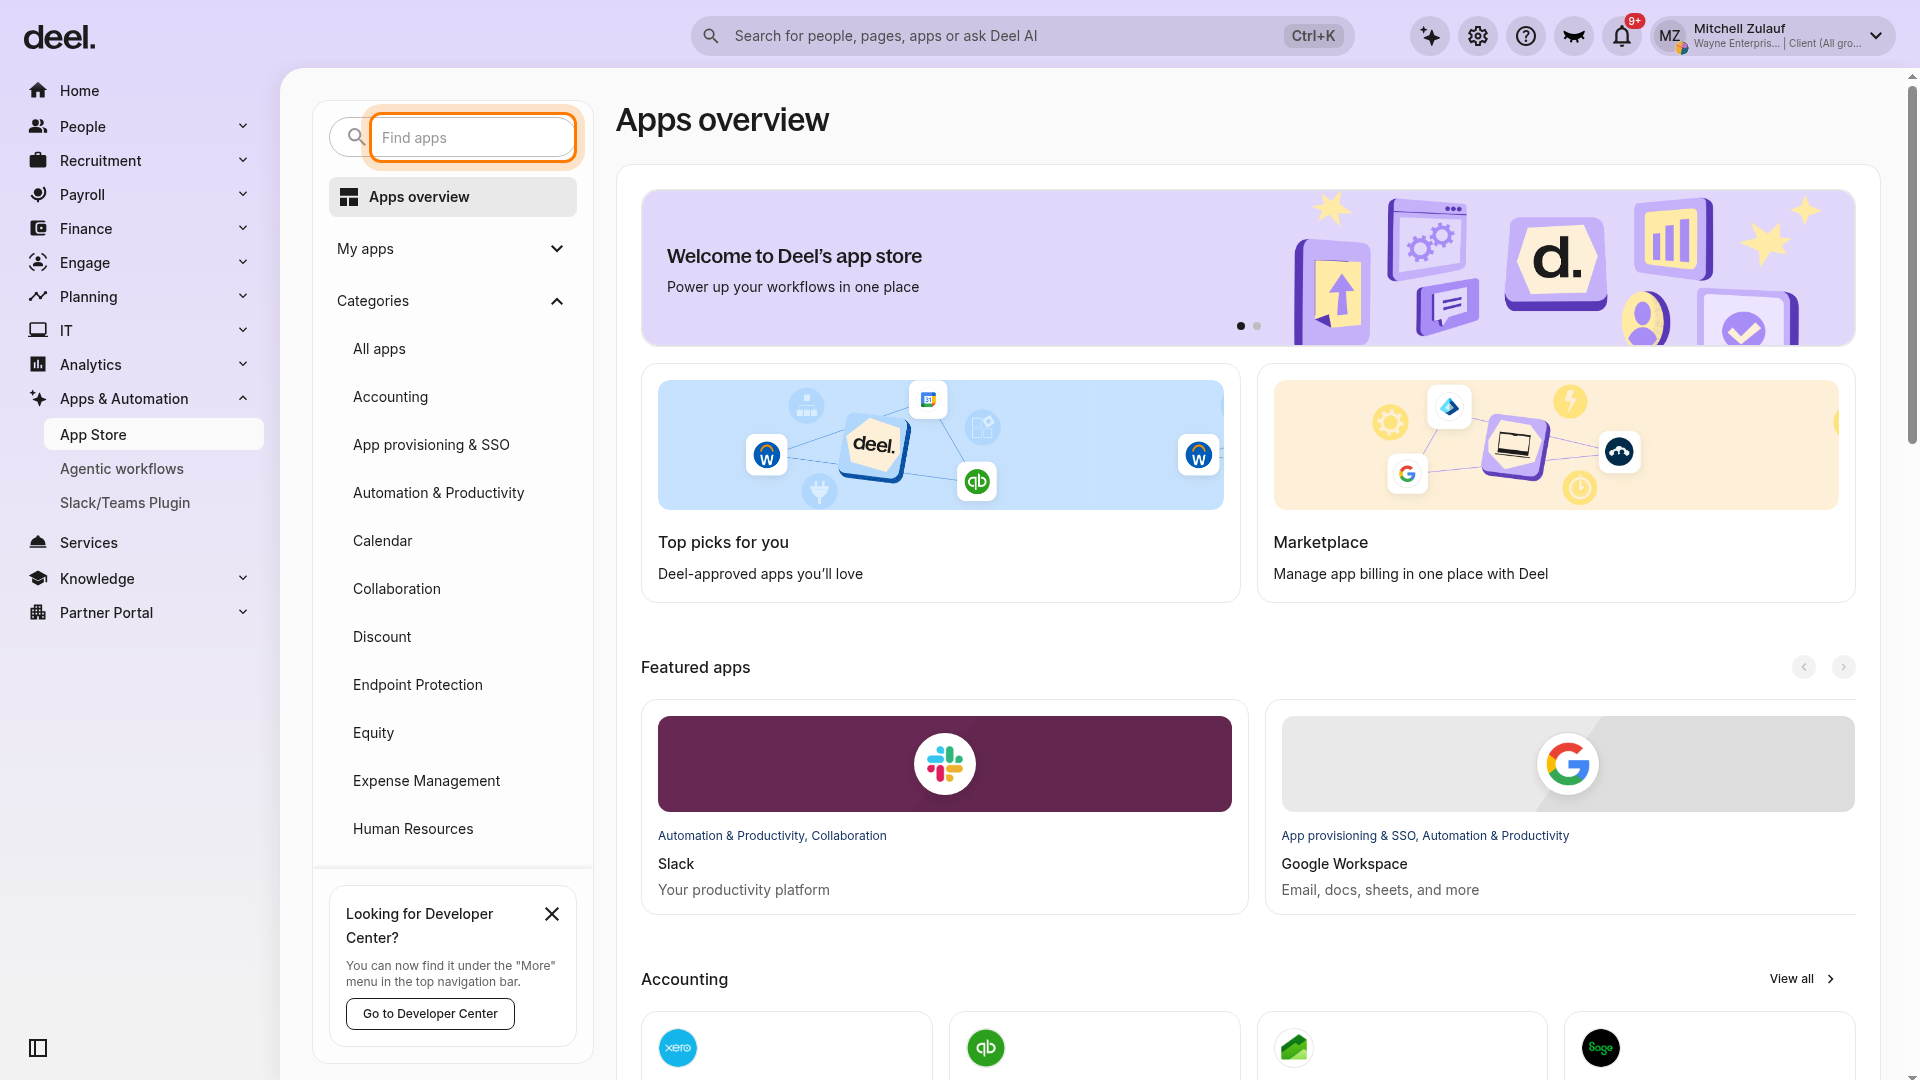
✅ Step 2 - If the Welcome to your Deel Apps & Integrations pop-up appears, select I'll do that later to close it. On the Apps overview page, enter SAML 2.0 in the Find apps search field.
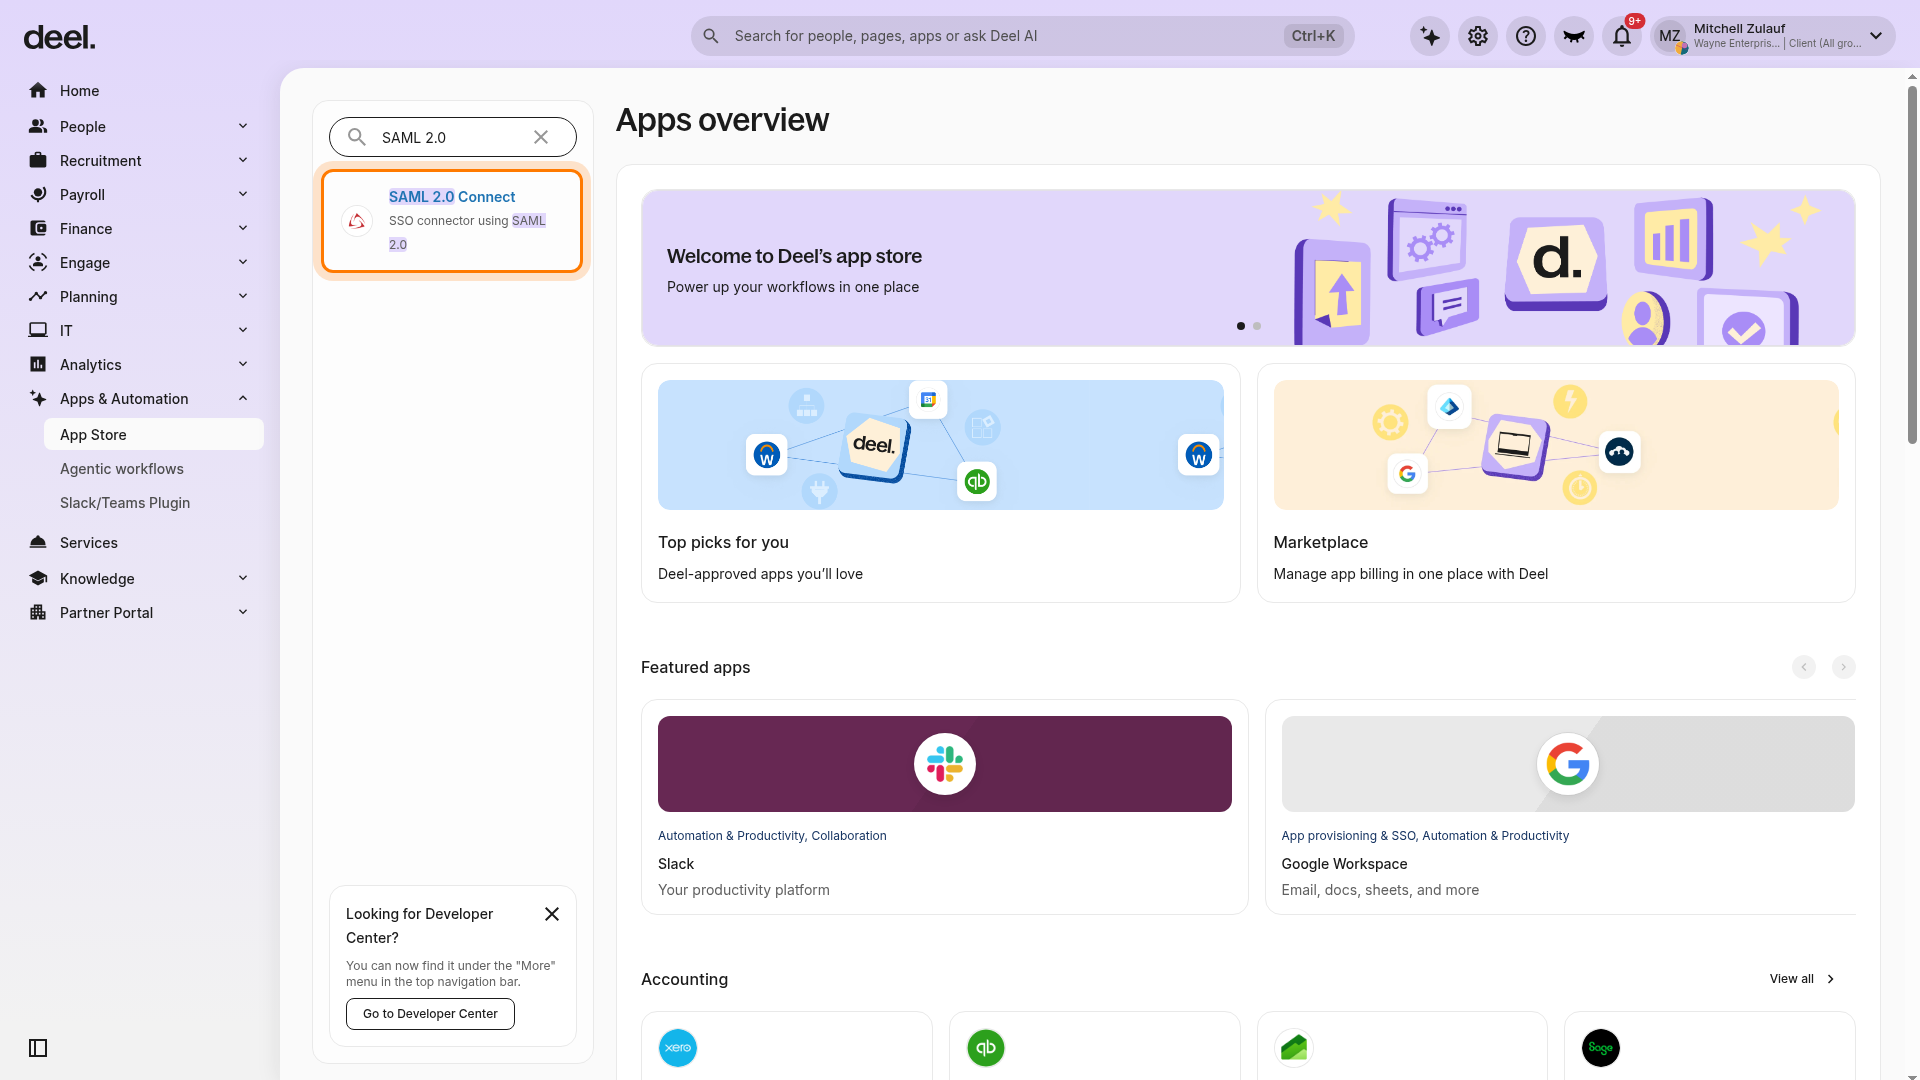
✅ Step 3 - Select SAML 2.0 Connect, described as SSO connector using SAML 2.0.
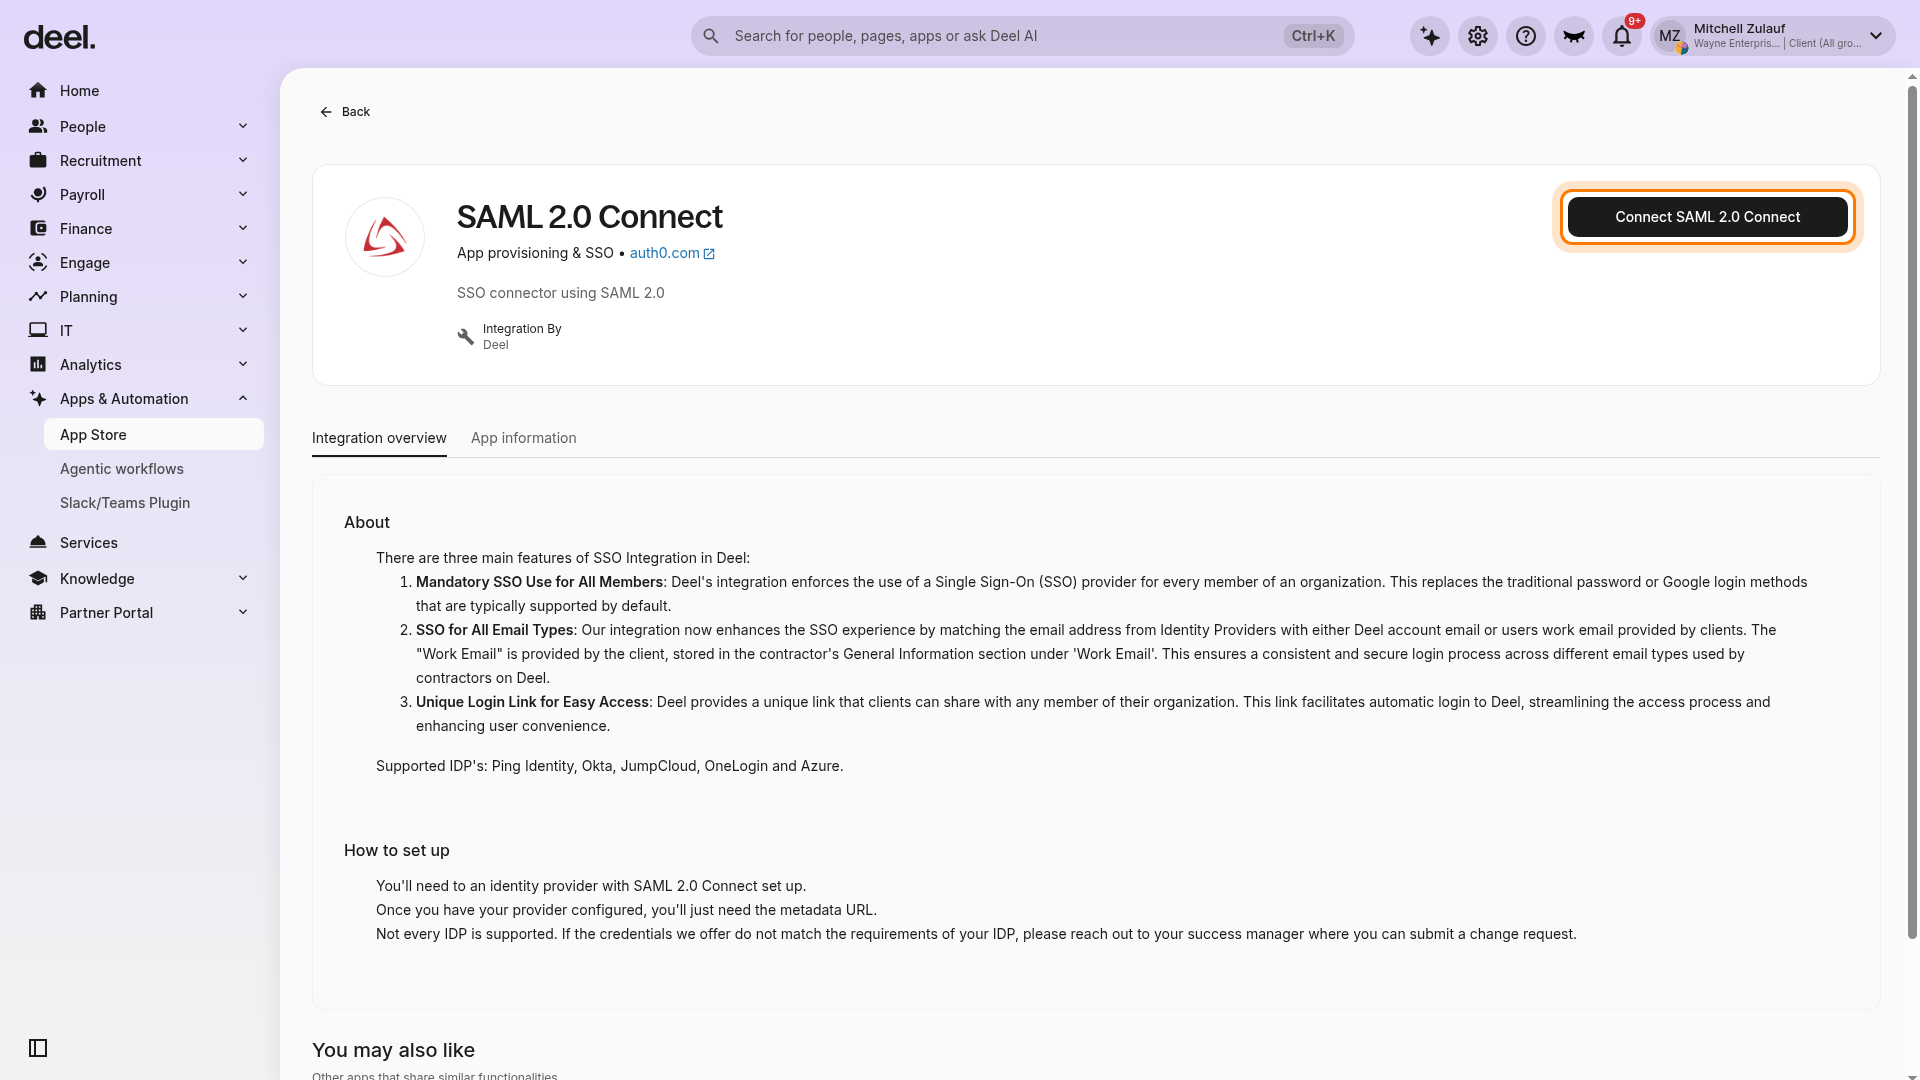
✅ Step 4 - On the integration details page, select Connect SAML 2.0 Connect.
✅ Step 5 - The SAML 2.0 Connect configuration page displays a Metadata URL field, an option to upload a metadata XML file, an optional Entity ID field, and an auto-save message. If you only need to reach the configuration page, stop here. Do not enter metadata or select Connect & go to settings until you are ready to configure SSO.
How to set up a new Okta application
To enable Deel to authenticate users via Okta using SAML 2.0 SSO protocol, create and configure a new application by following these steps:
✅ Step 6 - Using the Okta Administrator Portal, navigate to Applications and then Applications in the left menu. Click Create App Integration, choose SAML 2.0, and click Next.
✅ Step 7 - Give the app a name, for example, Deel SSO, and click Next.
In Configure SAML, enter a placeholder value in the Single sign-on URL field and provide a unique value in the Audience URI (SP Entity ID) field. Scroll down and click Next to proceed.
✅ Step 8 - Select This is an internal app that we have created for the App Type field. Then click Finish to complete the process.
✅ Step 9 - Once finished, you'll land on the SSO app settings. On the Sign On tab, copy the Metadata URL.
✅ Step 10 - Go back to the Deel SAML 2.0 Connect configuration page and paste the metadata URL in the Metadata URL field. For the optional Entity ID field, enter the same entity ID provided in the Okta configuration, and click Connect & Go to Settings.
✅ Step 11 - You'll be redirected back to the integration page, in the single sign-on configuration panel. Enter a name for the SSO application and copy the generated Redirect URL.
✅ Step 12 - Back in the Okta settings, click the General tab and click Edit in the SAML Settings section. Click Next, replace the placeholder value in the Single sign-on URL field with the Redirect URL from Deel, then click Next again and Finish to complete the set up.
✅ Step 13 - To assign this application to specific users, use the Users tab on the left, or configure specific roles to assign this application to entire groups of users. To better understand how Groups and Roles work in Okta, see their training page on this topic.
✅ Step 14 - Back in Deel's SAML 2.0 Connect settings, click Enable to enable SSO for your organization.
Once enabled, your organization members must use SSO to sign in.
To disable SSO, first open SAML 2.0 Connect. In the Deel left sidebar, expand Apps & Automation and select App Store. If the welcome prompt appears, select I'll do that later. Enter SAML 2.0 in the Find apps search field, then select SAML 2.0 Connect, described as SSO connector using SAML 2.0.
On the SAML 2.0 Connect details page, click More and select Disconnect. Review the disconnect confirmation modal before confirming the action. Disconnecting SAML 2.0 Connect can affect how organization members sign in.
FAQ
[ACCORDION] Does this integration support LastPass?
No, this integration currently doesn't support LastPass.
Troubleshooting
| Problem | Did you try? | How to fix |
|---|---|---|
| The search field is unavailable. | Check whether the welcome dialog is open. | Close the welcome dialog by selecting I'll do that later. |
| No matching app appears. | Check the search term. | Search for exactly SAML 2.0 and choose SAML 2.0 Connect. |
| The Connect button is missing. | Confirm that you are on the SAML 2.0 Connect details page and that your role has permission to connect integrations. | Confirm that you are on the SAML 2.0 Connect details page and that your role has permission to connect integrations. |
| You are still on the integration overview. | Check whether you have selected the connection option. | Select Connect SAML 2.0 Connect to open the configuration form. |
| The Disconnect option is missing. | Check whether the integration details page shows Connect SAML 2.0 Connect instead of a More menu. | If it does, SAML 2.0 Connect is not connected for the current organization. Do not select Connect SAML 2.0 Connect when your goal is to disable SSO. Instead, verify that you are in the correct organization or contact the person responsible for SSO configuration. |