
Time Tracking allows clients to create hourly EOR, PEO, and Direct Employee-Payroll contracts, and allows employees to submit worked hours for payroll processing.
This article explains how to submit one or multiple shifts, edit forecasted shifts, discard forecasted shifts, and review time-tracking information.
Before you begin
To open Time tracking in the current interface, use the left sidebar:
- Expand Workspace.
- Select Time tracking.
How to Submit Worked Hours
Use this workflow to submit hours for a date marked No hours worked or Non-working day.
Step 1 - Open the Submit Worked Hours form
- Open Workspace > Time tracking from the left sidebar.
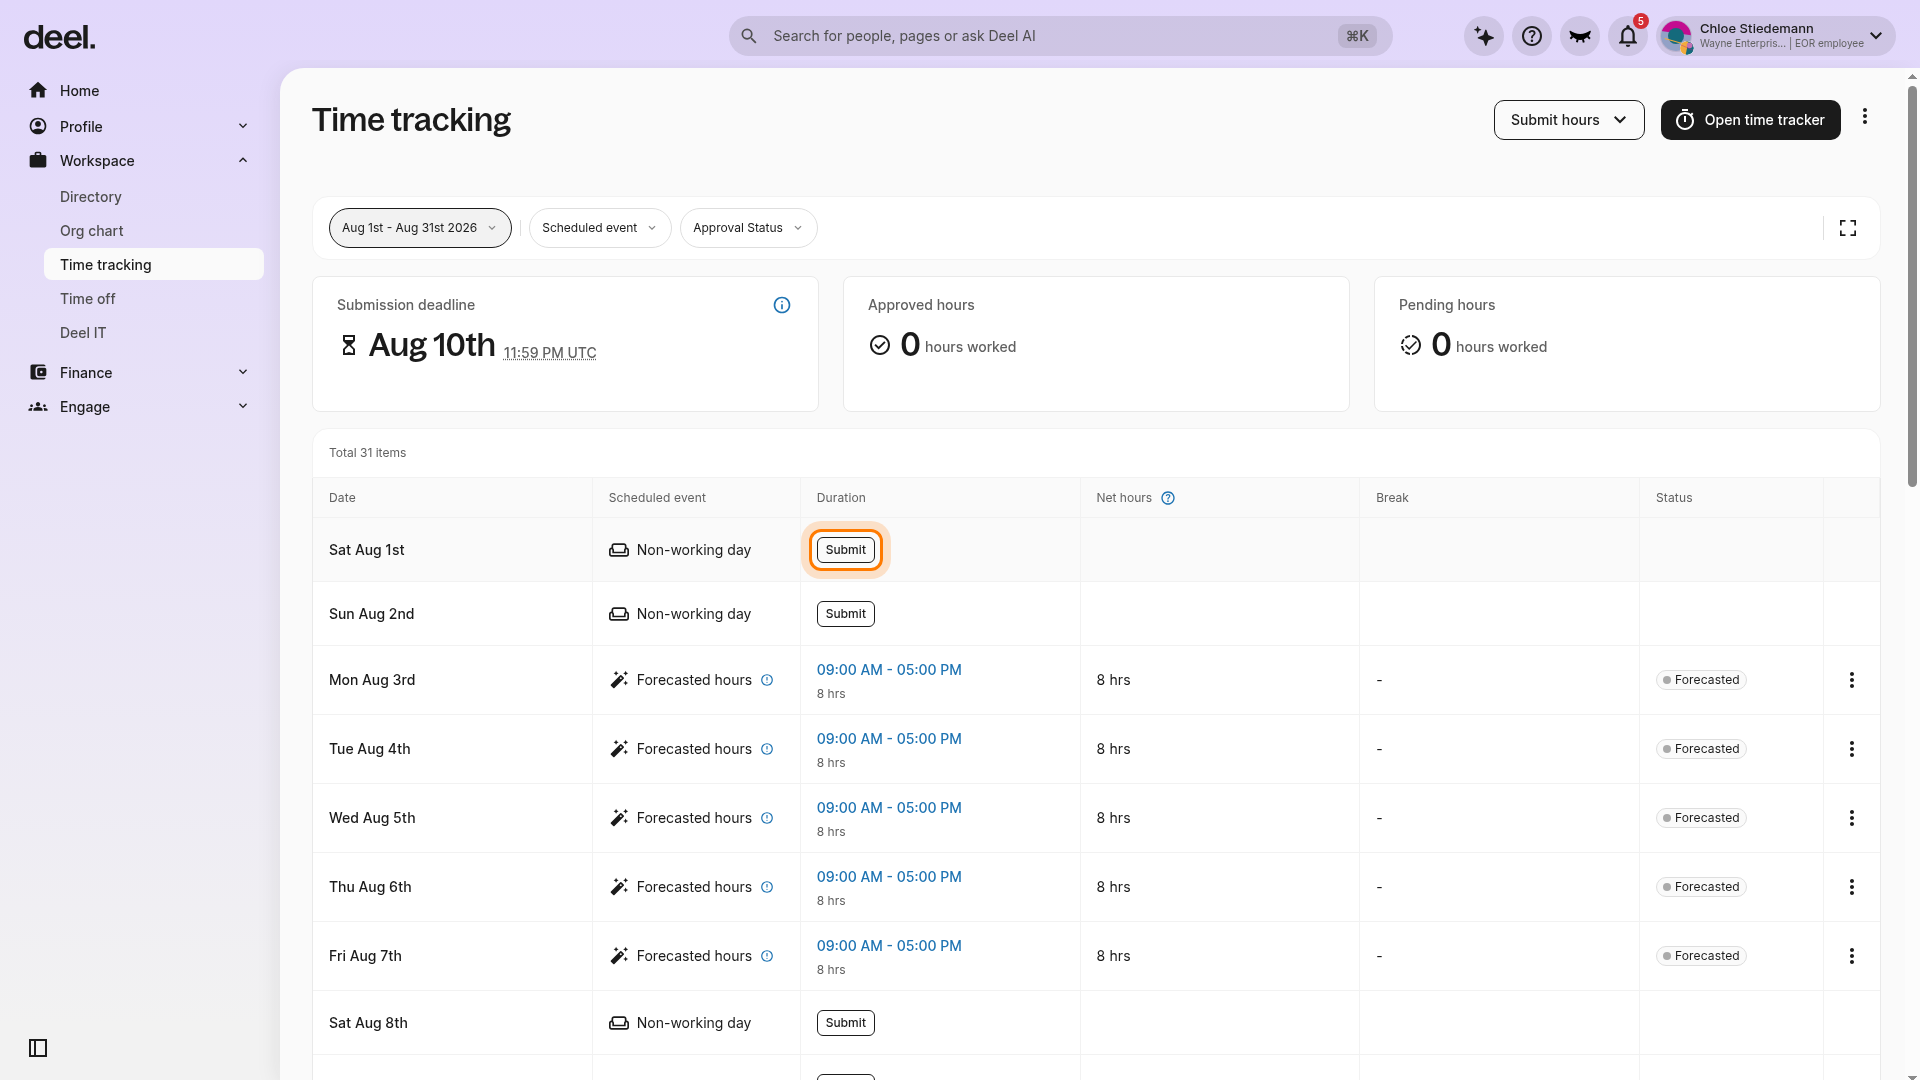
- In the time-tracking table, locate the applicable date. Select a row marked No hours worked or Non-working day that has a row-level Submit button.
- Select Submit on that row. Do not use the top-page submission control for this workflow.
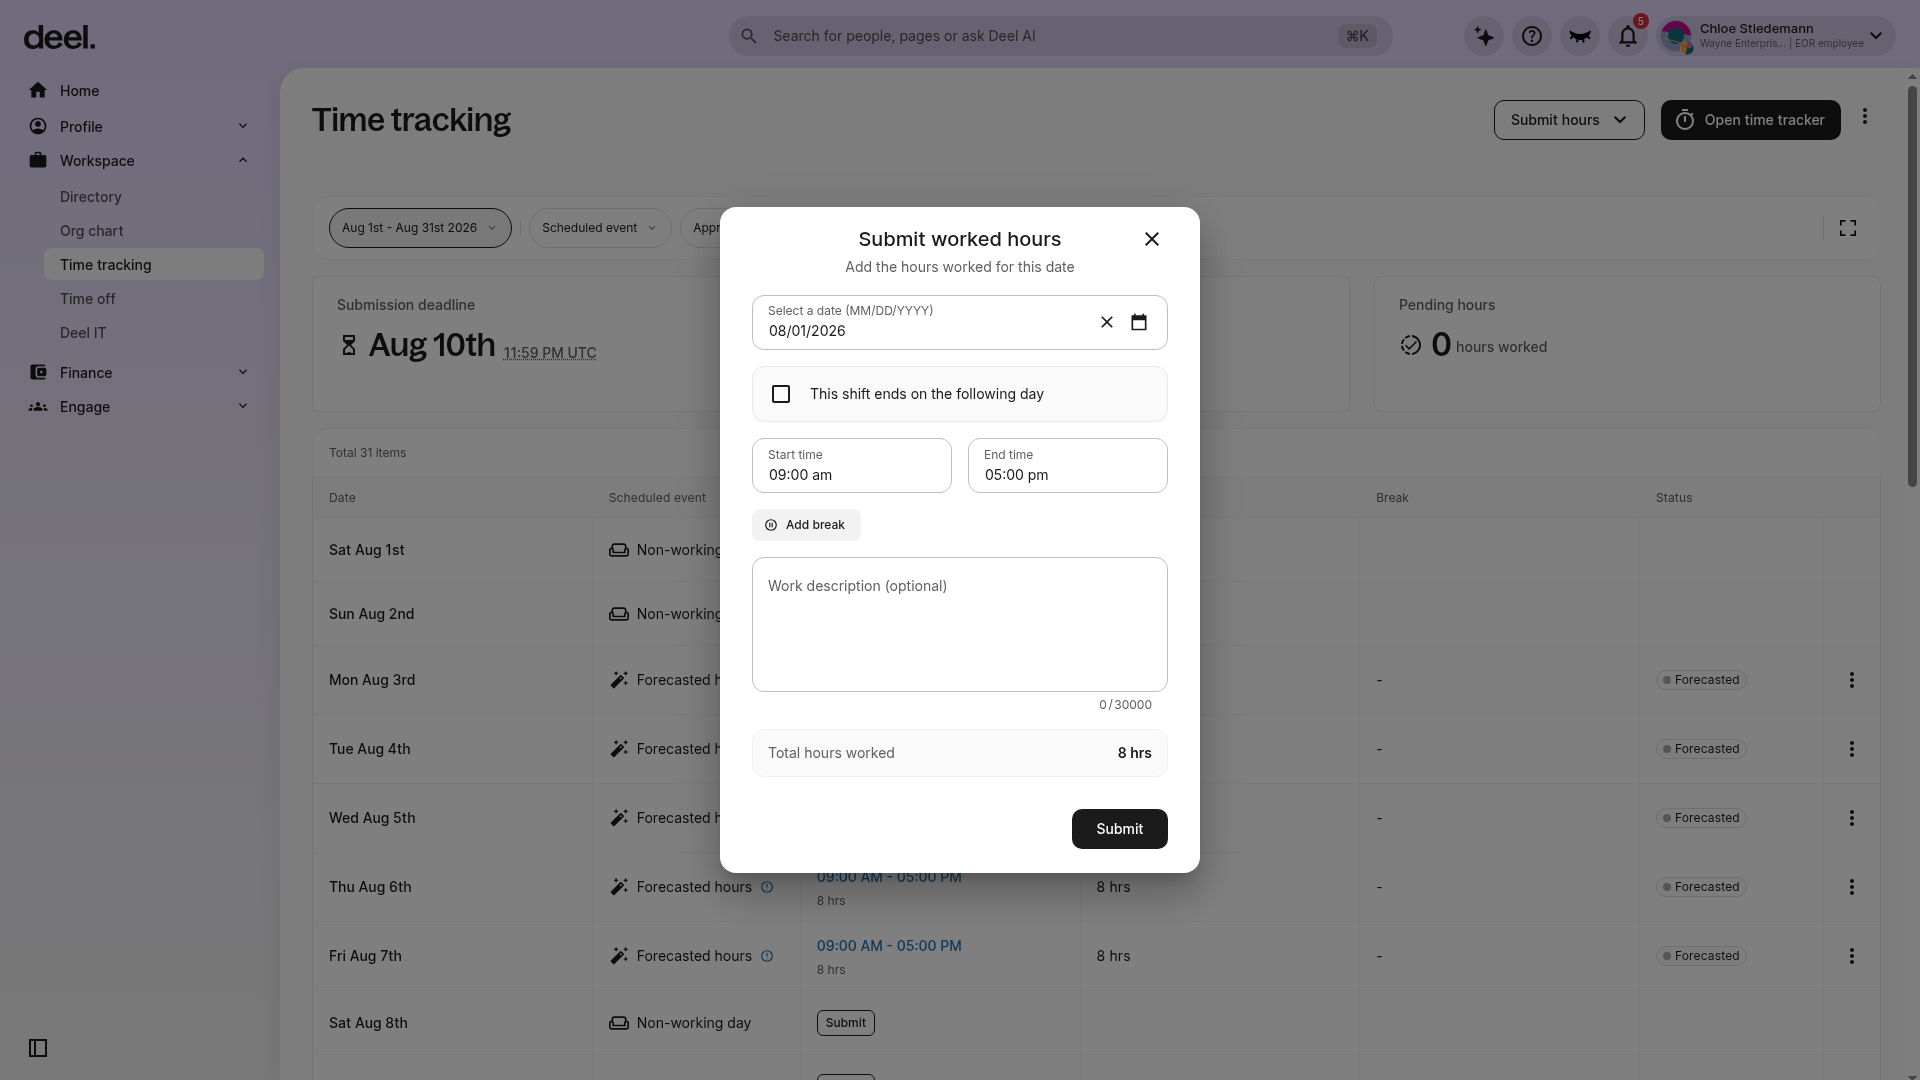
The Submit worked hours form opens. It contains the selected date, Start time, End time, an option for a shift ending on the following day, Add break, an optional work description, calculated total hours, and Submit.
Step 2 - Add worked hours
- Confirm or select the date.
- Enter the Start time and End time.
- If the shift ends the next day, select This shift ends on the following day.
- Select Add break if applicable.
- Add a work description if required.
- Review the calculated Total hours worked.
- Select Submit to record the shift.
Step 3 - View shift details and status
Return to the Time tracking table to review submitted shifts and their approval status. Use the date-range selector above the table to view another pay period.
Troubleshooting
- No Submit button is visible: Use the date-range selector or scroll through the table to find a No hours worked or Non-working day entry that has a Submit button.
- The form does not open: Make sure you selected the row-level Submit button, not a page-level submission control.
- The table is blocked: Close the Forecasted shifts announcement and select Got it on the Forecasted settings tip, if shown.
How to Submit Multiple Shifts
Use Submit multiple shifts to apply the same shift details to multiple eligible days.
Step 1 - Open Submit multiple shifts
- Open Workspace > Time tracking from the left sidebar.
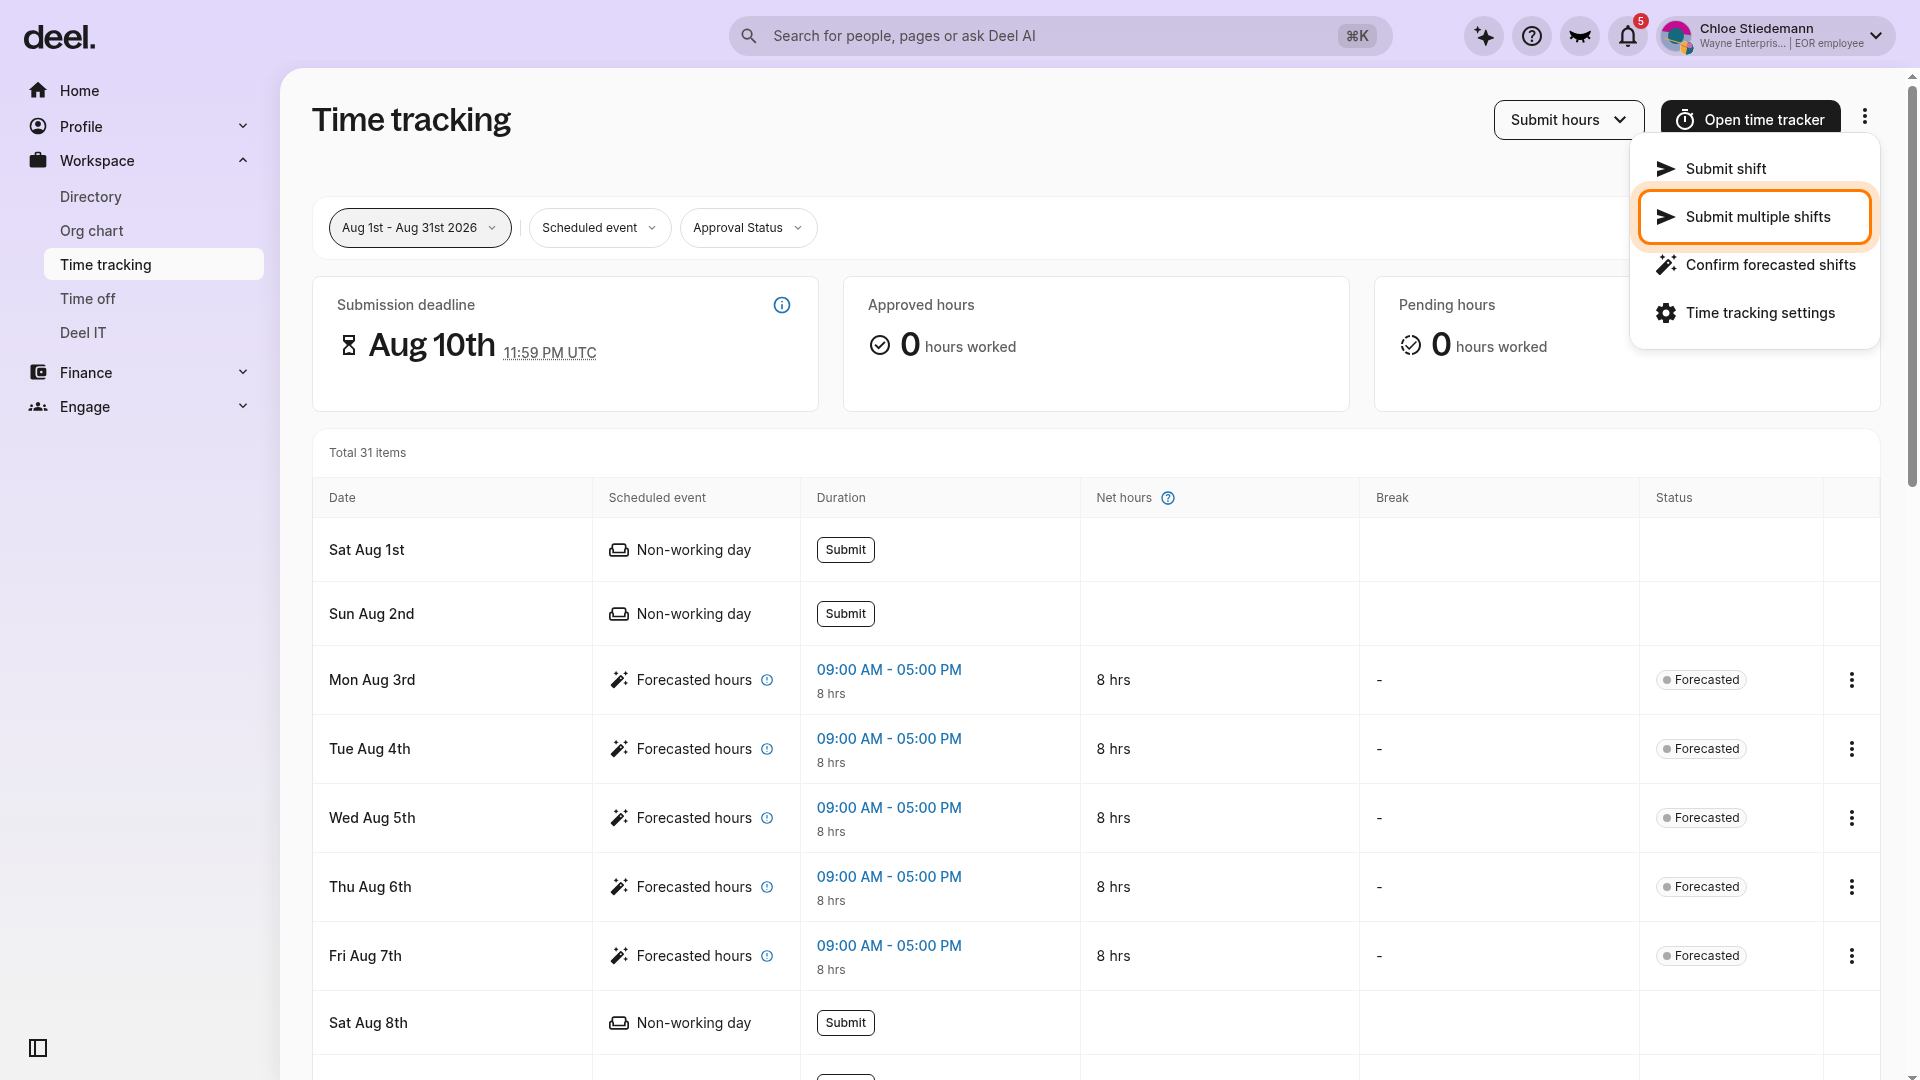
- Select the More menu (three vertical dots) in the upper-right corner of the page, beside Open time tracker.
- Select Submit multiple shifts. This is the current label for the former Add Multiple Shifts action.
Step 2 - Add multiple shifts
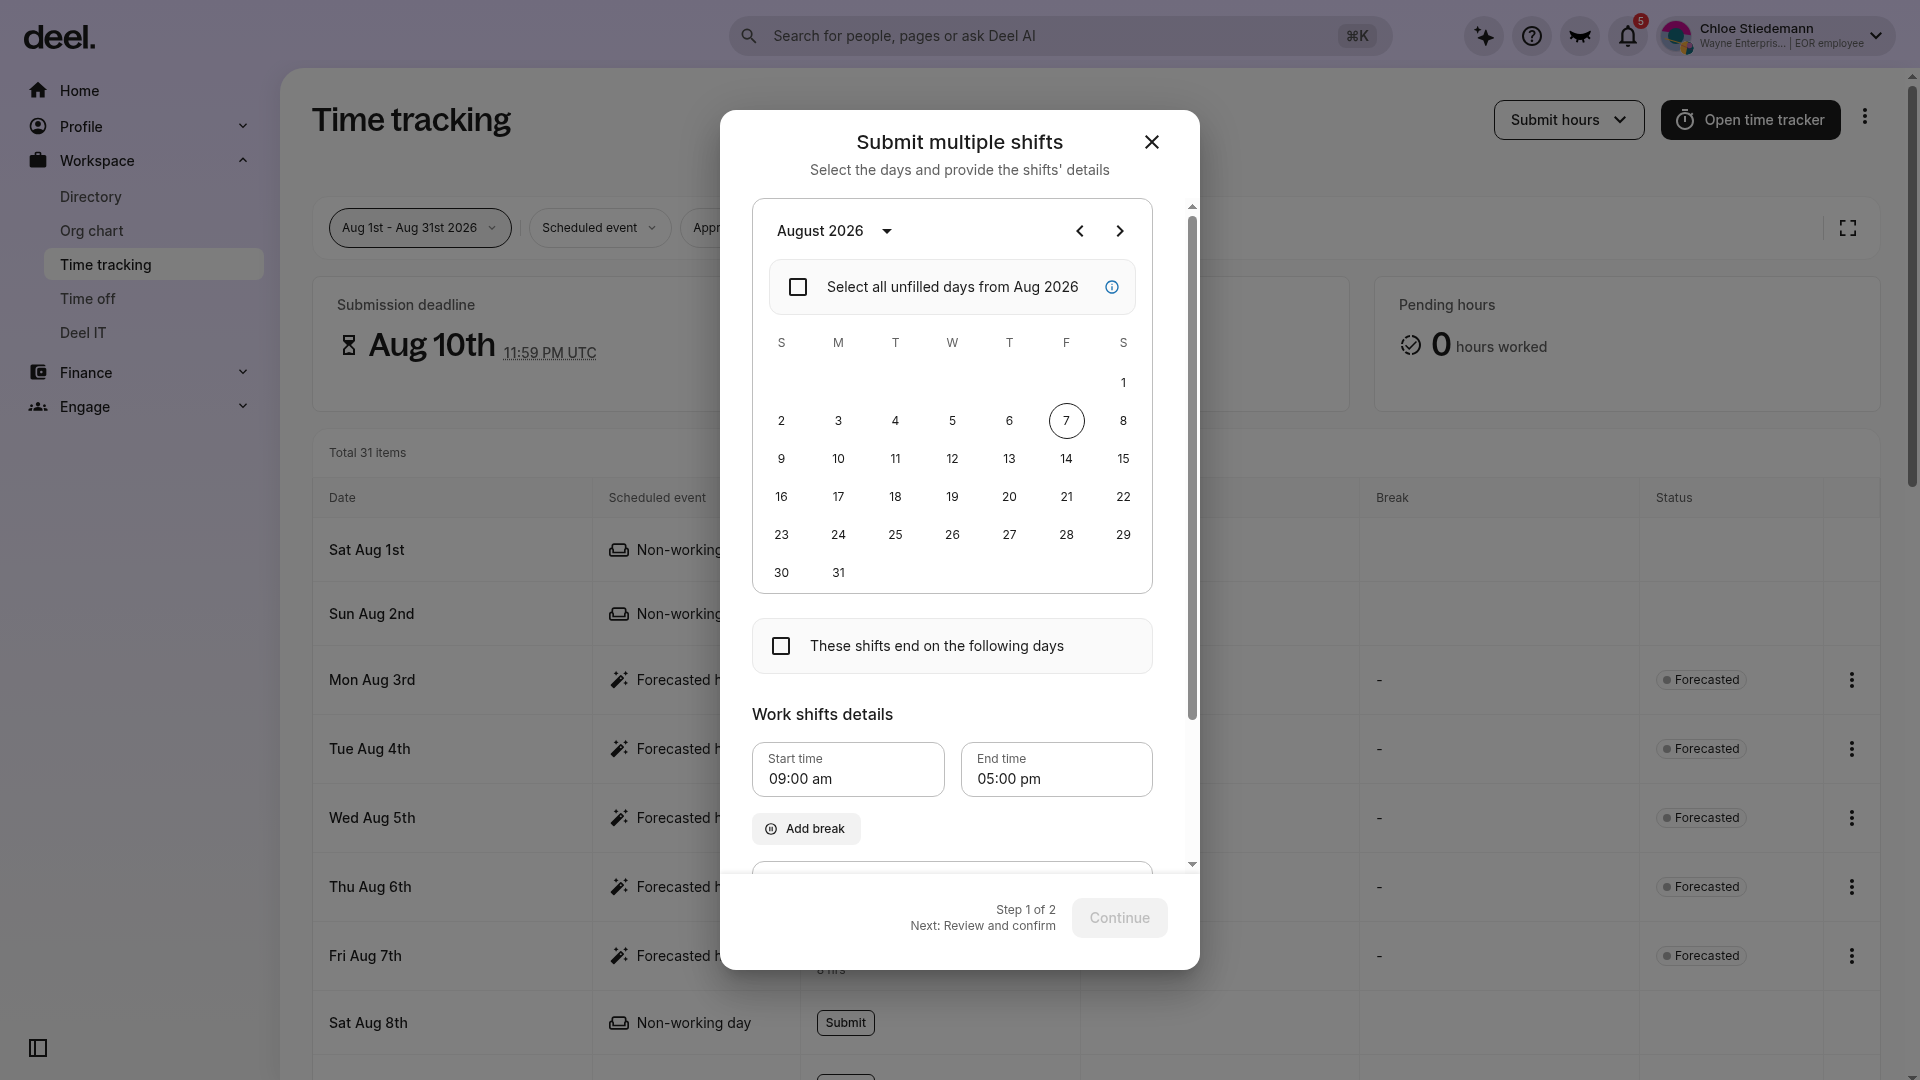
- In the Submit multiple shifts dialog, select individual dates from the calendar or select the option to select all unfilled days for the displayed month.
- If applicable, select These shifts end on the following days.
- Under Work shifts details, enter the Start time and End time.
- Add break time and a work description if needed.
- Select Continue, review the selected shifts, and confirm the submission.
Unfilled days are days without shifts previously submitted, time off, or public holidays, depending on country rules.
Troubleshooting
- Submit multiple shifts is missing: Your permissions or time-tracking configuration may not allow bulk submissions. Contact your Deel administrator or manager.
- You opened the single-shift flow: Close the panel or dialog, reopen More, and select Submit multiple shifts.
How to Edit Worked Hours
Forecasted shifts can be edited before they are confirmed or approved. If an entry has already been approved, contact your manager for help.
Step 1 - Select the forecasted shift
- Open Workspace > Time tracking from the left sidebar.
- Locate the relevant row marked Forecasted hours with a Forecasted status.
- Select the blue time range in the Duration column, such as 09:00 AM - 05:00 PM.
Do not use the row's three-dot menu to edit: it contains Confirm and Discard, not Edit.
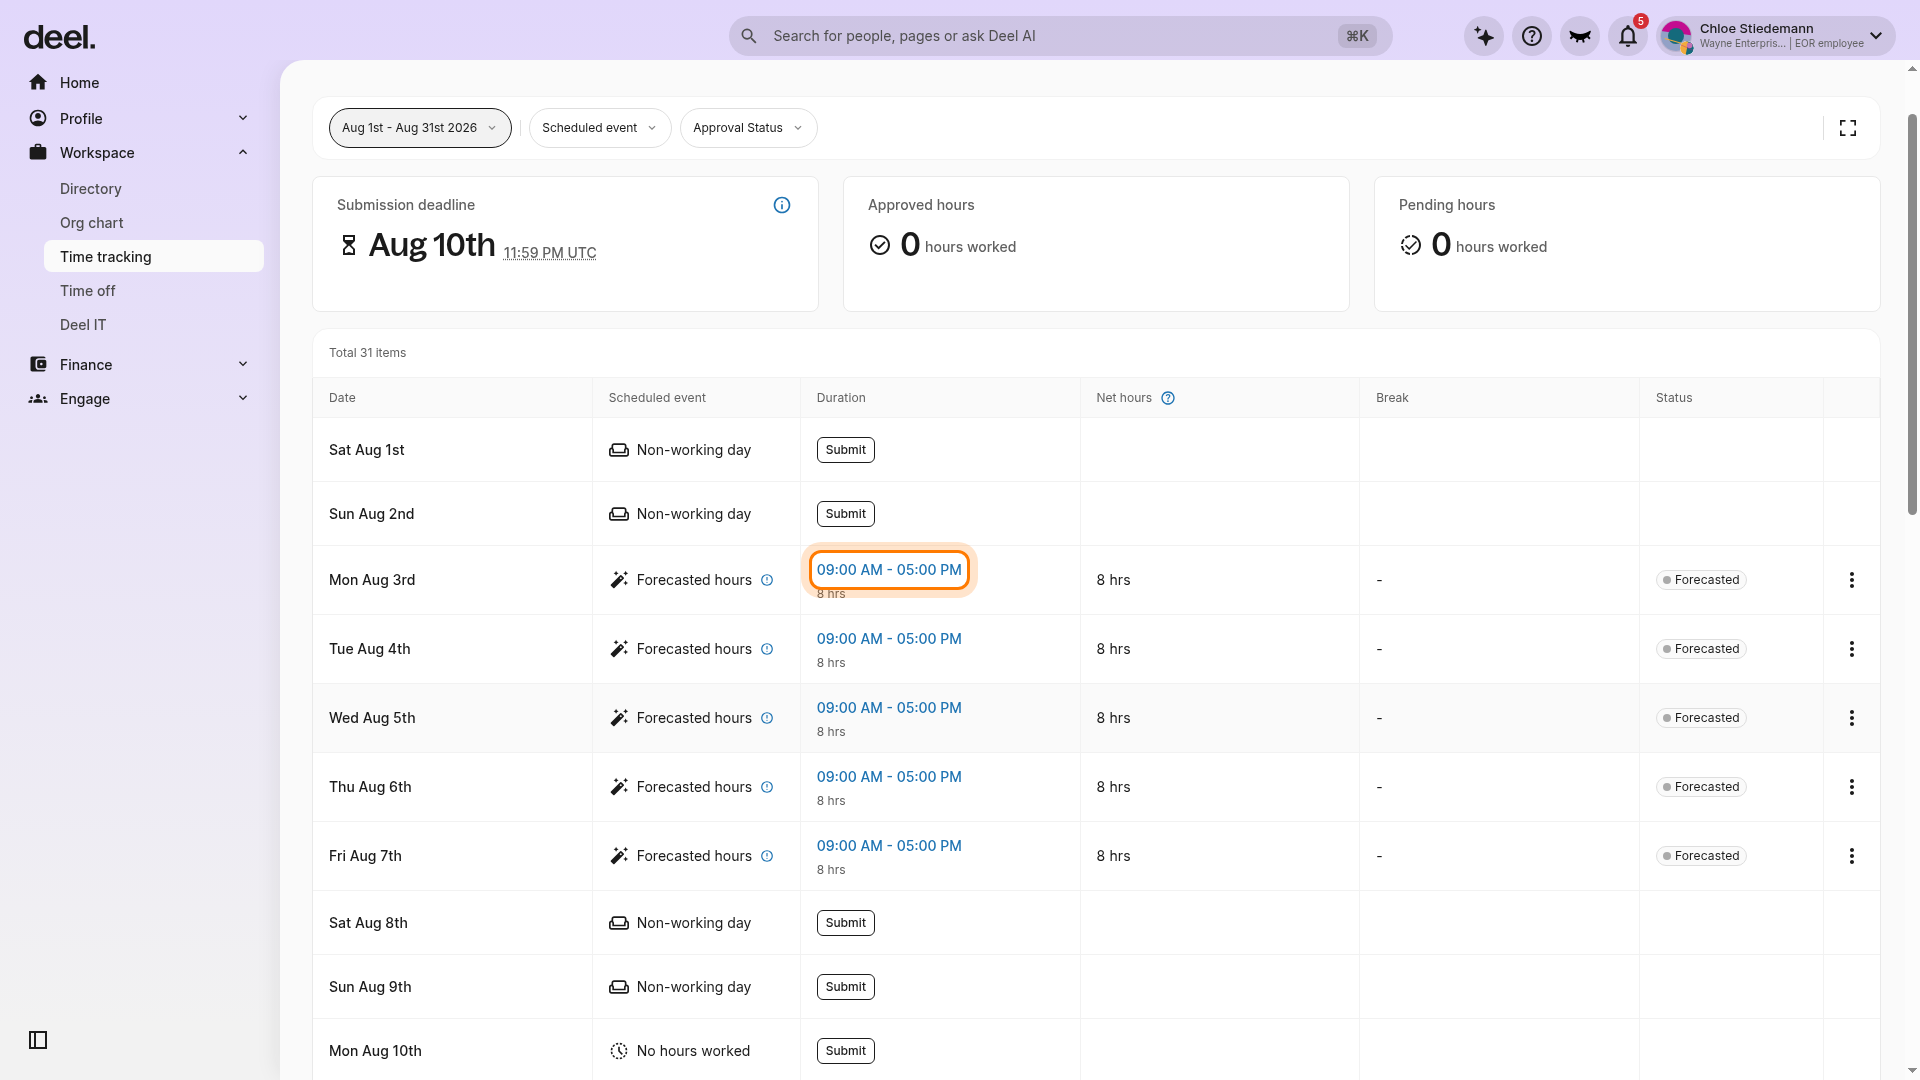
Step 2 - Edit worked hours
- In the Suggested hours dialog, review the date, worked-hours range, total hours, and status.
- Select Edit.
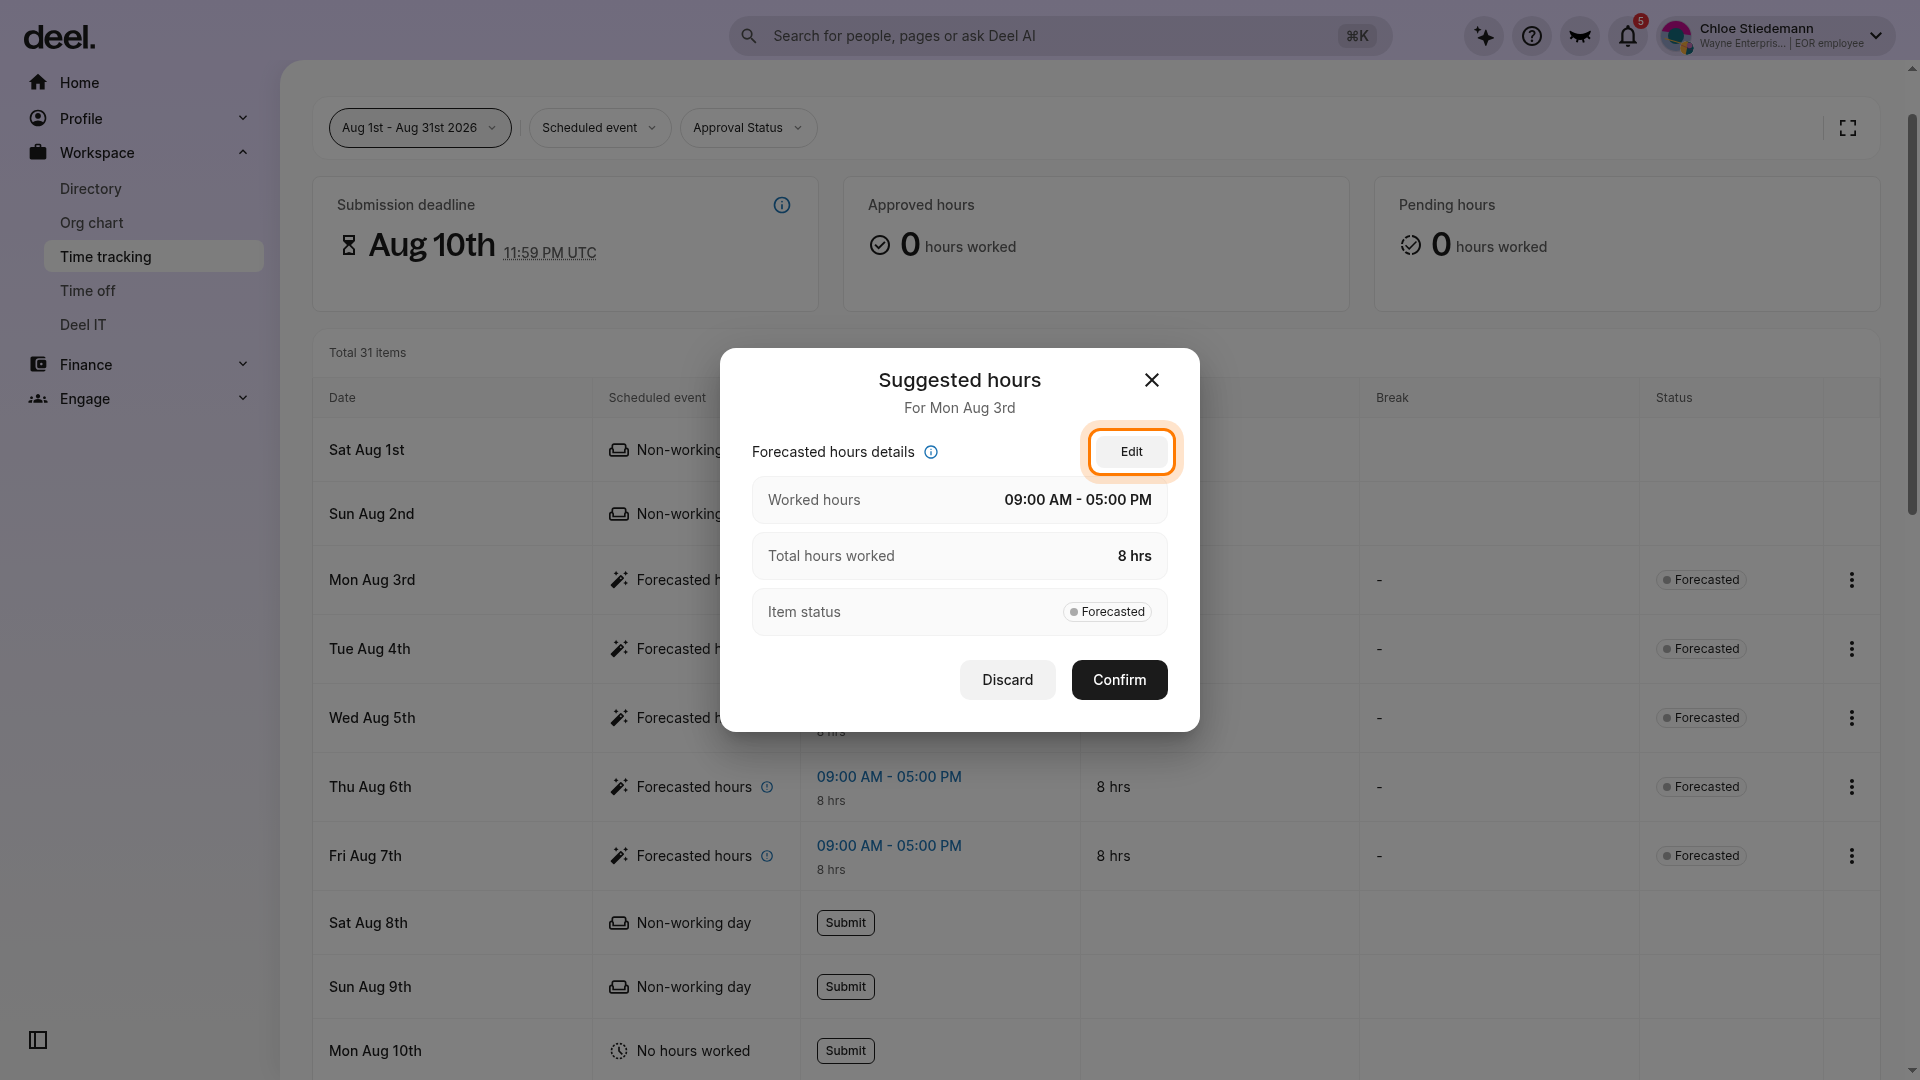
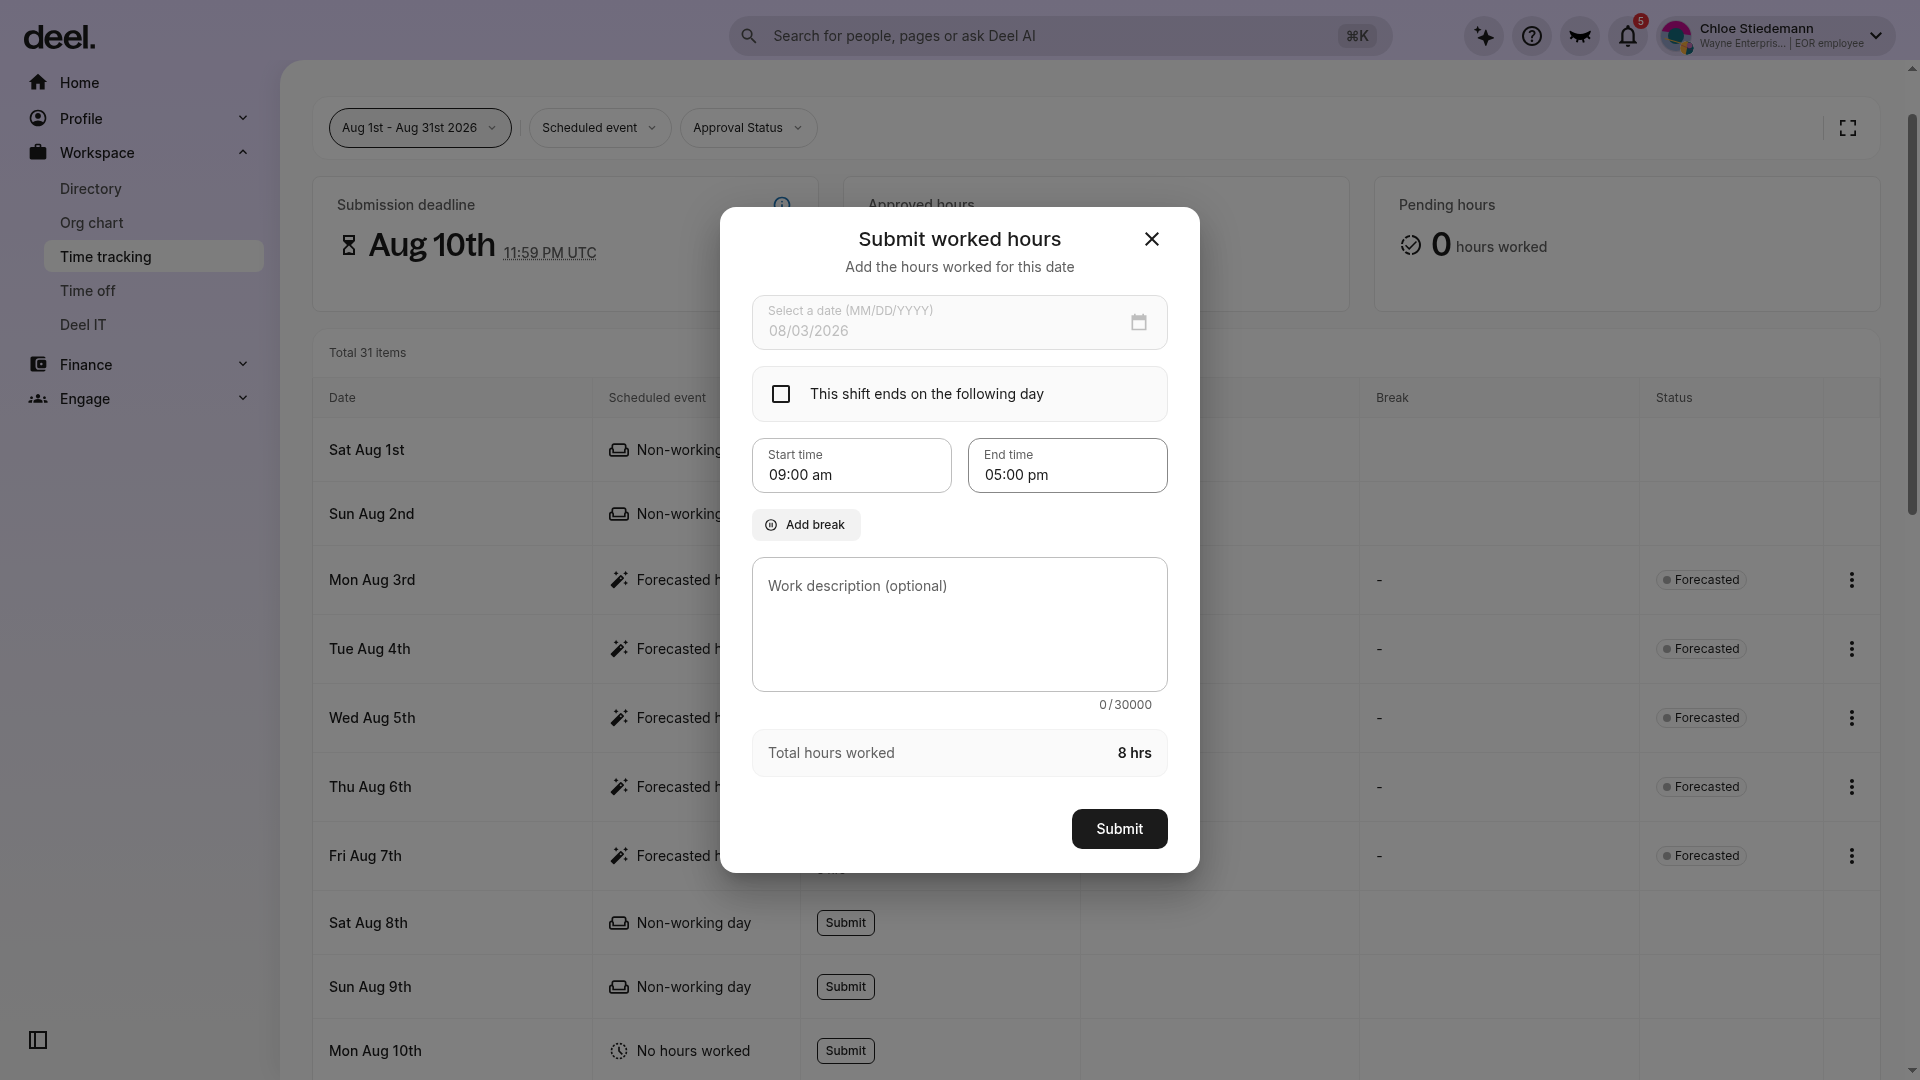
- Update the date or time fields as needed. You can also add a break and optional work description.
- Review Total hours worked, then select Submit to save the changes.
The edit form is titled Submit worked hours in the current interface.
Troubleshooting
- The required shift is not visible: Use the date-range selector to display the relevant pay period.
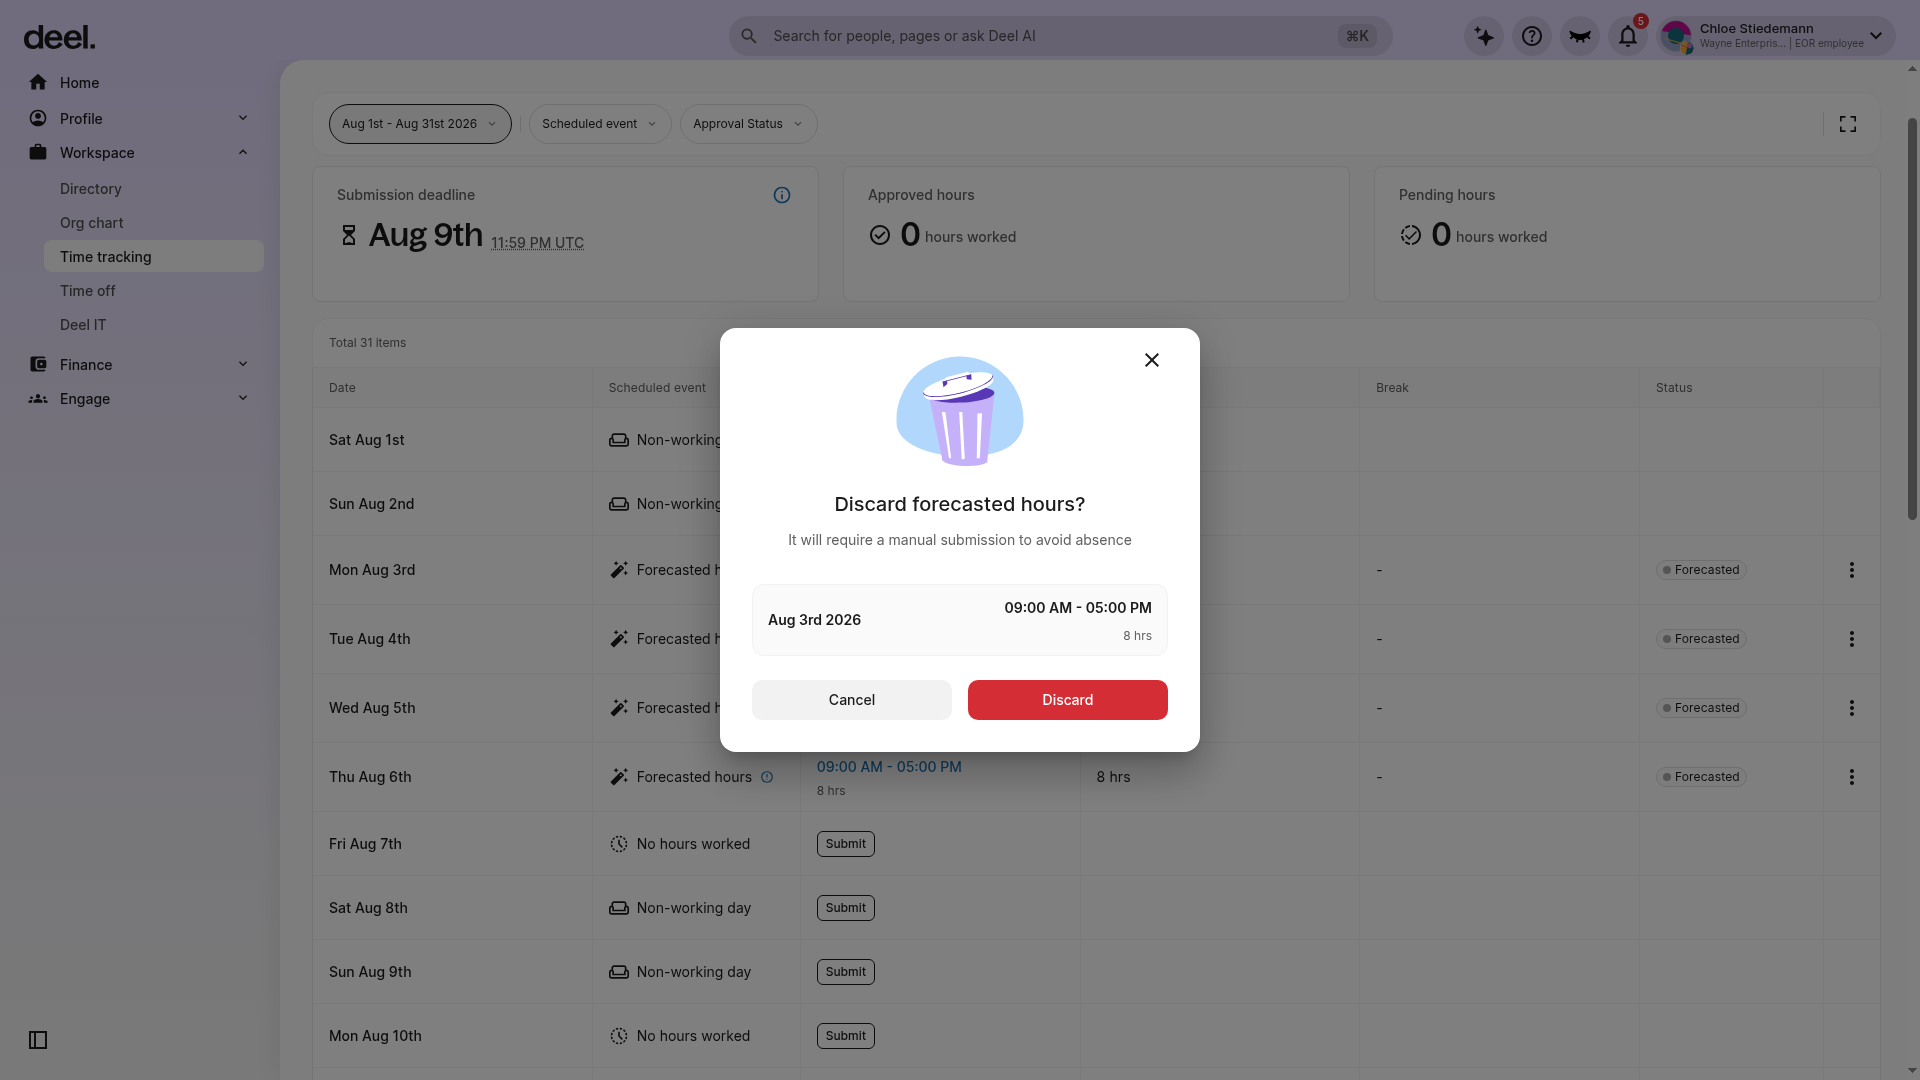
- You opened Discard by mistake: Select Cancel or the X in the confirmation dialog; this returns you to the table without changing the shift.
How to Delete Worked Hours
For a forecasted shift, the delete-equivalent action is Discard. Discarding forecasted hours removes that forecast and requires a manual submission to avoid an absence.
Step 1 - Select the forecasted shift to discard
- Open Workspace > Time tracking from the left sidebar.
- Locate the row labeled Forecasted hours with a Forecasted status.
- Verify its date, time range, and net hours.
- Select the three-dot menu at the far right of that row.
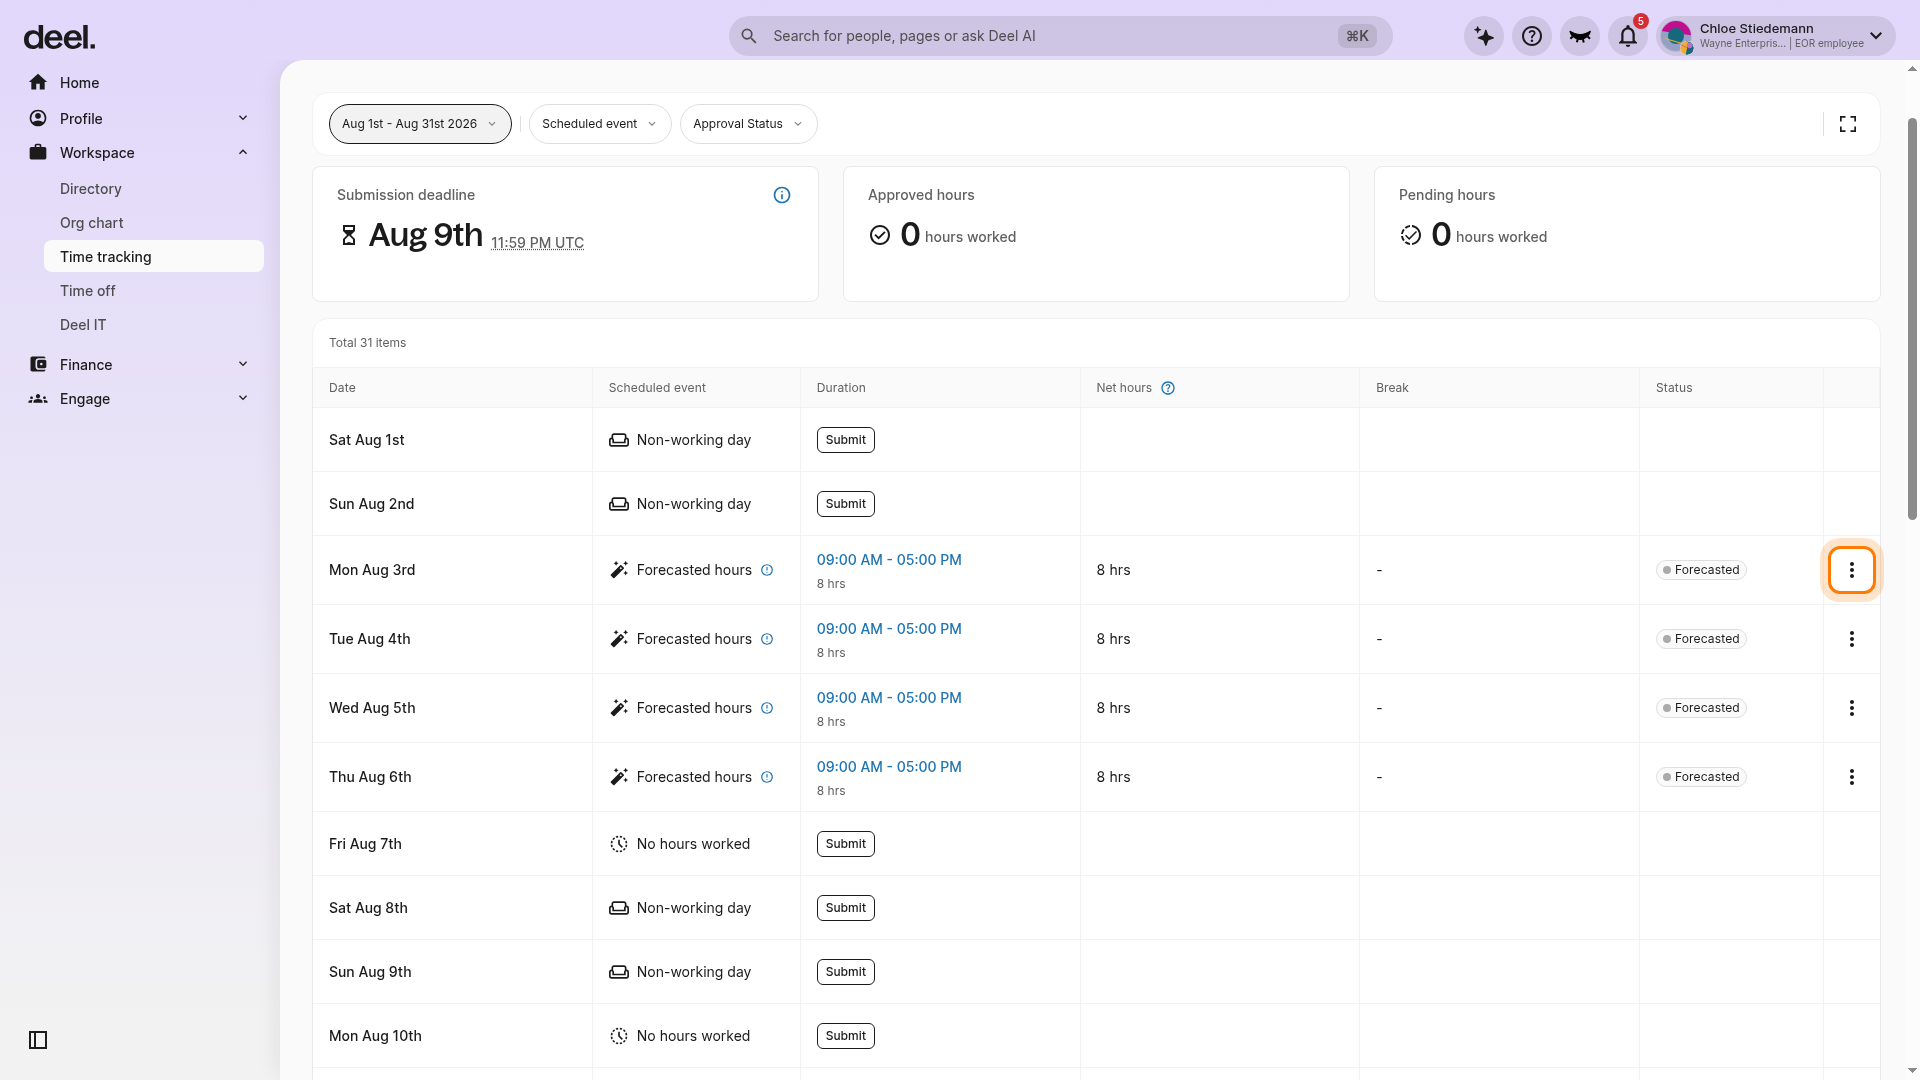
Step 2 - Discard forecasted hours
- Select Discard from the row menu. The menu may also show Confirm; select Discard only for the shift you intend to remove.
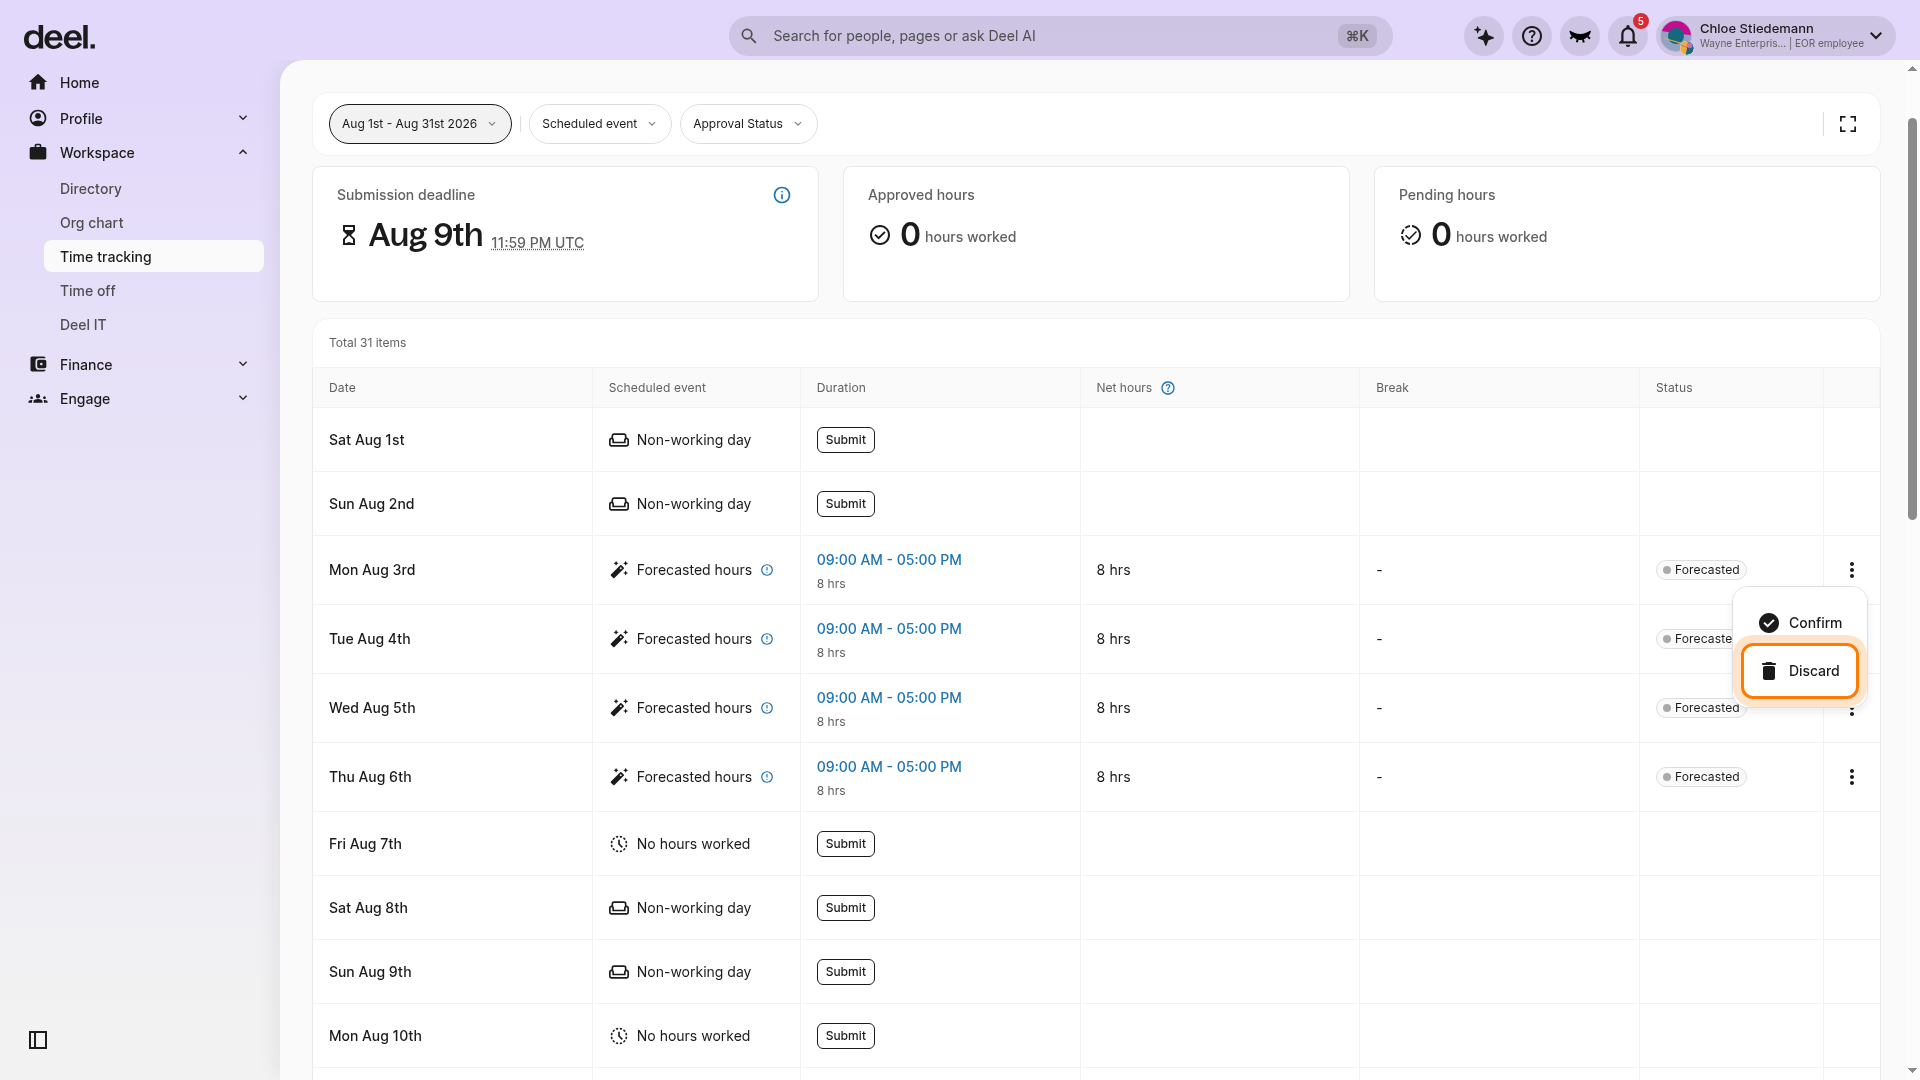
- In the Discard forecasted hours? confirmation dialog, verify the entry's date, time range, and total hours.
- Select the red Discard button to permanently remove the forecasted shift. Select Cancel or the X to leave the shift unchanged.
Troubleshooting
- Discard is not available: Confirm that you opened the menu for a row labeled Forecasted hours with a Forecasted status. Other row types do not offer this action.
- The confirmation dialog shows the wrong shift: Select Cancel or the X, then reopen the three-dot menu on the correct forecasted-hours row.
Frequently Asked Questions
How can I review the status of the timesheet?
Open Workspace > Time tracking from the left sidebar. The timesheet table displays dated entries and their status. Use the date-range selector above the table to review a different pay period.
How do I submit overtime hours?
The client sets an Overtime Submission method that determines whether you submit all worked hours or overtime hours only.
- If the client selects Submit all hours worked, the platform calculates regular and overtime hours after you submit your total hours.
- If the client selects Overtime hours only, you will see an overtime-only submission option when you open the applicable worked-hours submission flow.
How do I view hourly compensation details?
Open your contract overview and review the Compensation section.
How does Deel Time Tracking calculate Night Differential and Holiday Pay?
Deel Time Tracking calculates Night Differential and Holiday Pay based on the shift start time. If a shift starts on a holiday or during the night-differential window, the relevant rate applies from that start time through to the next day.