Group Admins can assign other admins within their group to review and approve work submitted before a payment goes through.
In order to guarantee that there will always be at least one admin with the right to approve items in a group, admins with the Admin role always have the right to approve items by default.
To learn more about the specific permissions each group-admin role has, see: What Are The Different Roles For Group Admins In Deel?
Assigning a Group Admin
Overview
Assigning a group admin ensures there is always someone with authority to review and approve items before payment is processed. The workflow below walks you through opening the Assign admins modal, selecting users, assigning a role and (optionally) giving extra permissions.
Prerequisites
• You must have organization-level permissions that allow you to access Organization Settings and manage groups. If you do not see the settings gear, contact a system administrator.
✅ Step 1 – Open the Assign admins modal
- From any page, click the Organization Settings (gear) icon in the header.
- In the left-hand sidebar, select Groups under the Organization & security section.
- Locate the group you want to update, click the ⋮ actions menu on the far-right of the row, and choose Assign admin.

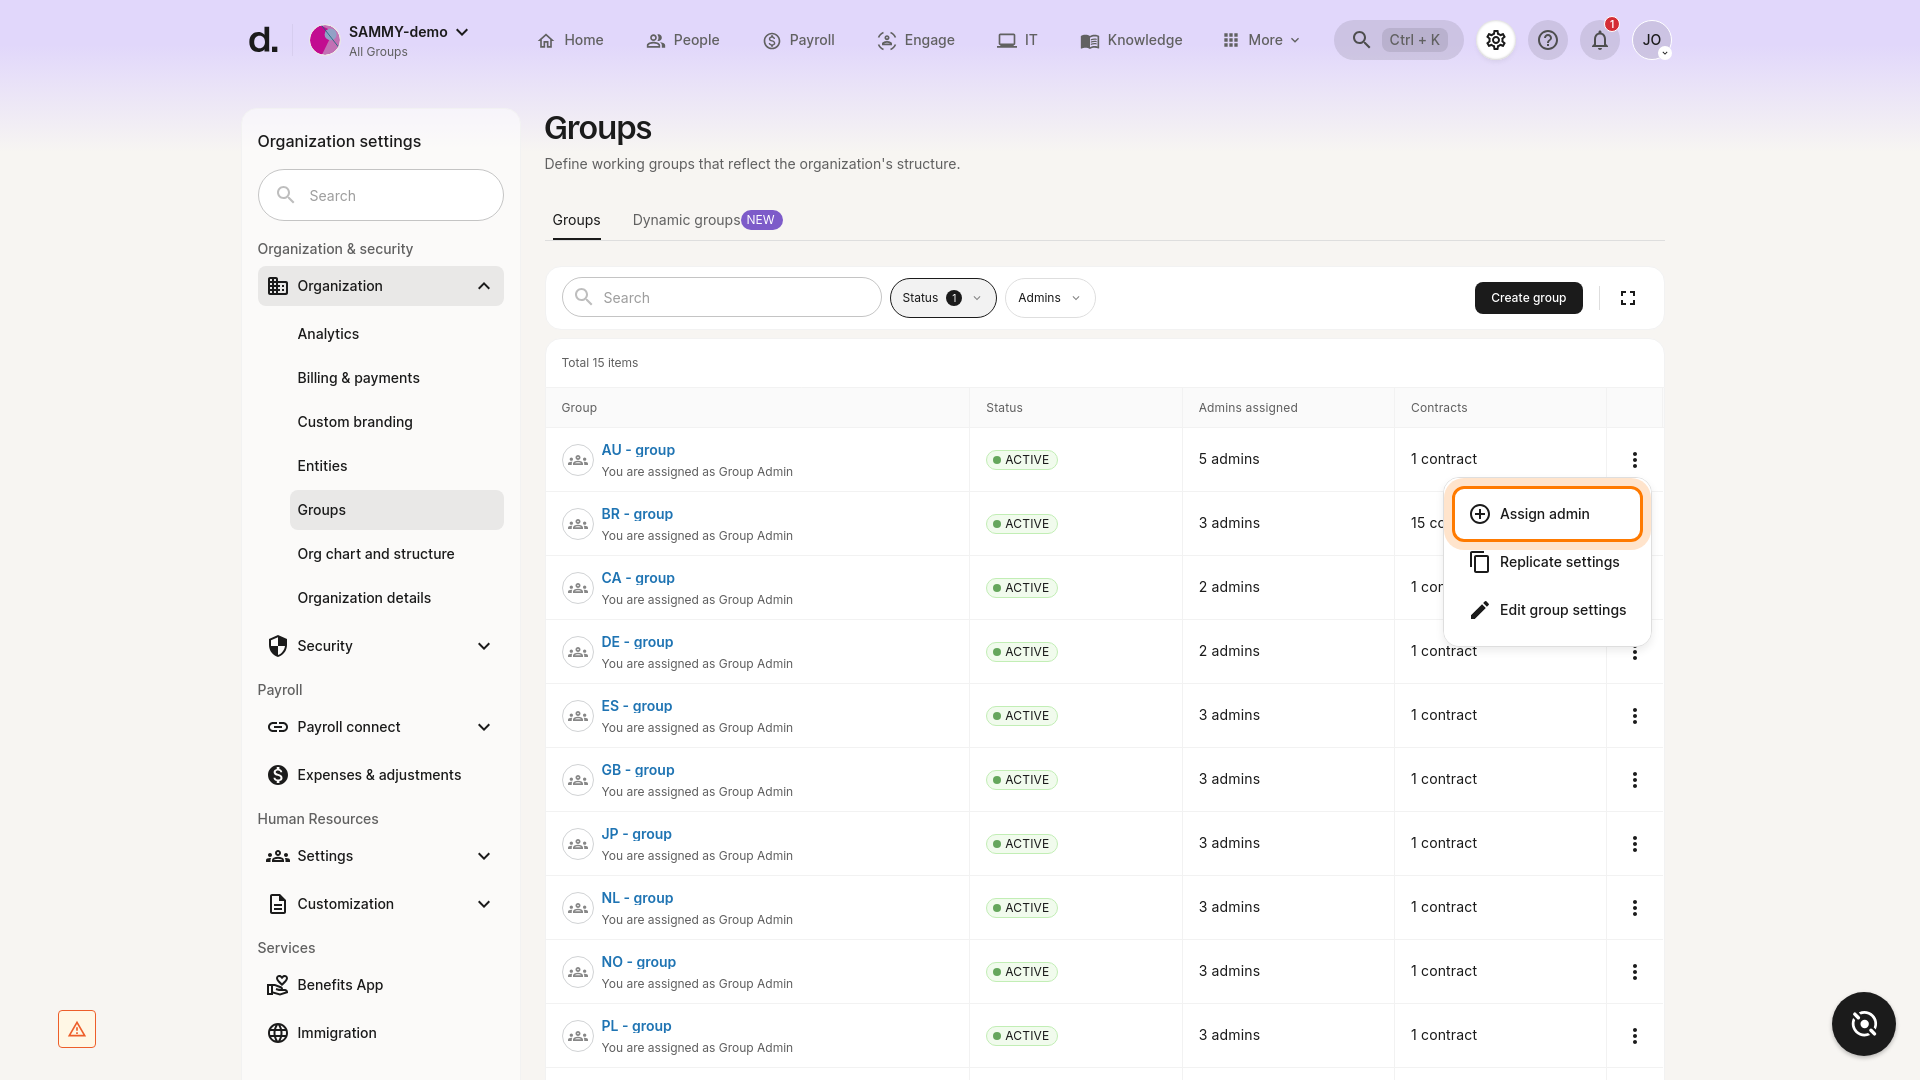
- The Assign admins modal opens. You can now select the users who should become group admins.
Success criterion: The Assign admins modal appears, showing a list of available users. Continue to the next step to give them a role.
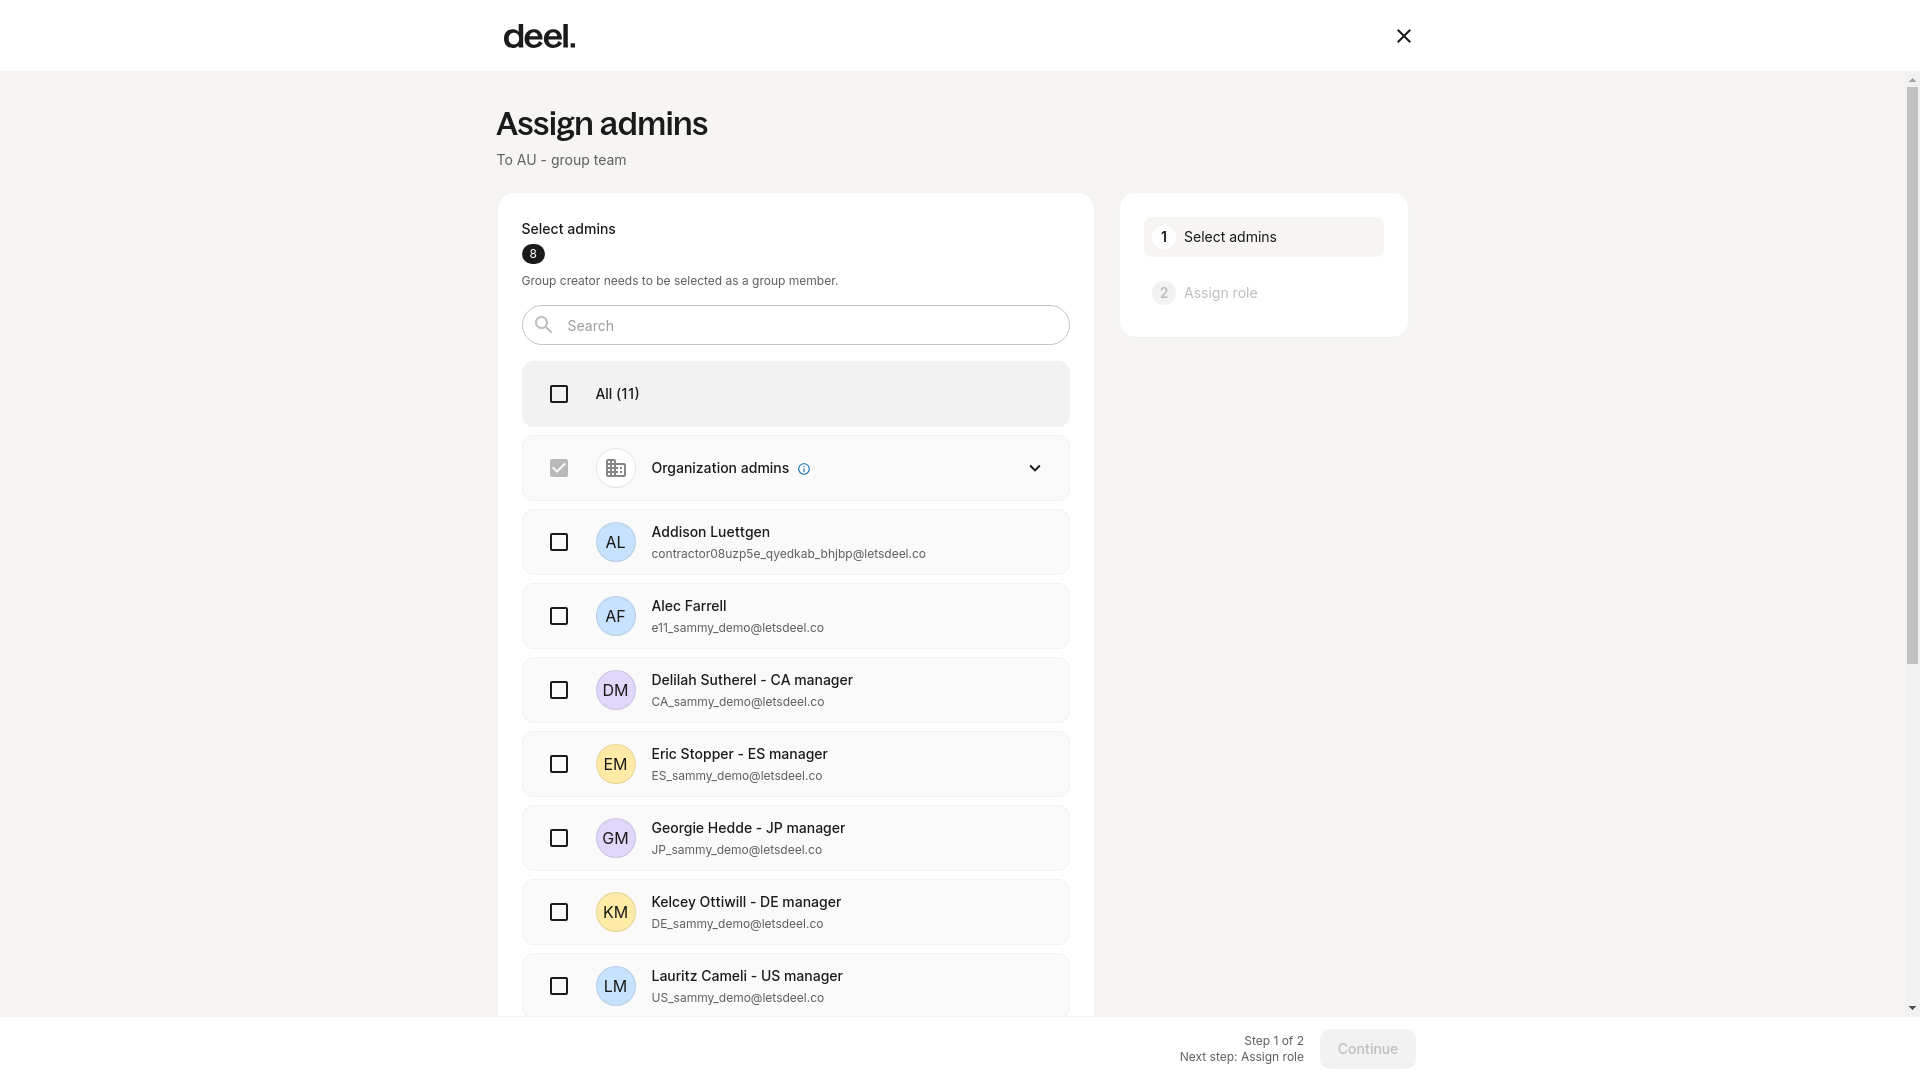
✅ Step 2 – Select admins
Select one or more users in the list and click Continue.
✅ Step 3 – Assign admin role
Click Assign role next to each selected user, choose the appropriate role, and then click Assign. You can toggle Apply the same role for all admins if needed.
(See What Are The Different Roles For Group Admins In Deel? for a full description of each role.)
✅ Step 4 – Add additional permissions (optional)
Depending on the chosen role, you can grant extra rights:
- Approve items
- Adjust payment items
Notes: • The Viewer (non-sensitive data) role can’t be allowed to approve or adjust. • Viewer (sensitive data) can only be added as an approver.
Click Confirm, then Assign admin to finish.
Troubleshooting
• Can’t see Organization Settings – You don’t have the required permissions. Contact your system administrator. • Groups option not visible – Your role may not allow group management. • Assign admin option missing – Only users with sufficient privileges see it. Verify your role. • Modal does not appear – Refresh the page or clear your browser cache and try again.
How to Edit or Remove an Existing Group Admin
If a user is already part of the group, you can change their permissions or remove them.
- Click the pencil icon next to the admin’s name.
- Update the additional permissions (Approve items / Adjust payment items) and click Update.
- To change the admin role entirely, click Change and select a new role, or click Remove access to remove the user from the group entirely.
Role limitations remain the same as above (Viewer roles have restricted permissions).