
Clients can manage Payments and Invoices within Deel from the Billing tab.
From here, they can review statements & receipts, download invoices, and release funds for individual invoices or for several at a time using Deel's bulk features.
In this article:
Downloading Invoices
Invoices can be downloaded individually or downloaded several at once using the bulk download option.
- If the client has selected several Invoices, they will be downloaded together in a zipped file.
- 50 documents can be downloaded at a time.
✅ Step 1 – Select the Invoice Tab under Payments
In the current navigation, Billing is under Finance, not under Payroll.
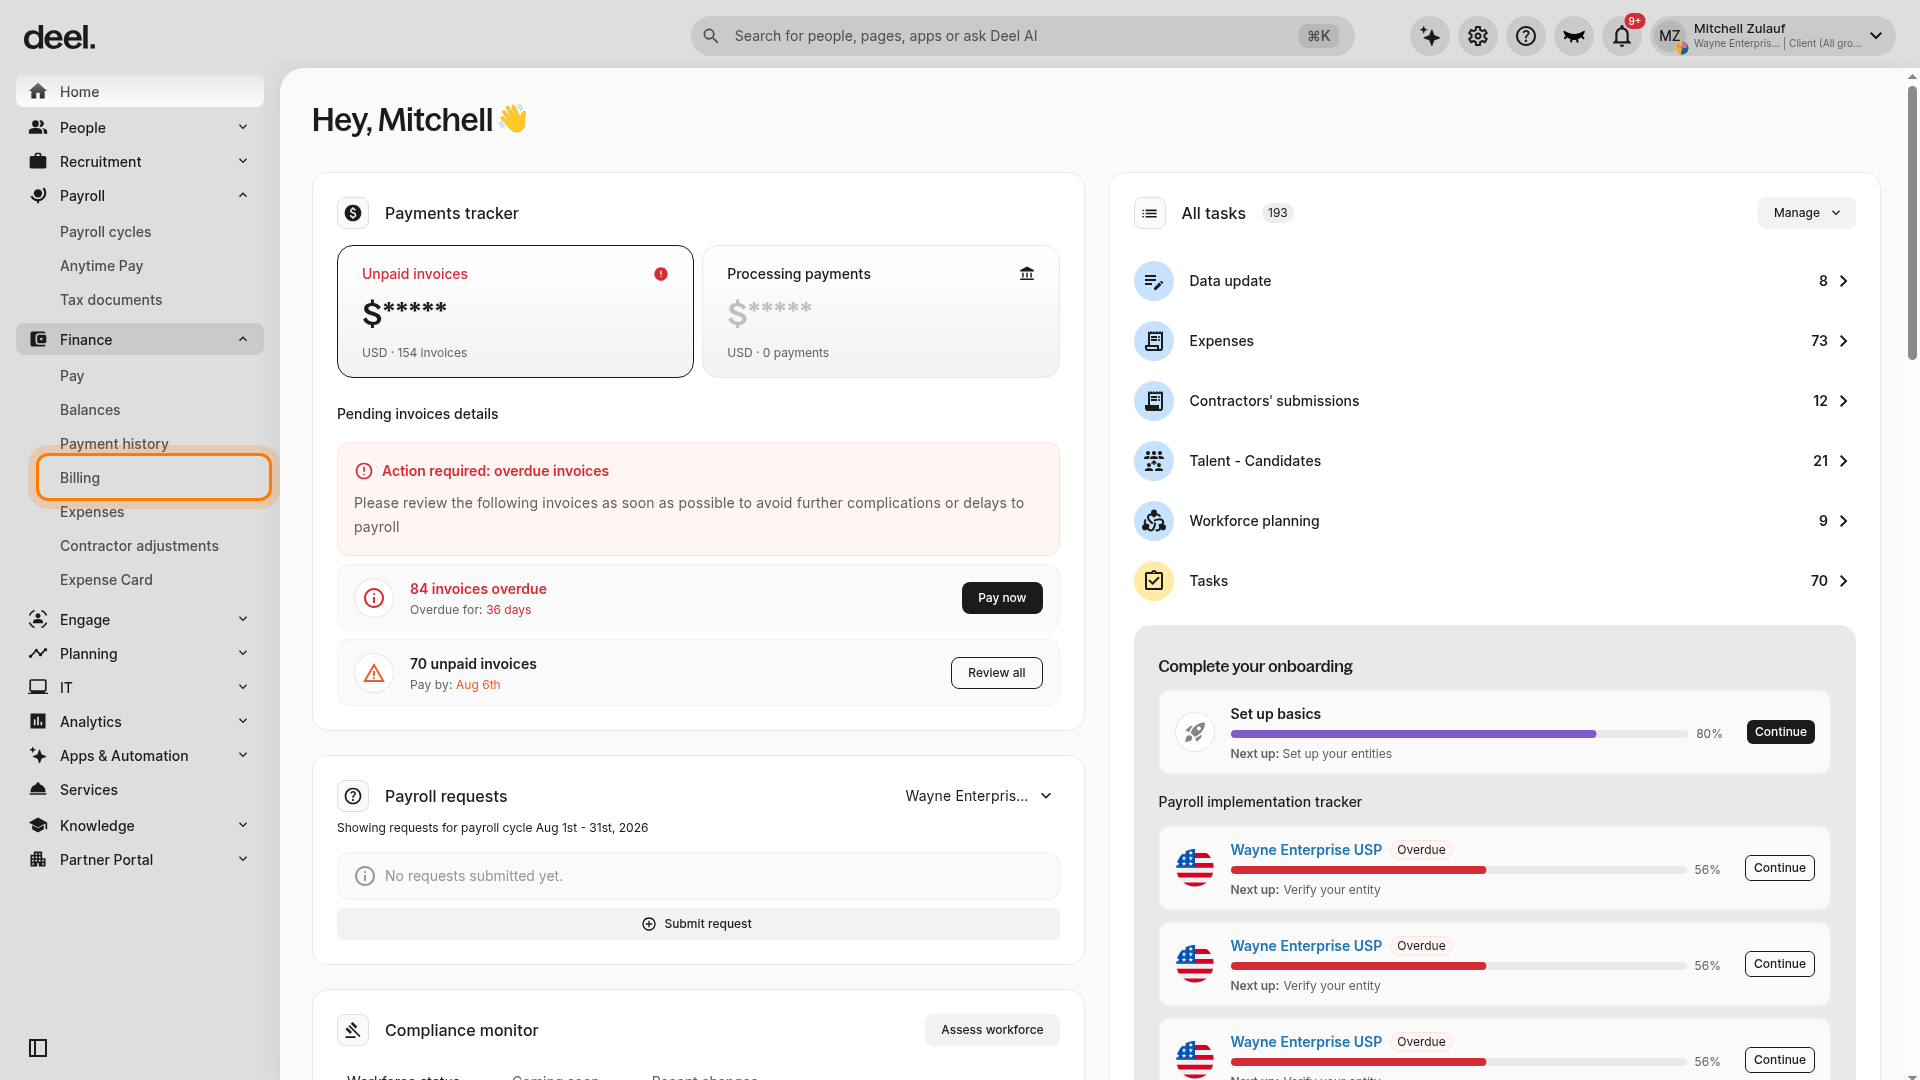
- In the left sidebar, expand Finance using its chevron.
- Select Billing.
- Confirm that the Invoices tab is selected.
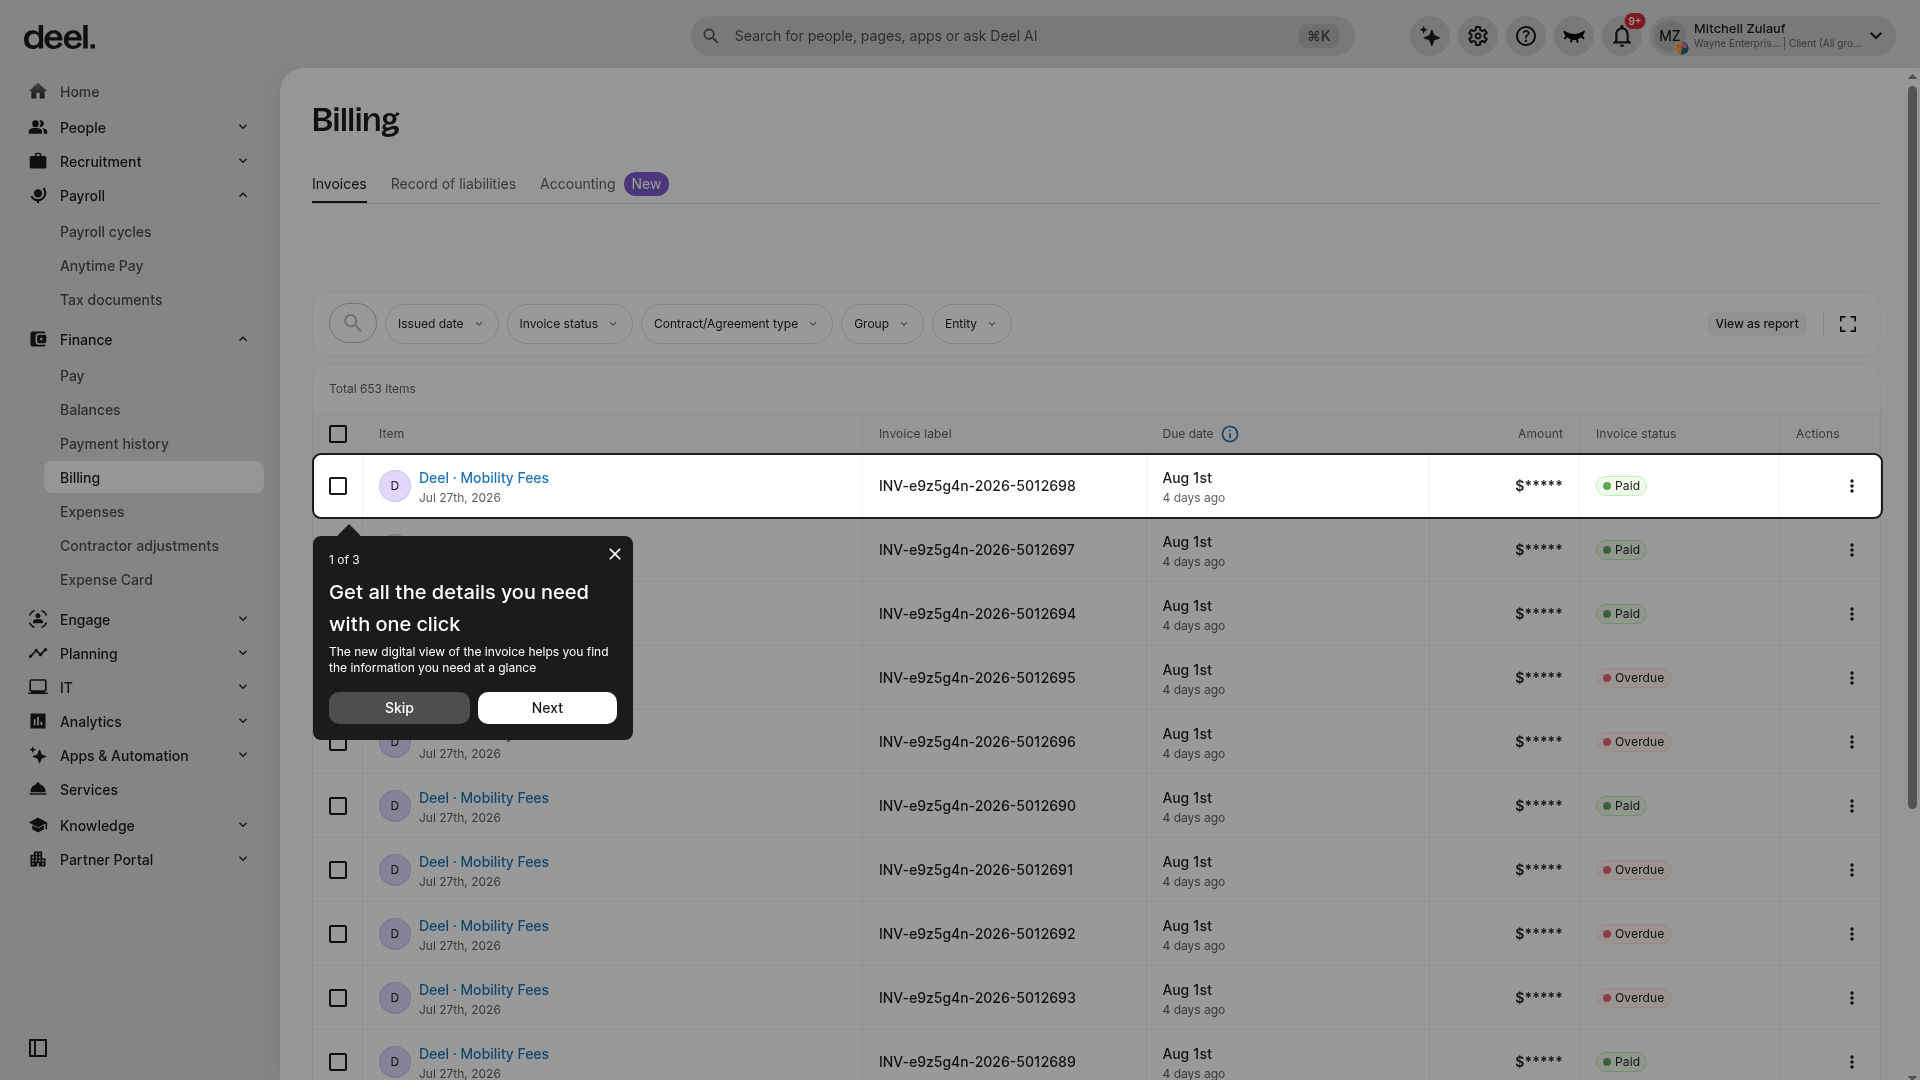
- The Billing page opens and shows an invoice table.
- Available filters, item counts, and columns vary by organization.
✅ Step 2 – Locate Invoices and select Download
Check the boxes on the left to select invoices to be downloaded.
Click the three vertical dots and select Download Invoice(s). Clients also have the option to download a breakdown of the invoice.
Releasing Funds For Payment
Clients can also release funds for individual invoices or select to release funds for several invoices at once.
✅ Step 1 – Select the Invoices tab
Confirm that the Invoices tab is selected on the Billing page.
✅ Step 2 – Locate Invoices and select Release Funds
Select the checkboxes for the invoices you want to pay. Review the selected-item count and estimated total, then select Pay selected in the lower-right corner. Use Clear selection or individual checkboxes to correct the selection if needed.
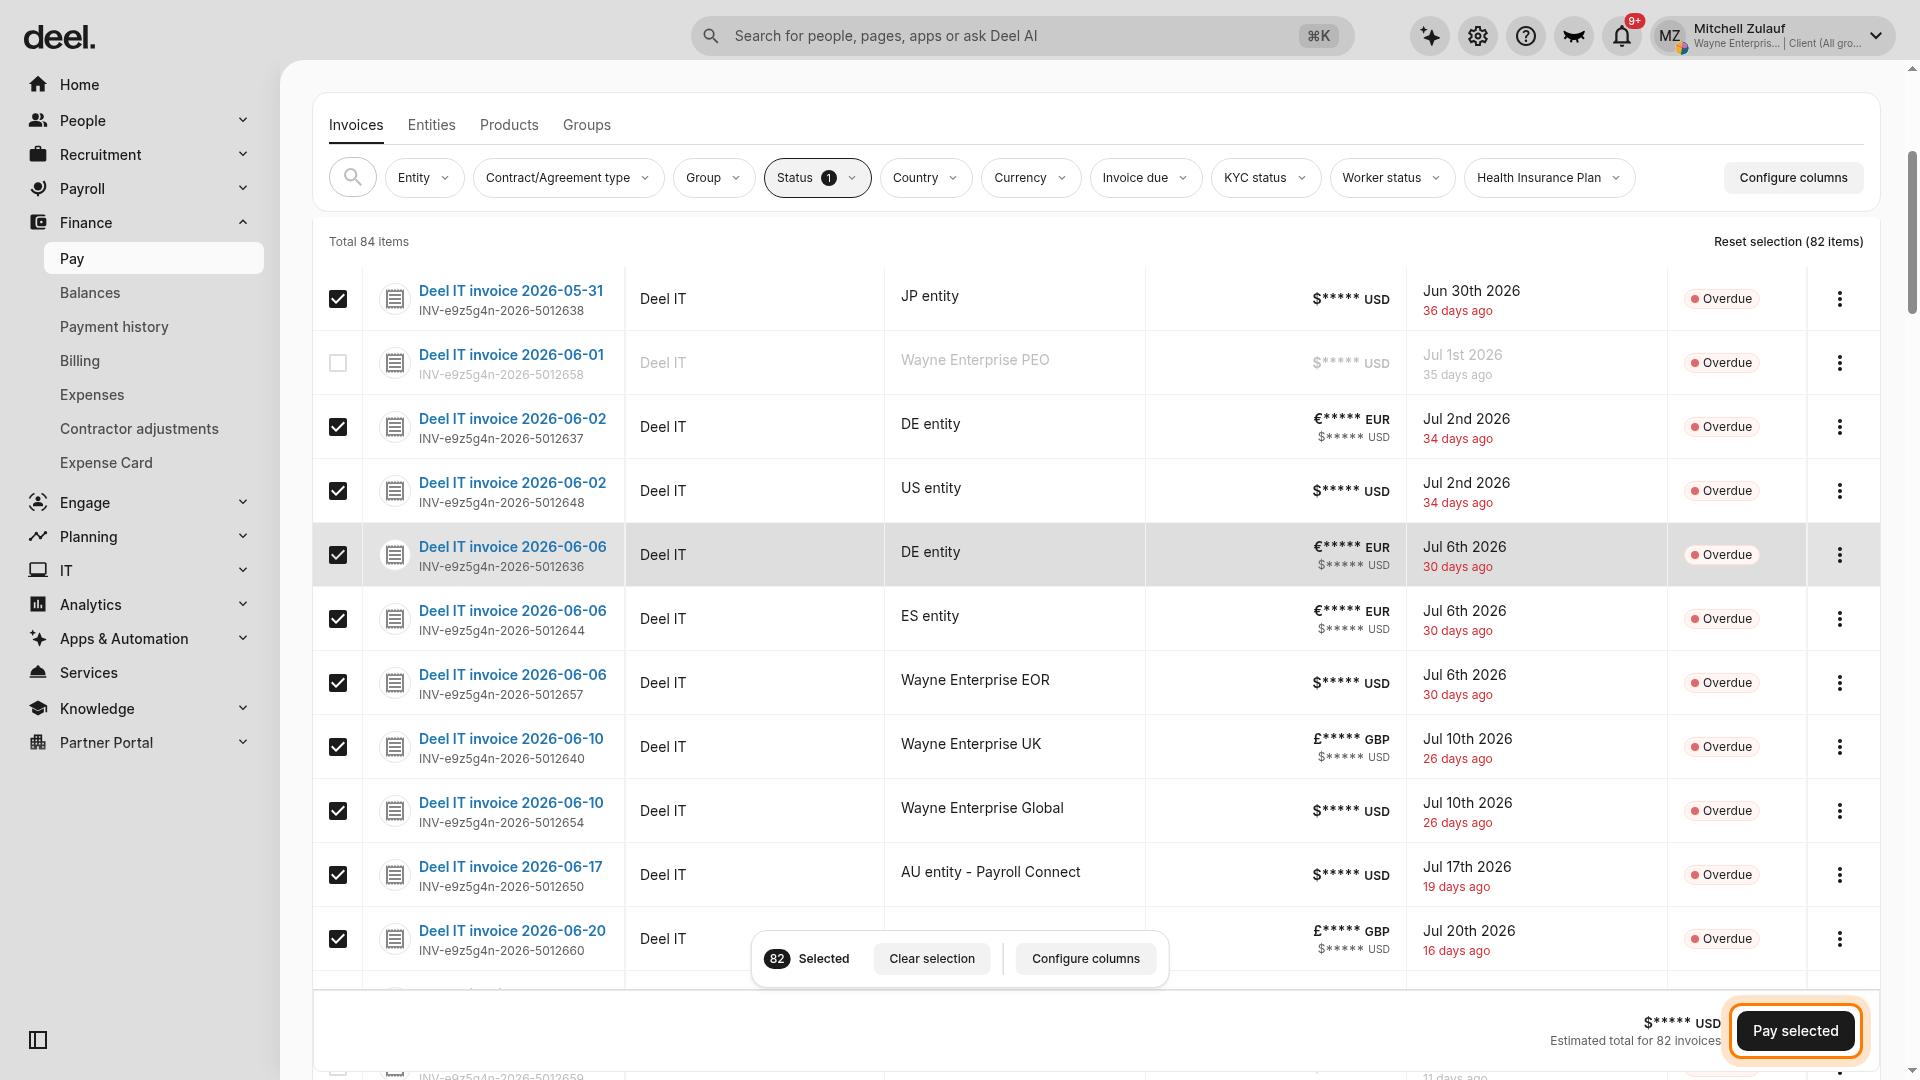
- On the Invoices list, select the checkboxes for the invoices you want to pay.
- Review the selected-item count and estimated total.
- Select Pay selected.
✅ Step 3 – Confirm release of funds for invoices selected
On the Pay your team review page, verify the invoice types, Bill to entity, total, applied balances or billing credits, and Total due. Select Select payment method.
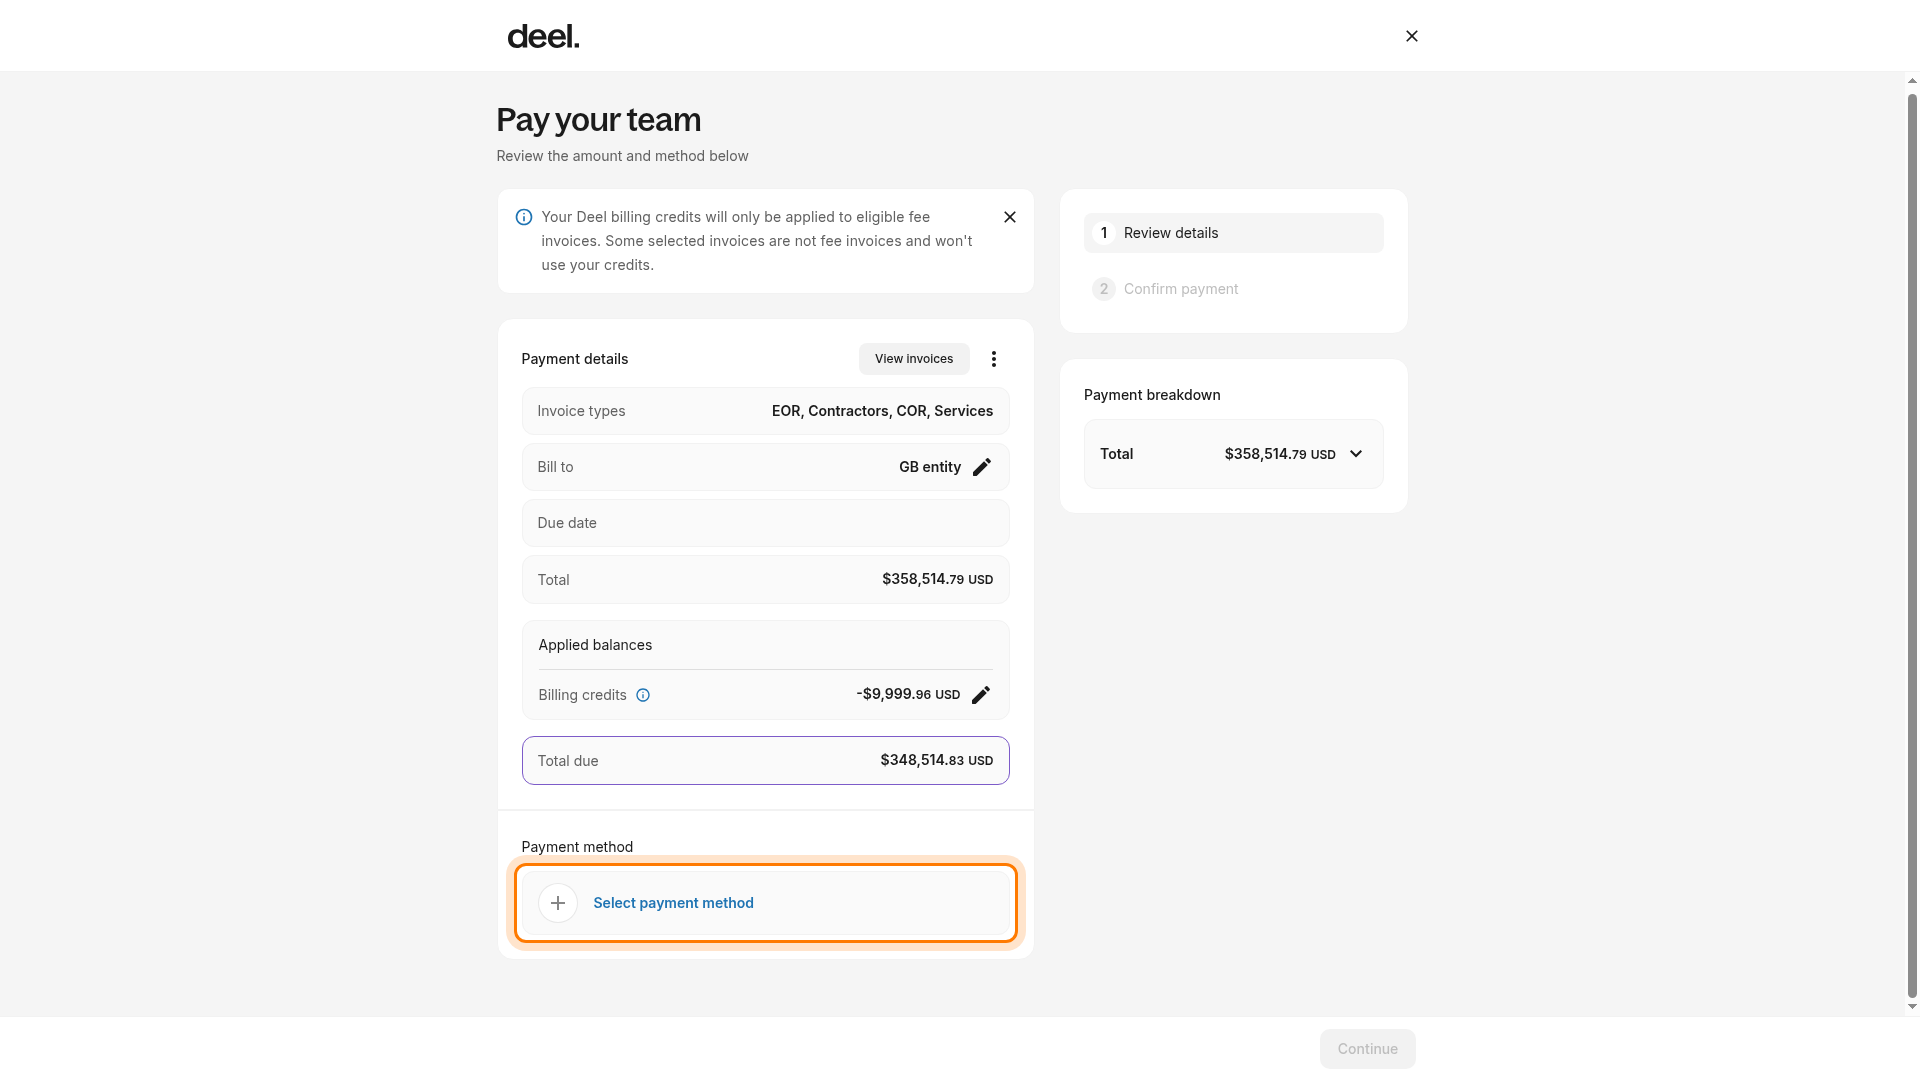
- Review the payment details and select Select payment method.
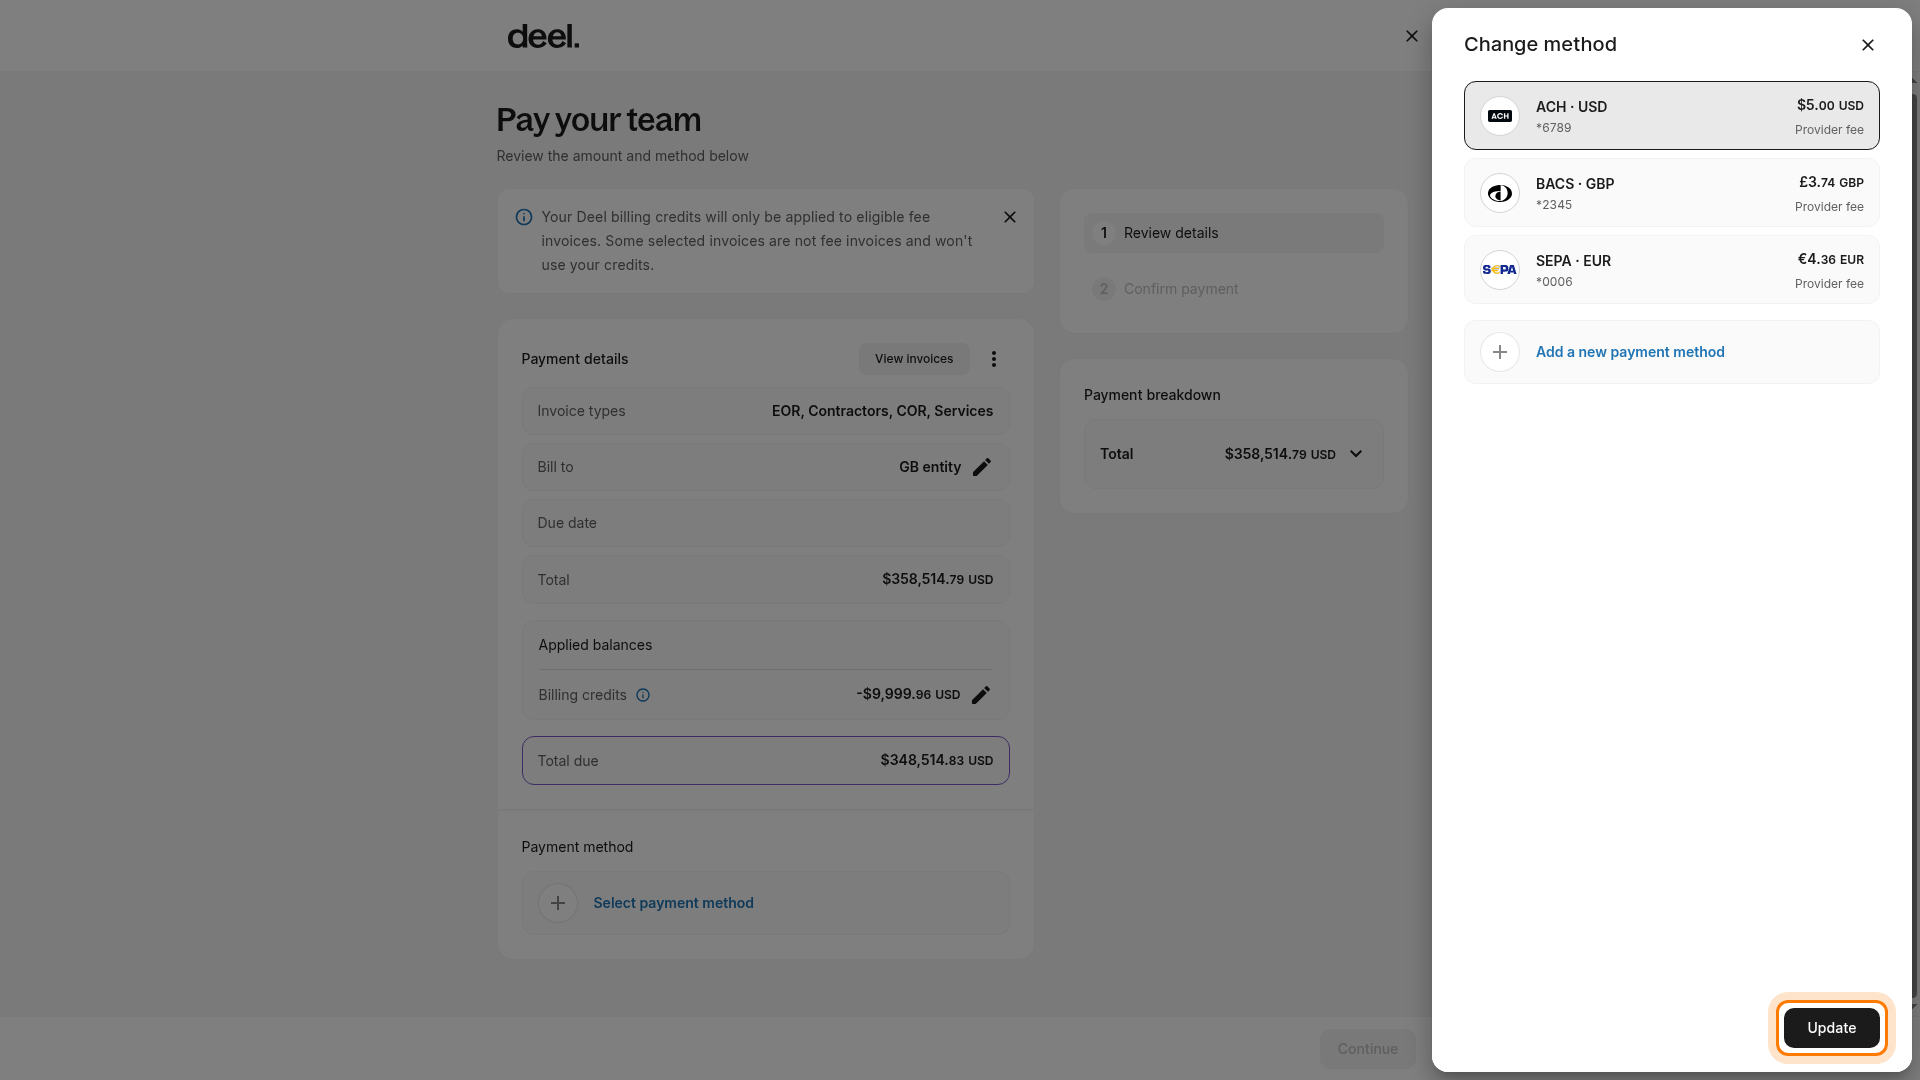
- In the Change method panel, choose the saved payment method you want to use. Review its currency and any provider fee.
- Select Update to apply the selected method.
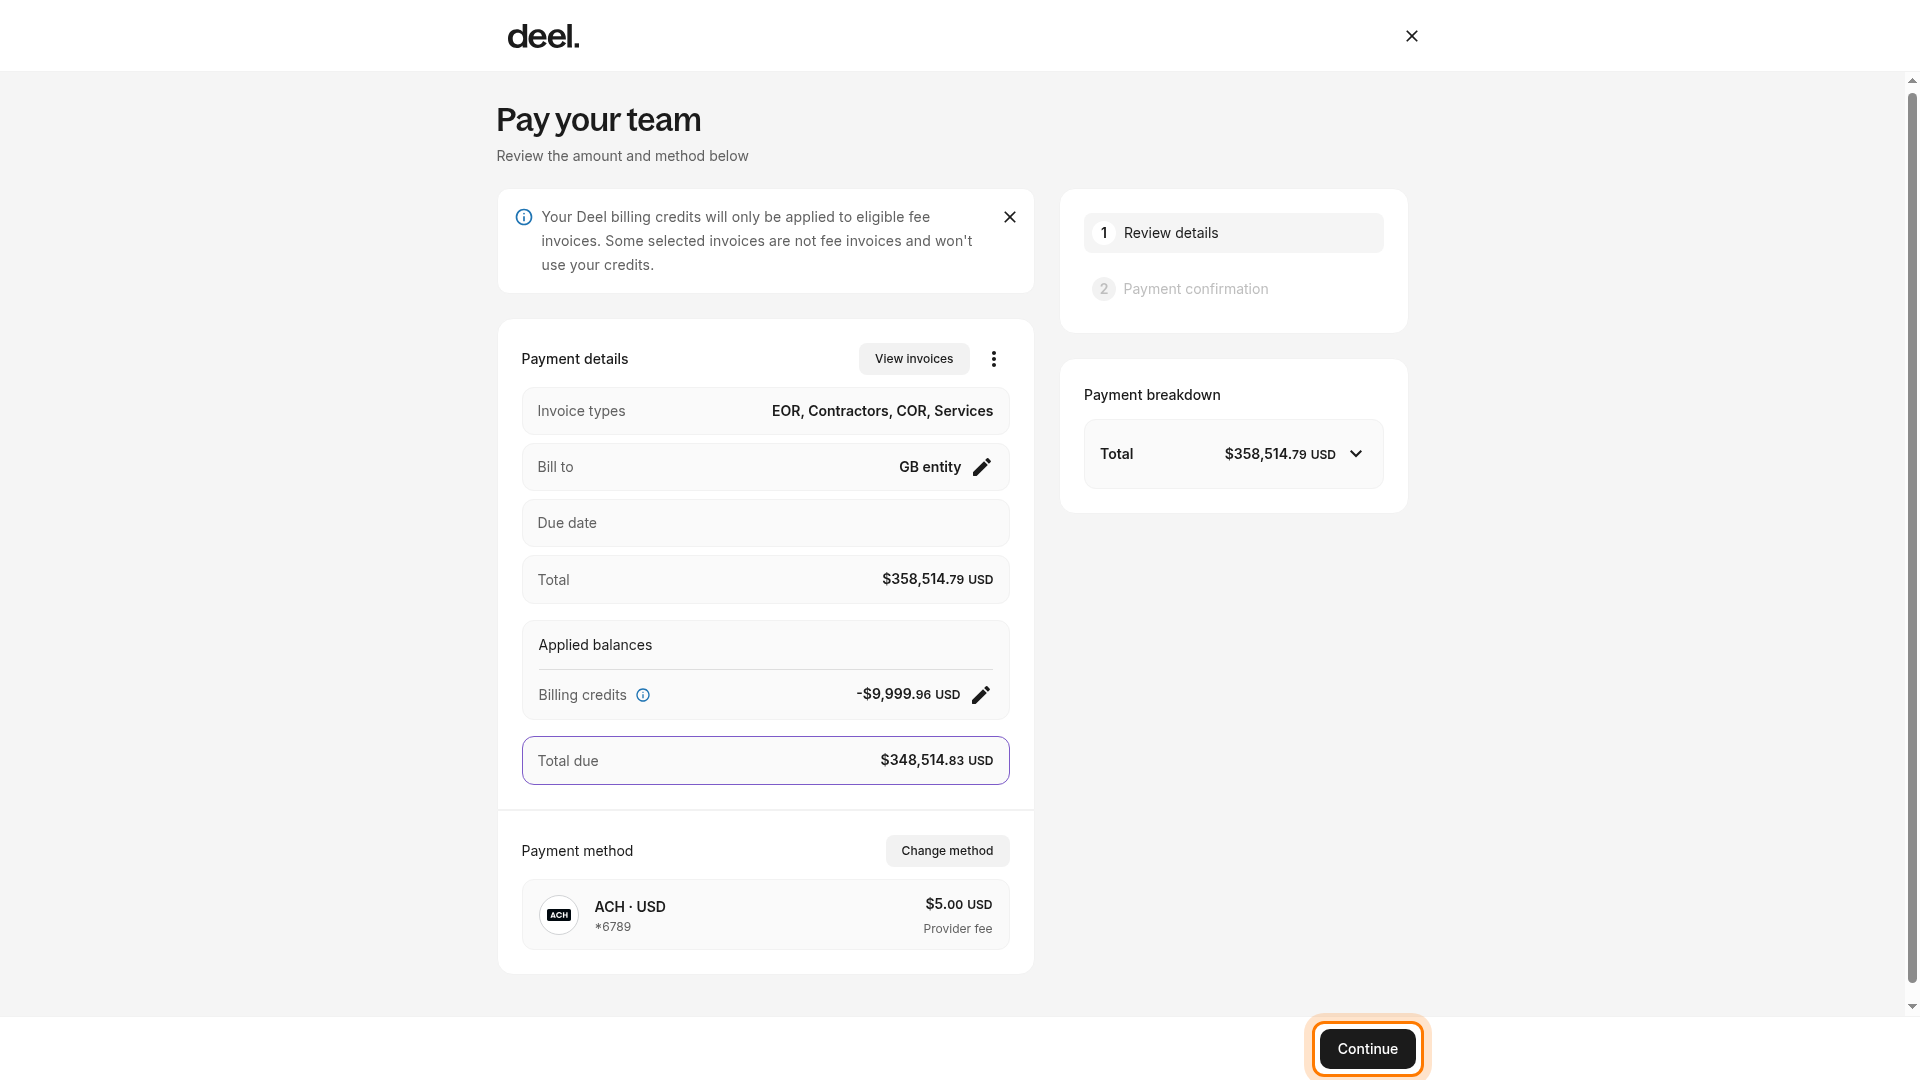
- Confirm that the payment method, currency, fee, and total are correct, then select Continue.
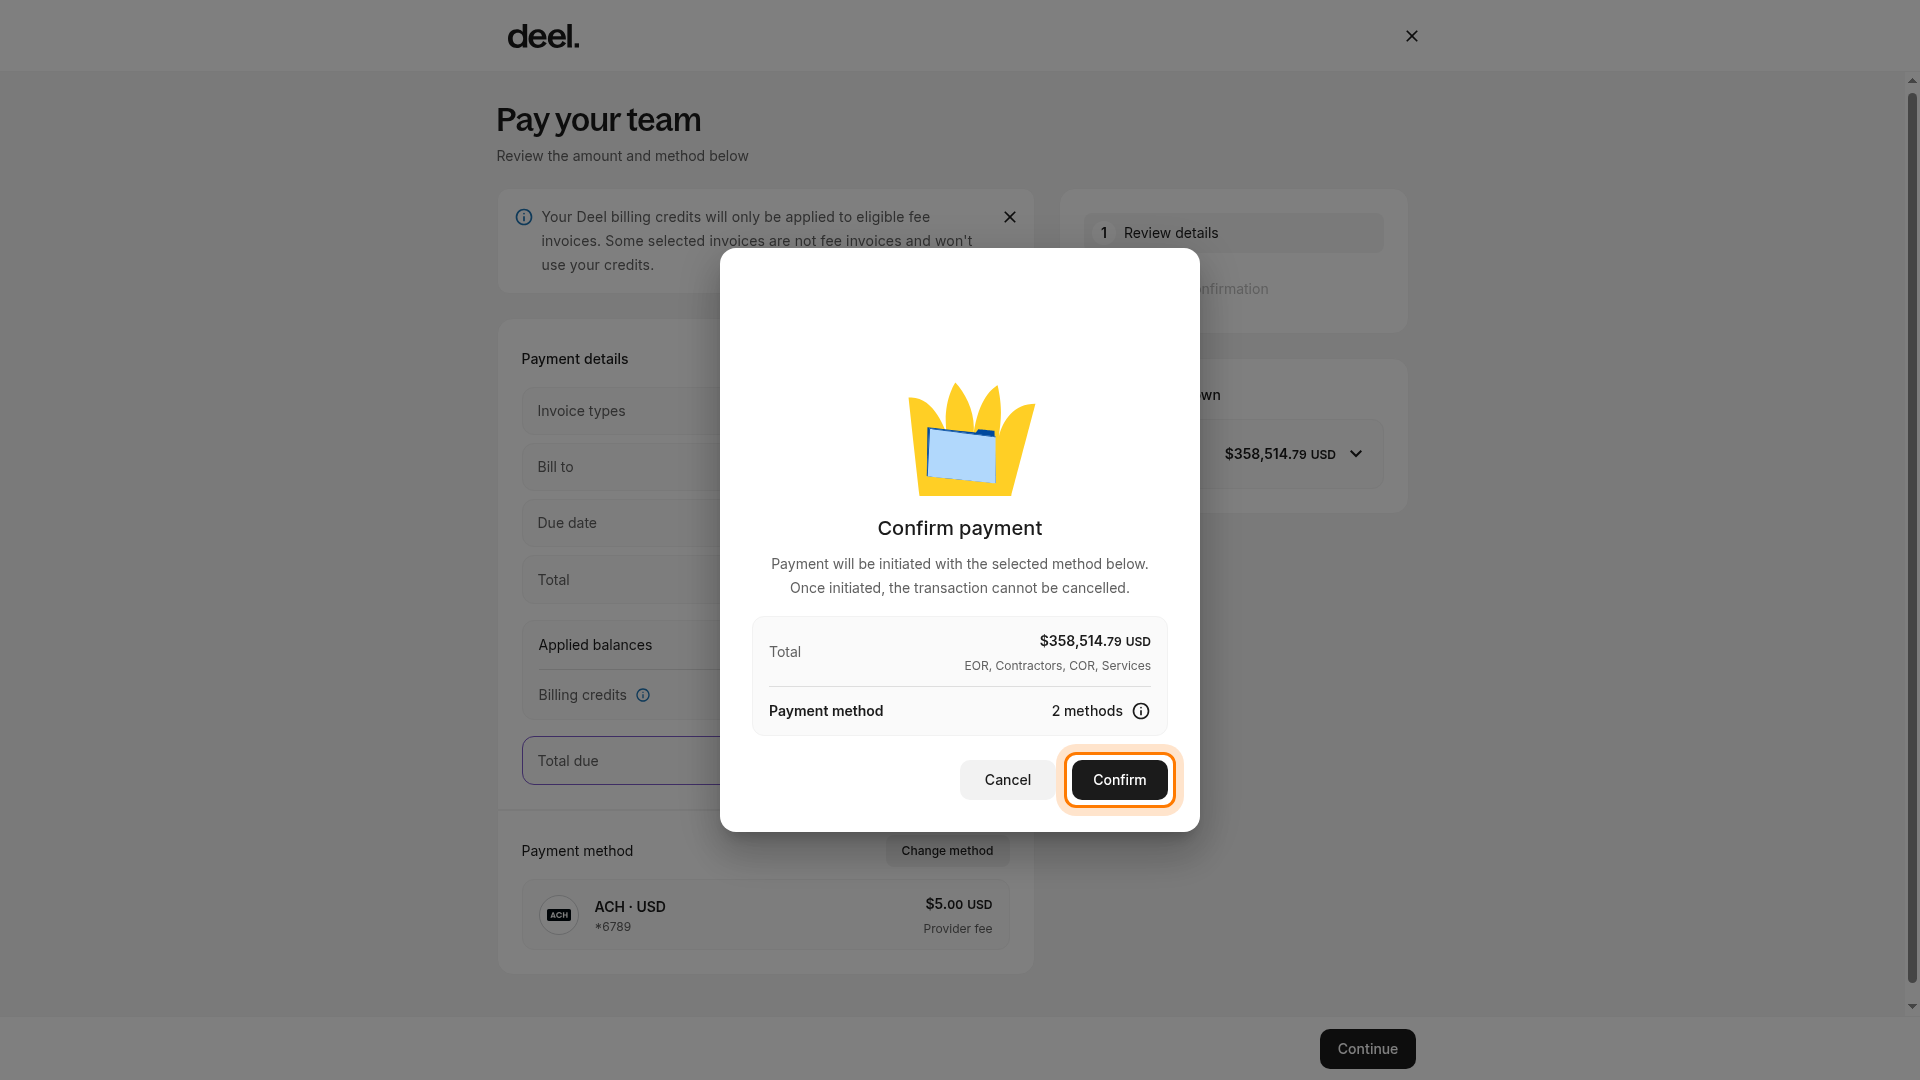
- In the Confirm payment dialog, perform a final review of the total and payment method. Select Confirm only when everything is correct.
Important: Once initiated, the transaction cannot be cancelled from the confirmation dialog. Select Cancel if you are not ready to submit it.
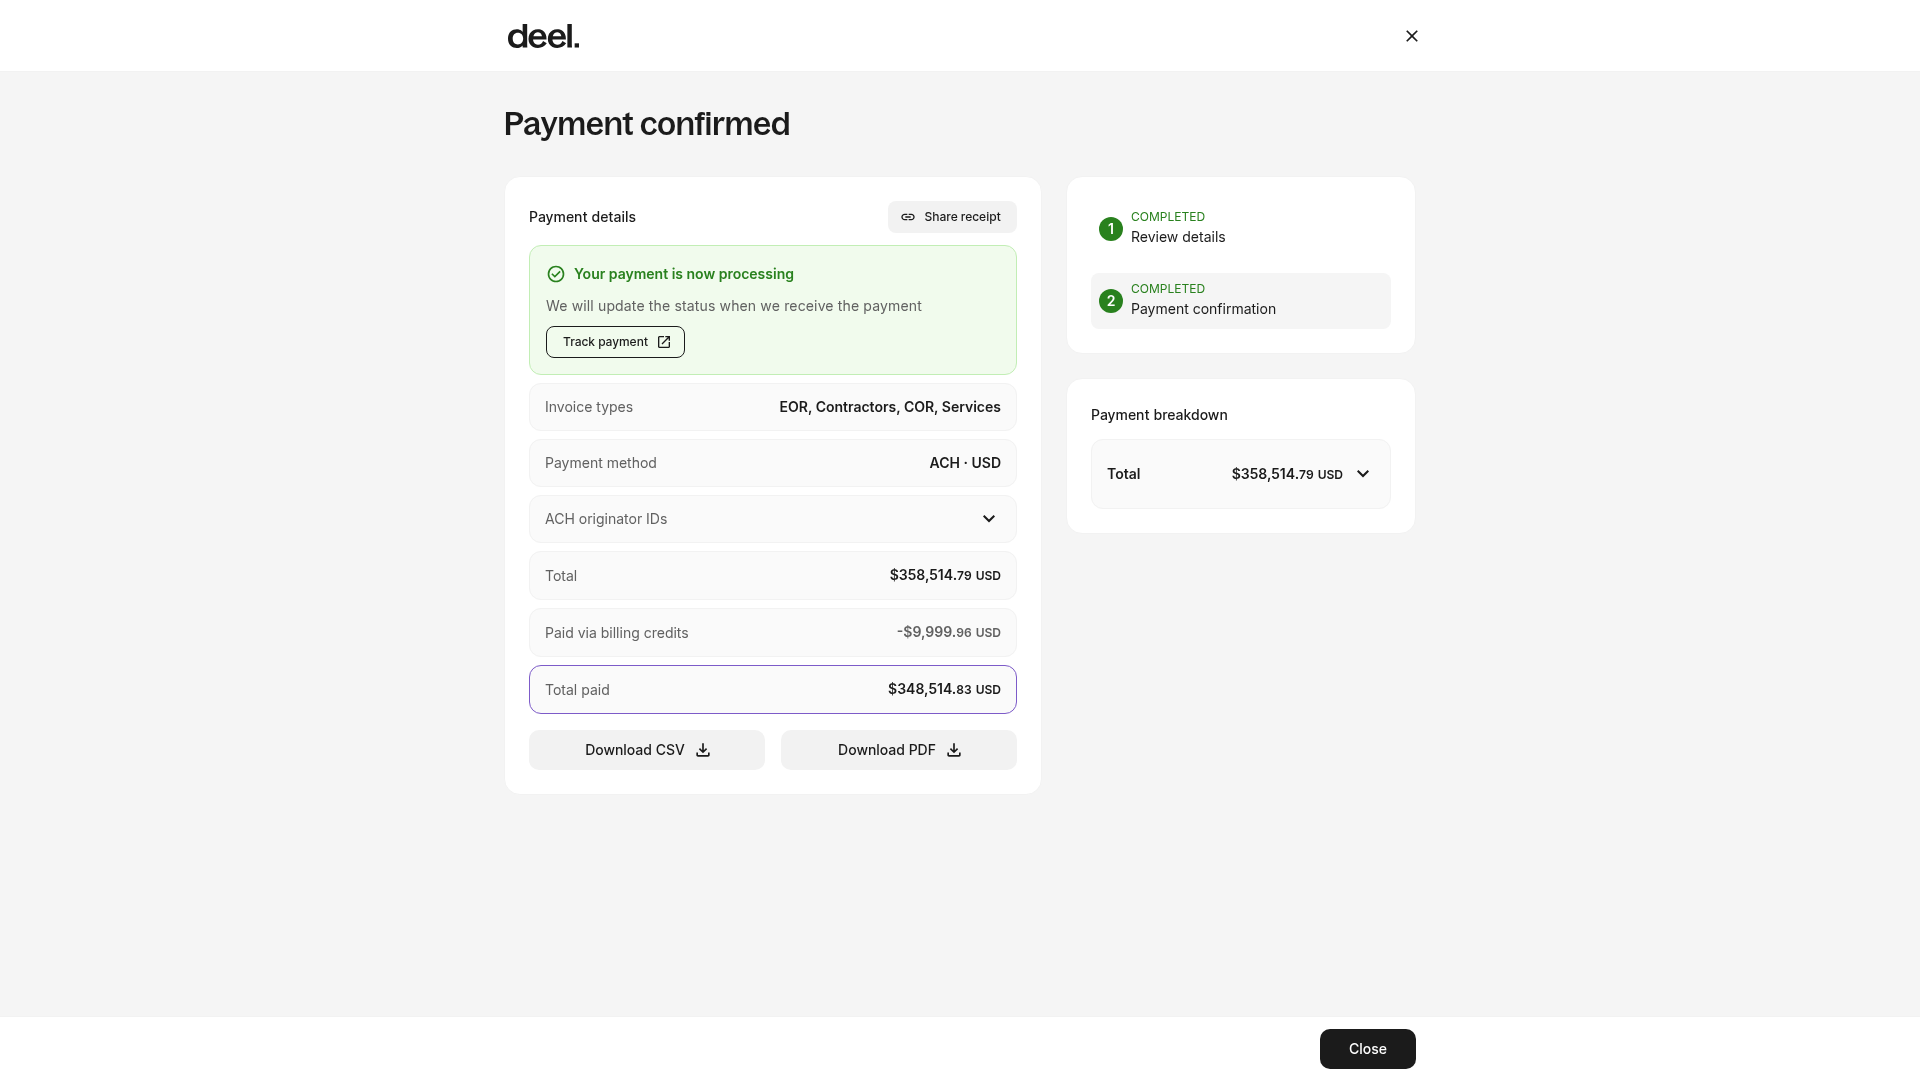
Payment submission is complete when the confirmation page shows Payment confirmed, Your payment is now processing, and both Review details and Payment confirmation as COMPLETED. You can select Track payment to monitor the payment, or use Share receipt, Download CSV, or Download PDF if needed.