
This article explains how clients can create, activate, and review Time tracking approval policies so that designated approvers can review and approve submitted worked hours.
Before You Begin
Note: You must be an Org Admin or have a client admin role with permission to manage Time tracking settings in Organization settings.
How to Configure and Manage Time Tracking Approval Policies
Step 1 – Open the Time tracking settings
- From the Deel Home dashboard, select the Organization settings gear icon in the upper-right corner.
- Under Quick access to main settings, select the Time tracking card. Its description is Configure time tracking, rate, and break policies for workers.
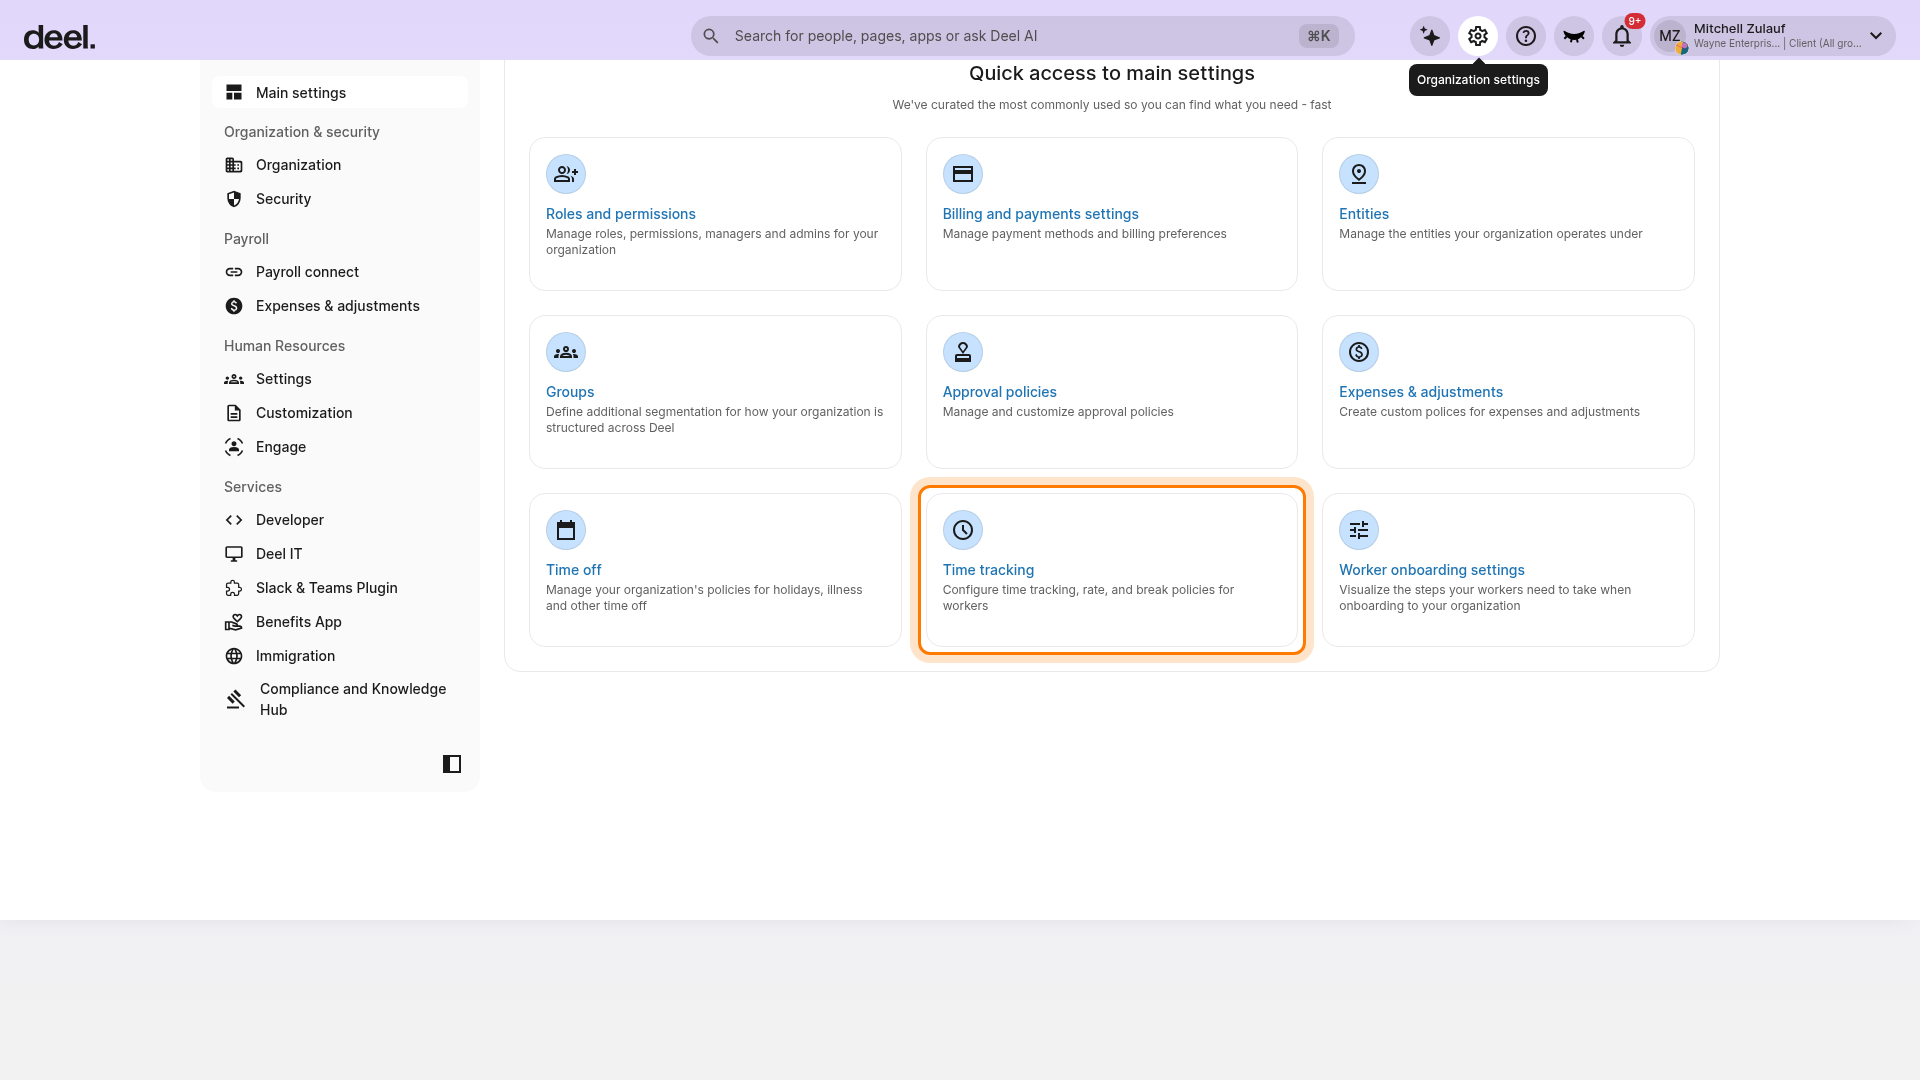
The Time tracking settings area opens on the Time tracking policies tab. Related tabs include Break policies, Rate policies, and General settings.
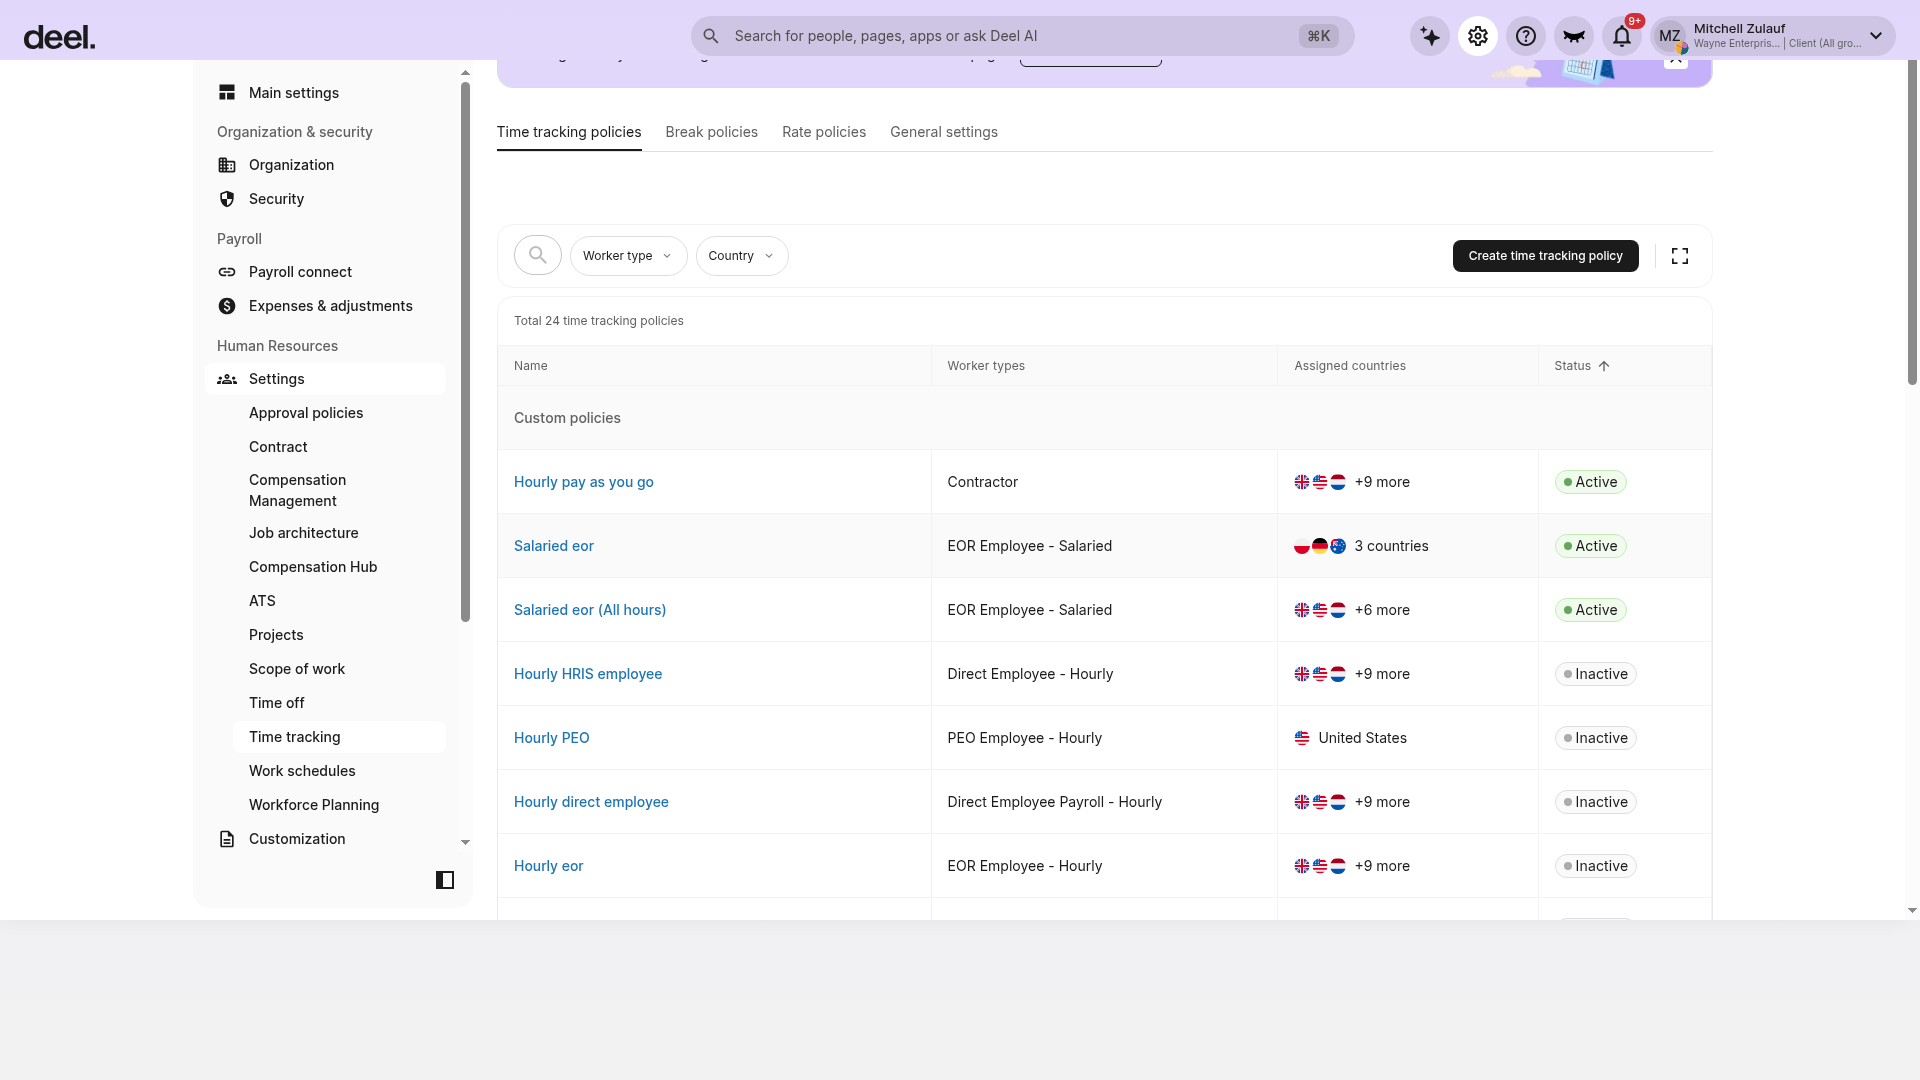
Tip: Select the Time tracking card, not the organization-wide Approval policies card. The worked-hours approval setting is managed from Time tracking.
Step 2 – Open the worked hours approval policy editor
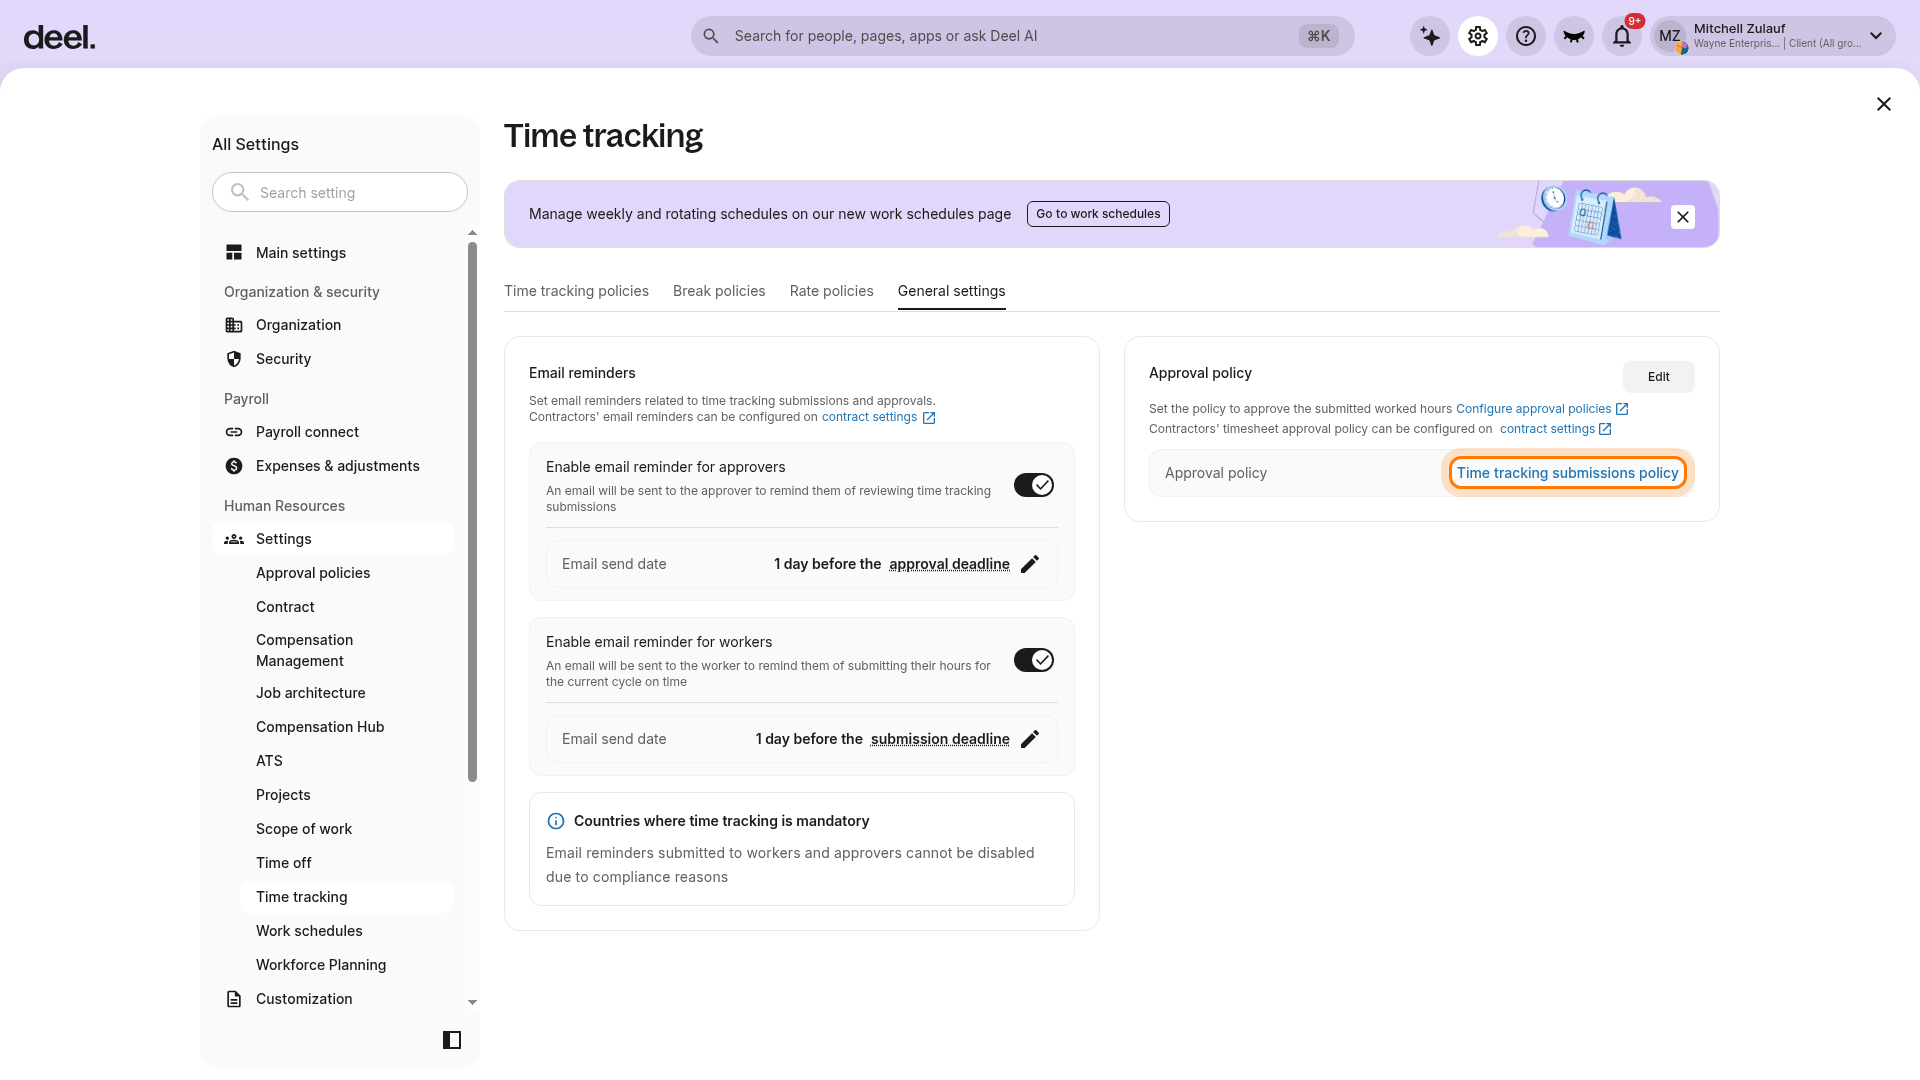
- On the Time tracking page, select General settings.
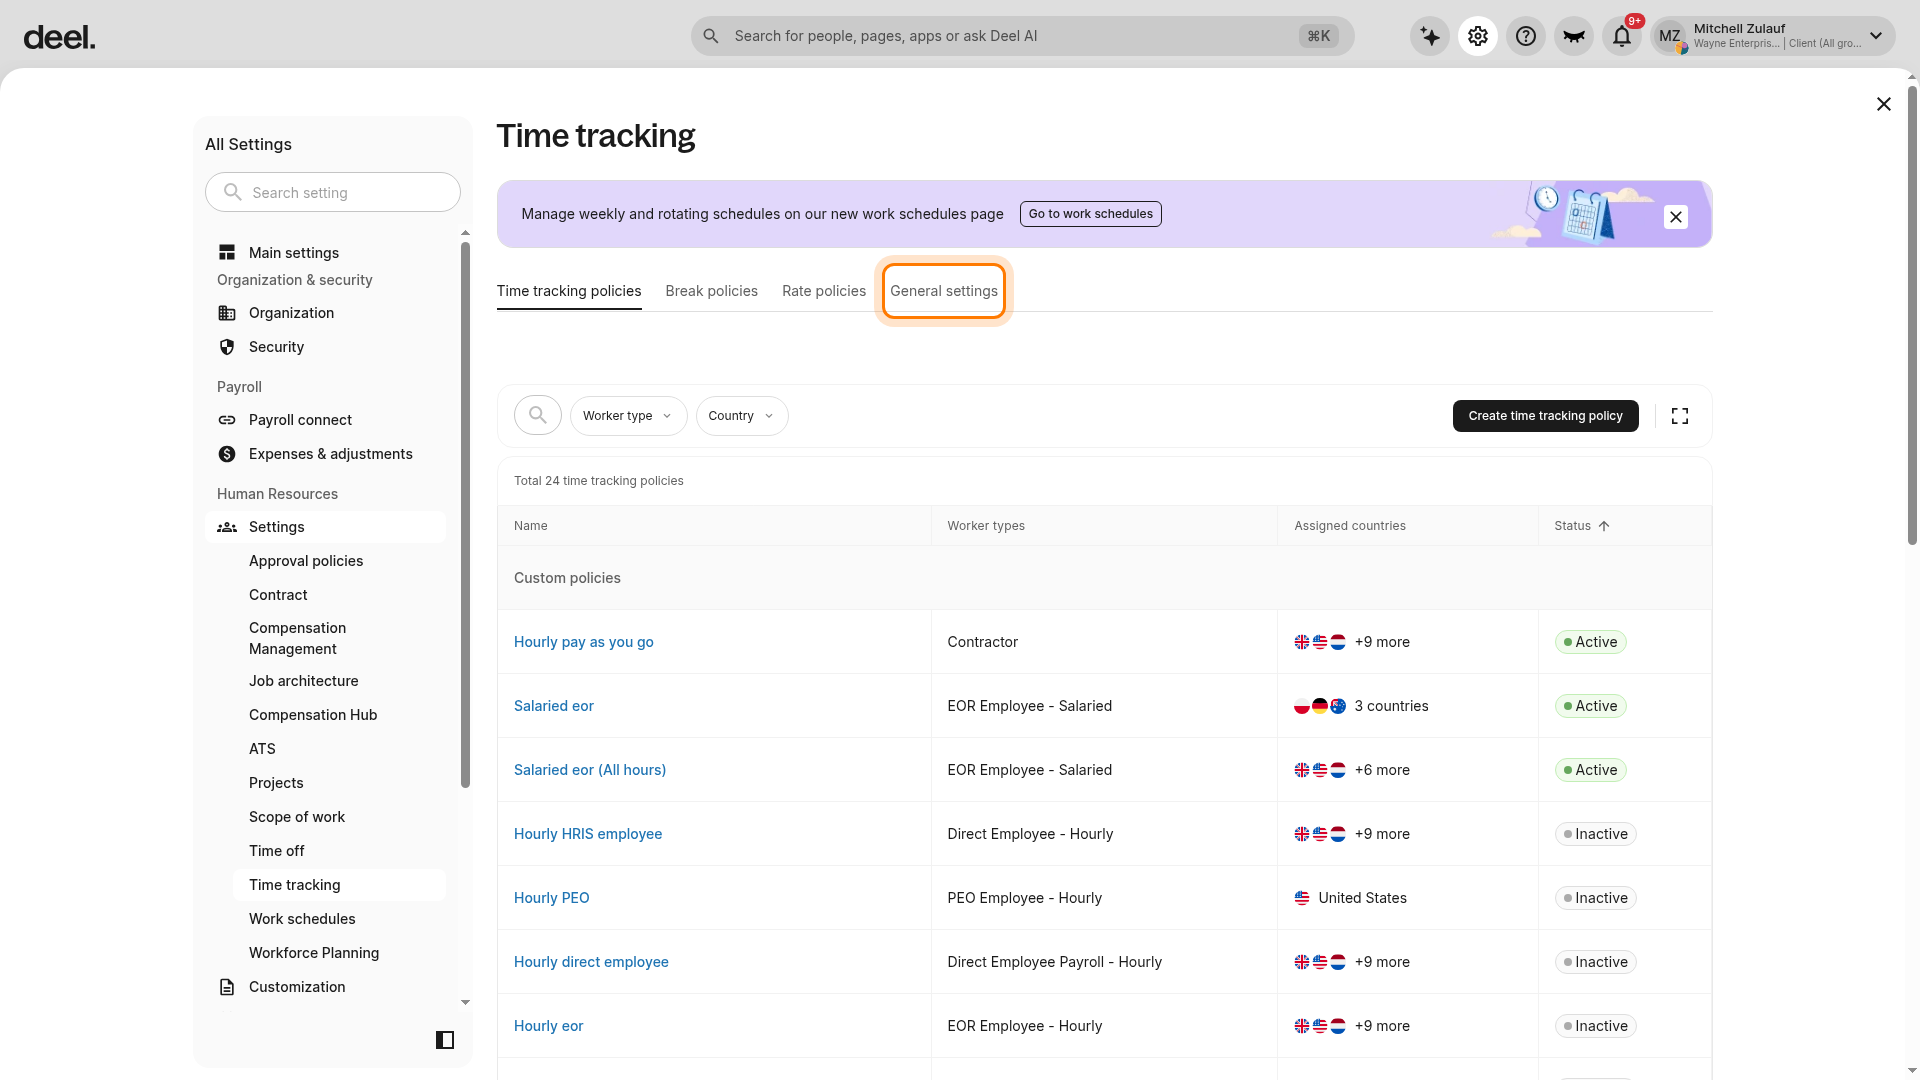
- In the Approval policy card, select Edit. This card controls approvals for submitted worked hours.
The Set worked hours approval policy modal opens. It includes an Approval policy dropdown and a Submit button. Opening this modal does not change the active policy.
You can now set the policy to approve the submitted worked hours by clicking on Configure approval policies. Additionally, the contractor's timesheet approval policy can be configured on their contract settings.
Note: A predefined approval policy exists by default and cannot be deleted.
Step 3 – Enter policy details and add approvers
- Create or update the approval policy as needed, entering a clear policy name and description. Under feature details, choose Time tracking submissions.
- Add approvers. If multiple approvers are at the same level, they can approve in any order.
- Add substitute approvers when primary approvers may be unavailable.
Step 4 – Activate the policy
- Return to Time tracking > General settings and, in the Approval policy card, select Edit. If no policy is assigned, the control may be labeled Set.
- In the Set worked hours approval policy modal, choose the policy from the Approval policy dropdown.
- Select Submit to publish the selection.
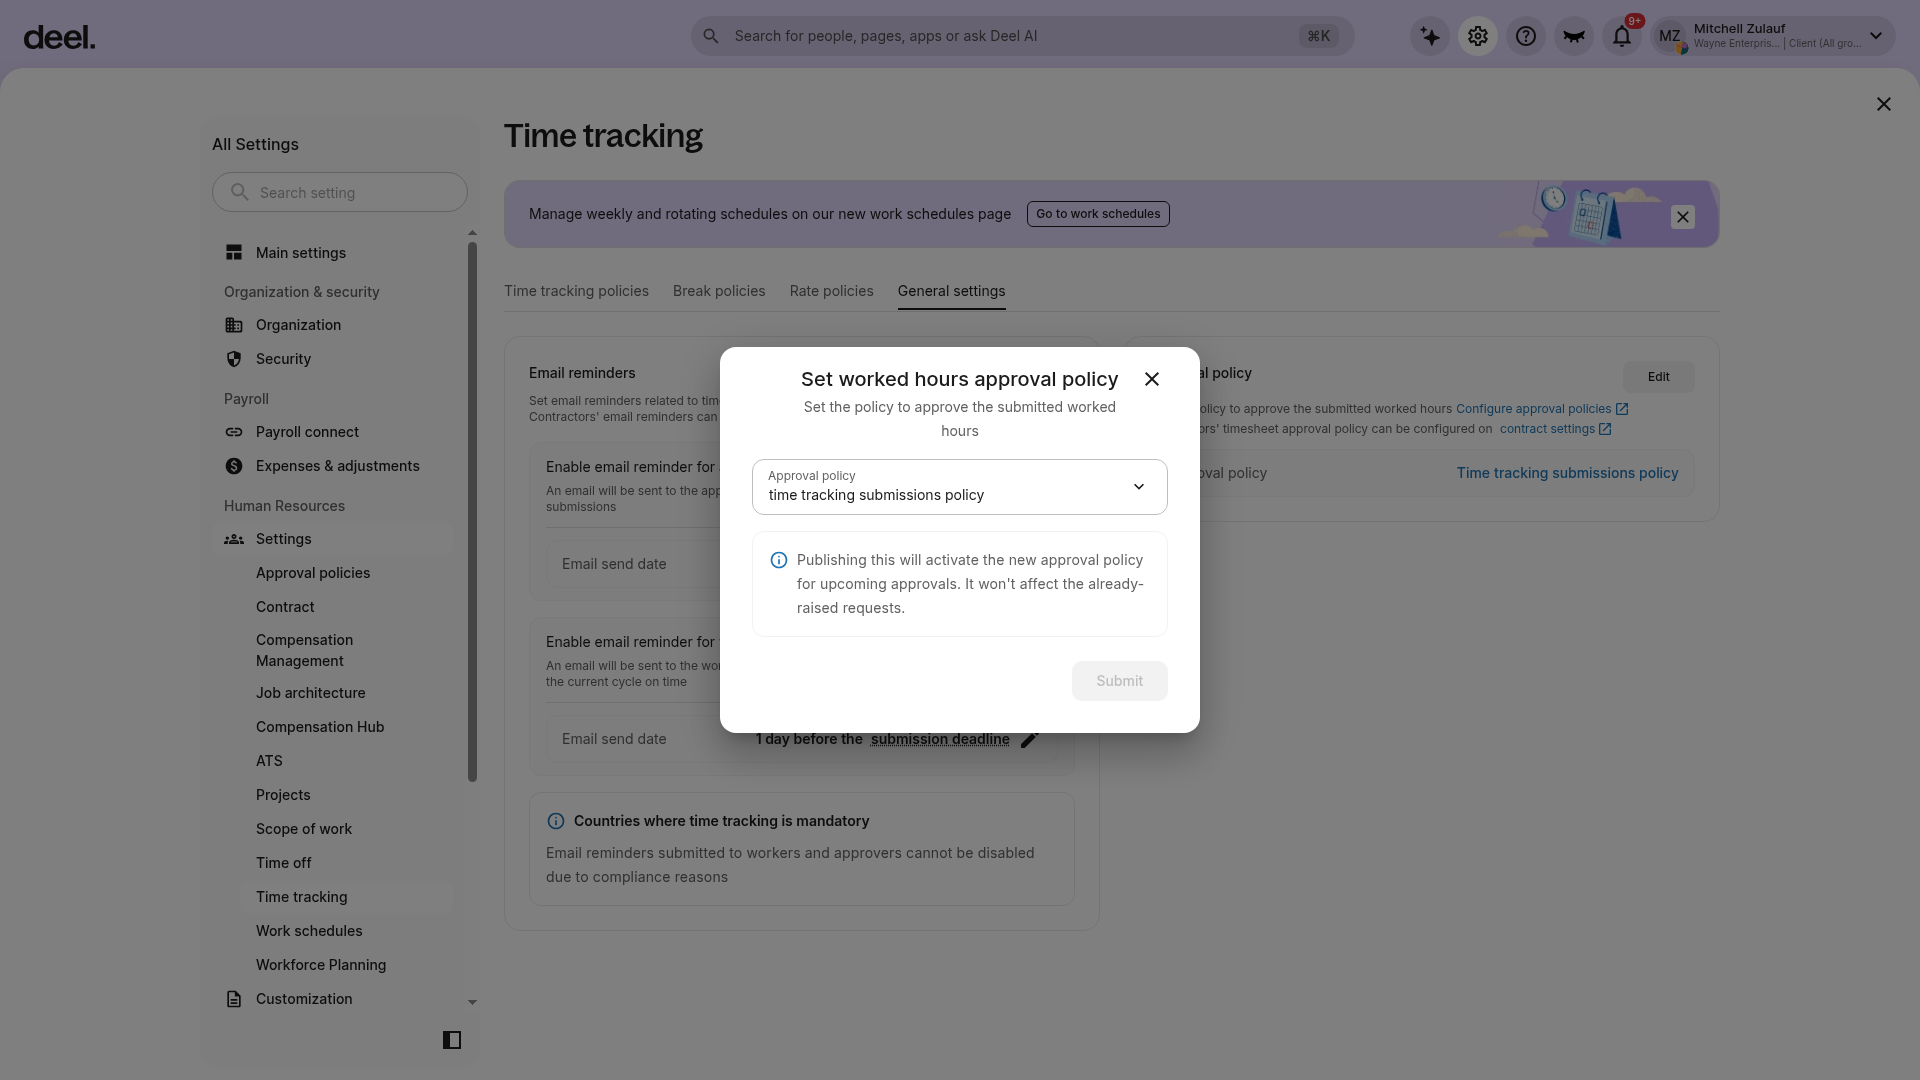
Note: Publishing activates the selected policy for upcoming approvals only. It does not affect requests that were already raised.
Step 5 – View or edit an existing policy
- Go to Time tracking > General settings.
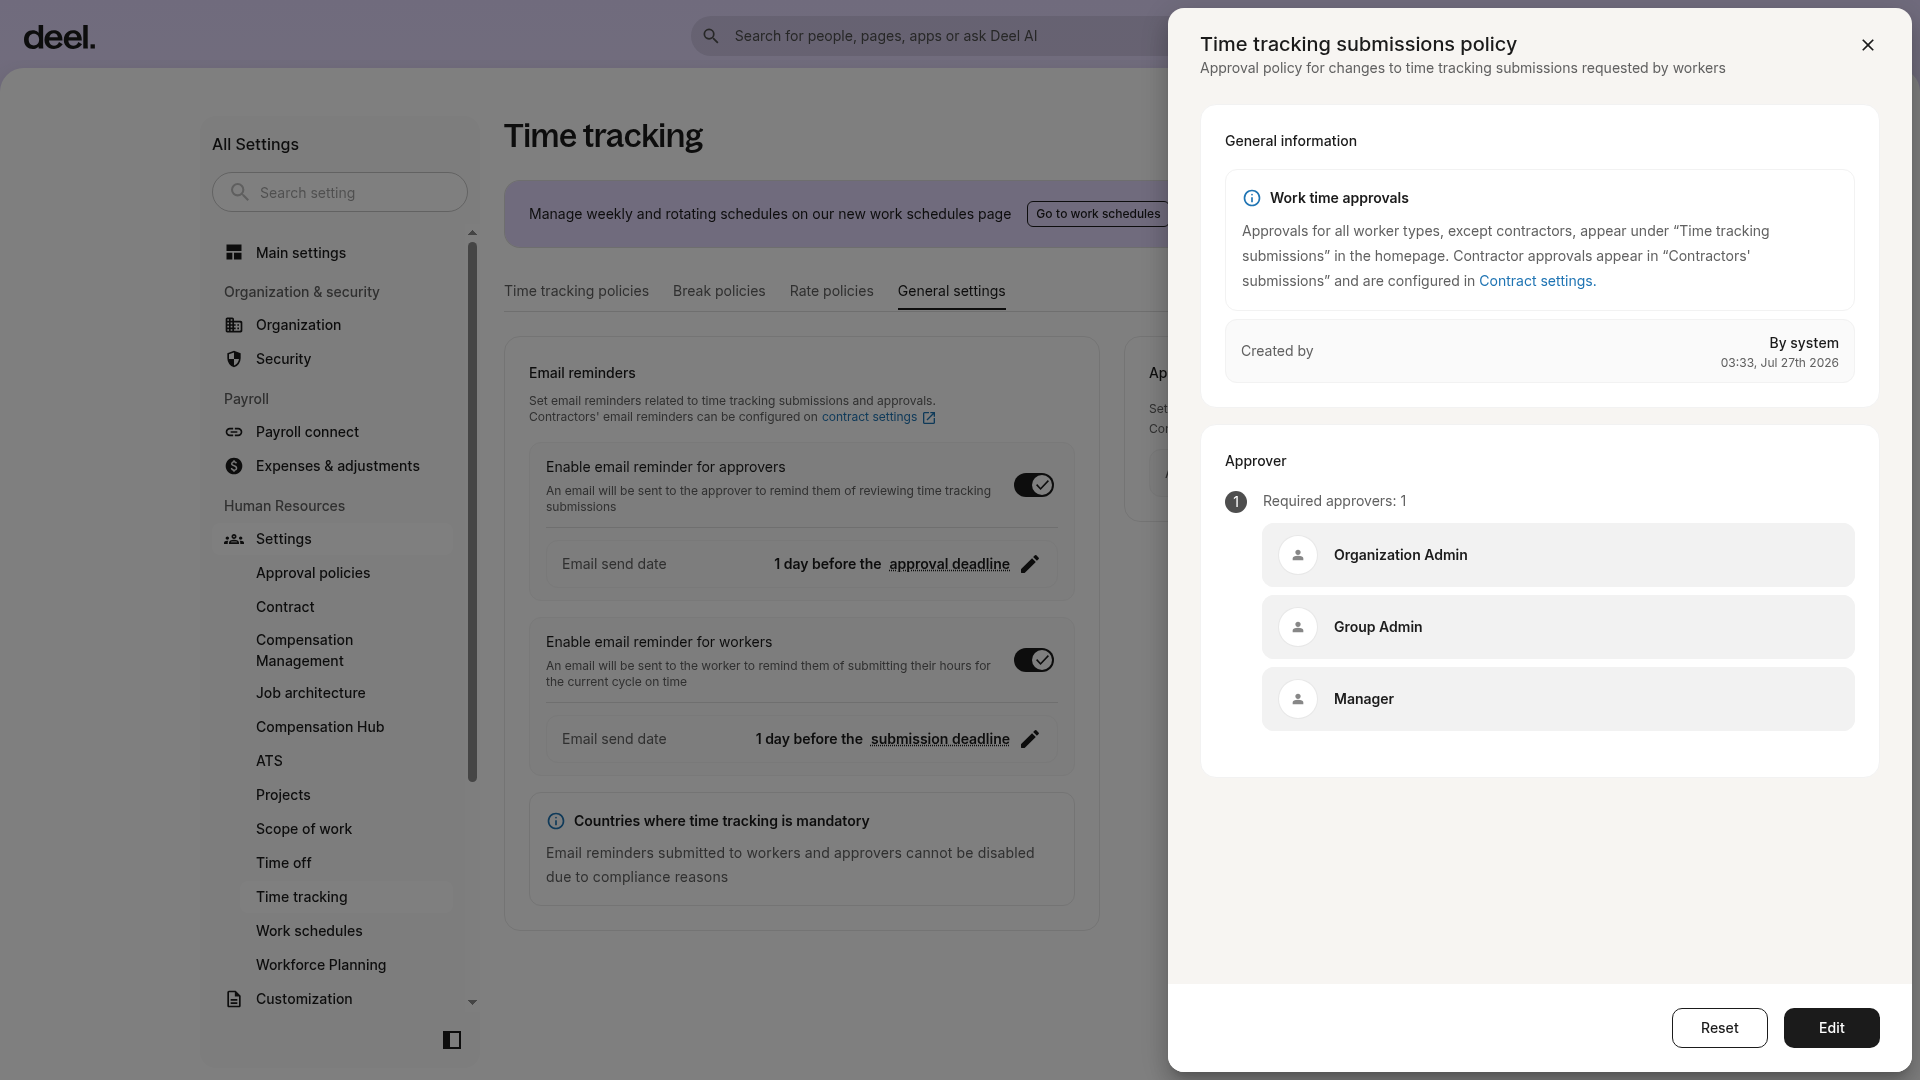
- In the Approval policy card, select the linked name of the current policy. Do not select Edit if you only want to review it.
A details drawer opens on the right side of the screen. It can show General information, the required number of approvers, configured approver roles, and actions such as Edit and Reset.
Frequently Asked Questions
Why do I see Edit instead of Set in the Approval policy section?
Edit is the current label when a worked-hours approval policy is already configured. Select it to open the same Set worked hours approval policy selection modal. If no policy is assigned, the control may be labeled Set.
Can I delete the predefined approval policy?
No. The predefined approval policy cannot be deleted.
The Time tracking card is not visible in Organization settings. What should I do?
Confirm that you opened Organization settings using the gear icon and look under Quick access to main settings. If the card is still unavailable, contact an organization administrator to confirm that your role has access to Time tracking settings.
I opened the Approval policies page. Is this the right place?
No. Return to Organization settings and select the Time tracking card. The worked-hours approval setting is located in Time tracking > General settings > Approval policy.