
Connect your Deel clients to your Partner Portal for better visibility and collaboration. Once linked, you'll monitor shared organizations, track contract activity, and view partner-specific data—all from one place.
You can think of linked partner organizations as Deel clients that have granted you access. As a Partner, you have two options:
- Create a new client account – if your client doesn't yet have a Deel account
- Link an existing client account – if your client already has a Deel account
Your access is limited to what the organization's admin explicitly allows. You cannot see information they don't grant you access to.
Option 1: Create a New Client Account
Use this option when you need to set up a brand new client account in Deel and link it to your Partner Portal account.
Steps
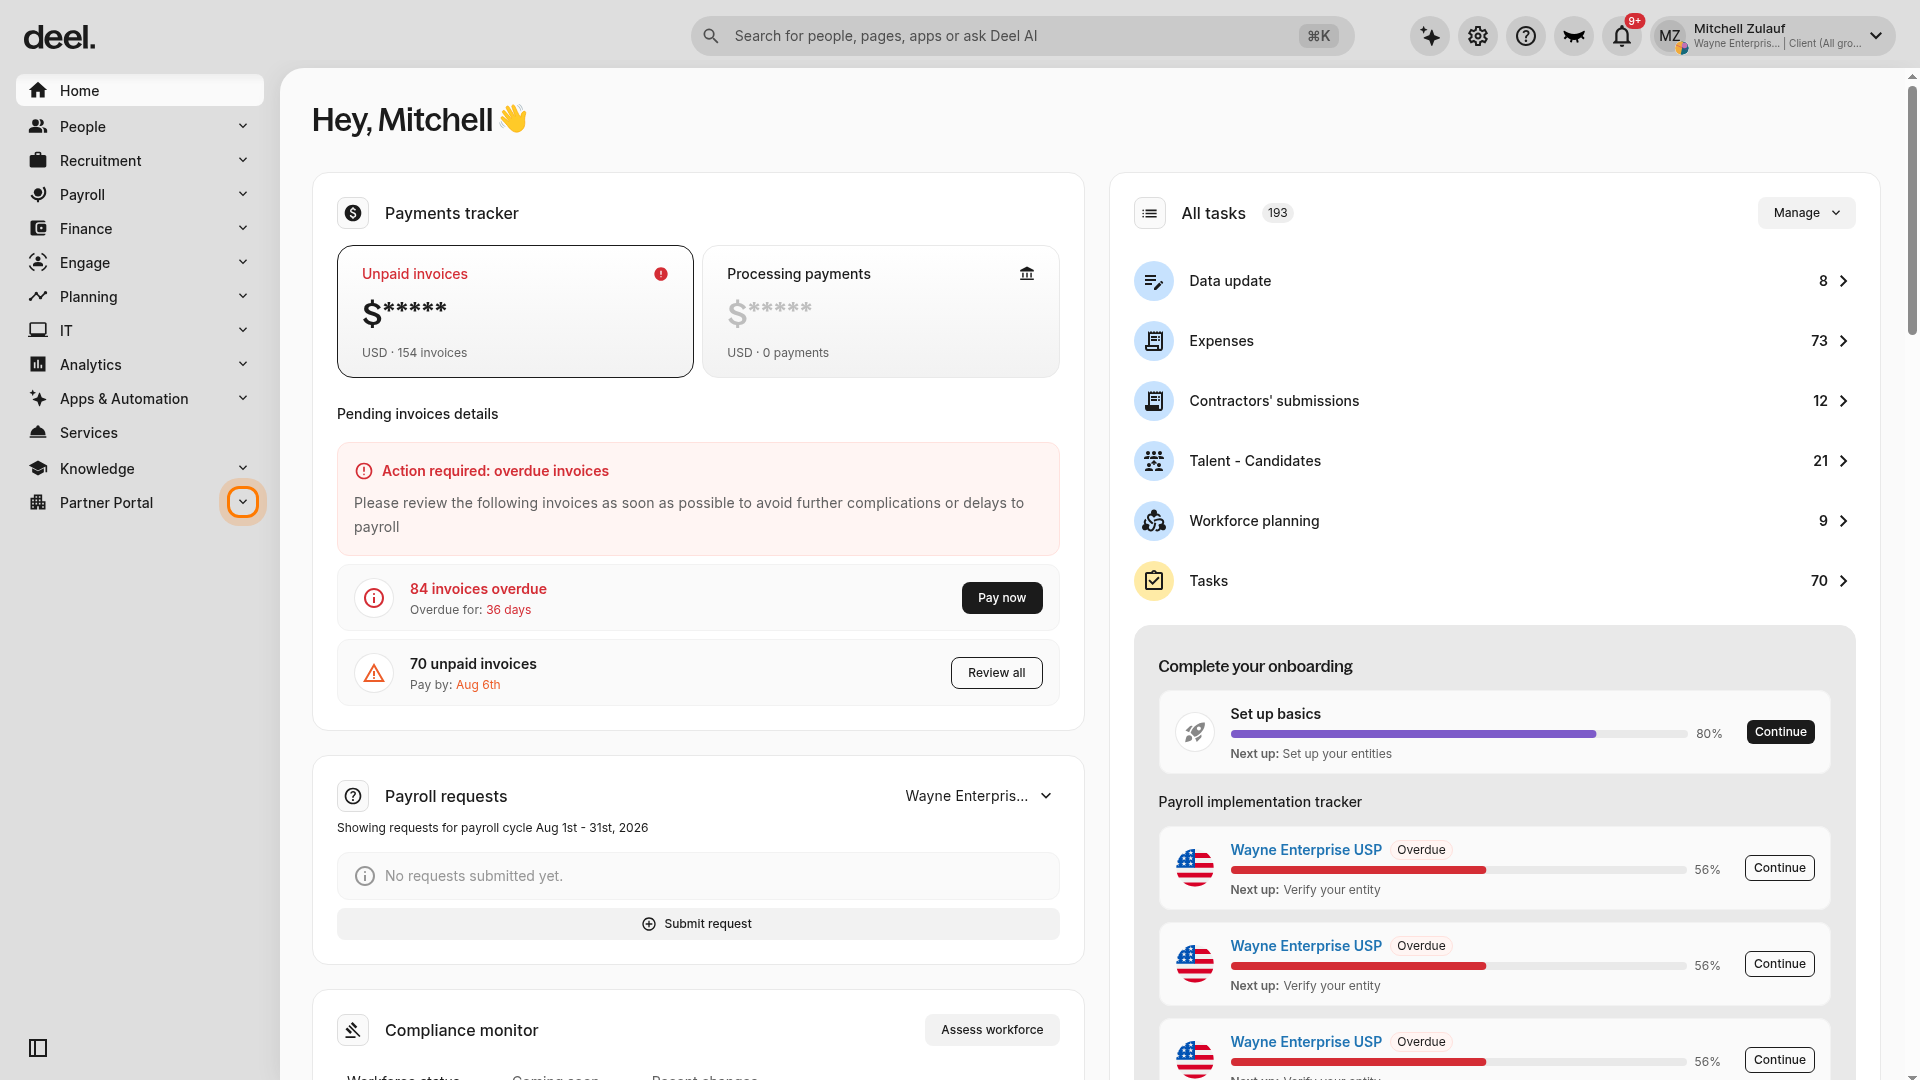
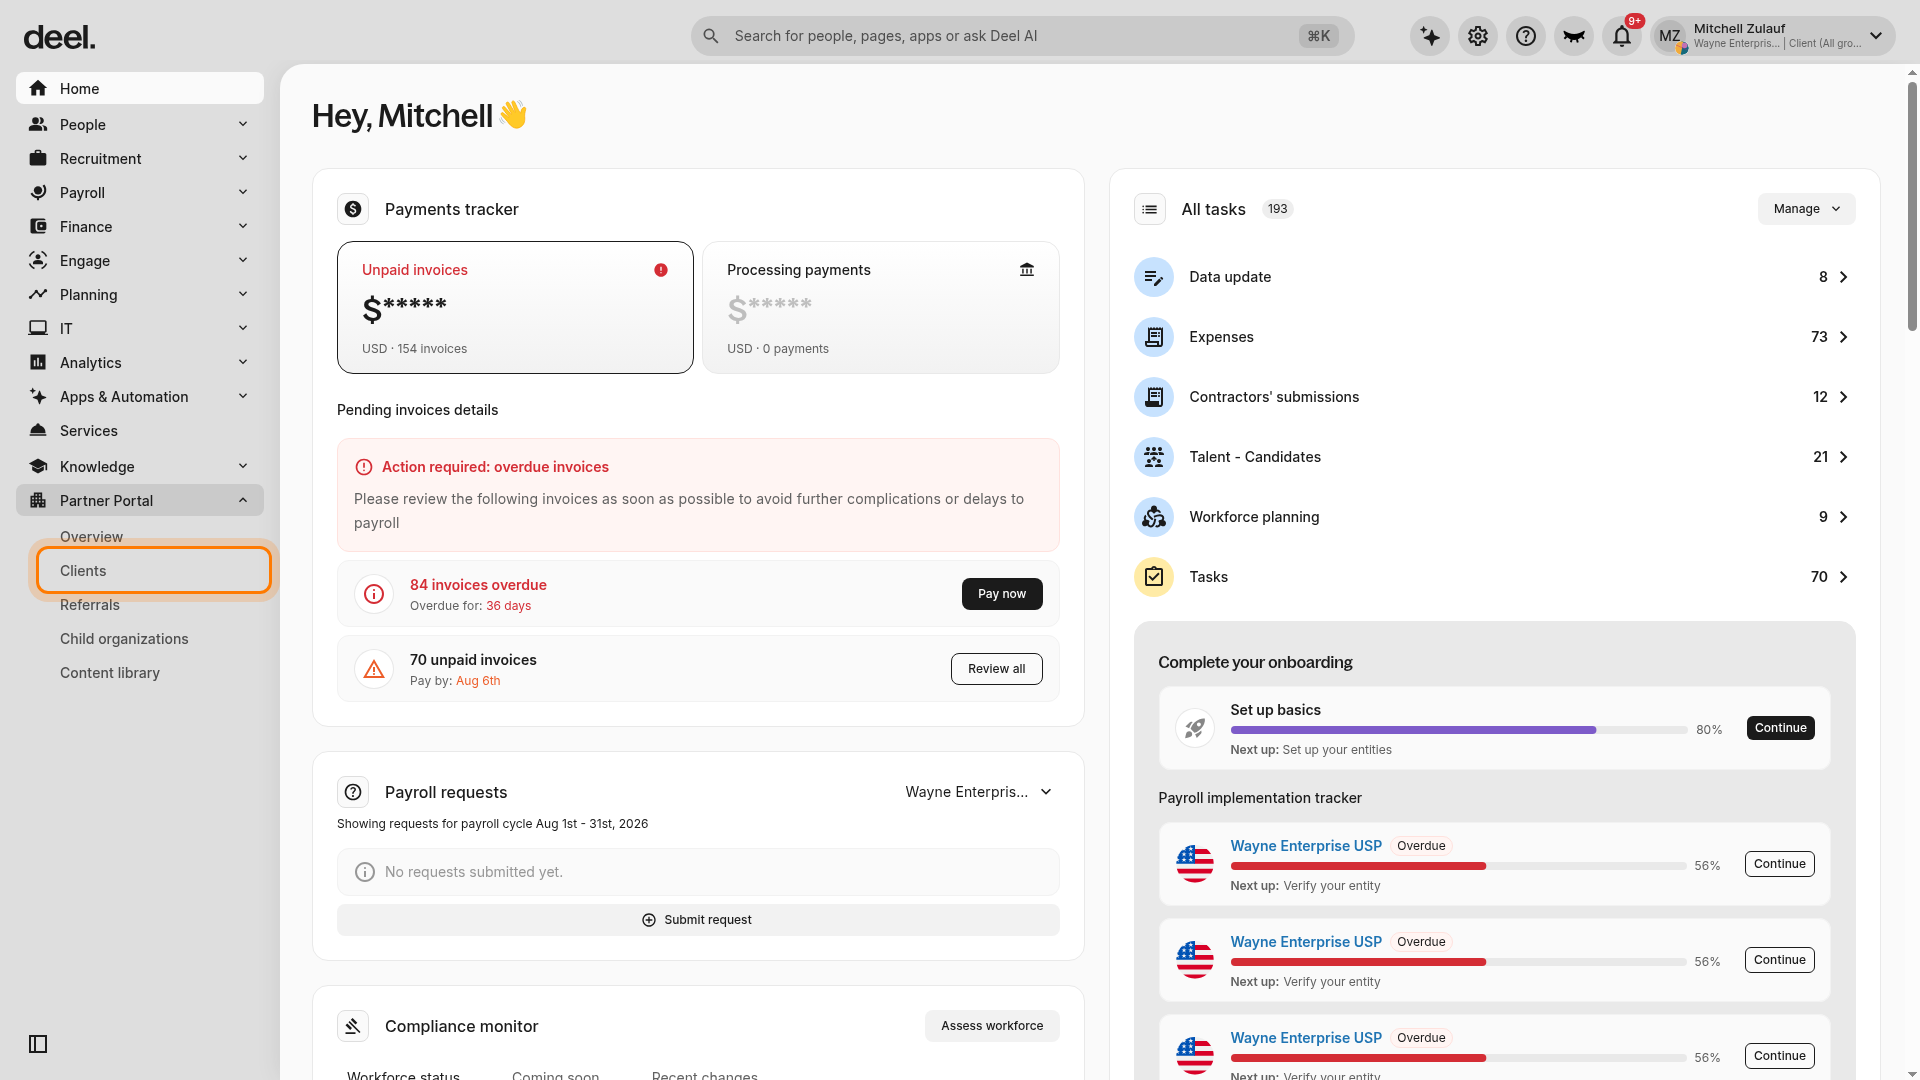
- In the left sidebar, select Partner Portal or its chevron to expand it, then select Clients.
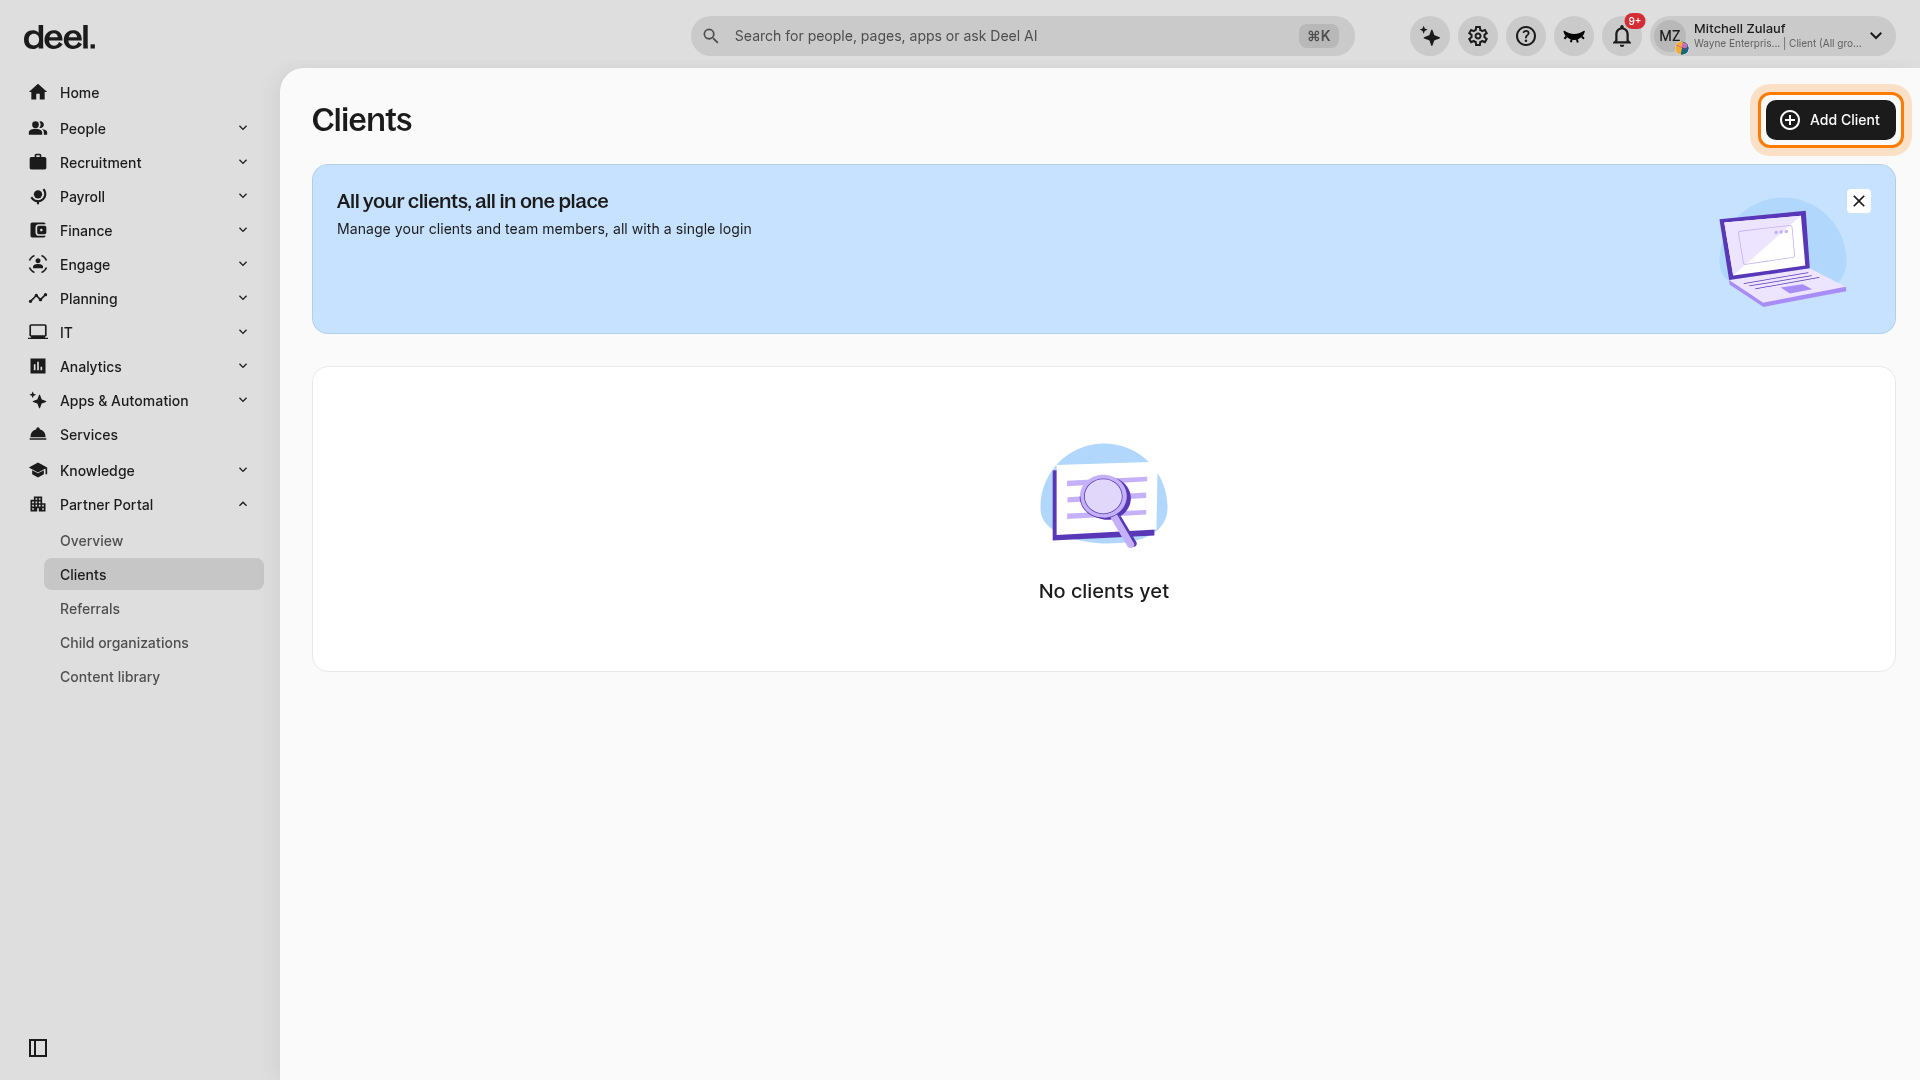
- On the Clients page, click the Add Client button. The Add a new Client form opens with Client details as the active first step.
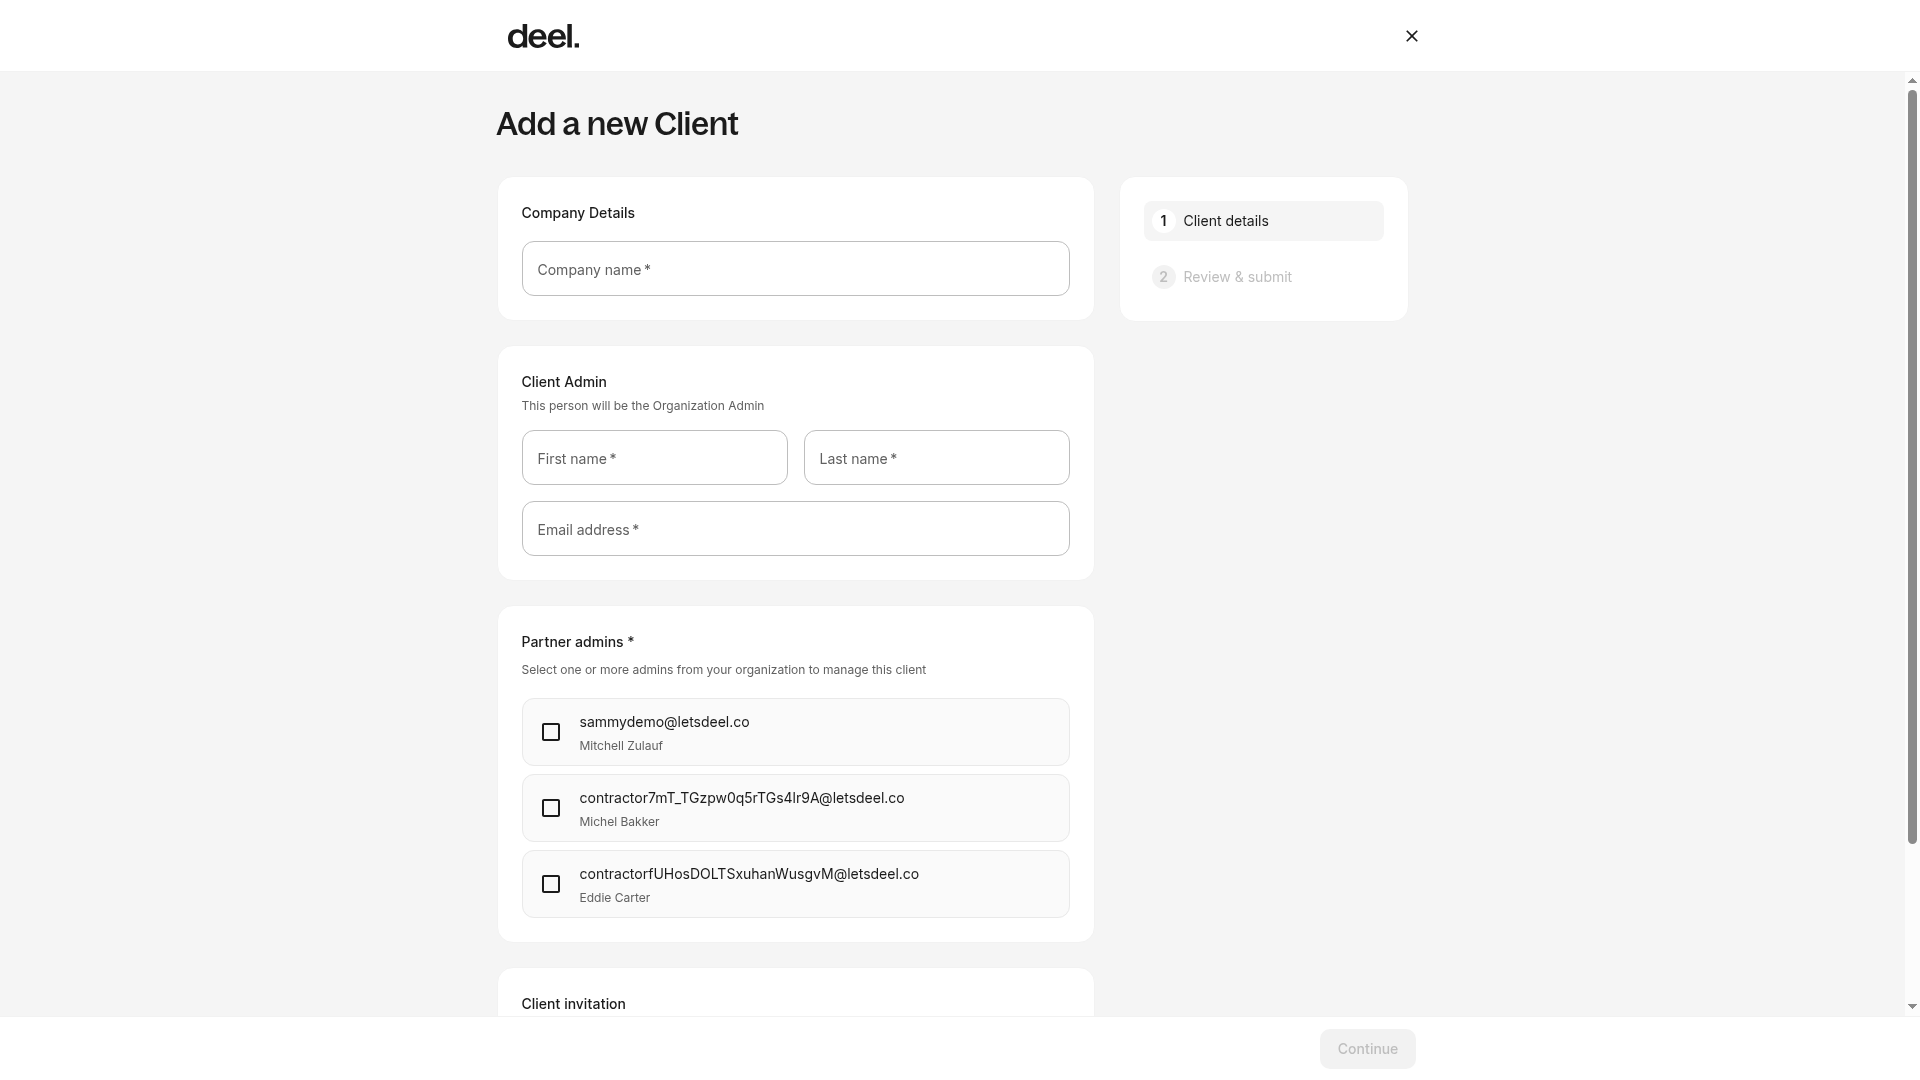
- Enter the client's company name.
- Enter the first name and last name of the primary contact.
- Enter the contact's email address.
- Select which team members from your Partner account will have organization admin access to this new client account.
- Choose your invitation preference:
- Invite now – the selected team members receive an invitation immediately
- Set up their account first – you can manually invite team members later via Roles and Permissions
- Continue to Review & submit, review your information, and click Create Client Account.
- The account is created and you're notified. You can log directly into the new client account to set it up on the client's behalf.
- When ready, invite the client user via Roles and Permissions (if you selected "Set up their account first").
Option 2: Link an Existing Client Account
Use this option when your client already has a Deel account and you want to establish a Partner-Client relationship with self-serve approval.
Steps
- In the left sidebar, select Partner Portal or its chevron to expand it, then select Clients.
- From the Clients page, click the Link an existing client account button.
- Choose how to share the linking request:
- Copy invitation link – copy the link and share it with your client using your preferred communication method
- Send email – enter the client's email and send the invitation directly
- Your client receives an email and in-app notification with the linking request.
- Any organization admin in the client's account can approve the request by clicking the link.
- The client reviews the consent flow, which explains:
- What information you can access
- That they can revoke your access anytime from Roles and Permissions
- That you can manage users and add your staff to their organization
- The client chooses whether to grant you access to:
- All groups in their account, or
- Specific groups they select
- The client approves the access request.
- You and all Partner Org Admins are automatically granted access to the client account. The linking status changes from "Pending" to "Active" and you can log directly into the client account. You'll be able to manage your staff members in that client account via Roles and Permissions.
Troubleshooting
| Problem | Did you try? | How to fix |
|---|---|---|
| The Clients option is not visible | Expanding Partner Portal using the chevron beside it | Select Clients from the expanded submenu. |
| Selecting Clients does not open the page | Selecting Clients under Partner Portal | Confirm that you selected the Clients submenu item rather than the parent Partner Portal row. Wait briefly for navigation to finish, then confirm the page heading reads Clients. |
| The Add Client button is missing | Confirming that you are on the Clients page | Confirm that you are on the Clients page rather than the Partner Portal overview. If the button is still unavailable, your role may not include permission to create clients. Contact your organization administrator. |