
You will use Deel as your go-to platform for anything related to your employment - payslips, tax documents, personal detail directory, even perks and benefits!
The onboarding process is designed to ensure that new employees are fully compliant with local employment laws and regulations, and that they have all the information they need to get started with their new job.
You will first need to create an account, sign your contract, and complete a mandatory onboarding checklist.
👉 Tip: For a step-by-step walkthrough, check out our Interactive Onboarding Guide.
You can contact us 24/7 and our support agents will be happy to help you!
[DROPDOWN] Please use the dropdown menu below to learn more about the onboarding process:
[DROPDOWN-OPTION] Step 1: Activate Deel Account
You will receive a welcome email from Deel with instructions on creating your employee Deel account.
By the time you get the email, your company has already signed the terms & conditions with us. But you will need to sign an Employment Agreement.
When you log in to your account, review your onboarding requirements and pending tasks. Open the task list and complete every required item. You cannot start working until all items on the list are completed.
Please also see: How To Create A Deel Account As An Employee
[DROPDOWN-OPTION] Step 2: Upload Compliance Documents
You must upload your mandatory compliance documents directly to the app. The documents are specific to your country of employment.
These documents may include, but aren’t limited to:
- A copy of your passport or other government-issued ID
- Proof of address
- Tax identification number (TIN)
You will be prompted to upload missing documents when you log into your Deel account.
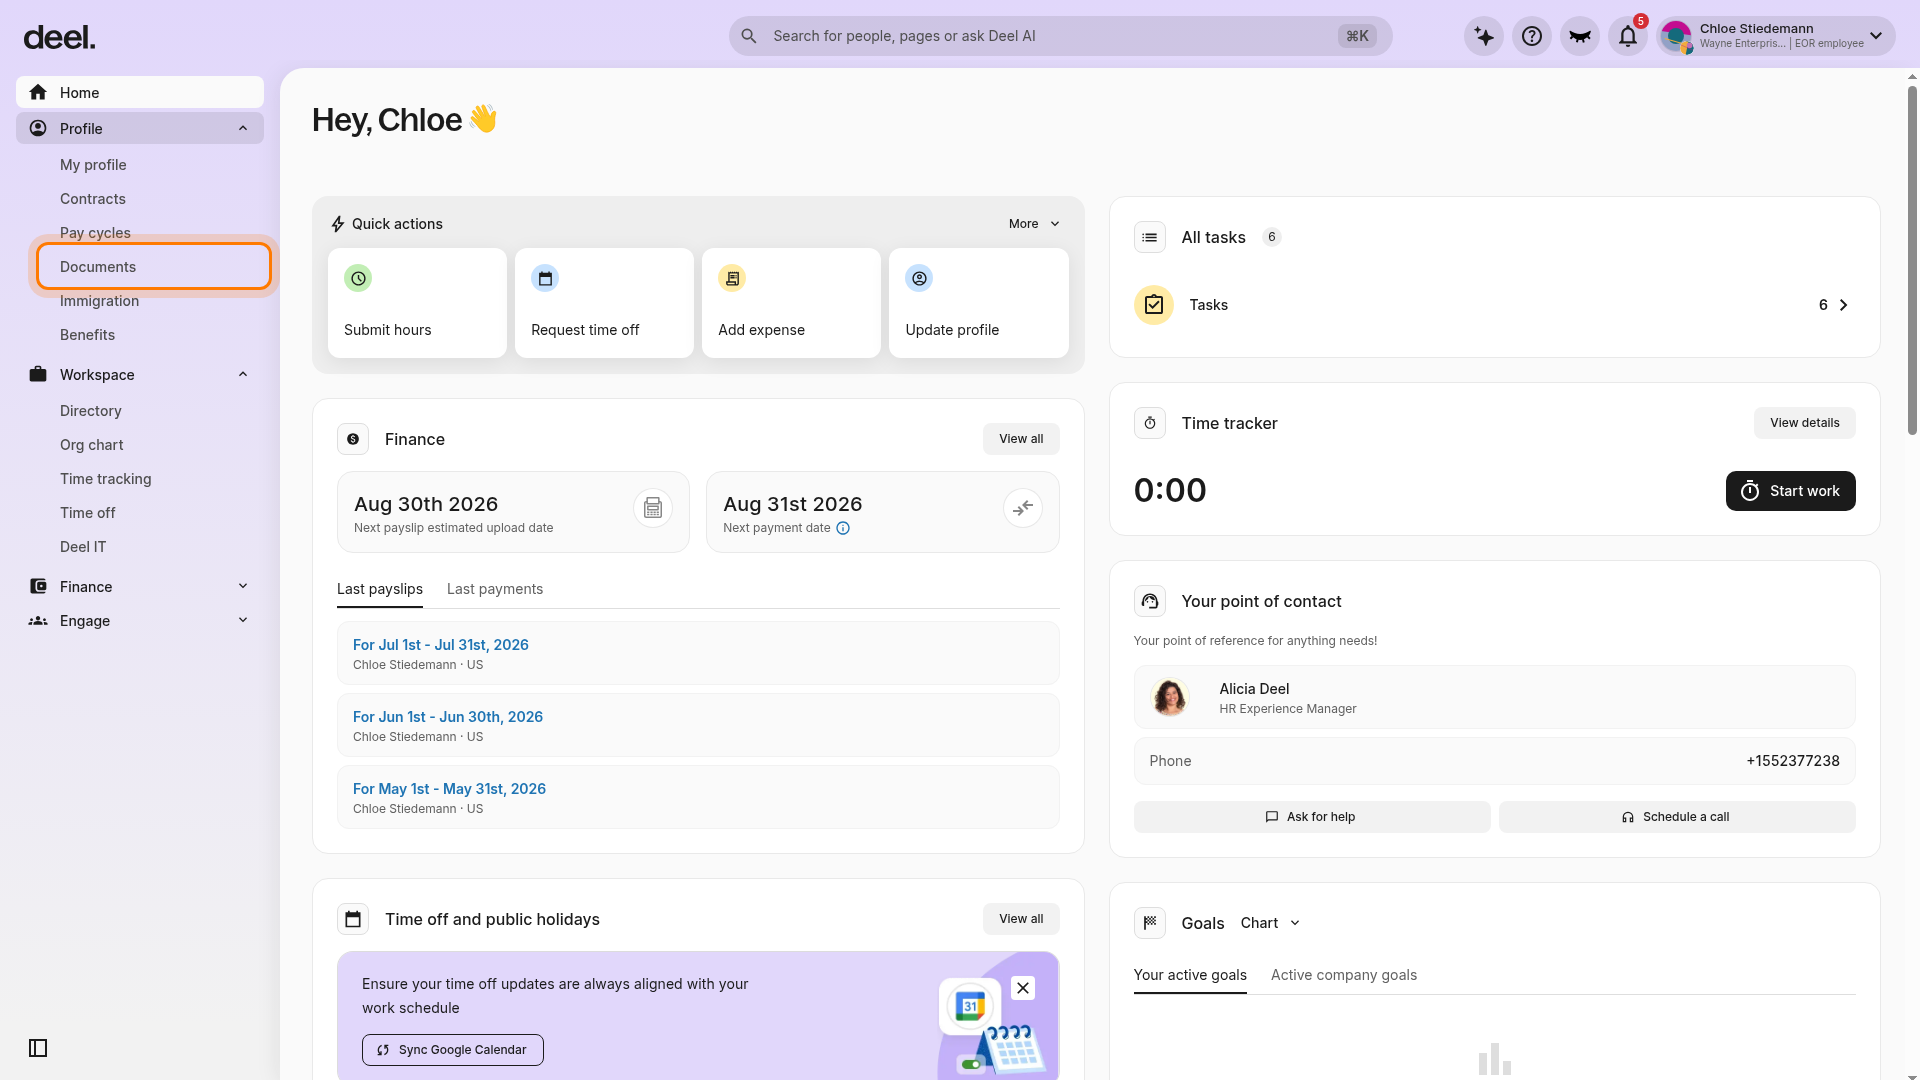
- In the left sidebar, select Profile to expand its submenu.
- Select Documents.
- Do not look for Documents under Workspace. Workspace contains people-related options such as Directory, Org chart, Time tracking, and Time off.
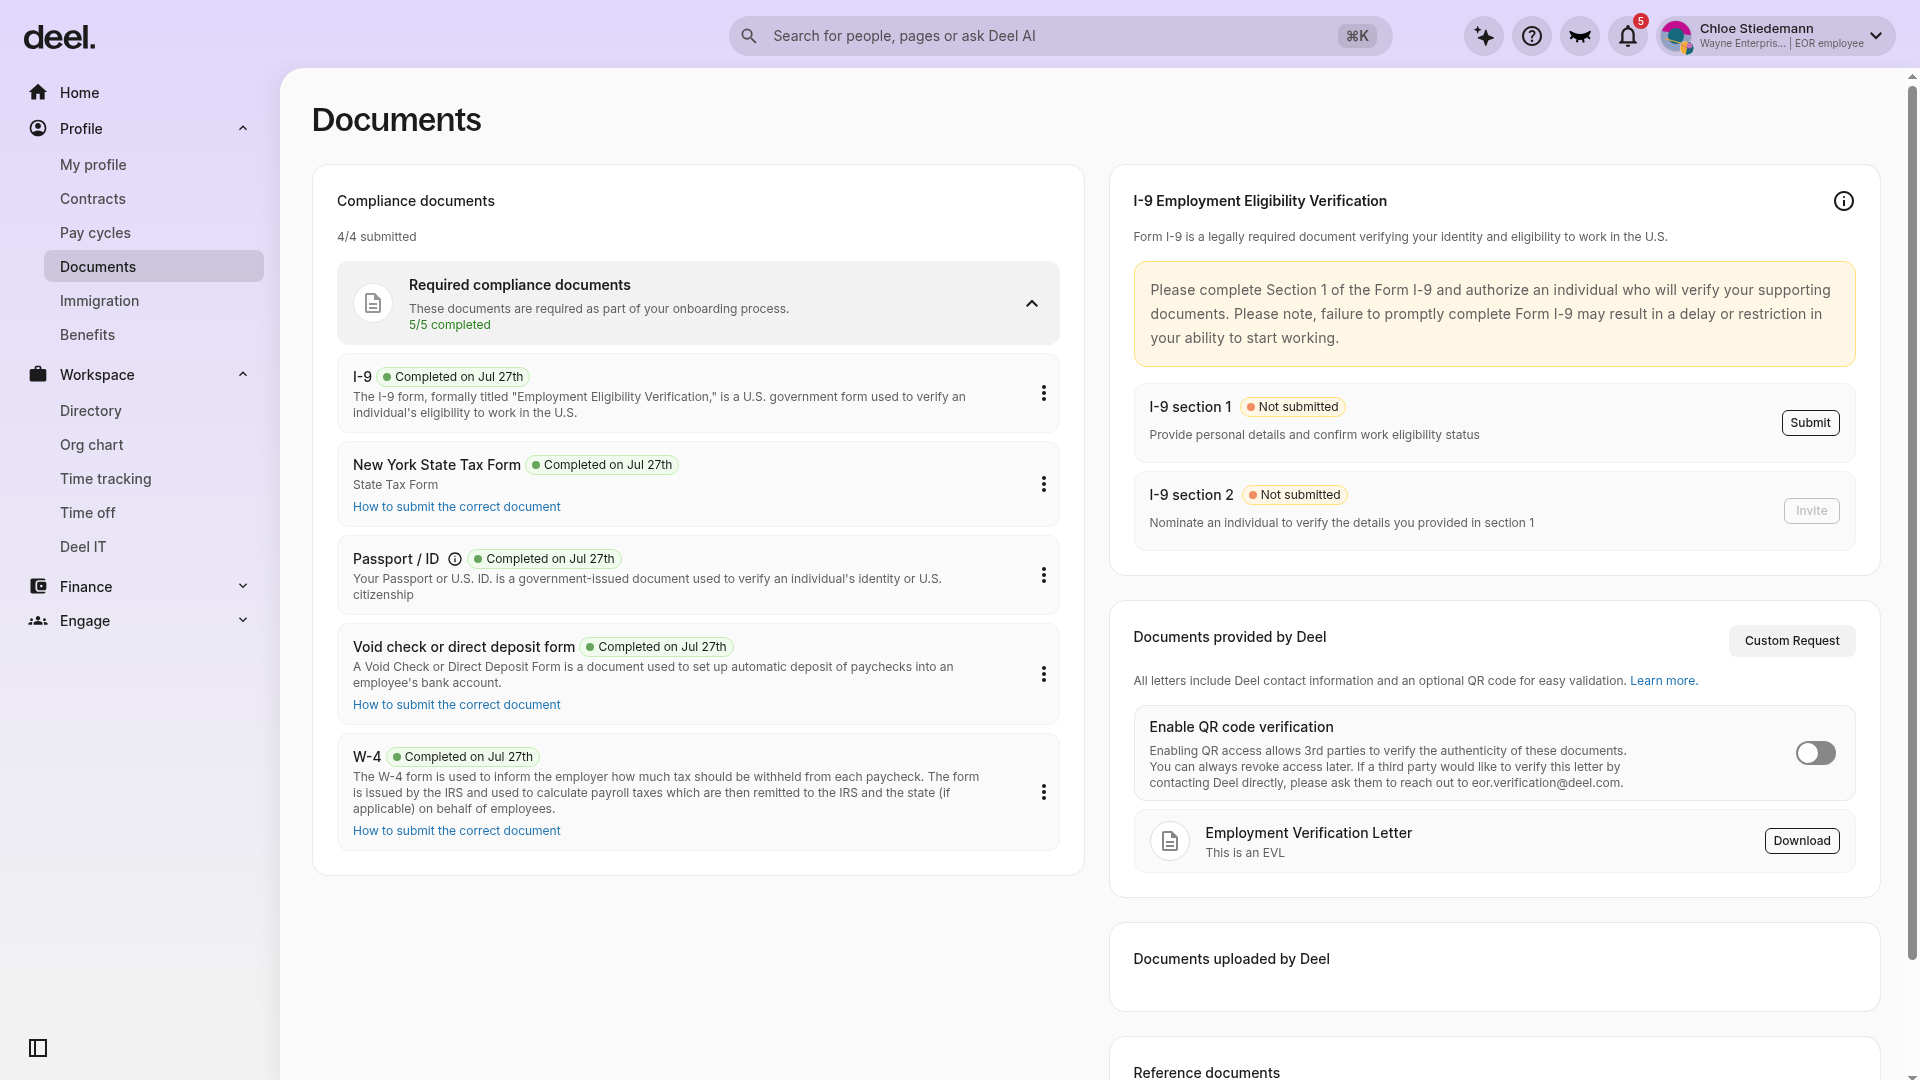
- Confirm that the page heading reads Documents.
- Review Compliance documents, including items that are completed or not submitted, and documents provided by Deel.
[DROPDOWN-OPTION] Step 3: Verify Your Identity
We need to verify your identity - with government-issued photo ID - to ensure compliance and protect your personal details.
This can be done by submitting a selfie and a photo of your government-issued ID.
Please see: Verifying Your Employee Account
[DROPDOWN-OPTION] Step 4: Sign the Employment Agreement
The Employment Agreement (EA) is the contract between you and Deel.
This agreement outlines the terms and conditions of your employment based on the information available in the Work Order Form (WOF) document.
Once your identity has been verified, you will be able to sign the EA in the employee app. The EA will be countersigned by us shortly after.
Please see: What Is My Working Relationship With Deel?
[DROPDOWN-OPTION] Step 5: Add Bank Details
Your salary will be paid directly into your bank account every pay cycle.
A local bank account under your name is needed for tax and compliance reasons in your employment country.
We will collect your bank details and direct deposit information so you can automatically receive your salary.
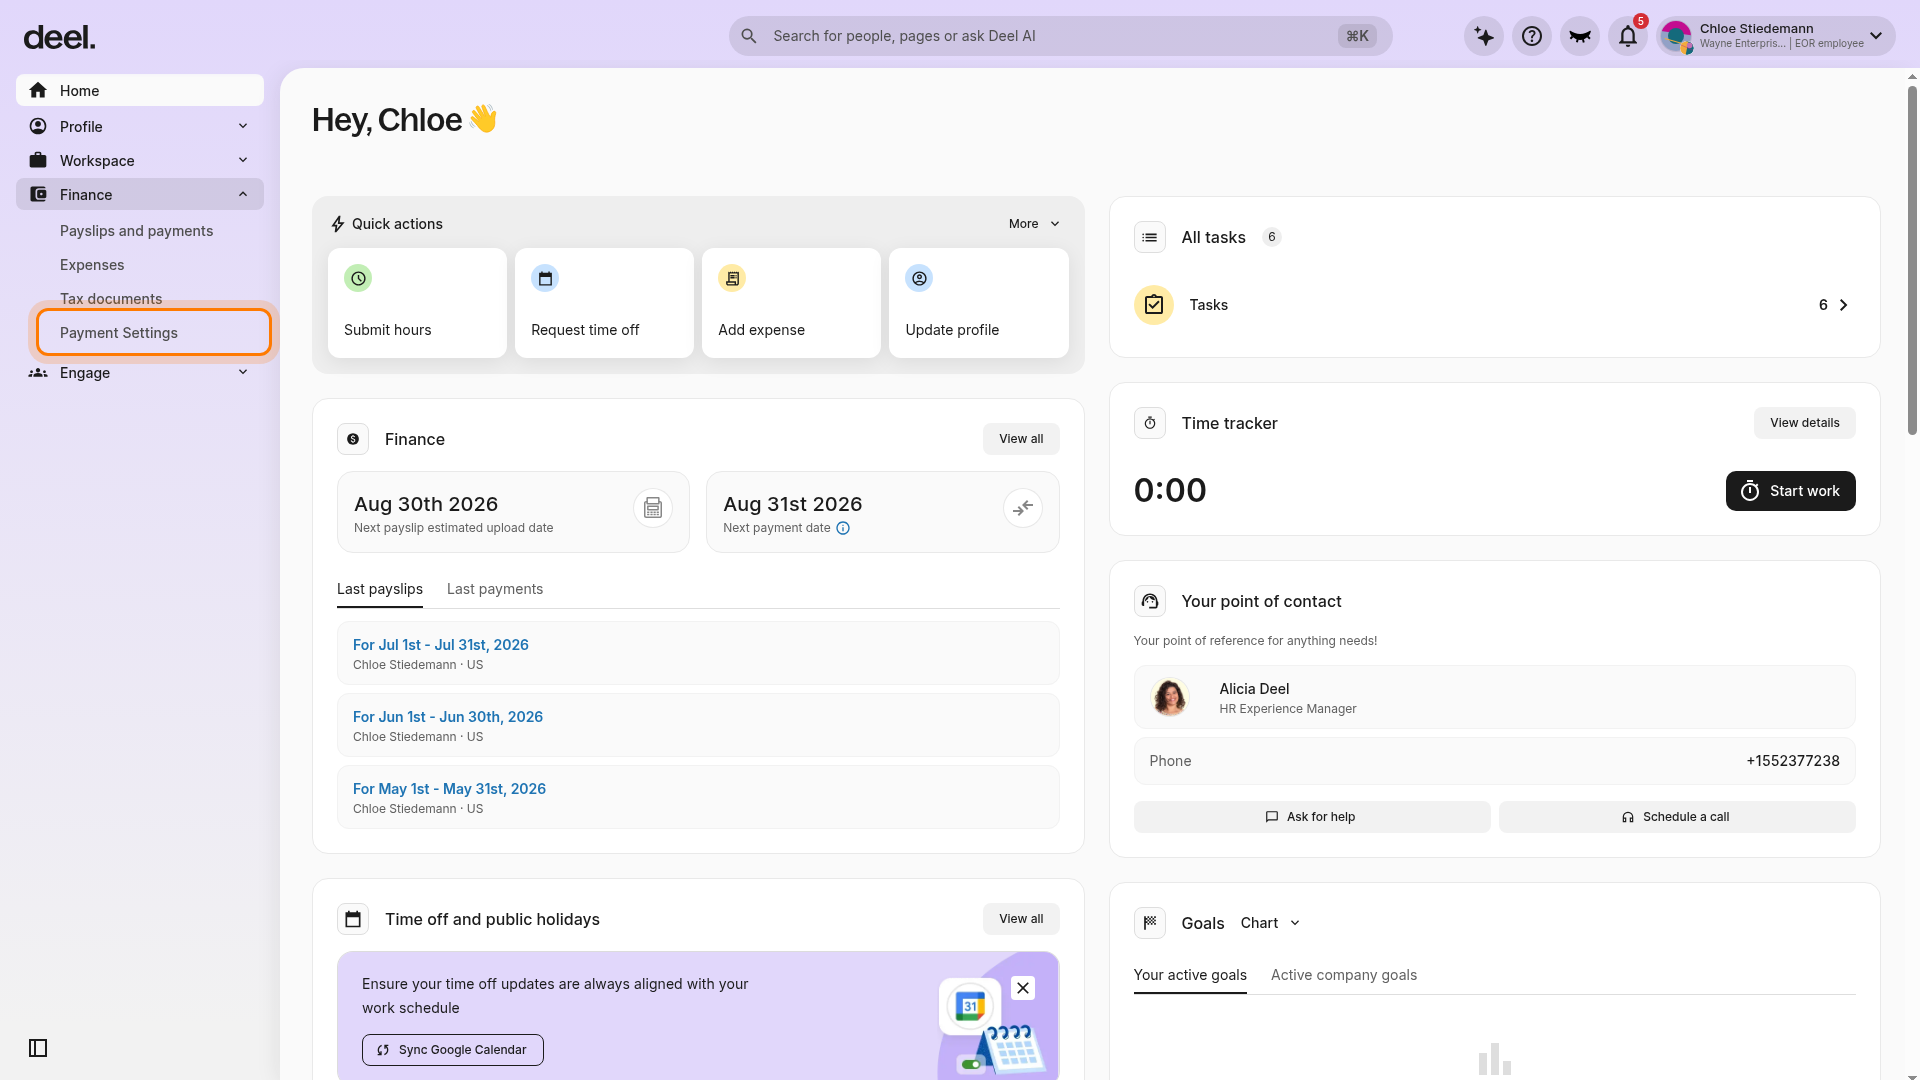
To view or change your bank details, select Finance in the left sidebar to expand the menu, and then select Payment Settings.
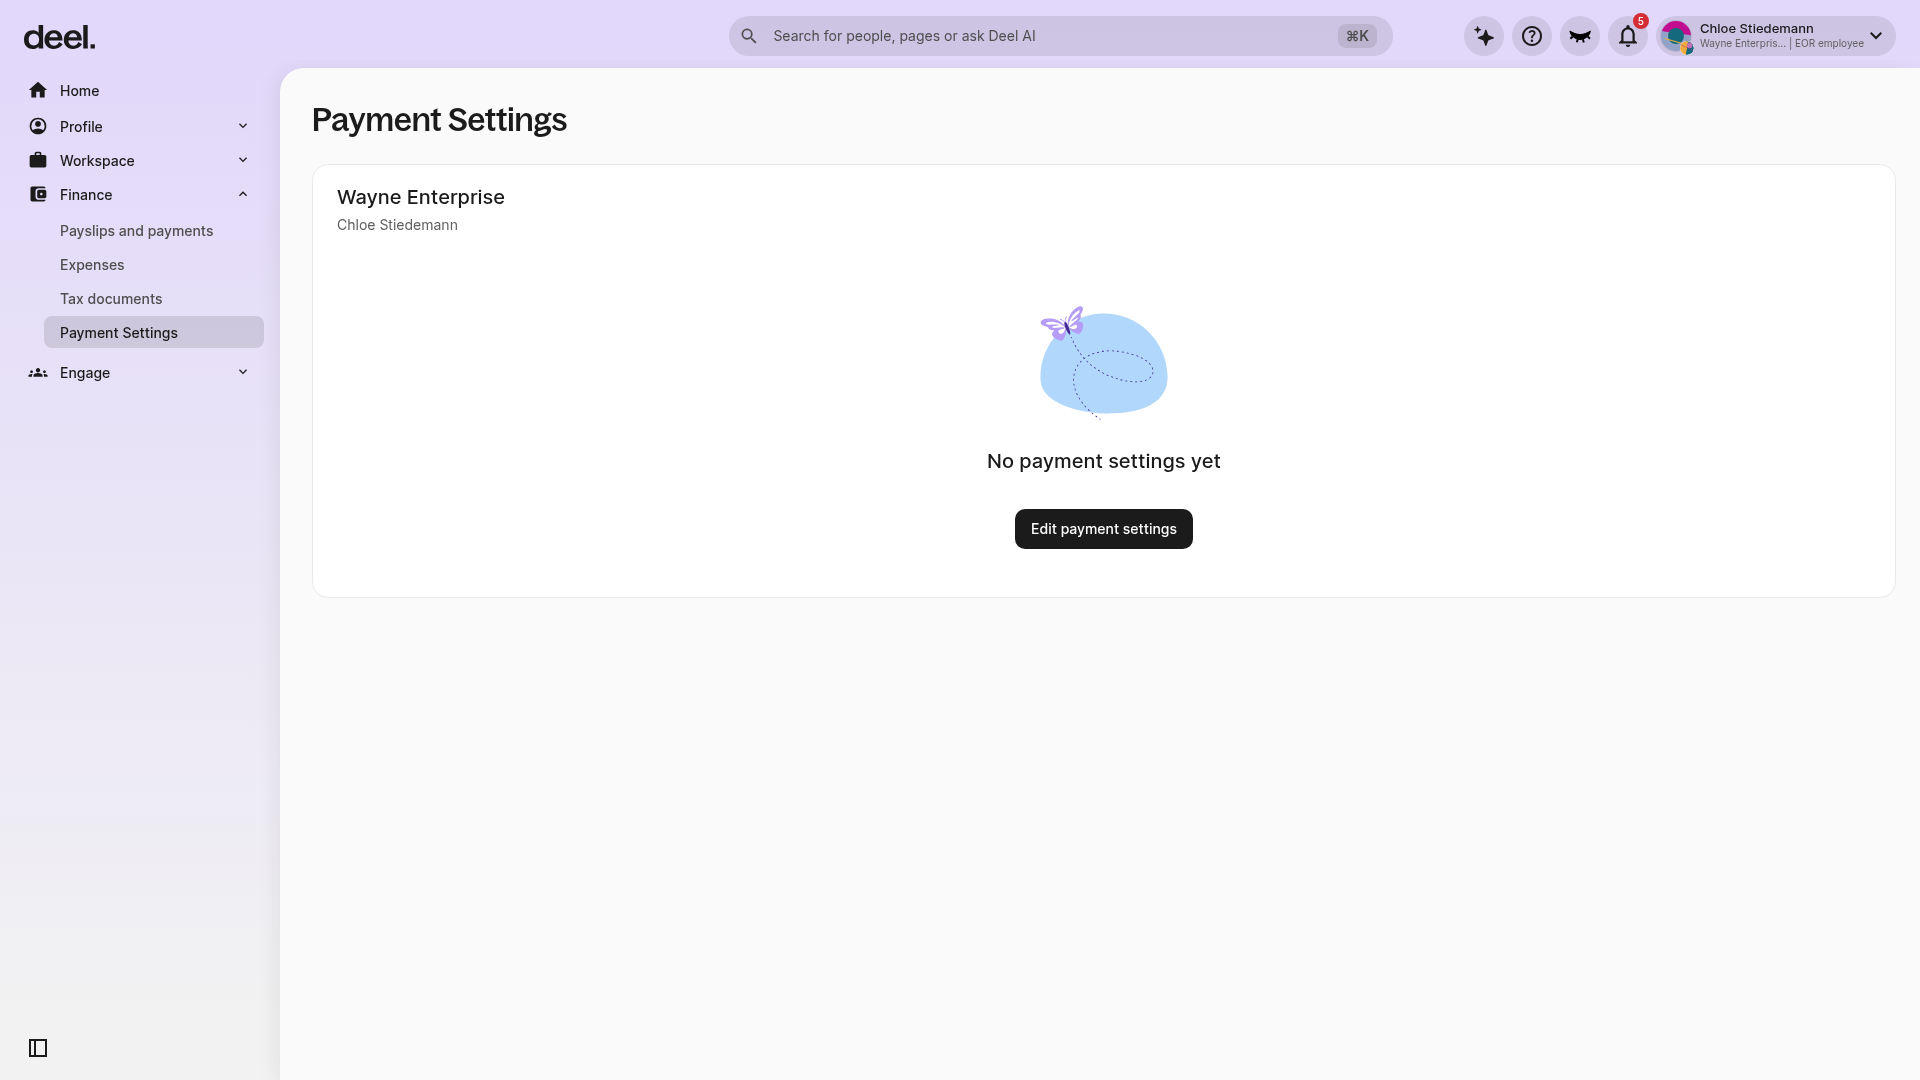
- Confirm that the main heading says Payment Settings.
- If no configuration exists, select Edit payment settings.
- If settings already exist, review your current settings.
If you change your details after the cut-off date for a particular pay cycle, you will see a warning that the updated account will be used for the next cycle.
Note: After saving new bank details, we'll send a small test deposit to confirm the account is valid. See Verifying your bank account for how to check and confirm it.

[DROPDOWN-OPTION] Step 6: Health Insurance and Additional Benefits
If health insurance, life insurance, pension plans, or other benefits are available to you based on your location, you will receive a separate invitation with further instructions on how to complete the enrollment process.
[/DROPDOWN]
Using Your Deel Account
[ACCORDION] Additional Pay
In addition to your salary, you may also be eligible for additional payments, such as commissions, expense reimbursements, and bonuses.
Expense reimbursements are generally tax-free, be sure to save your receipts!
Open up your contract and select Add Expense on the contract overview tab
Please see: How Do I Add An Expense Or Allowance To My Pay?
[ACCORDION] Time-Off Requests
You can submit time-off (PTO) requests right from the Deel platform.
From your home page, scroll down and click Time Off in the Quick Access card.
You can also access the Time Off section by selecting Workspace in the left sidebar and then selecting Time off.
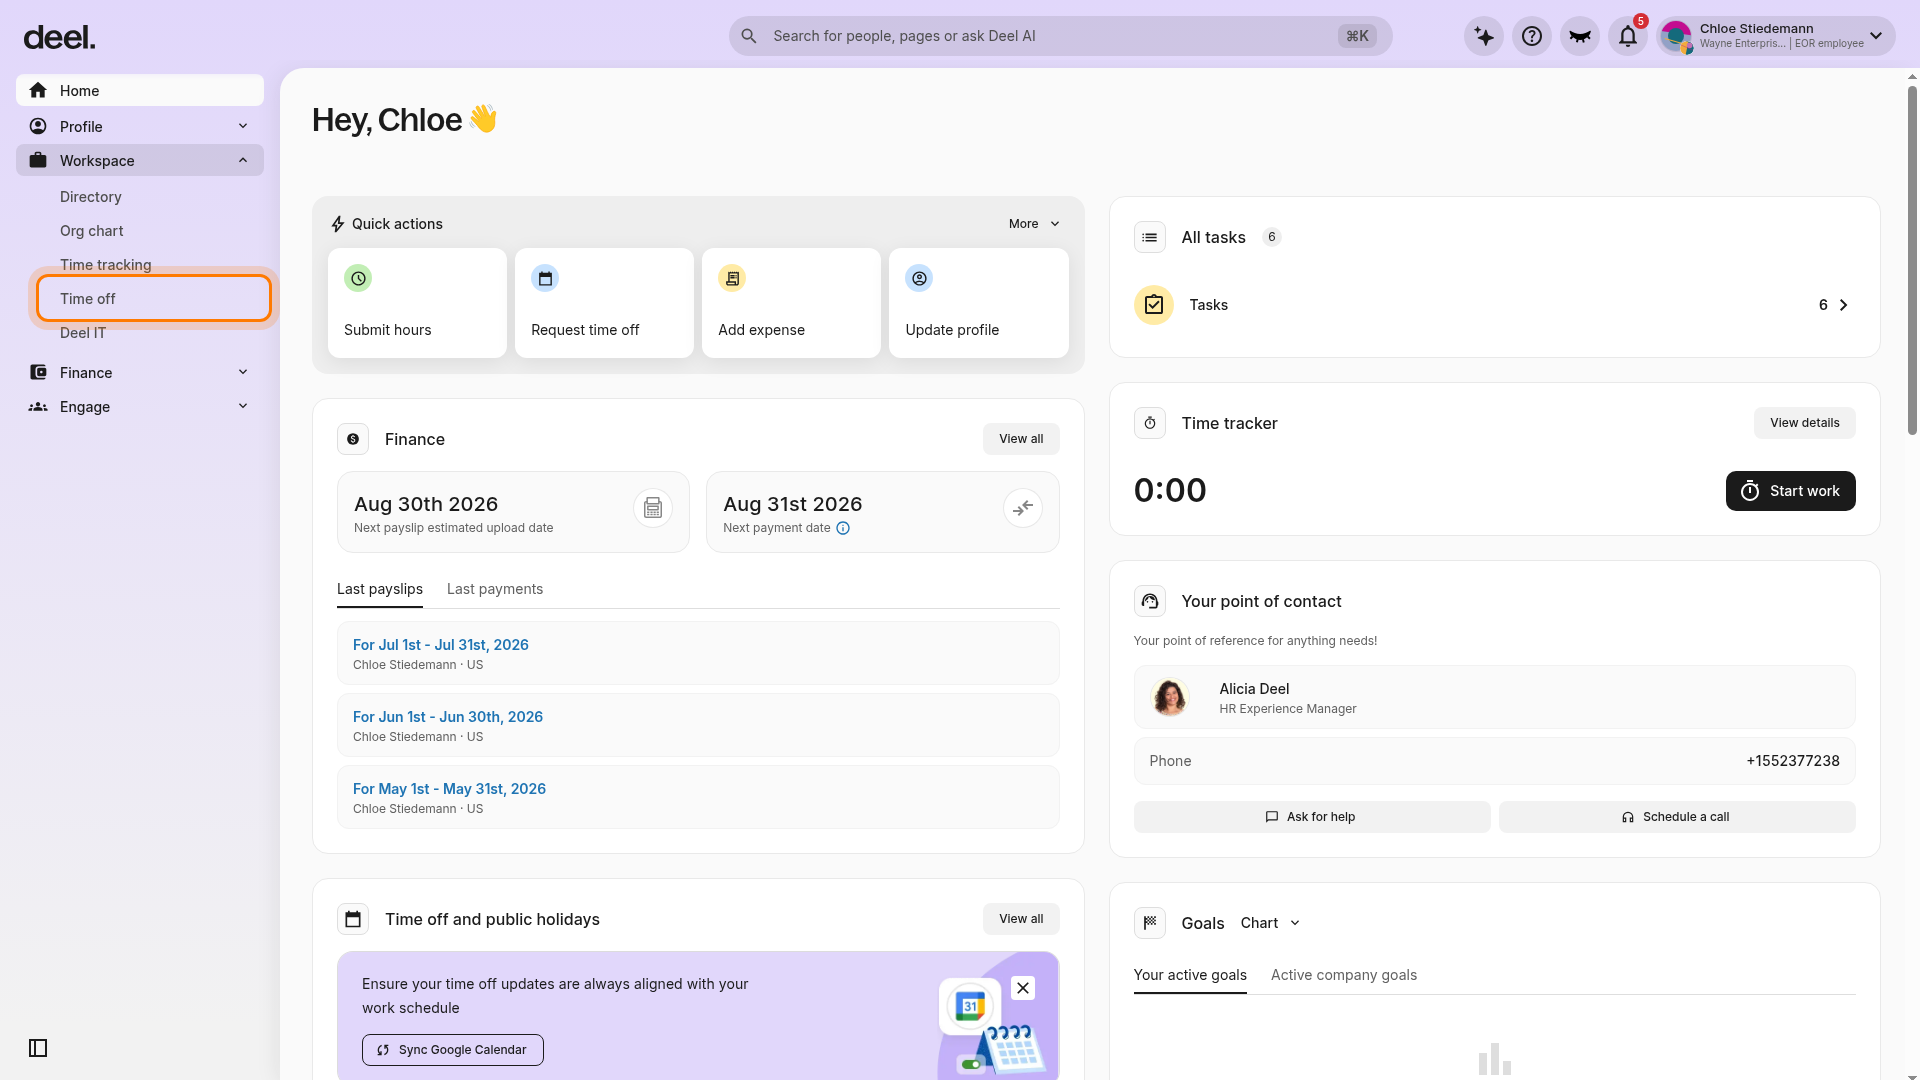
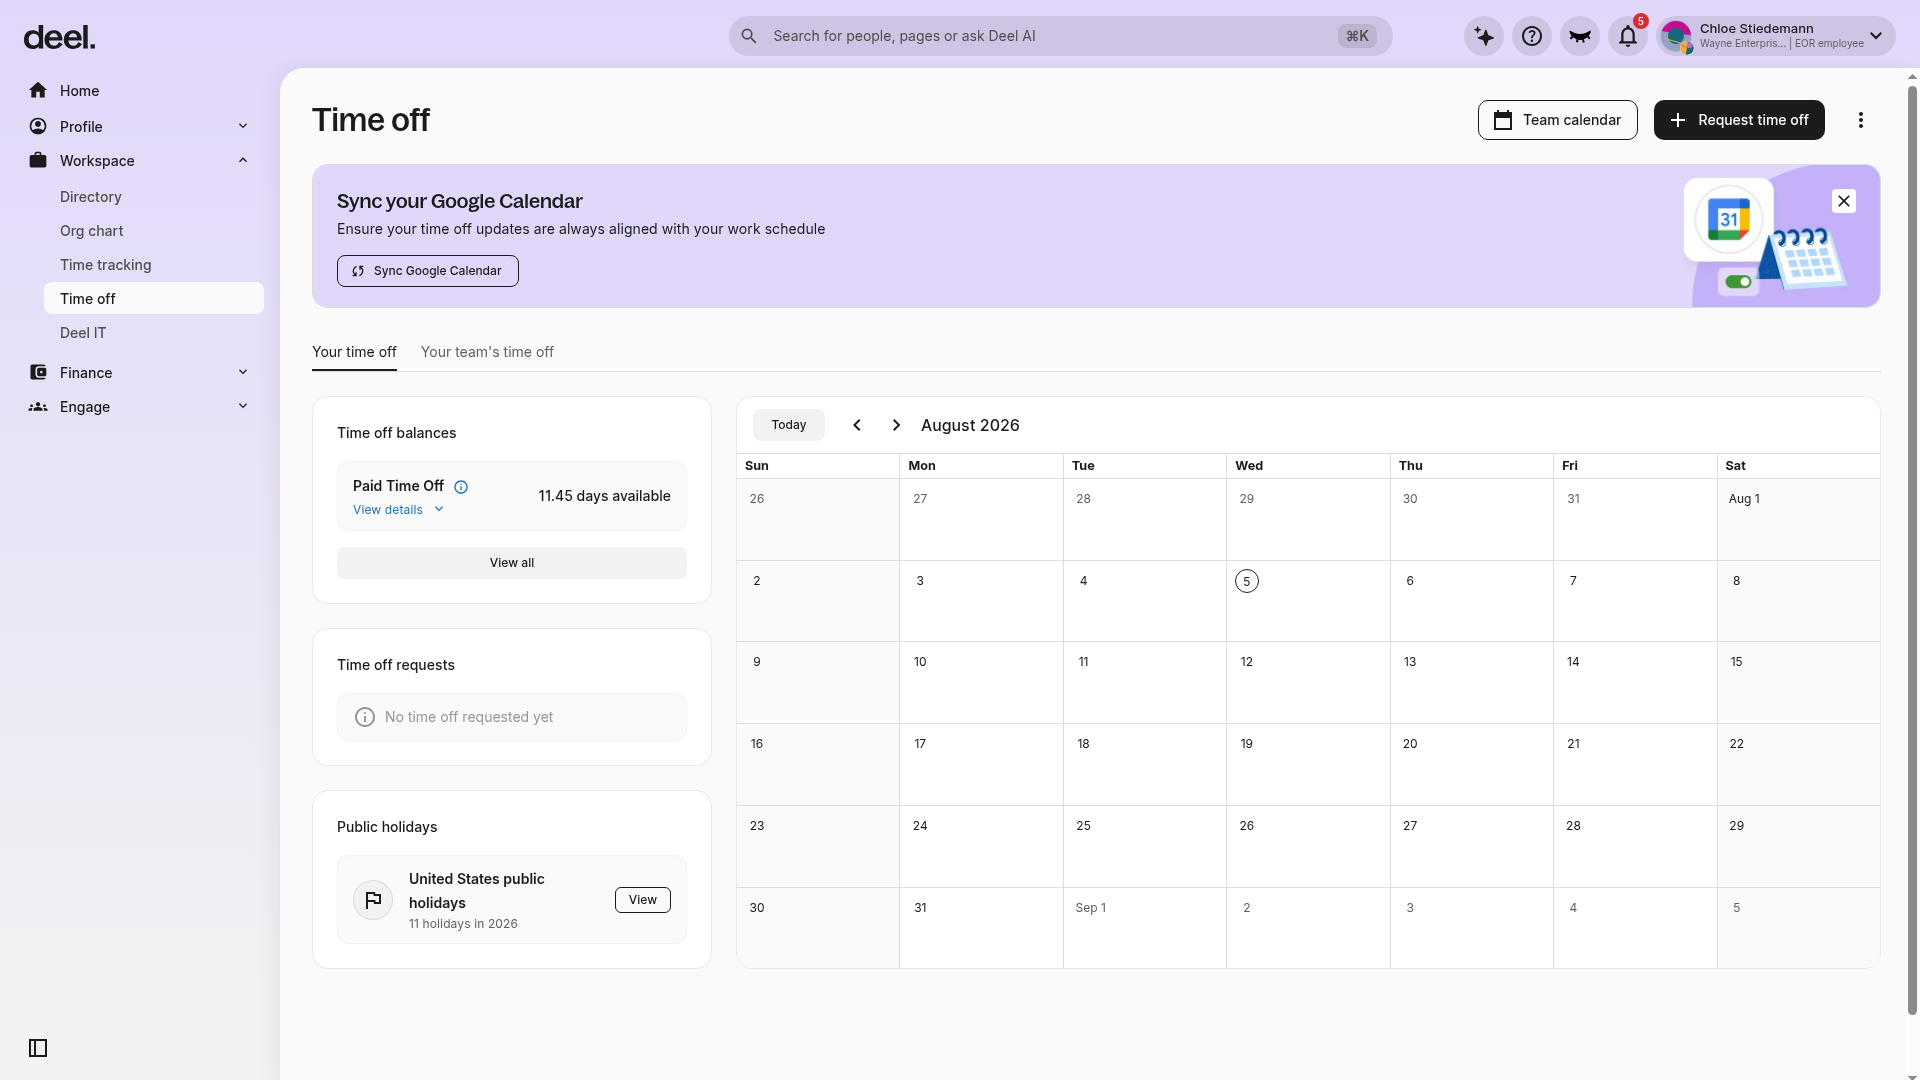
Confirm that the page heading says Time off. From the Your time off tab, review your time-off balance, requests, public holidays, and calendar. Select Request time off to submit a request.
Your PTO entitlement will depend both on local legal requirements and your employment agreement.
You will see your annual PTO entitlement and how many days you have used so far.
Please see: How do I request time off?
[ACCORDION] Employment Verification
Select Profile in the left sidebar, then select Documents. In Documents provided by Deel, find Employment Verification Letter and select Download if you need to save a copy.
EOR employees can additionally request from Deel customized documents and verification letters.
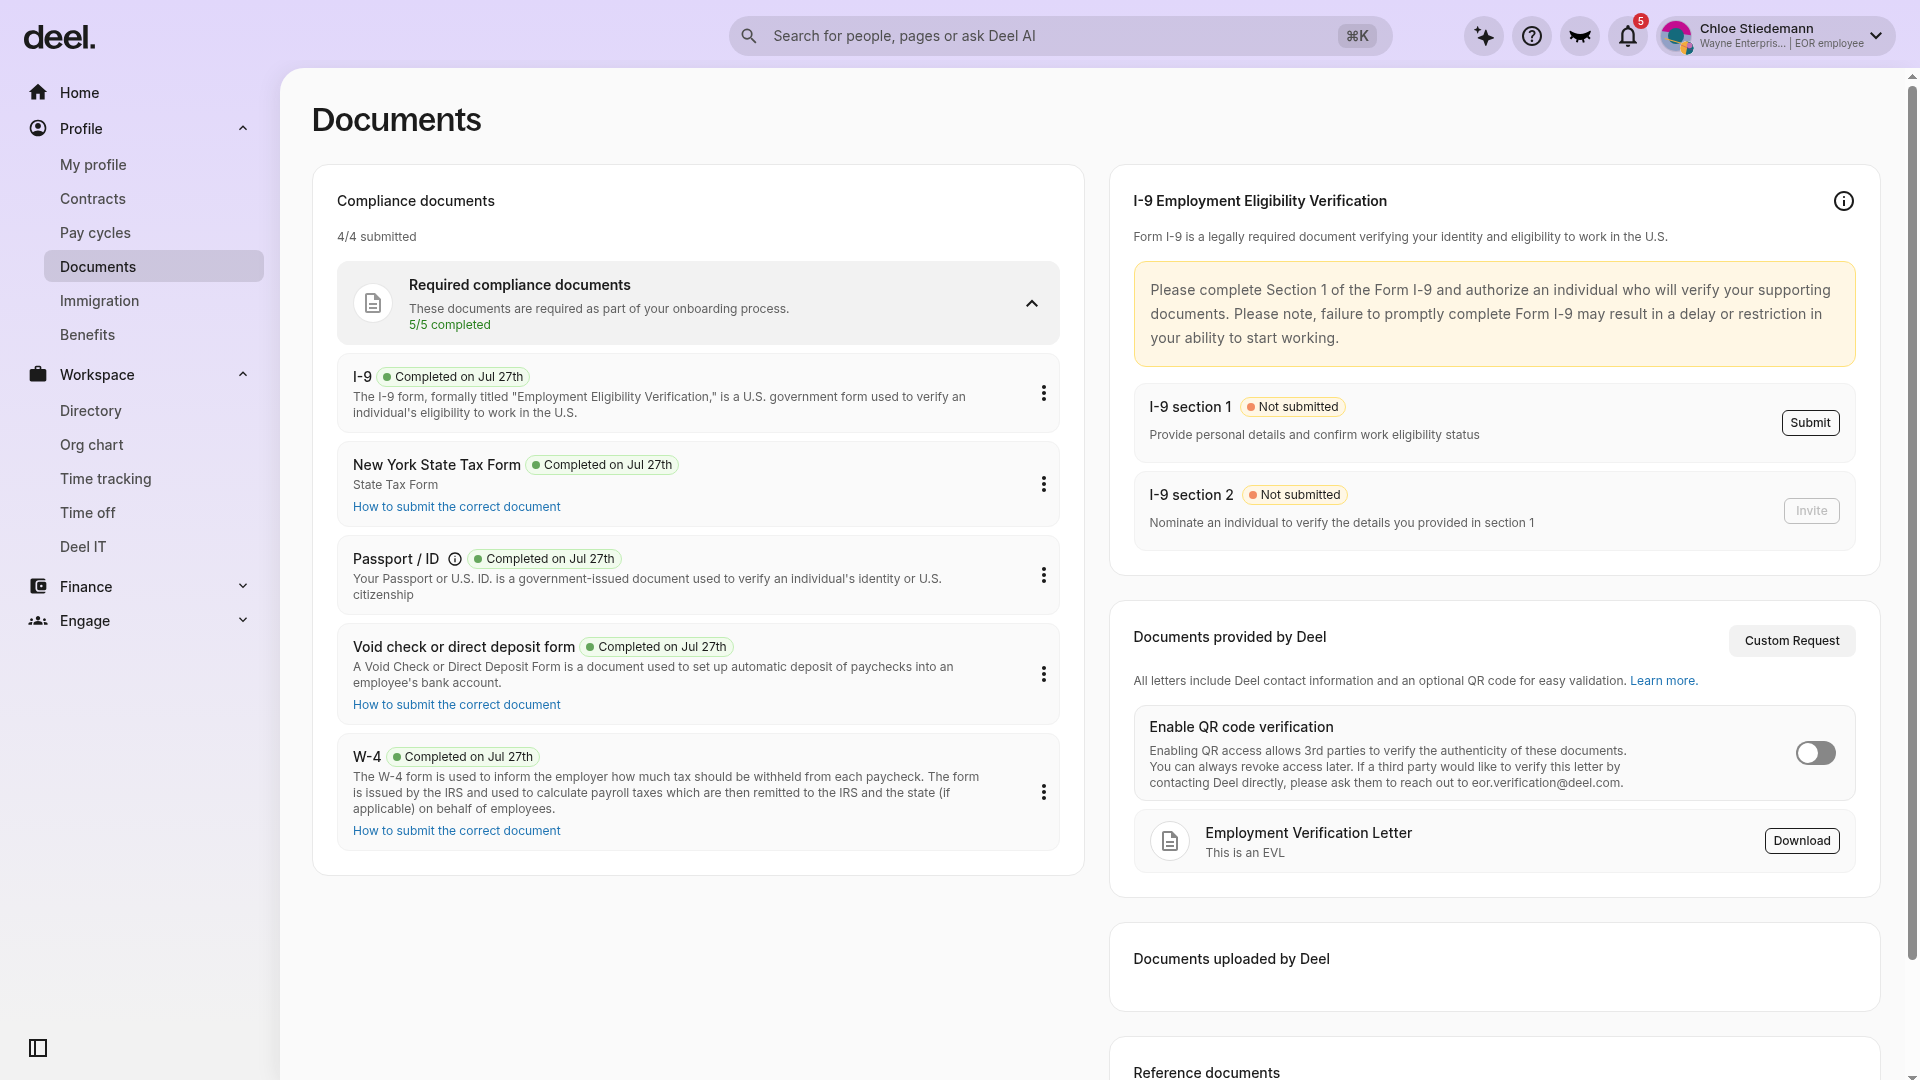
Please see: How To Request An Employment Verification Letter
[ACCORDION] Contact Deel
The best way to reach us is by live chat. We have agents available 24/7 to help you!
To open support chat, select the Help question-mark icon in the top-right corner. Under Contact us, select Communication Center.
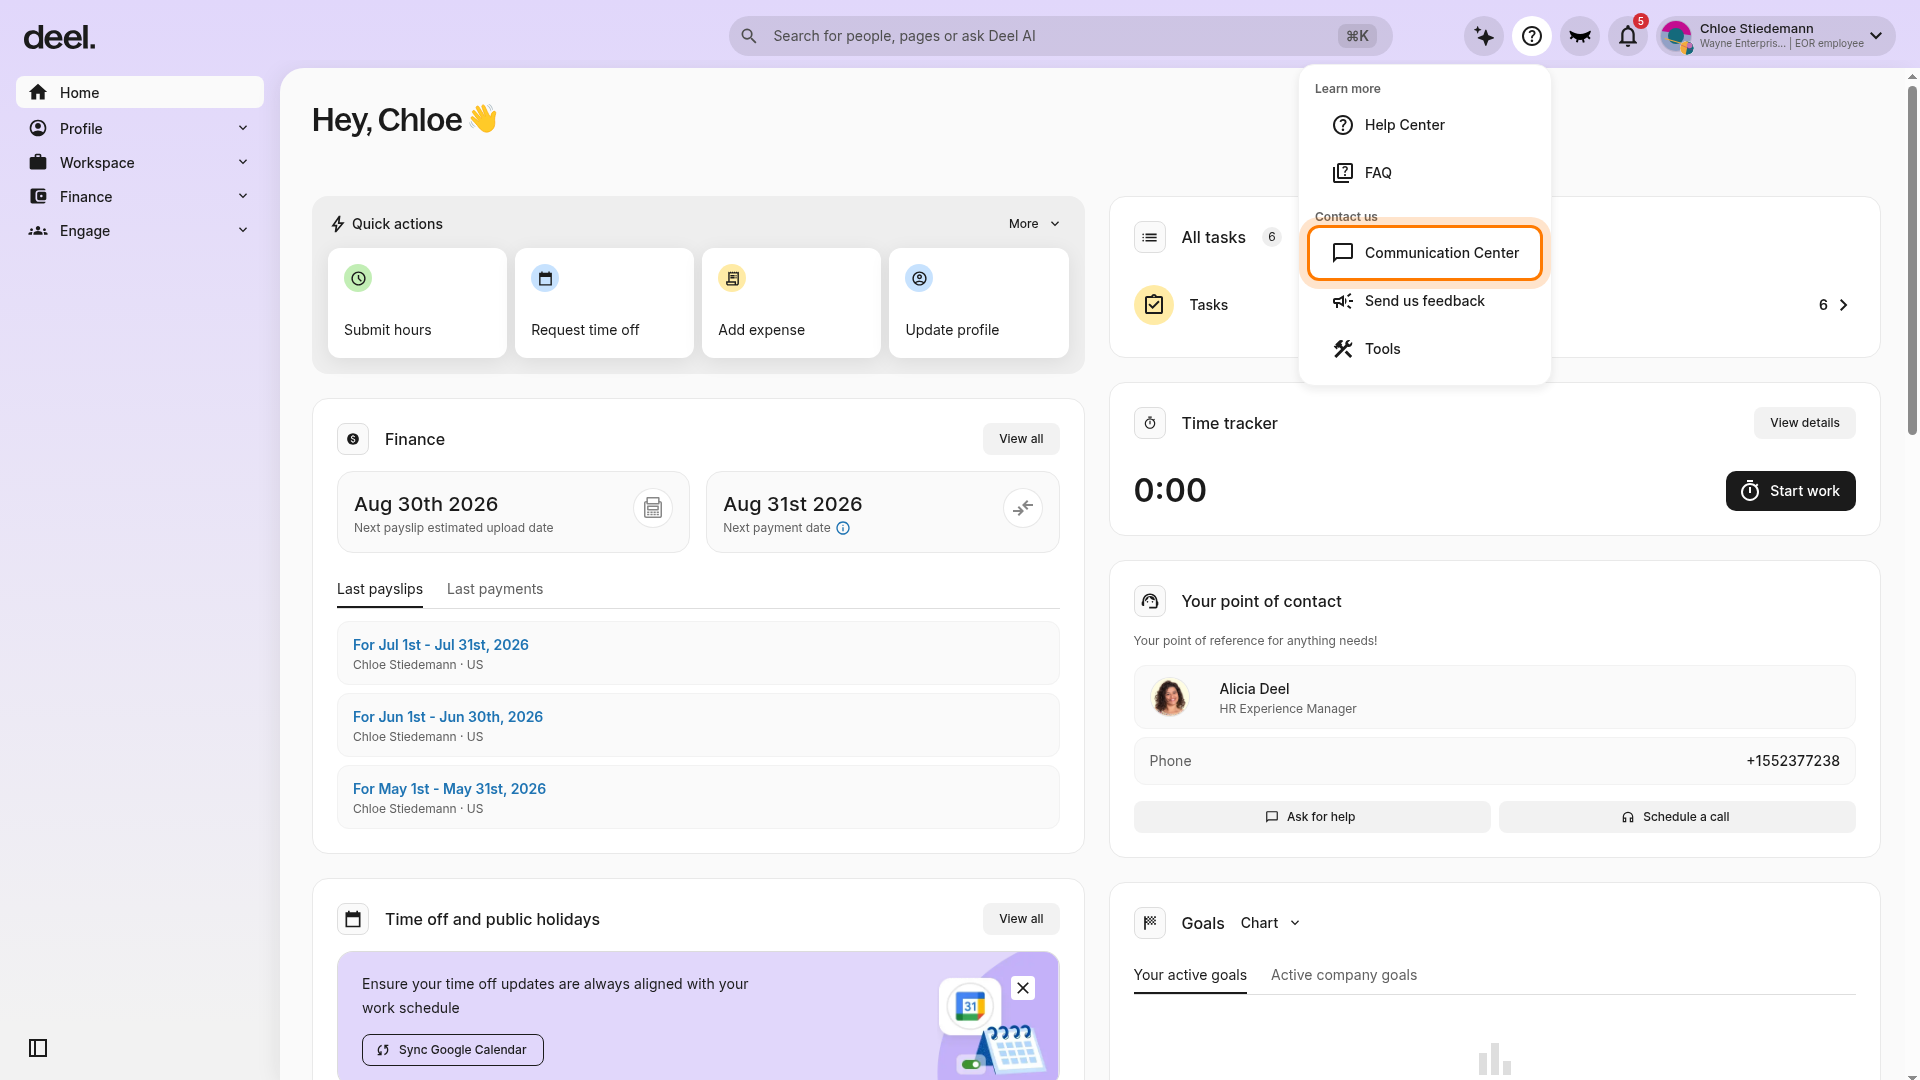
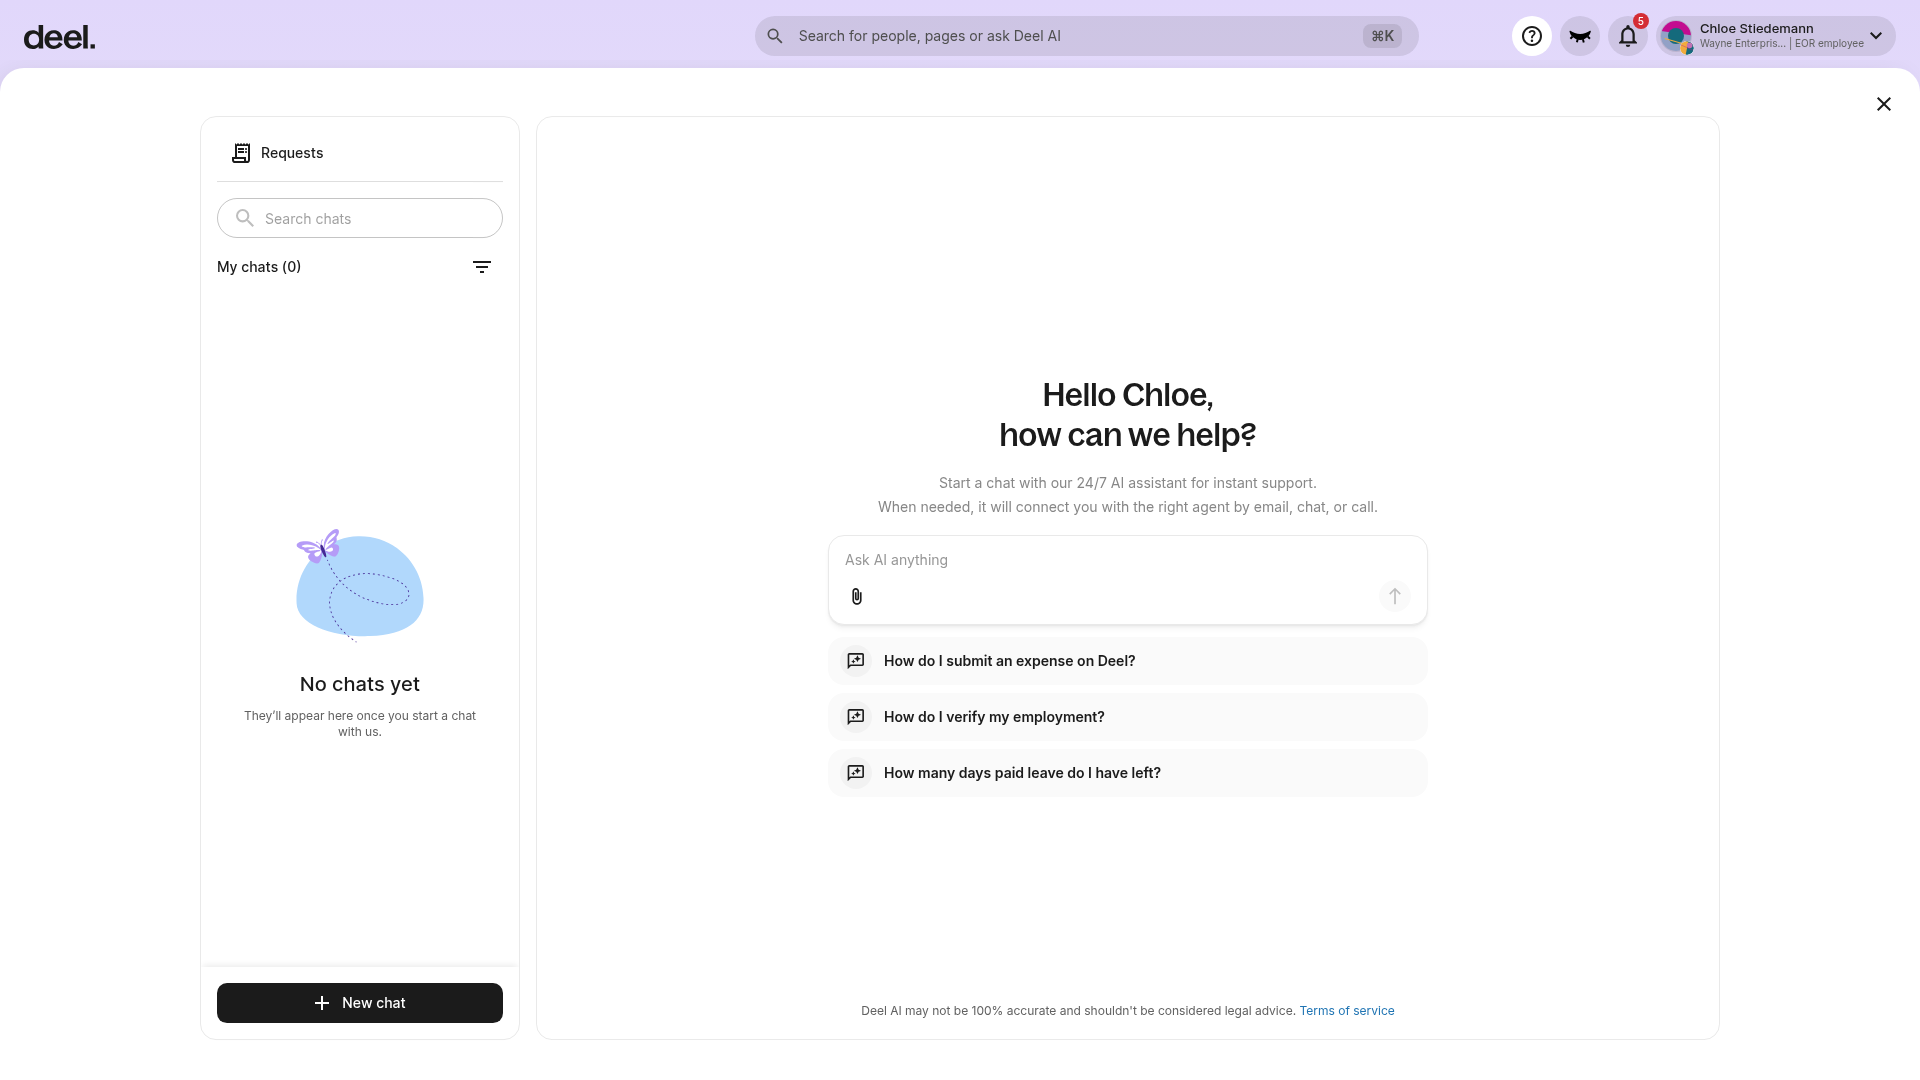
Confirm that the Messages support window opens. You can find Requests, My chats, the New chat button, and the Ask AI anything message field.
If you don't have an account yet with Deel or don't have time for a live conversation, you can also send us a message with this form and we'll assist you as soon as we can.
Please see: How to Contact Deel