
The mass import feature allows clients to efficiently onboard a large number of workers onto Deel at once.
This article explains how clients can use Deel’s Mass Import feature to import large numbers of workers via CSV file upload.
In this article:
About Mass Import
You can use Mass Import to upload information for a large number of workers onto Deel and initiate onboarding for all of them at once.
Worker types that you can mass import:
- Direct employees that you are paying through Global Payroll (Direct Employee - Payroll)
- Direct employees that you have hired through your local entity (Deel HR direct employees)
- Contractors (Pay as You Go, Fixed Rate, and Milestone)
- Person Without a Contract
- EOR Employees
Worker types that you cannot mass import:
- COR (Contractors hired with additional misclassification coverage)
- PEO employees
Note: You must have a Legal Entity and Group created before uploading your worker CSV file, or it will result in errors. If you’d like to create new or adjust your Legal Entities/Groups, go to Organization Settings.
How to mass import workers onto Deel
✅ Step 1 – Select Mass Import
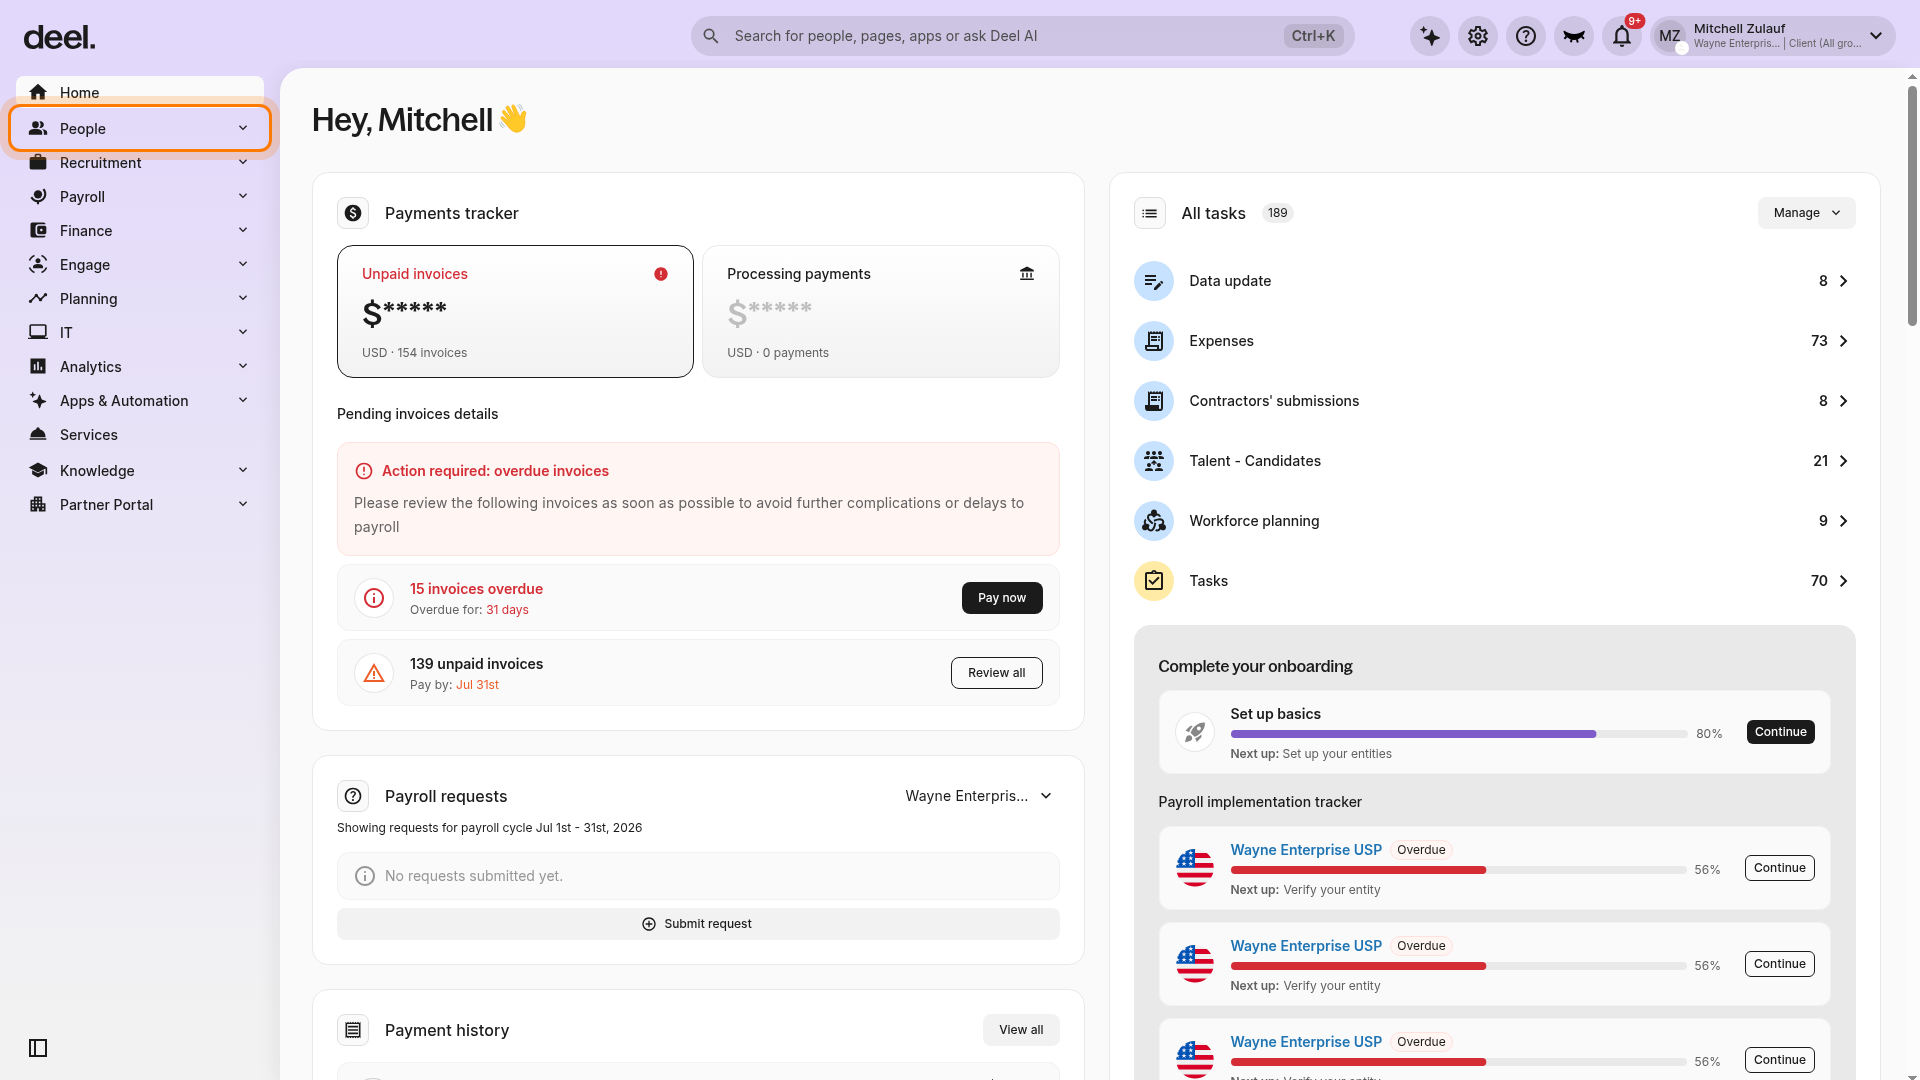
In the left sidebar, select People. If People expands instead of opening the directory, select Directory from its submenu.
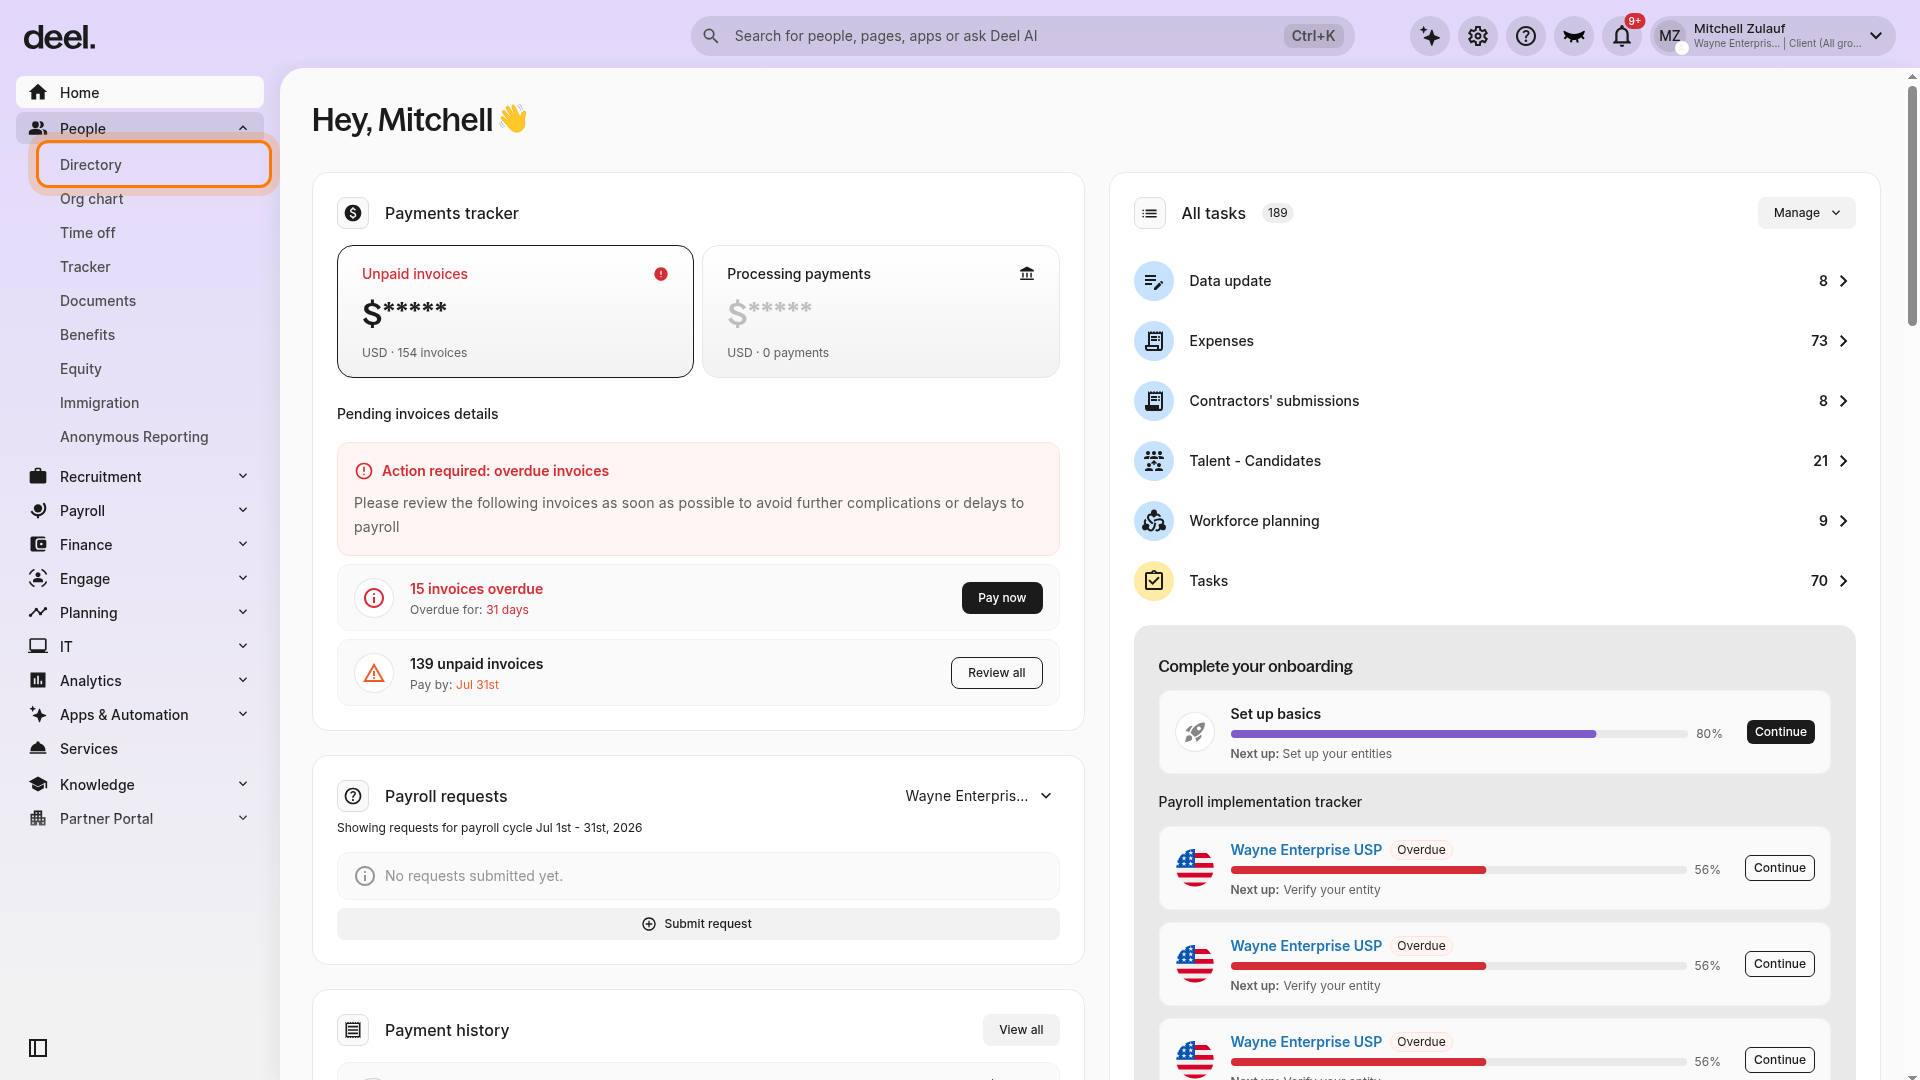
On the Directory page, select Add people in the upper-right corner.
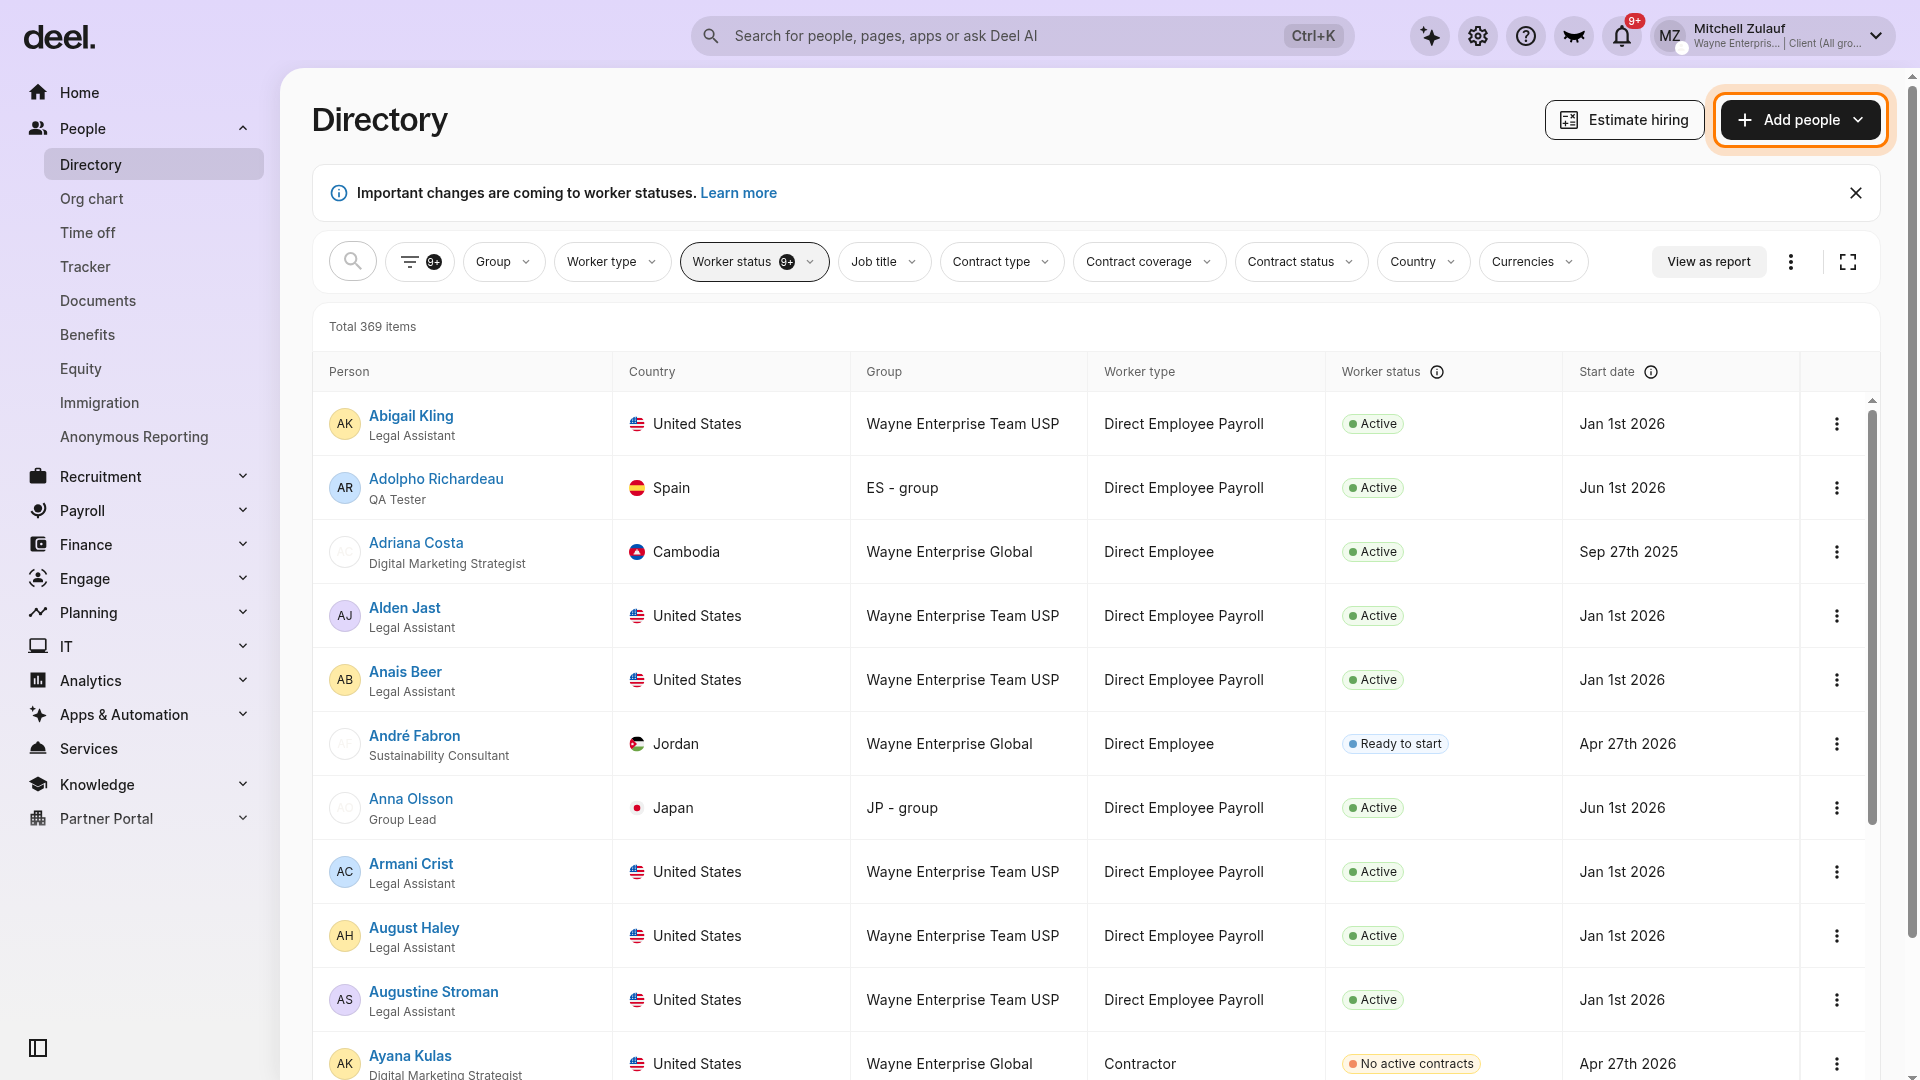
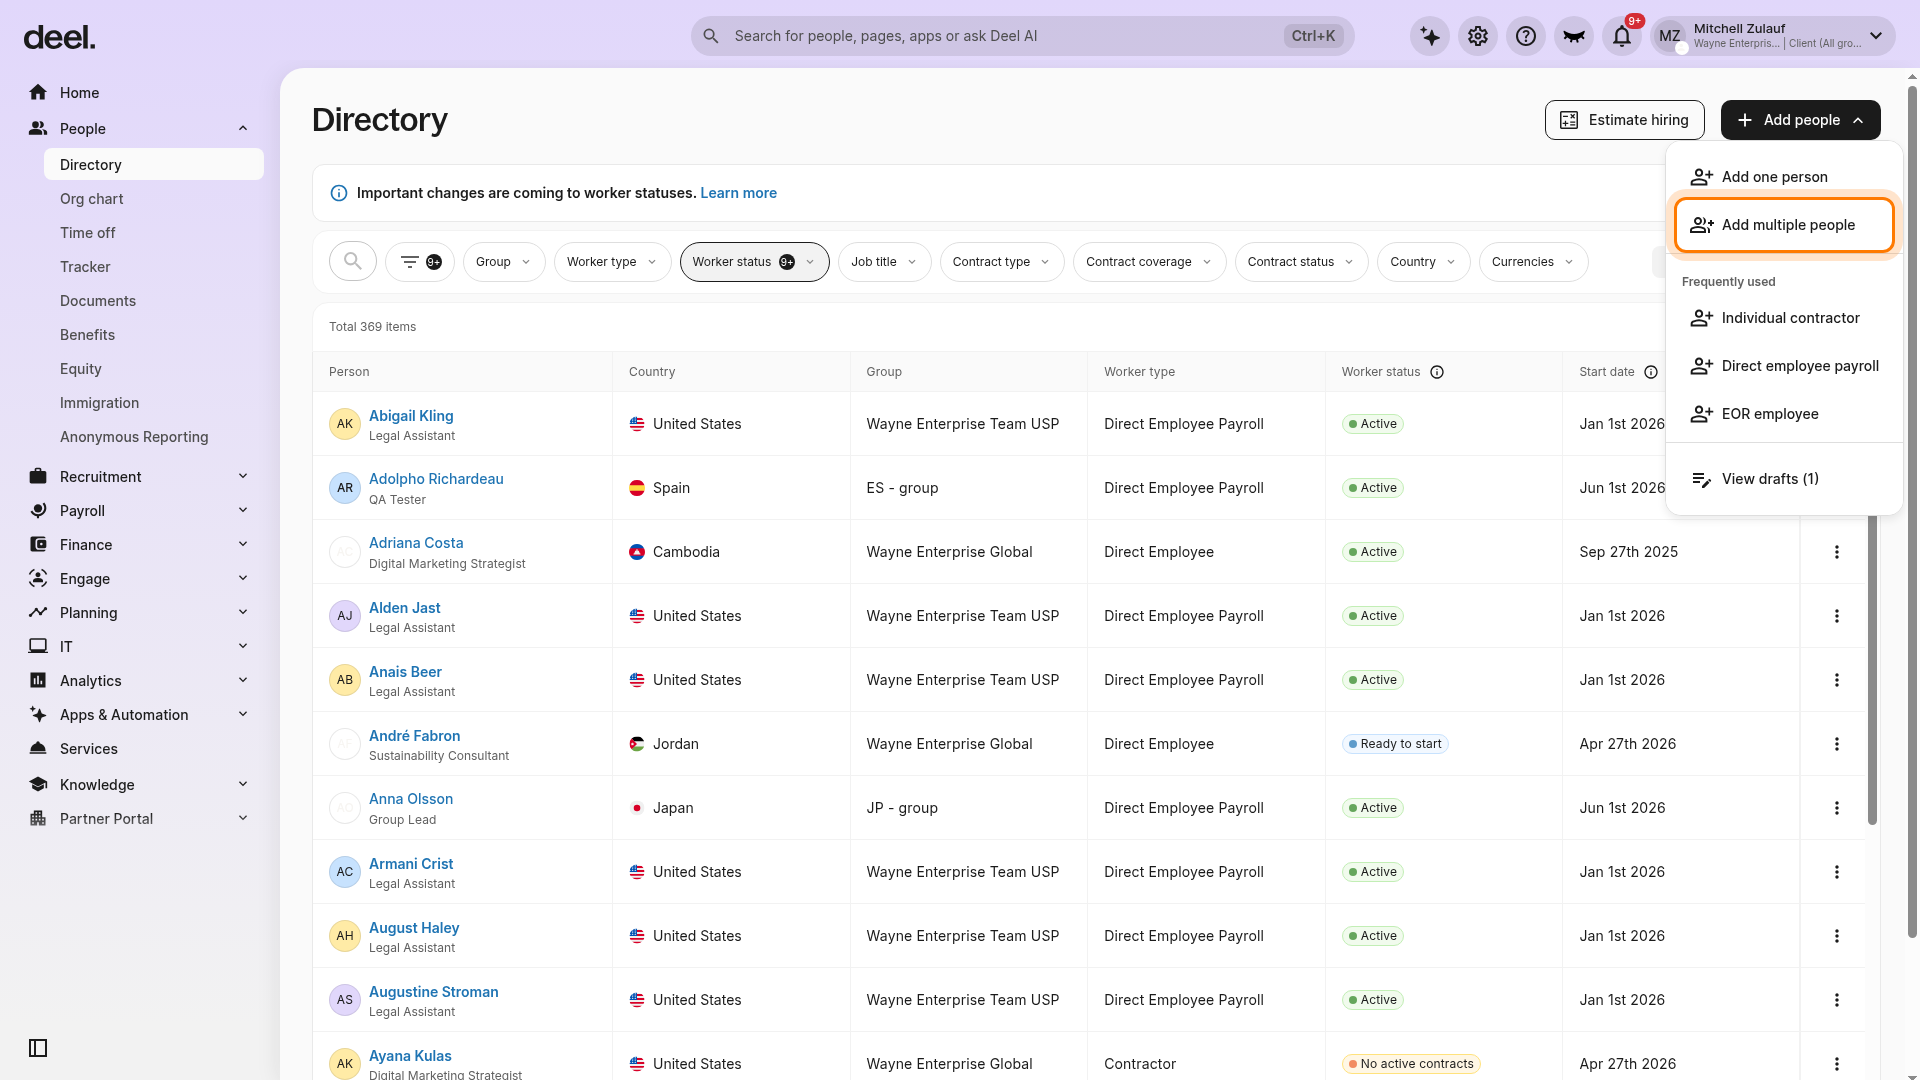
In the Add people menu, select Add multiple people. Do not select an individual worker type, such as Individual contractor or EOR employee, because those options begin a single-person hiring flow.
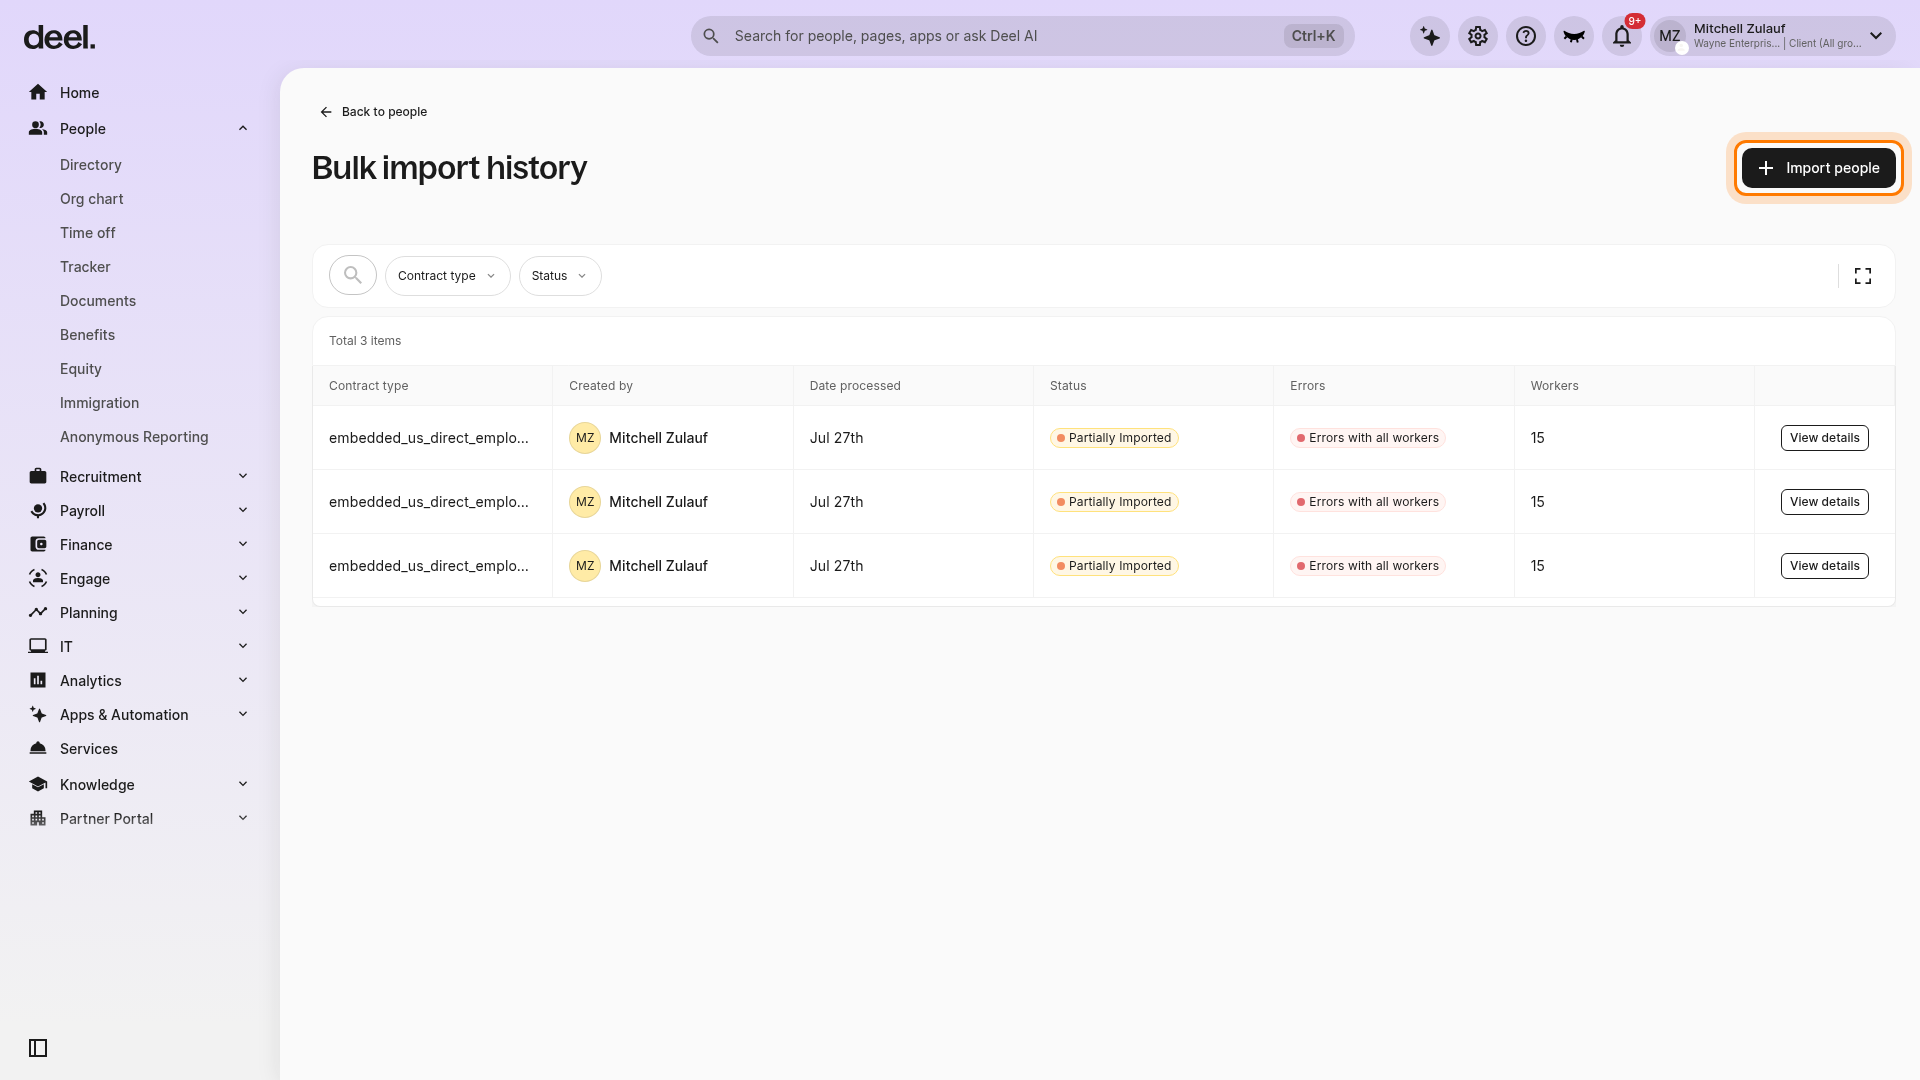
On the Bulk import history page, select Import people in the upper-right corner. Previous imports in the history table are informational and do not need to be opened.
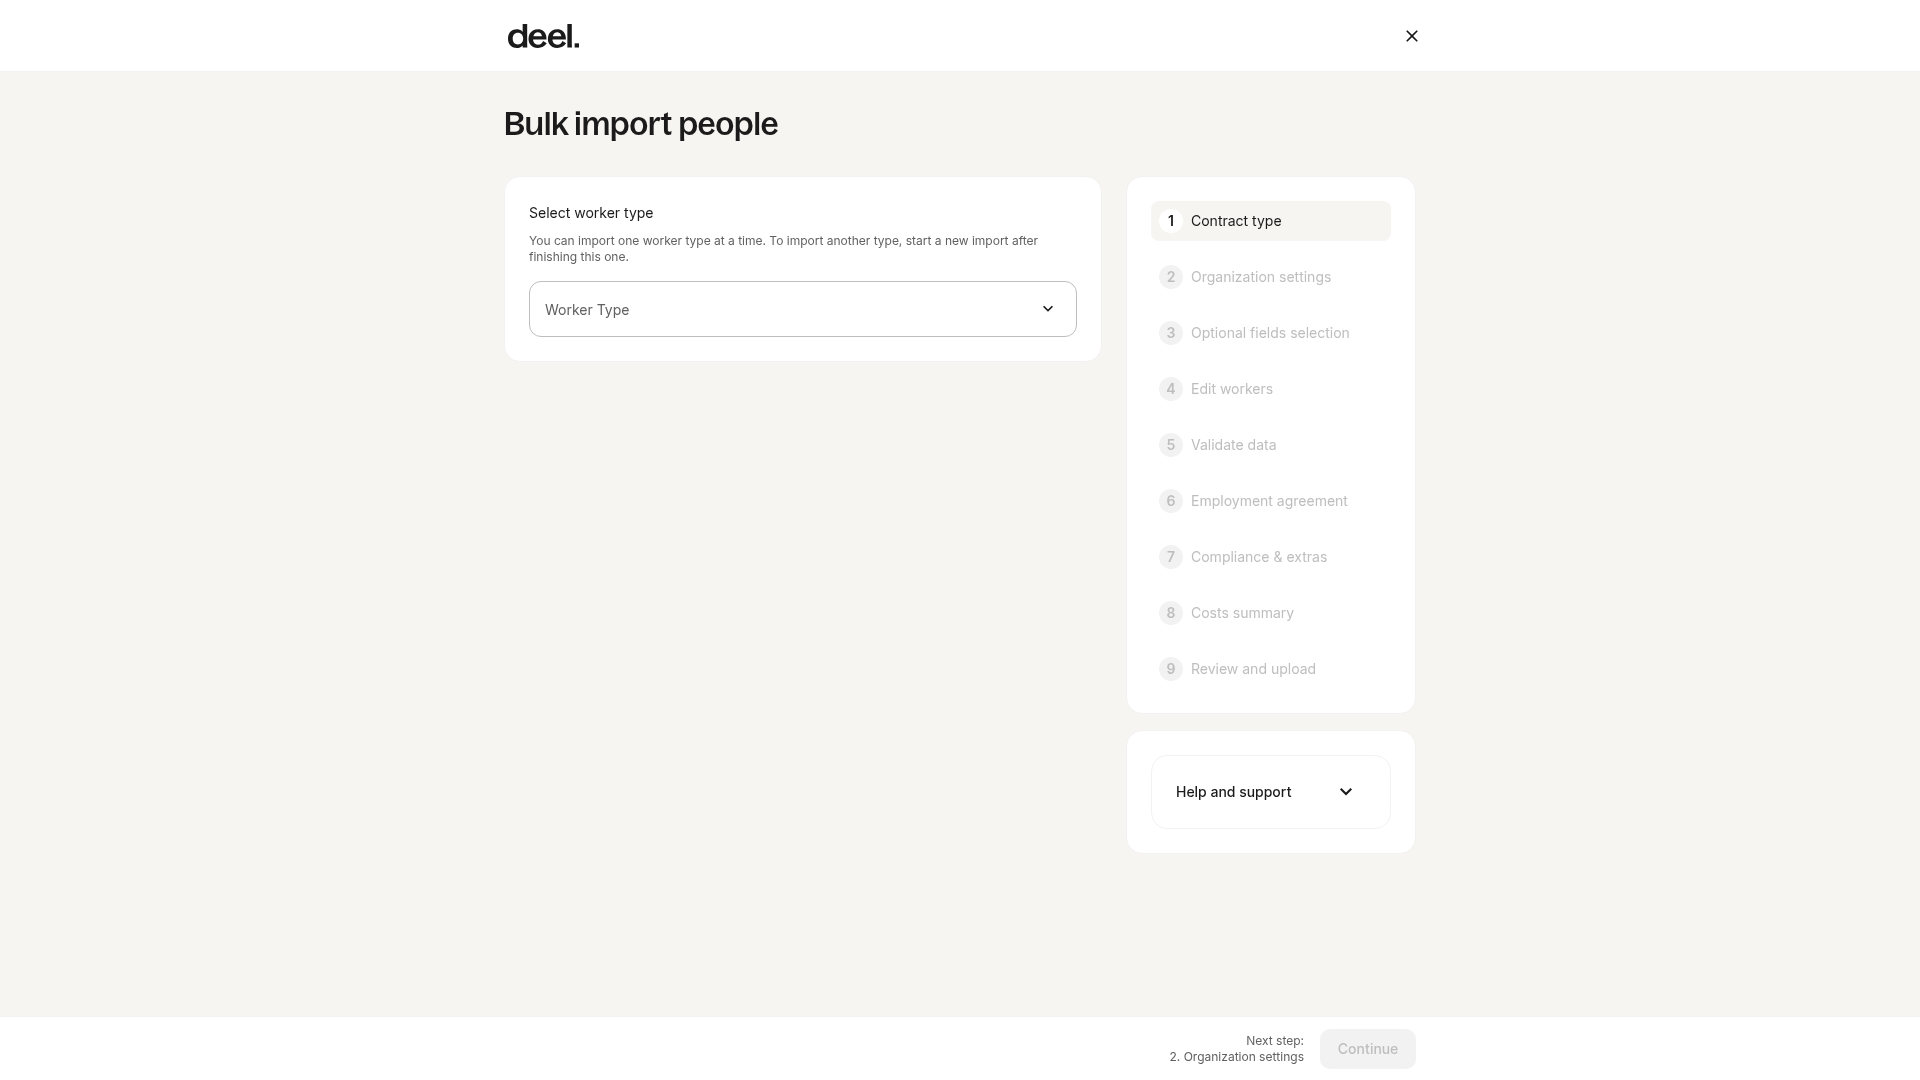
Confirm that the page title is Bulk import people. The page shows a Worker Type dropdown under Select worker type and a right-side progress panel beginning with 1 Contract type and continuing through 9 Review and upload.
✅ Step 2 – Select worker type
Use the Worker Type dropdown to choose the contract type to import. You can use a CSV file upload to add the following worker types:
- Direct employees that you are paying through Global Payroll (Direct Employee - Payroll)
- Direct employees that you have hired through your local entity (Deel HR direct employees)
- Contractors (Pay as You Go, Fixed Rate, and Milestone)
- Deel Employees (EOR Employees)
- Person Without a Contract
Select Continue.
✅ Step 3 – Enter Your Import Settings
Select the Legal Entity and Group that the new employees will be onboarded into.
Optional: Check the boxes under Additional Settings to add payroll and/or bank detail columns to the CSV template. This additional data will be included in the contracts created.
Select Continue.
✅ Step 4 – Download and fill in the CSV file
You can download one of two CSV files:
- Sample file: CSV file containing sample data and accepted values
- Blank import template: Empty CSV file to import your data onto Deel
Download the applicable CSV file and input the requested data according to the file’s formatting. Select the format that you will use for dates in the file.
Convert numeric fields, such as bank account numbers, to text format before saving the CSV. This prevents spreadsheet tools from removing leading zeros.
Then, click to browse or drag & drop to upload the filled CSV. Select Continue.
✅ Step 5 – Validate Data
Once you upload your CSV, Deel will validate the data and flag any errors.
Download and review the errors CSV or use the row number and error details provided to resolve any issues in your CSV. Then, re-upload the file.
See CSV file troubleshooting for help with resolving common upload errors.
Once all of the errors are resolved, select Continue.
For EOR employee mass import, clients can also add additional information, compensation details and benefits plans in the next steps.
✅ Step 6 – Review and Import
Review the Import Summary and the worker information that you’ve imported.
You can choose an appropriate invite method and select whether to send the invite to their personal or work email addresses.
Lastly, check the box to confirm that you have reviewed and approved the imported data. Select Upload.
FAQs
[ACCORDION] What fields must be included in the CSV file?
All CSV files are unique per contract type, so the fields may vary.
The template will look similar to this:
Fields marked with an asterisk (*) are mandatory.
[/ACCORDION]